iPhone 15 Pro Taptic Engine Replacement
Duration: 45 minutes
Steps: 29 Steps
Get ready to give your iPhone 15 Pro a little TLC by swapping out the Taptic Engine! If your phone isn't buzzing like it used to, or those vibrations are feeling a bit off—rattly or spotty—it might be time for a replacement. Just a heads up, you'll need some replacement screen adhesive to wrap up this repair. Let’s dive in and bring that vibe back!
Step 1


Make sure your phone's battery is below 25% before diving into this repair—an energized lithium-ion battery can be a bit of a drama queen and might spark up if mishandled!
- First things first, unplug any cables from your phone. Give it some space to breathe!
- Next, press and hold both the power button and one of the volume buttons, then slide to power off. You’re almost there!
Step 2


Look for a nice smooth spot along the bottom edge that's just right for your suction cup to grab onto.
- If your screen or back glass is cracked, slap some overlapping strips of packing tape over it to keep the shards in place and make taking it apart a bit less tricky.
Step 3


Pushing your opening pick in too deep can cause damage—let's avoid that! Mark your pick to keep things safe and sound.
Feel free to mark the other edges of your pick with different measurements for extra precision.
Or, tape a coin onto your pick about 3 mm from the tip to act as a handy depth guide.
- Take your opening pick, measure 3 mm from the tip, and give it a stylish mark with a permanent marker. Precision is key—think of it as accessorizing your tool!
Step 4


- Grab your P2 pentalobe screwdriver and unscrew the two 7 mm-long screws hanging out on either side of the charging port. Easy does it!
Step 5

Keep the heat in check—getting the phone too hot could harm the battery. Let's keep things cool!
- Grab a hair dryer or heat gun and warm up the bottom edge of the screen until it feels nice and toasty to the touch.
Tools Used


Step 6


- Stick a suction handle right on the bottom edge of the screen.
- Give the handle a firm, steady tug to gently pop open a gap between the screen and the frame.
- Slide the tip of an opening pick into that gap to keep things moving.
Tools Used

Step 7

Heads up! When you’re slicing through the adhesive holding the screen, keep an eye out for these spots to avoid any surprises:
- Heads up! Your screen is held in by two sneaky little cables: one hanging out just above the action button, and the other chilling near the middle of the left edge.
- Around the edges, you'll spot several spring contacts playing peek-a-boo. Be super gentle and don’t push your pick deeper than advised here, or you might end up bending these tiny guys.
Step 8


Keep your opening pick no deeper than 3mm along the bottom edge. You don’t want to go too far in—just a little nudge to get things started!
- Gently glide your pick back and forth along the bottom edge to detach that pesky adhesive.
- Keep your pick snugly in the bottom right corner to stop that adhesive from playing tricks and re-sealing.
Step 9

- Warm up the right side of the screen until it feels nice and toasty.
Step 10


Keep your pick to a maximum of 5 mm deep on the right edge—no need to go digging for treasure here!
- Glide your pick along the bottom right corner, heading toward the power button. You'll bump into a clip keeping the screen in check.
- Twist your pick so the flat side slides under the screen—like a ninja sneaking in for the next move.
Step 11


- Gently twist the pick to create a little more space between the screen and the frame until you hear that satisfying click when the right clip pops free.
- Slip in a second opening pick just to the right of the first one to give yourself some extra room and keep that gap nice and steady.
Step 12


- Slide your first pick back down to the bottom right corner—like it's on a mini skateboarding adventure.
- Send your second pick up to the top right corner and let it break up that stubborn adhesive.
- Keep both picks hanging out in their corners so the adhesive doesn't sneak back together.
Step 13

- Warm up the top edge of the screen until it feels nicely toasty.
Step 14


Keep your pick shallow—no deeper than 3 mm along the top edge—to avoid any surprises lurking underneath.
- Gently glide your pick around the top right corner and along the top edge to pop those two clips and adhesive loose. You've got this!
Step 15

- Warm up the left edge of the screen until it feels pleasantly toasty.
Step 16


Keep your pick shallow and friendly—just a gentle 2 mm along the left edge! We want to avoid getting too close to those important cables connecting the screen to your device. Trust us, it's a good move!
- Gently twist your pick around the top left corner of the screen.
- Carefully slide your pick down to the bottom left corner to loosen the adhesive.
Step 17


If the screen is feeling stubborn, grab your trusty opening pick and work your way around the edges to gently loosen any stubborn adhesive that’s still hanging on.
- Set up a small box or a stack of books to the left side of your phone to hold the screen upright while you unplug its cables.
- Lift the right edge of the screen like you’re opening a book’s front cover.
- Keep the screen propped open so you can reach the cables easily without pulling or stressing them.
Step 18


- Grab your trusty Y000 screwdriver and carefully take out the six screws holding the logic board cover in place:
- Four screws that are 1.6 mm long
- Two screws that are 1.3 mm long
Step 19


- Twist the bottom of the logic board cover to the left and gently slide the top left corner out from beneath the ambient light sensor cable to take it off.
- When putting it all back together, remember to tuck the top left corner of the cover under the ambient light sensor cable. You've got this!
Step 20


- Grab your opening pick and gently lift up the battery press connector from the bottom right corner of the logic board—easy does it!
Alright, let's get that connector back in place! Line it up with its socket, and gently press down one side until you hear that satisfying click. Once that's in, give the other side a press too. Make sure everything's sitting nice and flat—sometimes the insulating rubber around the sockets can throw a little tantrum and prevent a perfect connection. No worries, just give it a little extra love!
Step 21


- Grab your trusty opening pick and gently pop the screen cable up from the center of the logic board. Easy does it!
Step 22


- Carefully slide the tip of an opening pick beneath the ambient light sensor cable located in the top left corner of the logic board. Take your time, you've got this!
- Once you’ve got that pick in place, gently lift the cable to disconnect it. Easy peasy!
Step 23


Watch out for those tiny spring contacts while cleaning the frame—they're easy to bend, and nobody wants surprise issues later!
- Pop off that screen like a pro.
- When you're putting it all back together, check out this guide to stick on fresh adhesive and snap your screen back in place.
Step 24


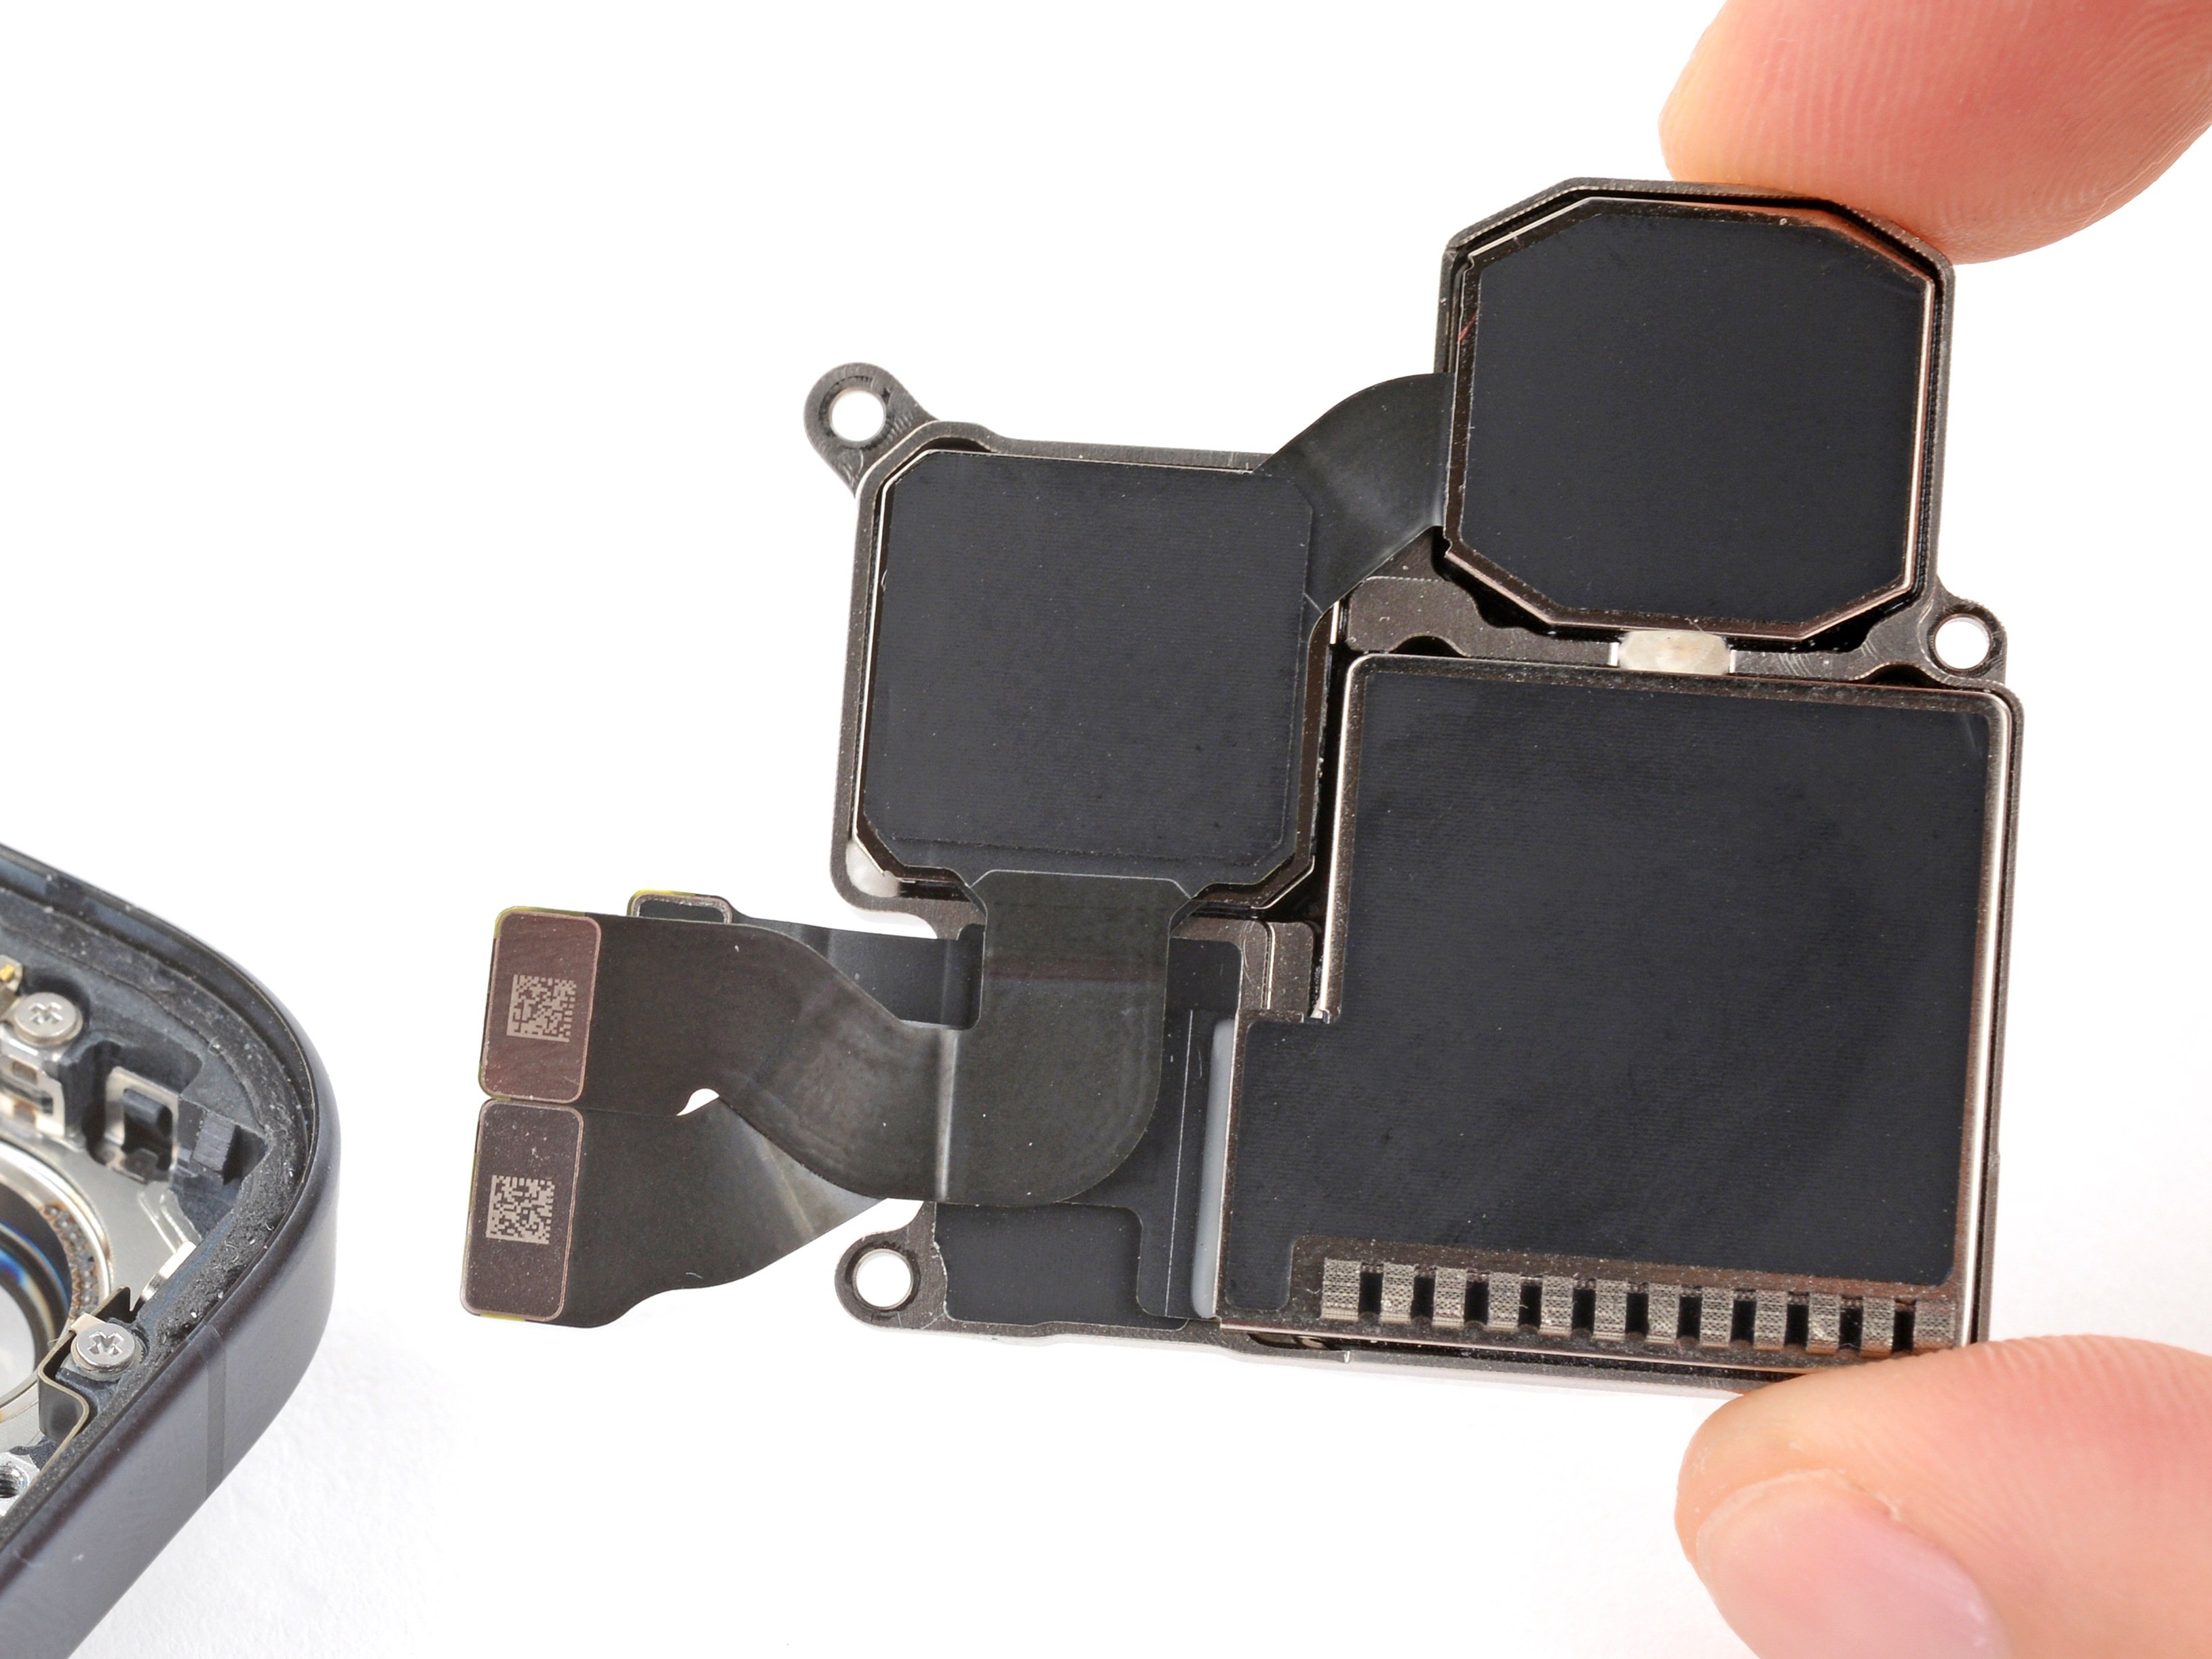
- Grab your trusty Phillips #000 screwdriver and unscrew the four screws holding the loudspeaker in place:
- One screw, 2.7mm long
- Three screws, each 2mm long
Step 25


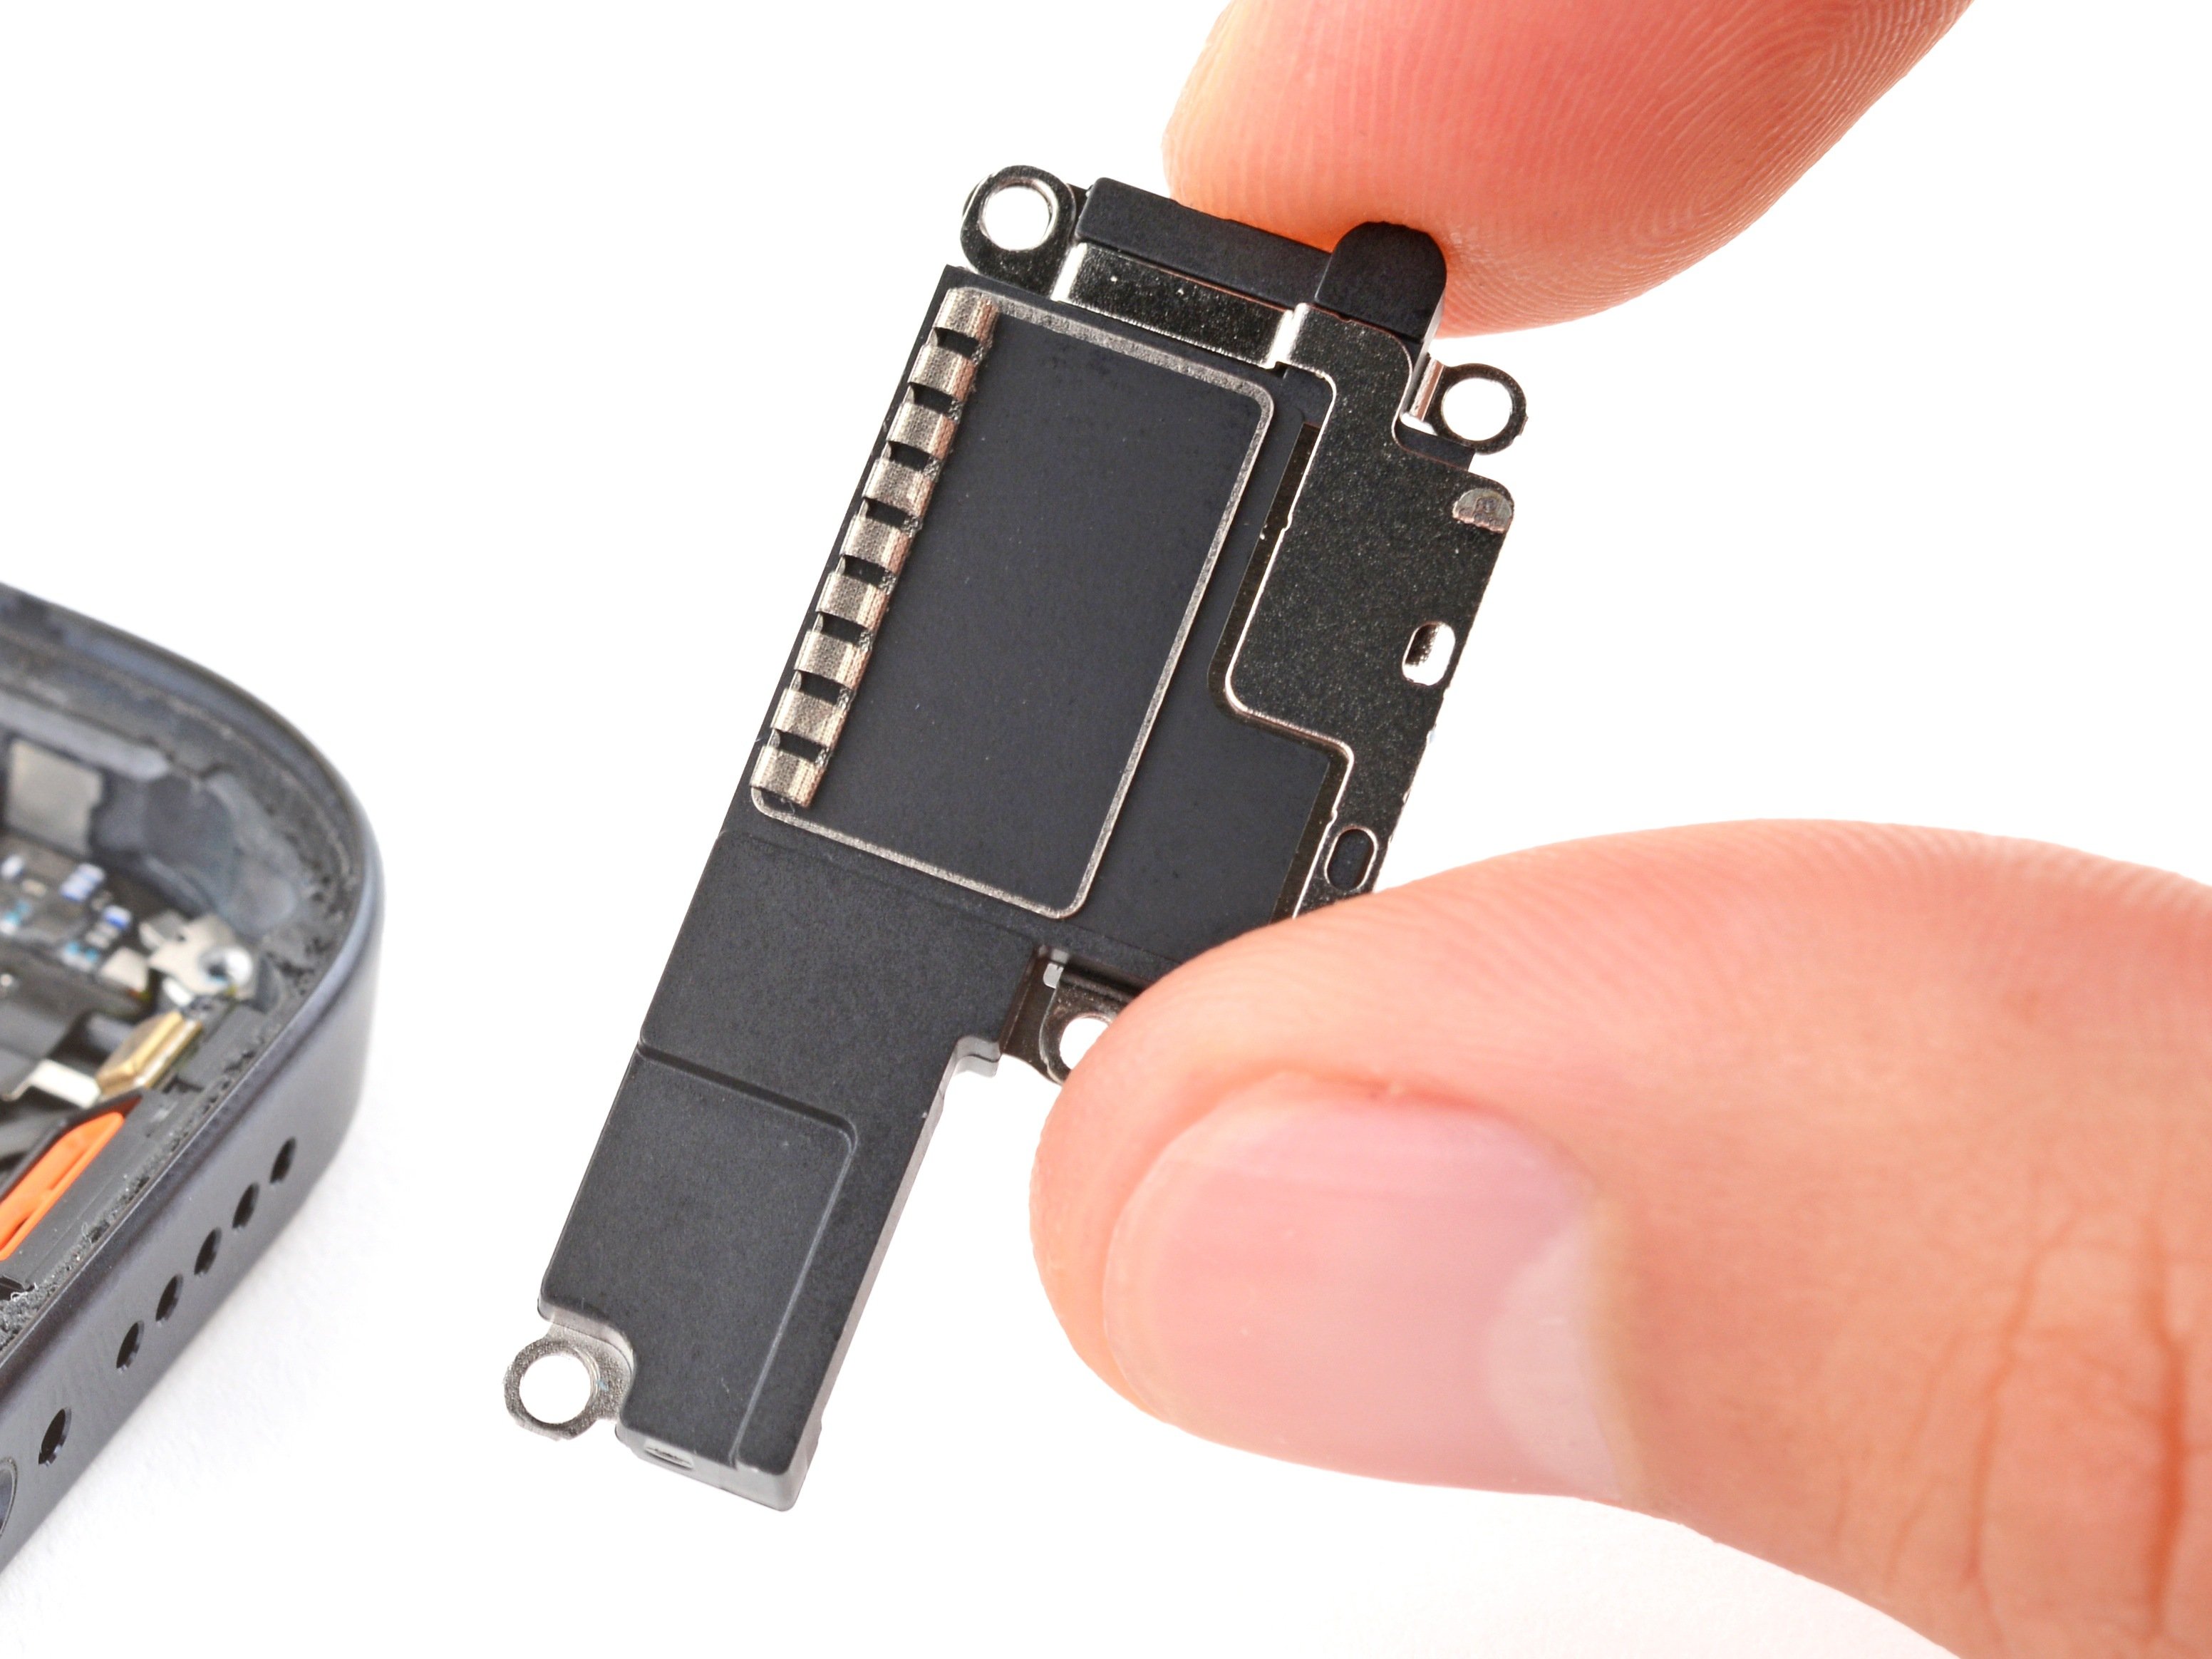
A plastic buffer is stuck on the top edges of the speaker and Taptic Engine, keeping everything snug as a bug!
- Gently lift up the bottom edge of the loudspeaker until you can get a good grip with your fingers.
- Carefully peel the loudspeaker away from the plastic buffer at the top edge and set it aside.
Step 26


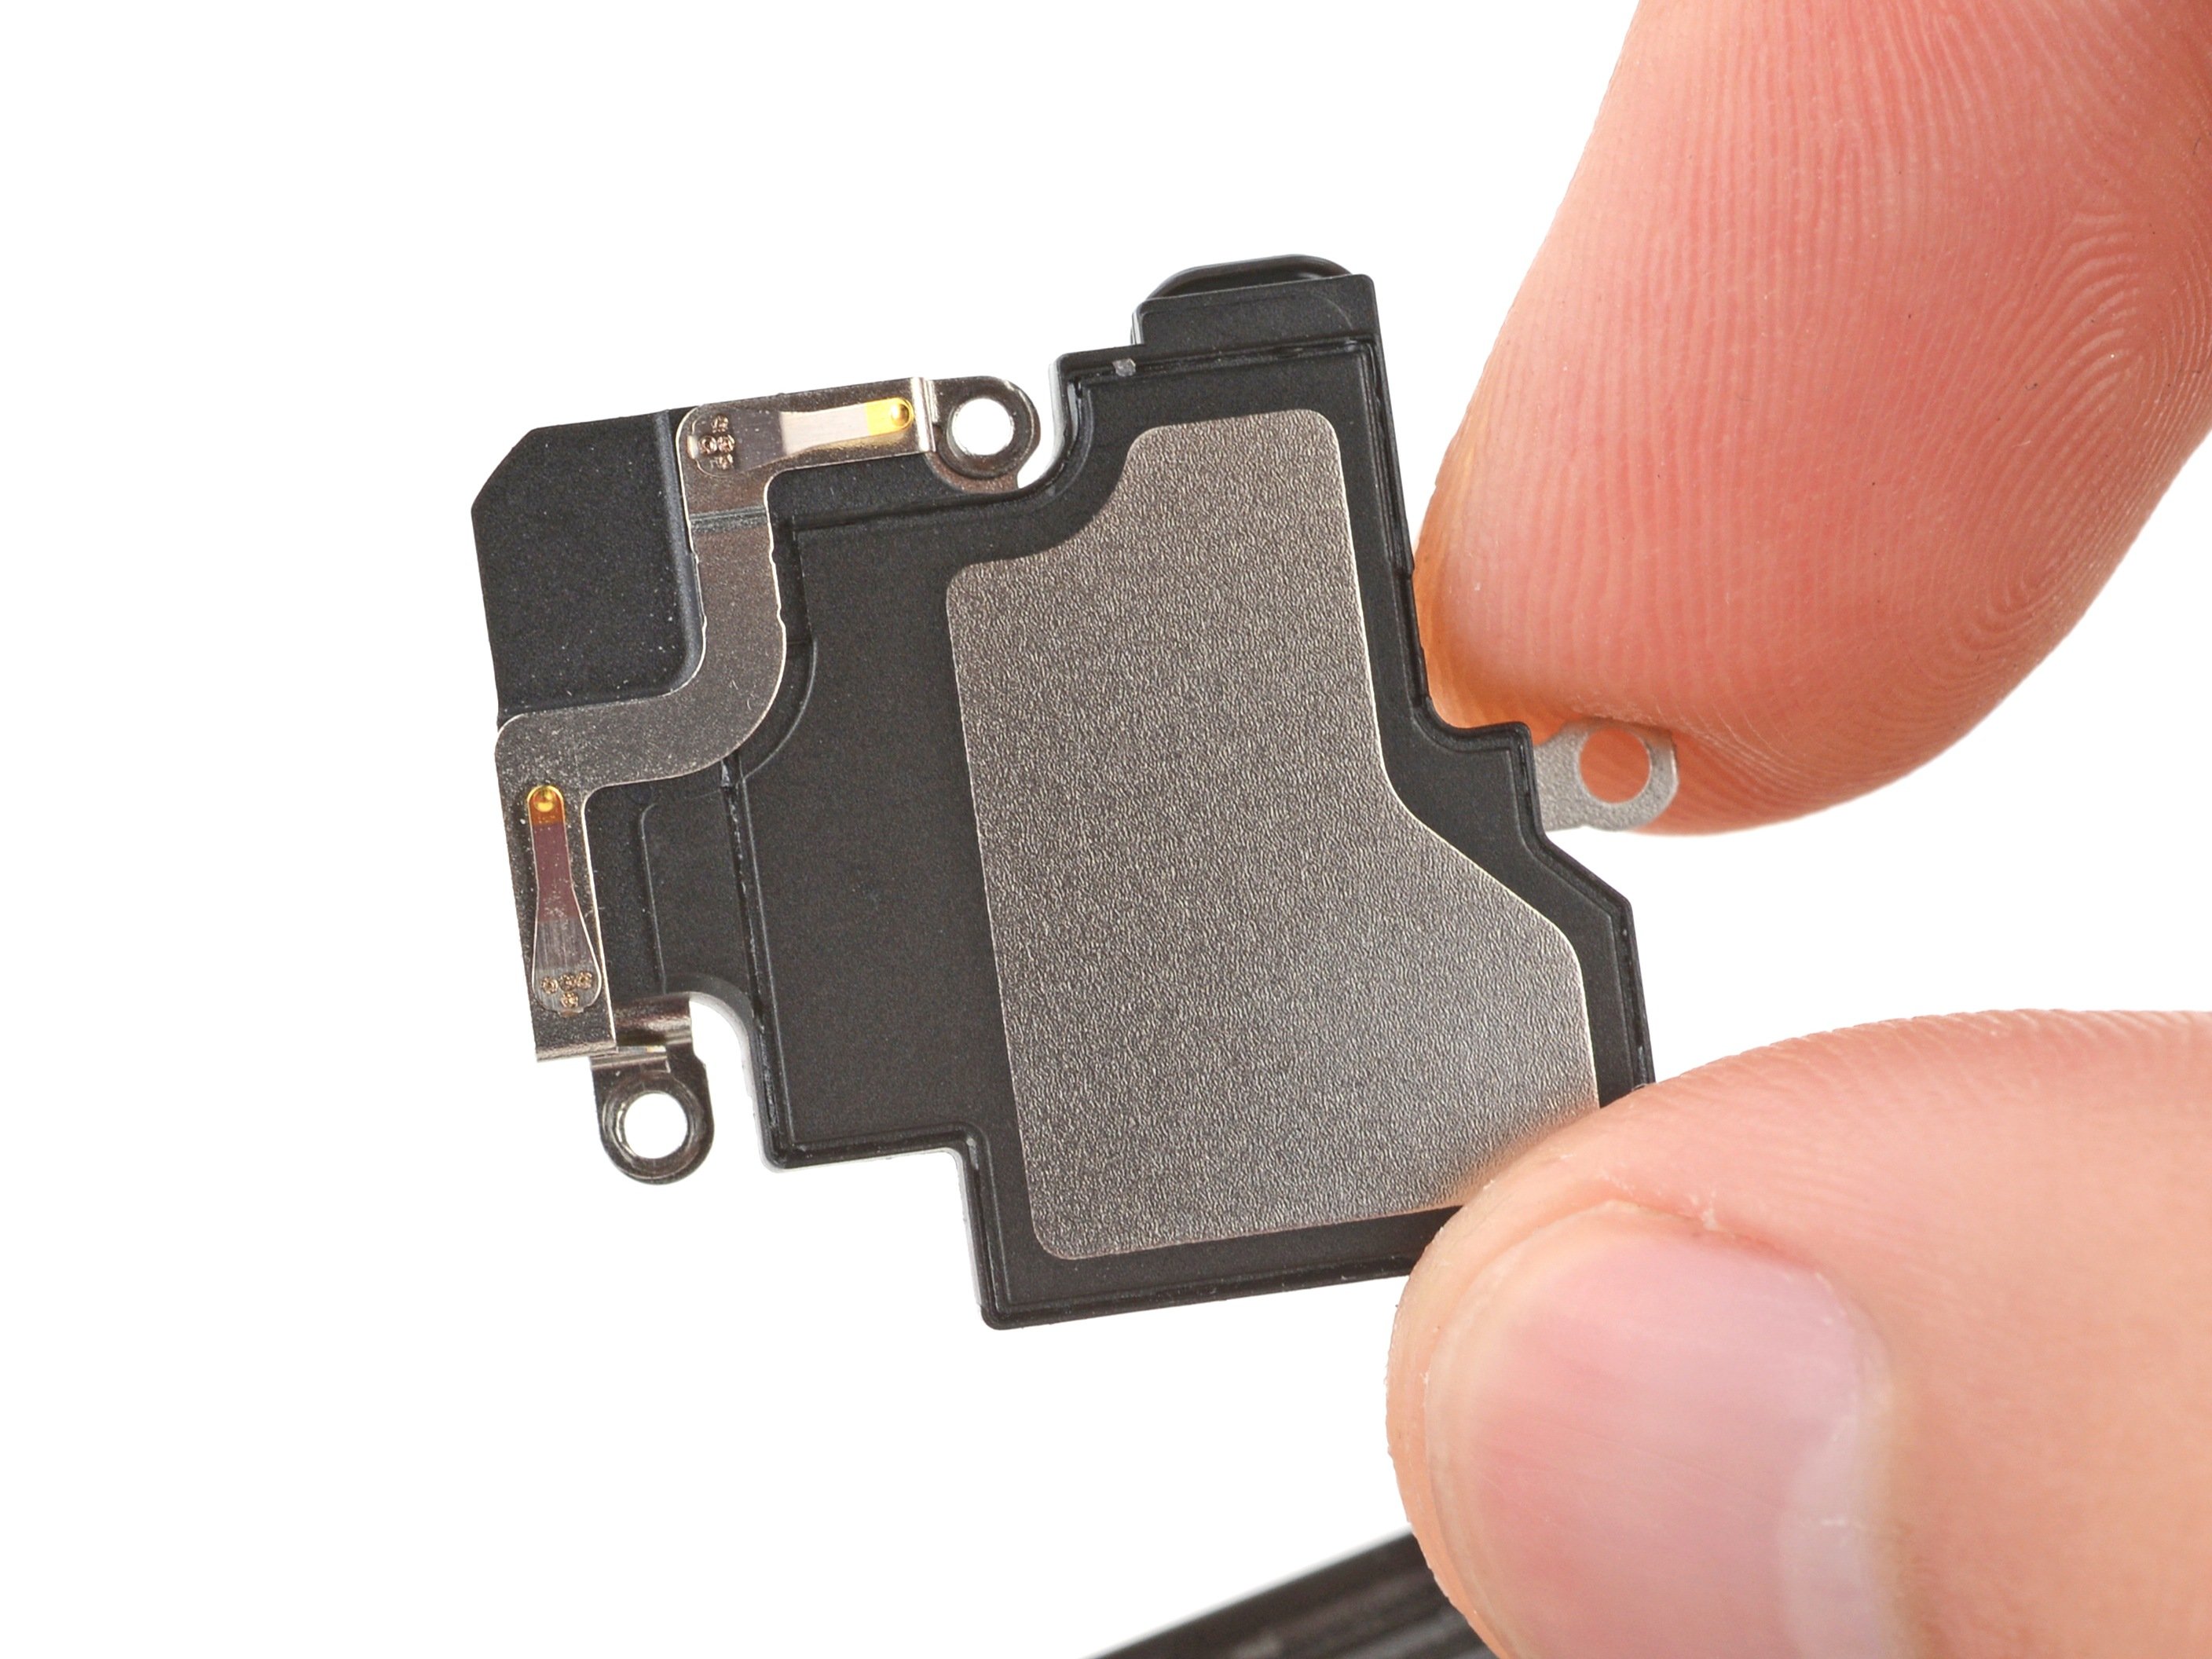
- Grab a spudger and use its point to gently lift and disconnect the Taptic Engine press connector. It’s a simple move, but be careful not to slip!
Tools Used

Step 27


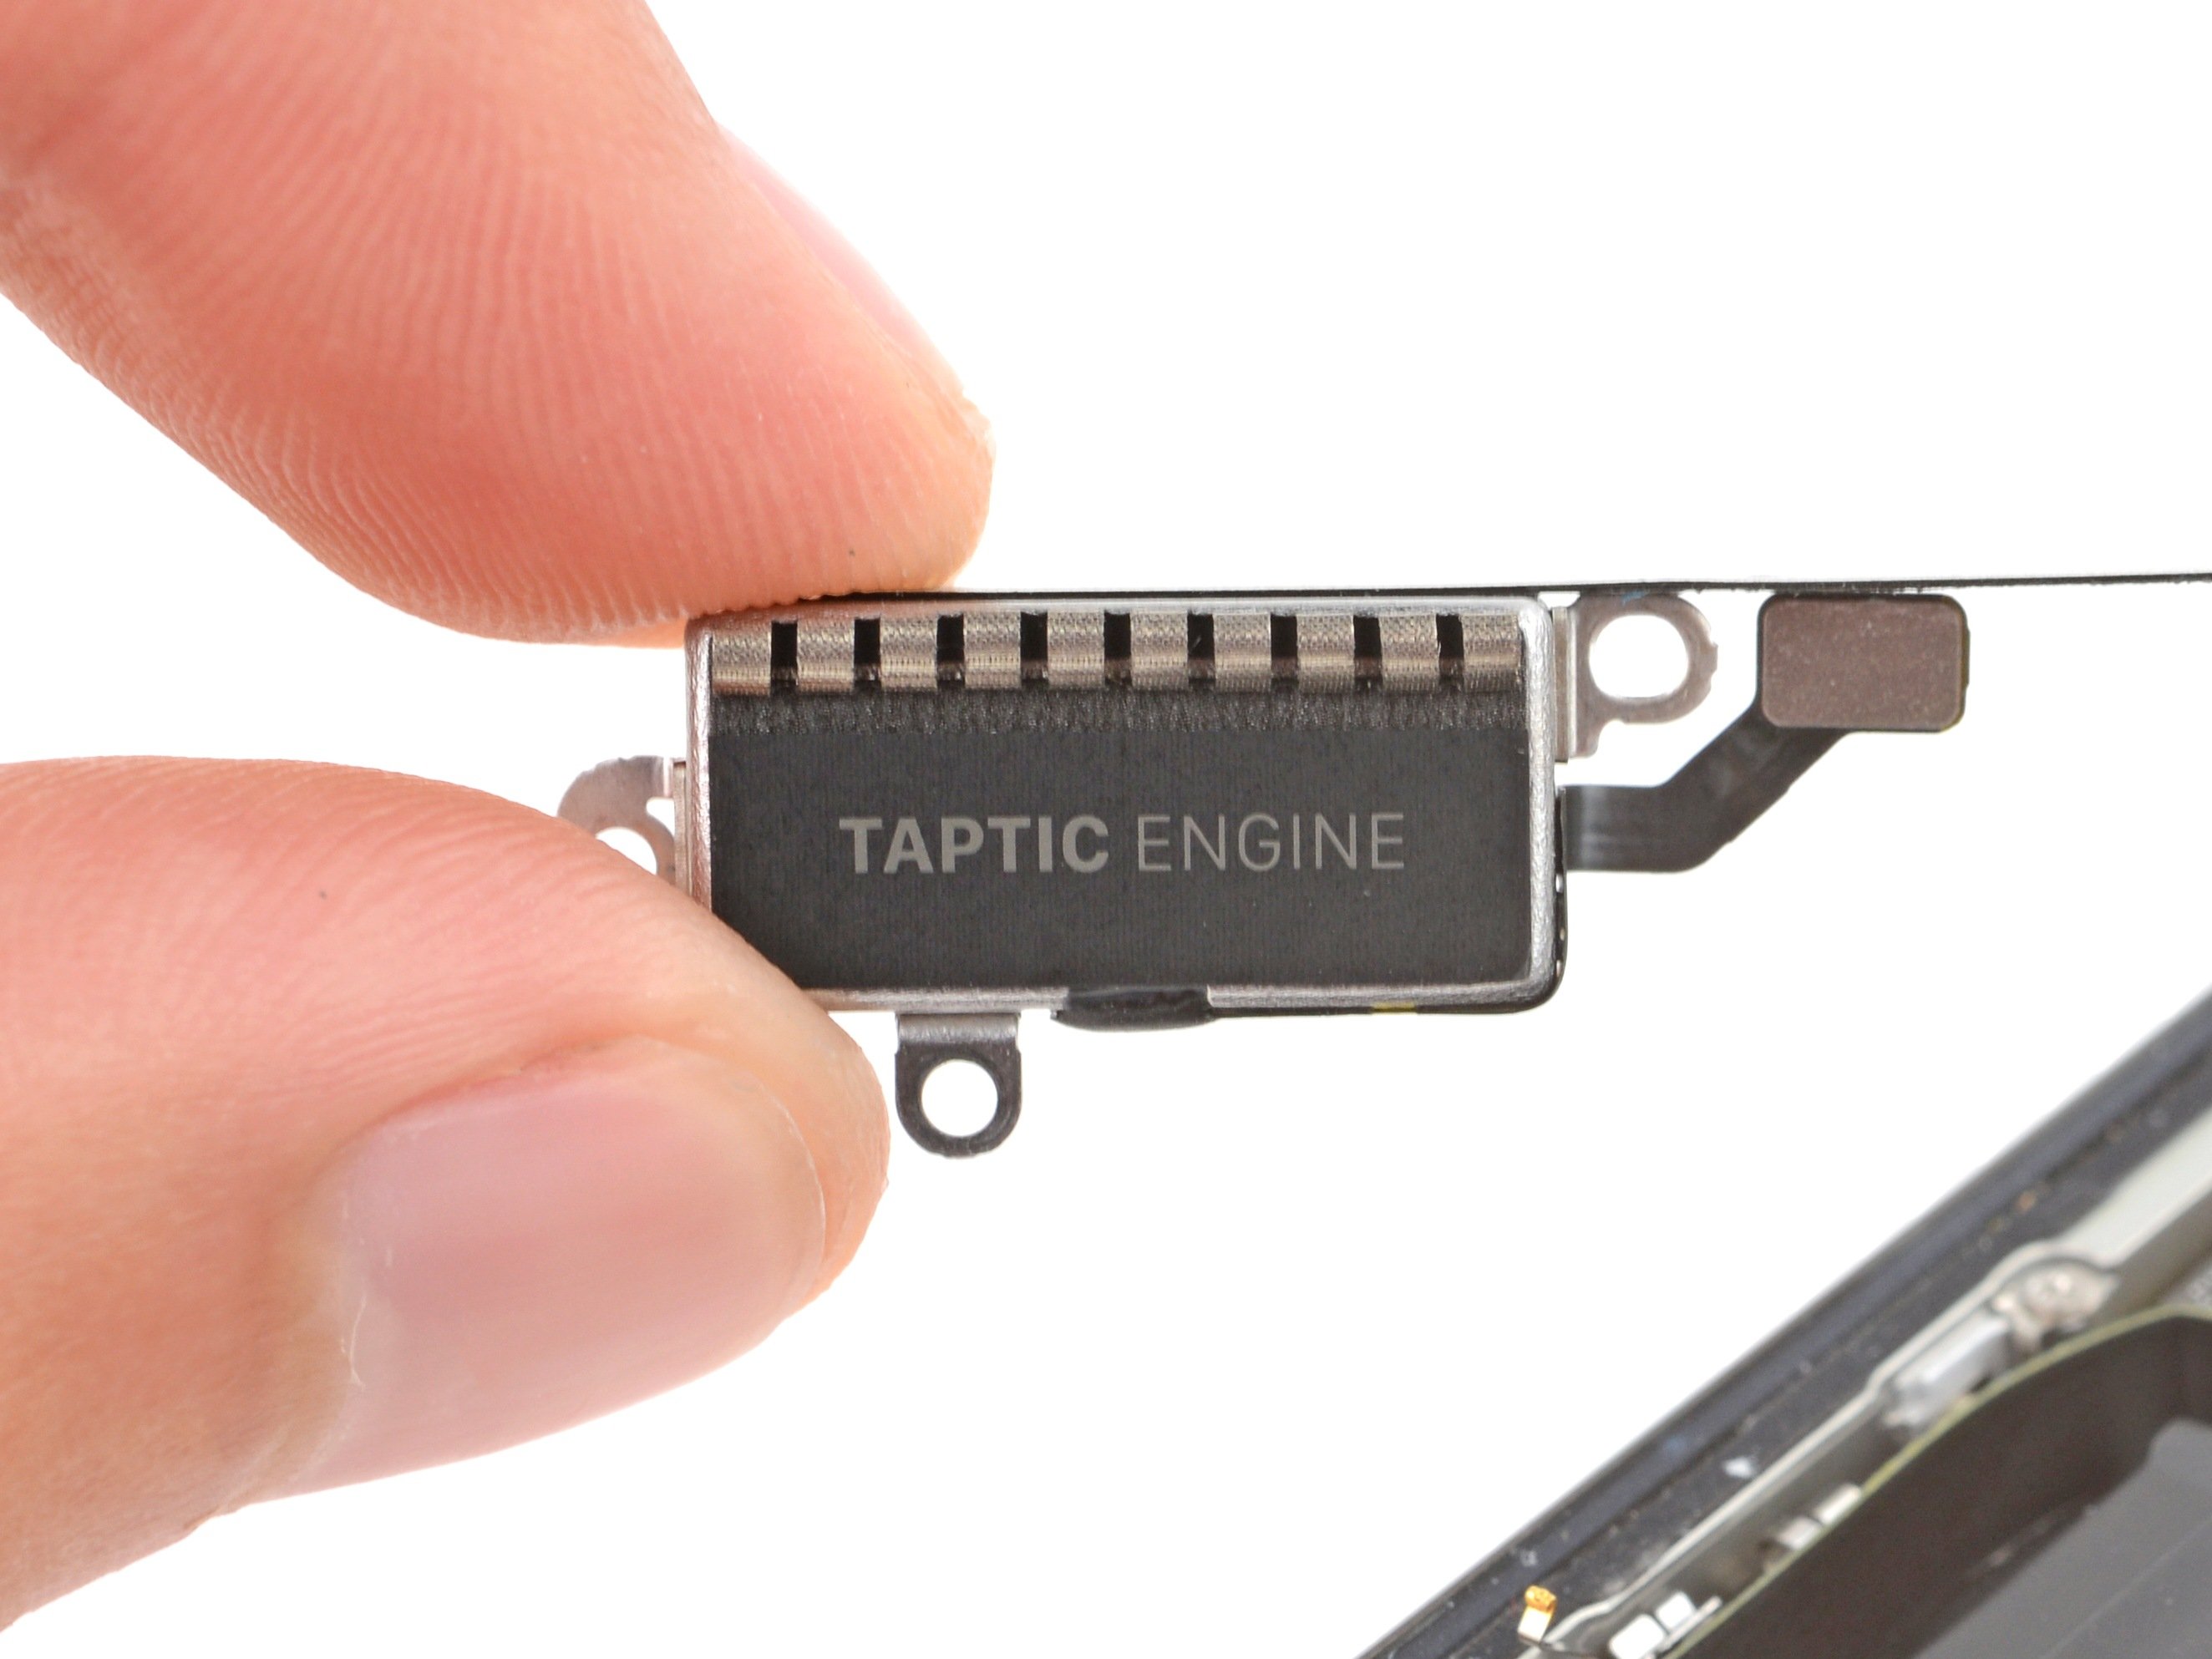
- Grab your trusty Phillips #000 screwdriver and unscrew those two 2 mm-long screws holding down the Taptic Engine. Let's get that thing out of there!
Step 28

- Carefully lift out the Taptic Engine.
Step 29


- Ready to put your iPhone back together? Just reverse these steps and you'll be all set!
- Got some old tech that needs a new home? Be sure to drop it off at an R2 or e-Stewards certified recycler.
- Things didn't go as smoothly as you'd hoped? No worries! Give some basic troubleshooting a shot, or swing by our Answers community for some friendly advice.
-