iPhone 15 Plus Front Camera Assembly Replacement
Duration: 45 minutes
Steps: 27 Steps
Face ID is taking a little vacation!
Follow this guide to swap out the front camera assembly on your iPhone 15 Plus. This unit includes both the front camera and the Face ID components, which come as a single package and are uniquely paired to your logic board. Heads up: replacing this part means Face ID won’t work anymore. This repair will get your selfie camera back in action, but on iOS 17.6 and earlier, only Apple or an Apple-authorized technician can restore Face ID. For iOS 18 and up, Apple’s Repair Assistant lets you recalibrate genuine front-facing cameras. You'll also want some replacement adhesive for the back glass to wrap things up.
Step 1


Let your phone’s battery drop below 25% before starting—charged lithium-ion batteries can be a bit touchy, so better safe than sorry!
- First things first, let's disconnect any cables from your phone. No strings attached, right?
- Next, press and hold the power button along with either of the volume buttons, then slide to power off your phone. It's like giving your device a little nap!
Step 2


Find a nice smooth spot near the bottom edge that's just right for a suction cup to grab onto.
- If your screen or back glass has a major crack, grab some packing tape and lay down a few overlapping strips across the glass. This not only keeps you safe but also makes it way easier to take things apart without any drama.
Step 3


If you push the opening pick in too deep, it could cause some damage. To avoid that, mark your pick to keep things safe.
Feel free to mark other corners of the pick with different measurements for added precision.
Another trick? Tape a coin about 3mm from the tip of the pick. It'll give you that extra control!
- Measure 3 mm from the tip and mark your opening pick with a permanent marker to keep things precise and tidy.
Step 4

- Grab your P2 pentalobe driver and unscrew the two 7.7 mm screws hanging out on both sides of the charging port. Time to show those tiny screws who’s boss!
Step 5

Keep that phone at a chill temp—overheating can really tick off the battery!
- Crank up your hair dryer or heat gun and warm up the bottom edge of the back glass until it feels nice and toasty.
Tools Used


Step 6

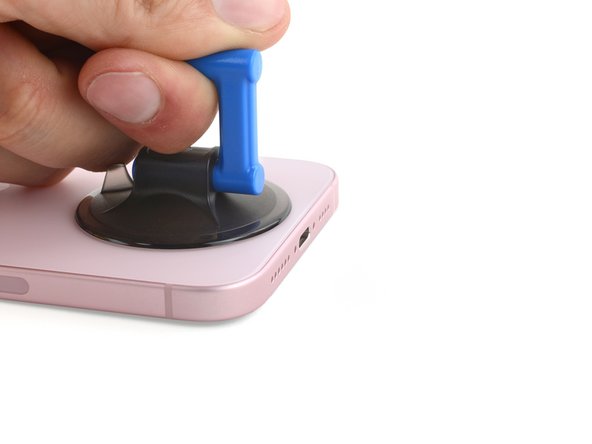
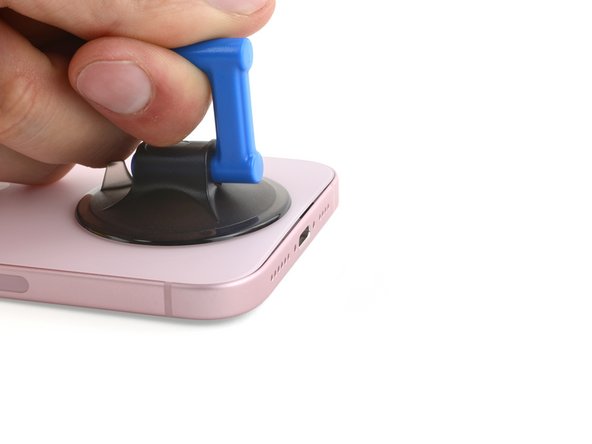
- Place a suction handle on the bottom edge of the back glass.
- Give the handle a firm, steady tug to gently create a gap between the back glass and the frame.
- Slide the tip of an opening pick into the gap you just made.
Tools Used

Step 7

Heads up! While you slice through the adhesive holding the back glass, keep an eye out for these spots—they're extra sensitive.
- Watch out for a fragile cable connecting the back glass near the volume up button. Avoid sliding your pick in there to keep that cable safe and sound.
- Around the phone’s edge, you'll find several spring contacts. Be sure not to push your pick in deeper than recommended at each step to prevent bending these little guys.
Step 8


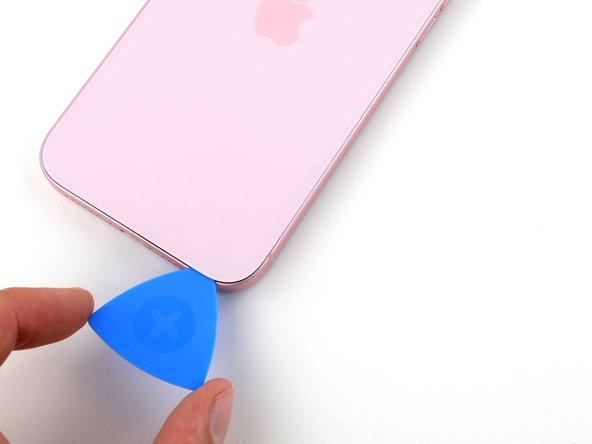
Be careful not to push your opening pick in more than 5 mm along the bottom edge.
- Work your pick along the bottom edge, wiggling it side to side to loosen that stubborn adhesive.
- Leave your pick chilling in the bottom right corner—it’ll keep the glue from sticking itself back together while you work.
Step 9

- Warm up the right edge of the back glass until it feels nice and toasty to your fingers.
Step 10


Keep your pick no deeper than 7 mm along the right edge to avoid any surprises.
Steer clear of slicing near the volume buttons so you don’t accidentally nick the wireless charging cable.
- Twist your pick around the bottom right corner and slide it halfway up the right edge, or until you hit that solid stop from a clip holding the back glass in place.
- Keep that pick wedged in there to stop the adhesive from snapping back together.
Step 11

- Warm up the left edge of the back glass until it feels nice and toasty!
Step 12


Keep your pick shallow—don’t go deeper than 5 mm on the left edge. Your device likes gentle hands!
- Pop in a second opening pick along the bottom edge—like you're starting a guitar solo.
- Swing that pick around the bottom left corner, keeping things smooth.
- Slide this pick all the way up to the top left corner and let it break up the sticky stuff.
- Leave your pick chilling there so the glue doesn’t sneak back together.
Step 13

- Warm up the top edge of the back glass until it's nice and toasty to the touch.
Step 14


Keep your pick shallow—don’t go more than 3 mm deep along the top edge. Your device likes its boundaries!
You might notice some delightful clicks and feel a little action as the top two clips pop free.
- Swing your second opening pick from the top left corner over to the top right corner, gently sliding it to break the adhesive seal.
- Keep that pick right where it is to stop the adhesive from sticking back together.
Step 15

- Warm up the top right corner of the back glass until it feels nicely toasty.
Step 16


Be careful not to push your pick more than 4 mm deep along the right edge. It's easy to go too far, so keep it light!
- Gently twist the second opening pick around the top right corner and slide it over to the volume up button to loosen that stubborn adhesive.
Step 17


If the back glass is feeling a bit stubborn, take a stroll around the edges and see if there are any sneaky spots of adhesive or clips that might be holding it back.
- Carefully swing the back glass open to the right side of your phone.
- Rest the back glass on a raised surface, giving that cable a little breathing room.
Step 18


As you go through this repair, make sure to keep track of every screw. They each have a special spot to return to, so be sure to remember where each one came from!
- Grab your tri-point Y000 driver and take out the two tiny 1.3 mm screws holding down the lower connector cover. You got this!
Step 19


- Grab your trusty tweezers and gently nudge the cover up towards the top of the phone to pop it free from the logic board. Easy peasy!
- Time to say goodbye to the cover. Just remove it and set it aside.
- When you're putting everything back together, make sure to hook the top edge of the cover into its slot on the logic board before securing it with the screw. You got this!
Tools Used

Step 20


When reconnecting a press connector, line it up with the socket and gently press down one side until you hear that satisfying 'click' sound. Then, do the same on the other side. Double check that it's sitting flat, as the insulating rubber around the sockets could be a bit picky and prevent a full connection.
You’ll notice a plus and minus symbol printed on the head of this connector – just a little reminder to keep things in the right direction!
- Hold the back glass steady with one hand, and gently rotate the bottom edge to the left—this will reveal the battery press connector hiding just below the volume buttons.
- Now, grab your opening pick and carefully slide the tip under the battery press connector. Give it a gentle pry to disconnect it from the logic board. Nice and easy!
Step 21


- Grab your tri-point Y000 driver and twist out that 0.9 mm screw holding down the middle connector cover—show it who's boss!
Step 22


- Take the flat end of a spudger (or your trusty finger) and gently nudge the cover down toward the bottom of the phone—you're aiming to pop free the top edge.
- Lift off the cover and set it aside like a pro.
- When putting things back together, line up the cover so its tab sits just behind the logic board clip. Hold it down with one finger and slide the cover forward to snap the clip in place.
Tools Used

Step 23


- Grab your opening pick and gently lift to unplug the wireless charging coil and NFC connector—easy does it!
Step 24

- Pop off that back glass like a pro.
- While you're putting things back together:
- This is a golden moment to check if your phone is back in action—hook up the battery and back glass, power it on briefly, and make sure everything’s groovy. Once you’re happy, turn it off and continue reassembling.
- Follow this guide to stick the back glass on and finish the job.
Step 25

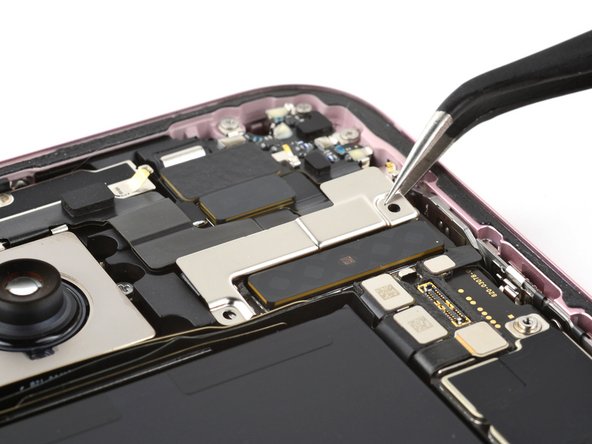
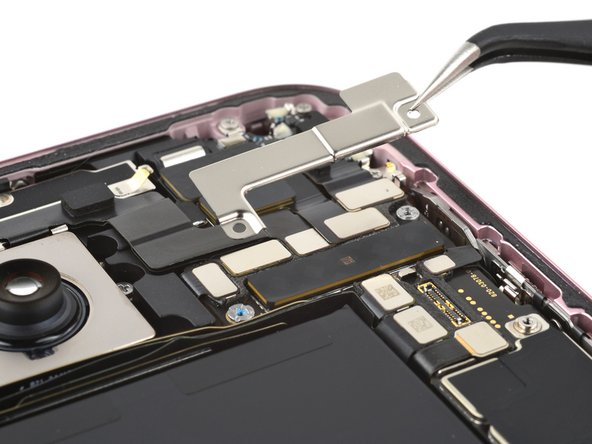
- Grab your tri-point Y000 driver and take out the two 1.3 mm-long screws holding down the upper connector cover.
- Lift off the cover and set it aside—easy peasy.
Step 26
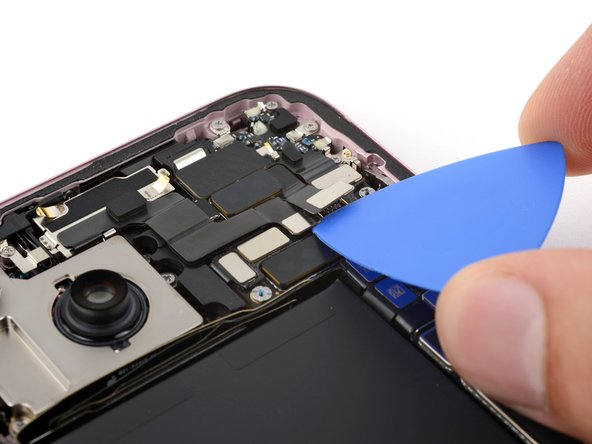
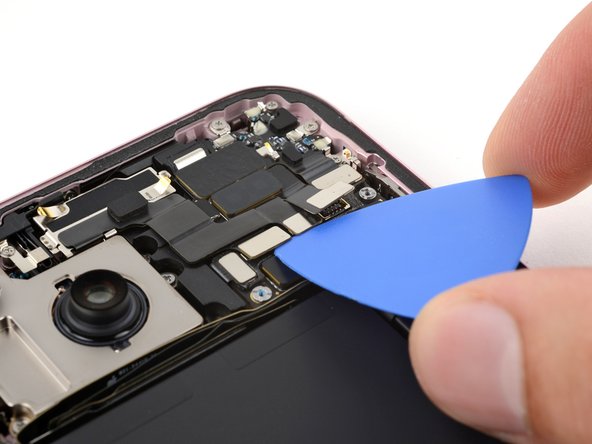

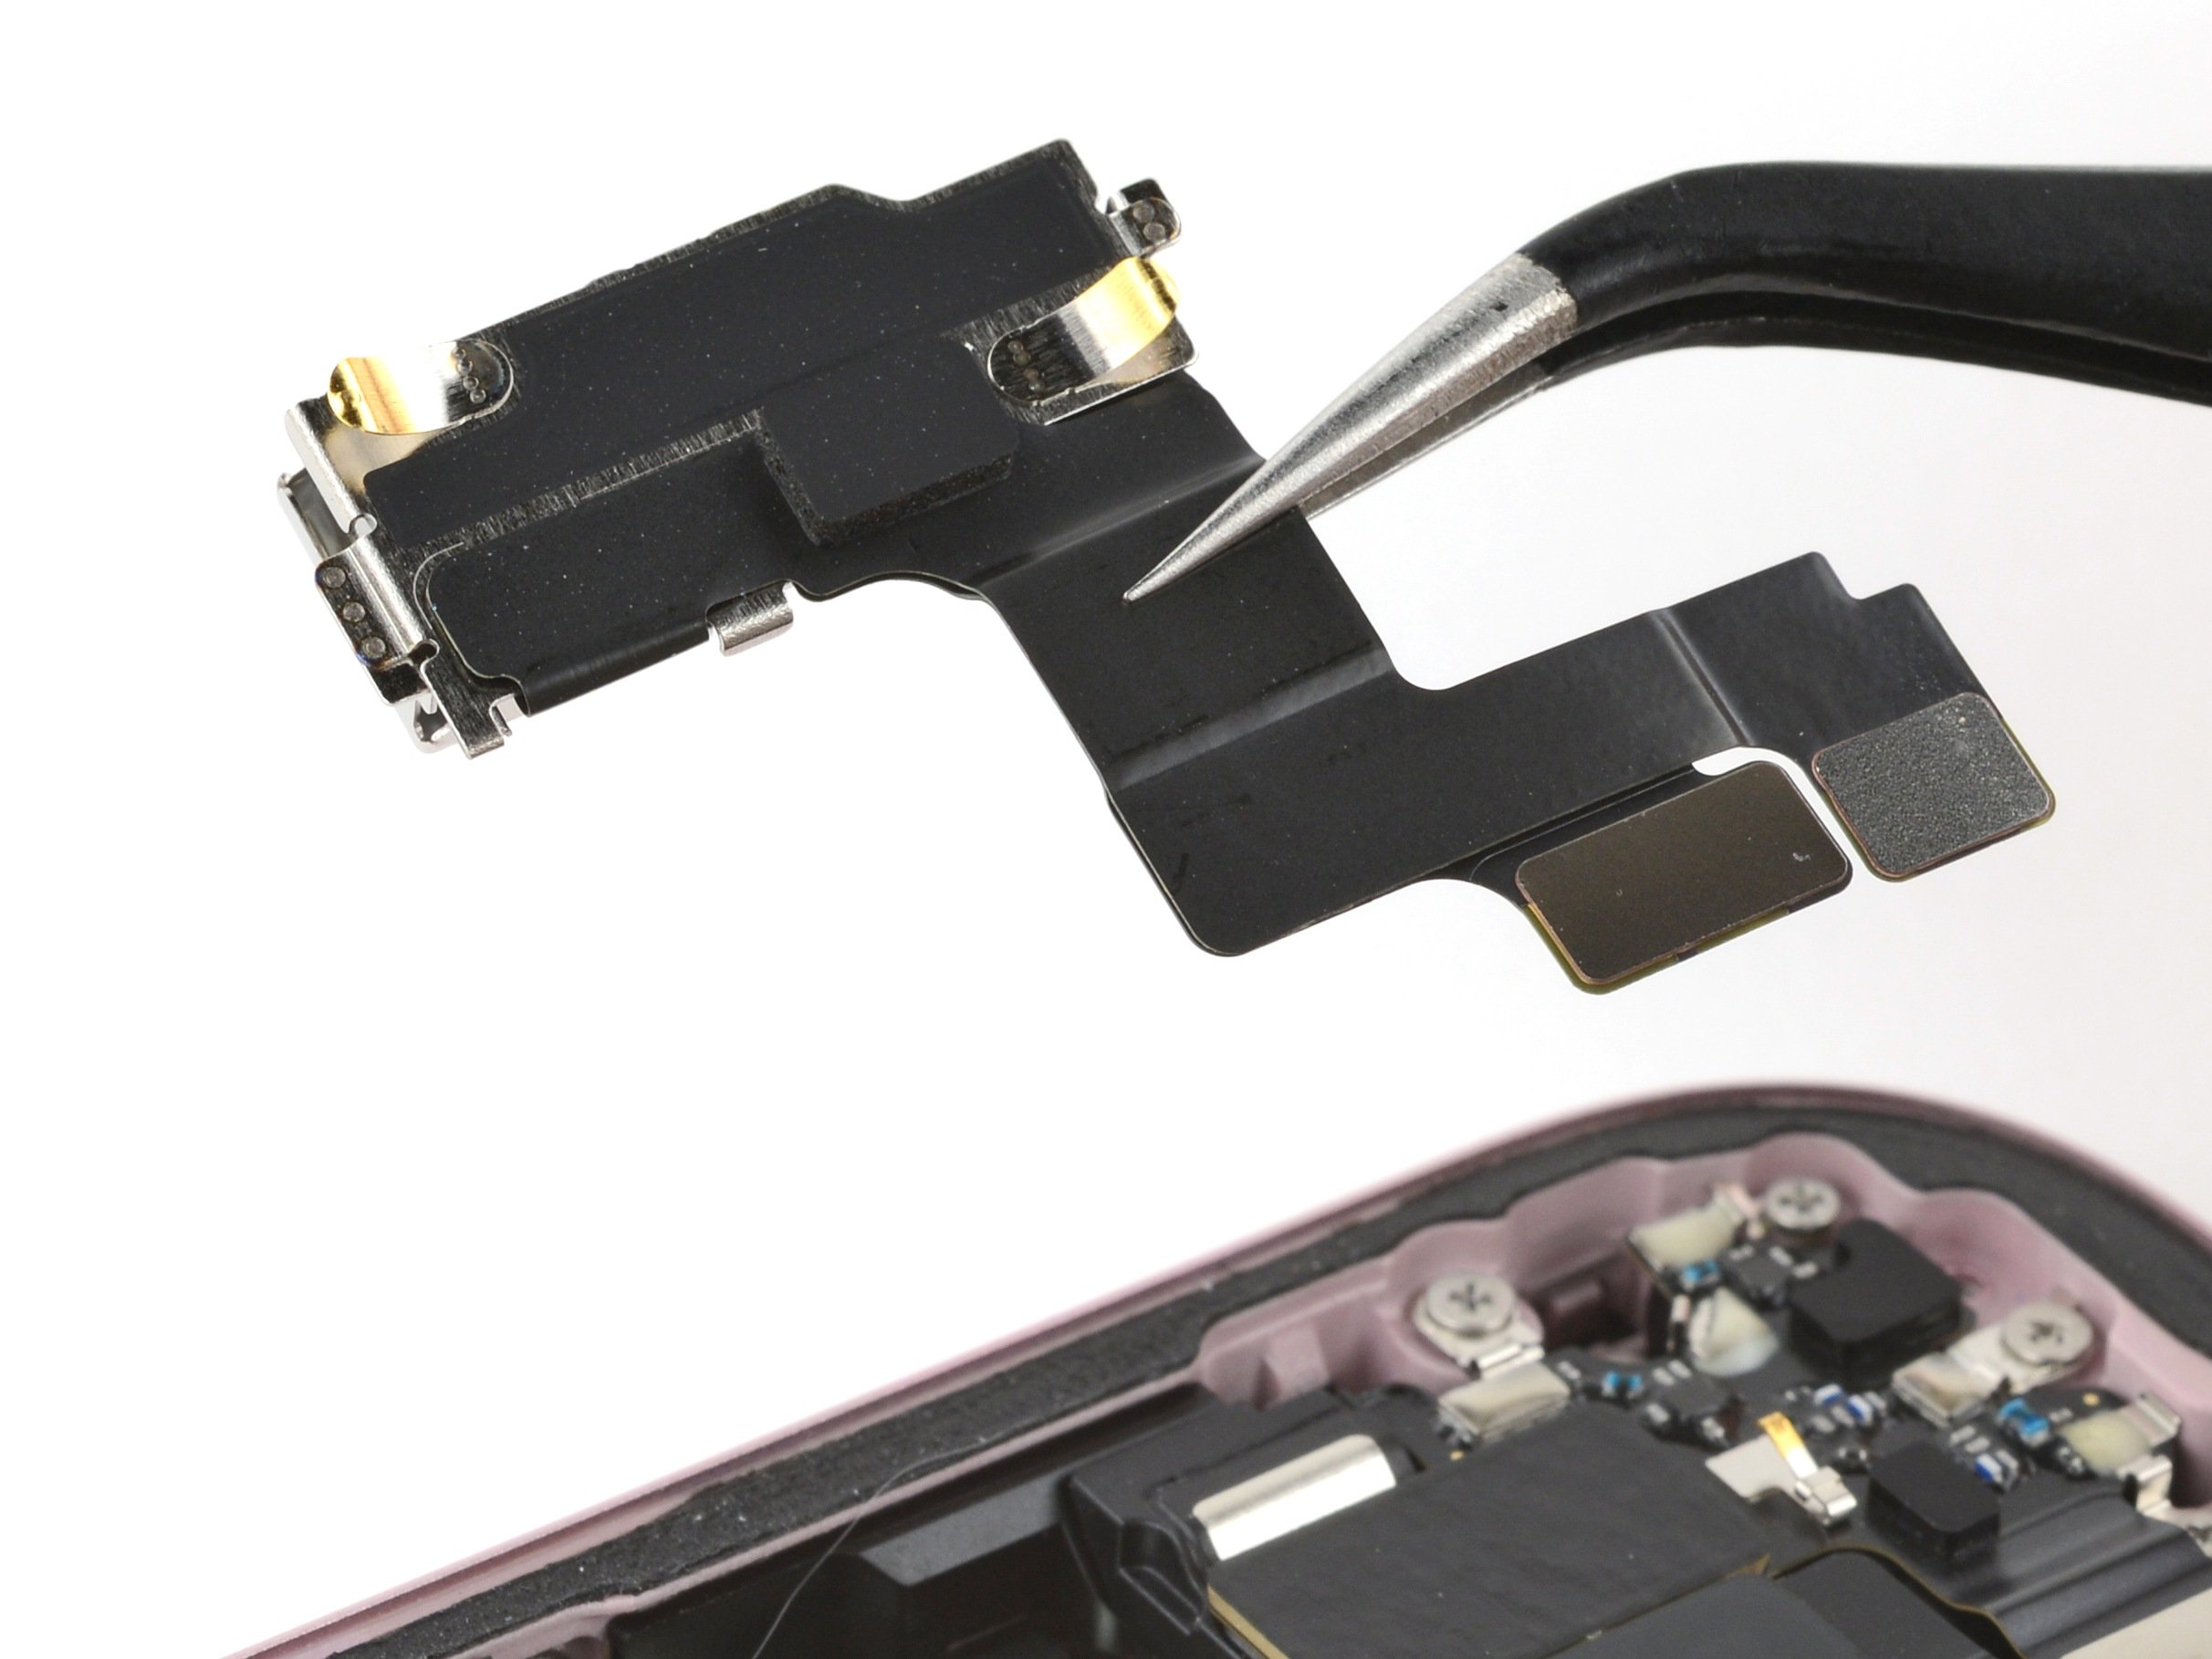
- Gently use the tip of an opening pick to lift and unplug the antenna, front sensors, and front camera press connectors — that’s three connectors you’ll be handling here.
Step 27


- Grab your tweezers or just use your fingers to gently pull out the front camera and sensors from their little cozy spot in the frame. Once they're free, go ahead and remove them.


