Polaroid PTAB7XC Screen Replacement
Duration: 45 minutes
Steps: 14 Steps
You’ll need to roll up your sleeves for some desoldering and the removal of quite a few components—but don’t stress, you’ve got this! If soldering feels like a maze, there’s a treasure trove of tips to guide you along the way. The good news? Swapping out the screen on this device is a breeze compared to many others. Let’s get moving!
Step 1


Got some stubborn screws with corroded or stripped heads? Time to step up your game with a larger screwdriver head, like the J0—because you’re a repair rockstar and you’ve got this!
– Grab your trusty J00 Phillips screwdriver and get ready to tackle those two 7 mm screws perched on top of your device. Just twist them counterclockwise, and watch them loosen like they’re ready for a break!
Step 2


At this point, the power and/or volume buttons might just pop out on their own. No worries, this is completely normal! Just be sure to pop them back in when you’re putting everything back together.
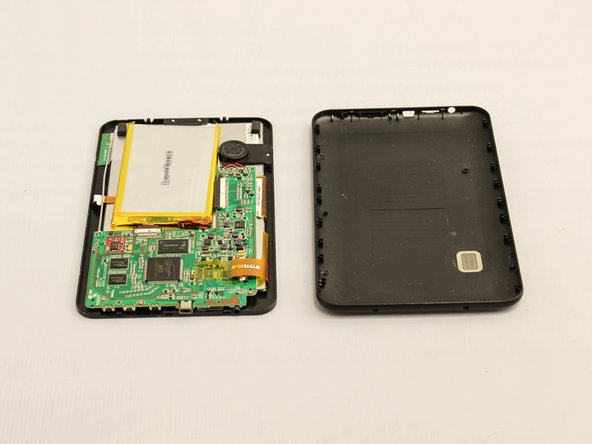
– Start by gently prying open the seam between the screen and the case using a large plastic opening tool. Work your way around all four sides until the plastic case pops off.
– Once the case is loose, carefully lift the device out and flip it over so the screen is facing down.
– And just like that, the device is free from its plastic casing. Nice work!
Step 3

Avoid puncturing the battery; it can create a serious safety issue.
There’s a plastic bag wrapped around the battery. If it happens to be torn or stretched, don’t worry—it’s not a safety issue!
– Slide a plastic card under the battery like you’re sneaking in a surprise visit.
– Gently shimmy the card back and forth, and up and down, until the glue holding the battery in place decides it’s time to let go.
Step 4

Time to wave goodbye to all those pesky wires connecting the motherboard to the device! Just leave the ones for the battery in place, and we’re golden!
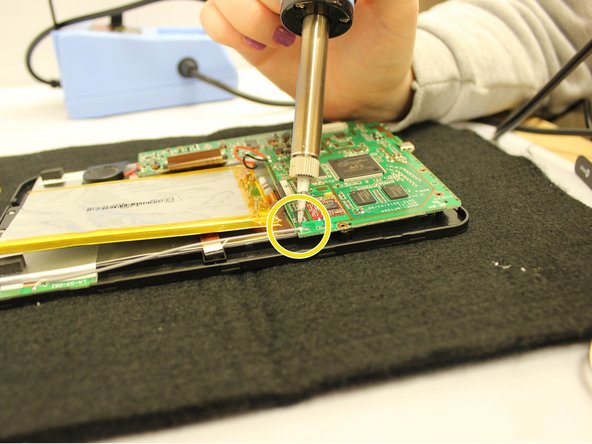
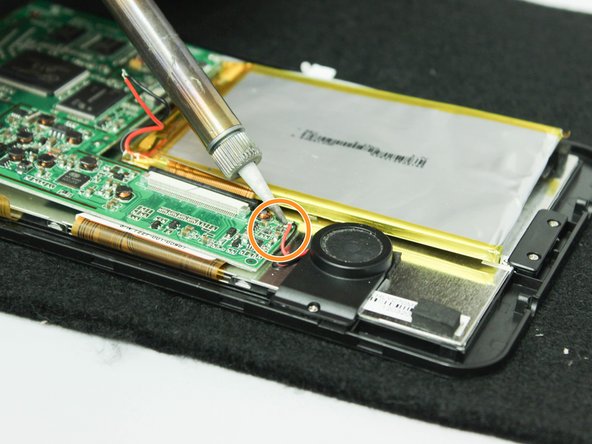
– Let’s get started by desoldering some key components from the motherboard – it’s time to set those parts free!
– Carefully desolder the red wire that’s connected to the speaker unit from the motherboard. You’re making great progress!
– Next, desolder the black wire that’s linked to the speaker unit from the motherboard. You’re doing fantastic!
– Now, desolder the gray wire that runs along the edge of the device from the motherboard. Almost there!
Step 5
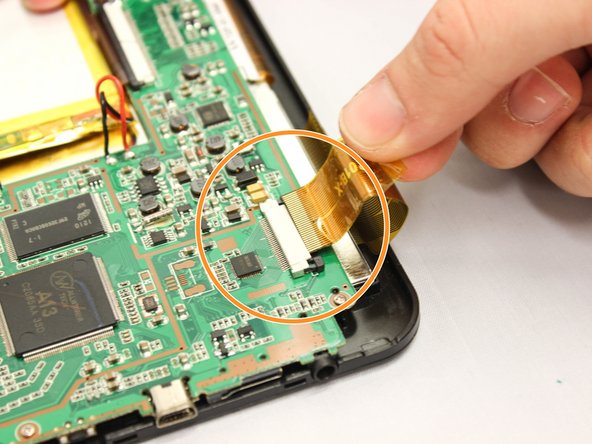

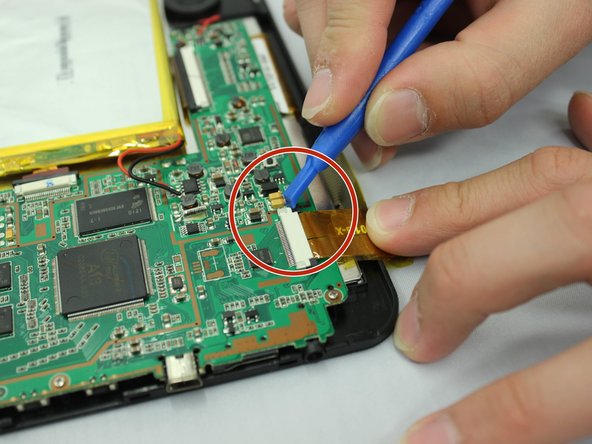
– Grab your trusty tweezers and gently pry the medium width yellow ribbon cable away from the motherboard.
– Next up, take a small opening tool and carefully slide those two little black clips off the white connector where the medium width yellow ribbon cable connects.
– Now, with a gentle touch, use your fingers to pull the medium width yellow ribbon cable out of the white connector.
– Time to repeat those last two steps for the narrower and wider yellow ribbon cables—let’s get them disconnected from the motherboard!
– Congratulations! The motherboard and battery are now free from any ribbon cables linking them to the device.
Tools Used

Step 6

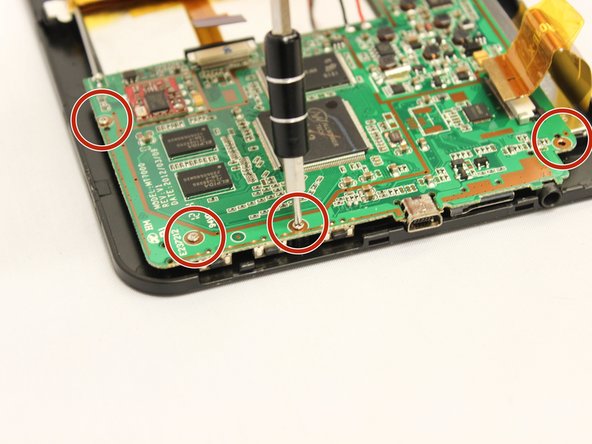
– Grab your trusty PH000 screwdriver and unscrew those four 5 mm screws along the bottom edge of the motherboard by turning them counterclockwise. Easy peasy!
Step 7

You’ll now have a clear view of the back of the display and the speaker unit, making it a breeze to access!
– Gently lift the motherboard and battery out of the device using your hands. You’ve got this!
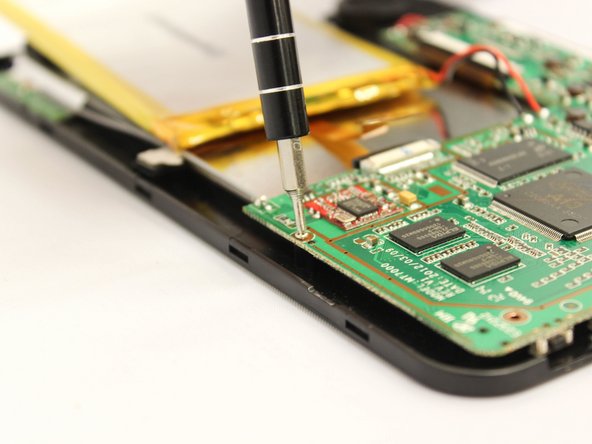
Step 8

– Grab a J000 screwdriver and unscrew the 5mm screw holding the speaker unit to the display unit. Turn those screws counterclockwise—it’s like loosening up the world’s tiniest bolt!
Step 9

– Gently grab the speaker unit with your thumb and forefinger, then lift it out of the device like a pro.
Step 10

– Grab your trusty J000 Philips head screwdriver and carefully unscrew the two 5mm screws at the bottom of the display unit. Just turn them counterclockwise and you’ll have them out in no time. Keep it steady!
Step 11

– Gently lift the small black display protector nestled between the screws and the display unit using your thumb and forefinger. Keep it steady and take your time!
Step 12

Now the screen and display unit have been successfully popped free from the plastic casing—nice work!
– Grab the device with both hands and give it a gentle lift.
– Slide your fingers up from underneath the screen until the screen and display unit pop free from the black plastic frame.
– Place the screen and display unit face down on a safe surface.
Step 13
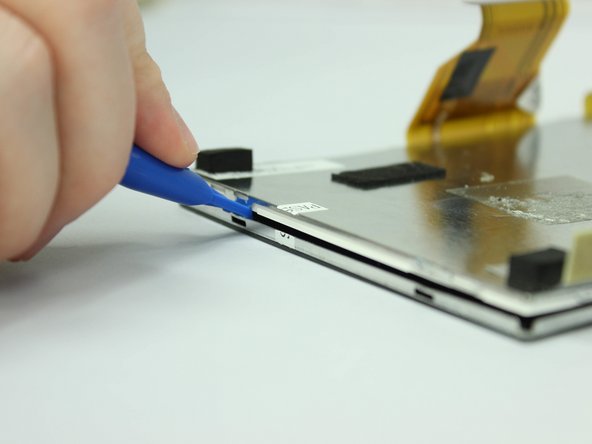

– Slide the big plastic opening tool into one of the grooves on the edge of your screen and display unit.
– Gently pry until you hear a satisfying little pop from the tab.
– Keep going and do this for every groove around the edge of the screen and display unit!
Step 14

– Gently use your fingers to lift the display off the screen. It’s easier than it sounds!
– Now that the screen is free, you’re all set for the replacement!


