iPhone 15 Front Camera Assembly Replacement
Duration: 45 minutes
Steps: 27 Steps
Heads up! Face ID won’t be available after this step.
Time to give your iPhone 15 a selfie boost! This guide walks you through swapping out the front camera assembly, which includes both the front-facing camera and Face ID sensors. Keep in mind, these sensors are specially paired to your logic board, so Face ID won’t work after replacement. This repair will get your broken selfie cam snapping again. On iOS 17.6 and earlier, only Apple or an Apple “authorized” technician can restore Face ID. For iOS 18 and up, you can recalibrate genuine front cameras using Apple's Repair Assistant. Don’t forget: you’ll need replacement back glass adhesive to finish the job. If things get tricky, you can always schedule a repair.
Step 1


Let that battery of yours dip below 25%! A fully charged lithium-ion battery can be a bit of a party pooper when it comes to safety.
- Disconnect any cables hanging out of your phone—let's keep things tidy.
- Press and hold the power button with either of the volume buttons, then swipe to turn your phone off. Easy does it!
Step 2


Find a nice smooth spot near the bottom edge that's just right for your suction cup to grip onto.
- Got a seriously cracked screen or back glass? Slap on some overlapping strips of packing tape to keep your fingers safe and make taking things apart a whole lot smoother.
Step 3


Don’t let your pick go rogue! Mark how deep it should go so you don’t accidentally poke something important.
Want to get fancy? Mark all the pick’s corners with different depths.
Or, for a quick hack, tape a coin to your pick at 3 mm from the tip.
- Grab your opening pick and measure about 3 mm from the tip. Give it a little mark with a permanent marker so you know where to go!
Step 4


- Grab your P2 pentalobe driver and get ready to work those muscles! Carefully unscrew the two 7.7mm screws on either side of the charging port. They’re holding everything in place, so make sure they don’t roll away!
Step 5

Keep things cool—don’t overheat your phone, since the battery isn’t a fan of high temps.
- Grab a hair dryer or heat gun and warm up the bottom edge of the back glass until it feels nice and toasty to the touch.
Tools Used


Step 6


- Stick a suction handle right at the bottom edge of the back glass.
- Give the handle a firm, steady pull to gently separate the back glass from the frame.
- Slide the tip of an opening pick into the little gap you've created.
Tools Used

Step 7

While you're slicing through the adhesive to free up the back glass, keep an eye on these areas—they're a bit delicate and could use some extra care!
- Heads up! There's a fragile cable linking the back glass to the phone right next to the volume down button. Avoid sliding your pick in there to keep that cable safe and sound.
- Around the phone’s edge, you’ll find several spring contacts. Be mindful not to push your pick too deep at any point to prevent bending these little guys.
Step 8


Keep your pick shallow—no deeper than 5 mm along the bottom edge, or you might poke something you don’t want to!
- Gently slide your pick along the bottom edge, wiggling it back and forth to break through that stubborn adhesive.
- Leave the pick snugly in place in the bottom right corner to keep the adhesive from sticking back together.
Step 9

- Warm up the right side of the back glass until it feels comfortably warm to the touch.
Step 10


Keep your pick shallow—never poke it more than 7 mm in along the right edge.
Steer clear of slicing past the volume buttons, or you’ll risk giving the wireless charging cable a bad hair day.
- Swing your pick around the bottom right corner, gliding it up toward the volume down button. Stop when you hit a stubborn clip holding the back glass in place.
- Leave the pick chilling there to keep that adhesive from sticking things back together.
Step 11

- Warm up the left edge of the back glass until it feels nice and toasty!
Step 12


Along the left edge, keep your pick shallow—no deeper than 5 mm—to avoid any surprises!
- Pop in a second opening pick at the bottom edge.
- Twist that second pick around the bottom left corner with a little finesse.
- Slide it up to the top left corner to break that adhesive free.
- Keep that pick in place to stop the adhesive from being all clingy again.
Step 13

- Gently warm up the top edge of the back glass until it feels nicely toasty to the touch.
Step 14


Be careful not to push your pick too deep—no more than 3 mm along the top edge.
You'll likely hear and feel some satisfying clicks as the top two clips pop free.
- Grab your trusty second opening pick and give it a whirl around the top left corner. Slide that bad boy over to the top right corner to break free from the adhesive's grip.
- Keep that pick in place like a loyal sidekick to stop the adhesive from sealing back up!
Step 15

- Warm up the top right corner of the back glass until it feels nice and toasty to the touch.
Step 16


Be careful not to push your pick in more than 4 mm along the right edge. We want to keep things light, no need to go too deep here!
- Take your second opening pick and gently slide it around the top right corner. Move it towards the volume up button, and with a little patience, separate that sticky adhesive.
Step 17


If the back glass is holding on tight, take another lap around the edge—there might be some sneaky adhesive or stubborn clips still clinging on.
- Carefully swing the back glass open toward the right side of the phone.
- Lean the back glass against something raised to keep the cable comfy and unstressed.
Step 18

As you work through this repair, make sure to keep track of each screw and remember where it came from. Trust us, your future self will thank you when it's time to put everything back together!
- Grab a tri-point Y000 driver and unscrew the two 1.3mm screws holding the lower connector cover in place. Nice and easy, just take your time!
Step 19


- Grab those tweezers and gently nudge the cover towards the top of the phone to pop it off the logic board. You've got this!
- Now, go ahead and remove that cover like a pro.
- When it's time to put everything back together, make sure to hook the top edge of the cover into its snug spot on the logic board before securing it with that screw.
Tools Used

Step 20


To get that press connector back in action, simply line it up with its socket and give one side a gentle push until you hear that satisfying click! Then, do the same on the other side. Just make sure it's sitting nice and flat; the insulating rubber around the sockets can sometimes be a bit picky and prevent a snug connection.
Oh, and don't forget: there's a plus and minus sign right on the head of this connector to help you out!
- Grab that back glass like you're holding a trophy and give it a gentle twist to unveil the battery press connector hiding just under the volume buttons.
- Now, take the tip of your trusty opening pick and slide it in there to pop up and disconnect the battery press connector from the logic board. You've got this!
Step 21


- Grab your trusty tri-point Y000 driver and unscrew the 0.9mm screw holding the middle connector cover in place. Nice and easy, you're doing great!
Step 22


- Grab the flat end of your spudger (or just use your finger, we don’t judge) and gently nudge the cover toward the bottom of the phone until the top edge pops free.
- Lift the cover off and set it aside like the VIP it is.
- Putting it back together? Slide the cover so its tab sneaks in just behind the clip on the logic board. Give it a gentle press and slide forward to lock the clip in place. Smooth moves!
Tools Used

Step 23


- Grab your trusty opening pick and gently lift up to disconnect the wireless charging coil and NFC connector. You've got this!
Step 24

- Pop off the back glass to get started.
- While you're putting everything back together:
- Now’s a smart time to check your work—hook up the battery and back glass, power up your phone, and make sure everything’s running smoothly. Once you’re happy, power down and finish reassembling.
- Follow this guide to stick the adhesive back on and put the back glass in place.
Step 25


- Grab your trusty tri-point Y000 driver and kick off by unscrewing those two 1.3 mm-long screws that are holding down the upper connector cover.
- Once those screws are out of the way, gently lift off the cover.
Step 26


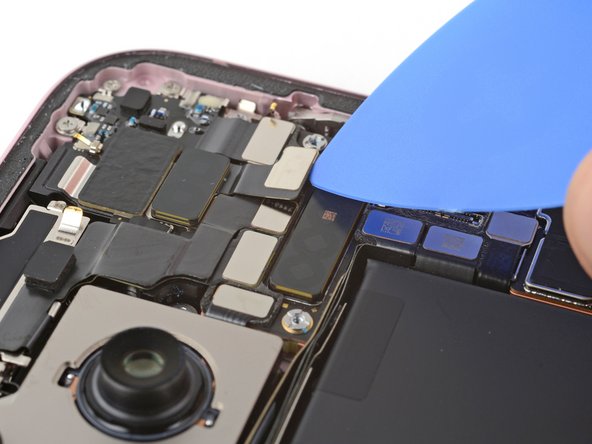
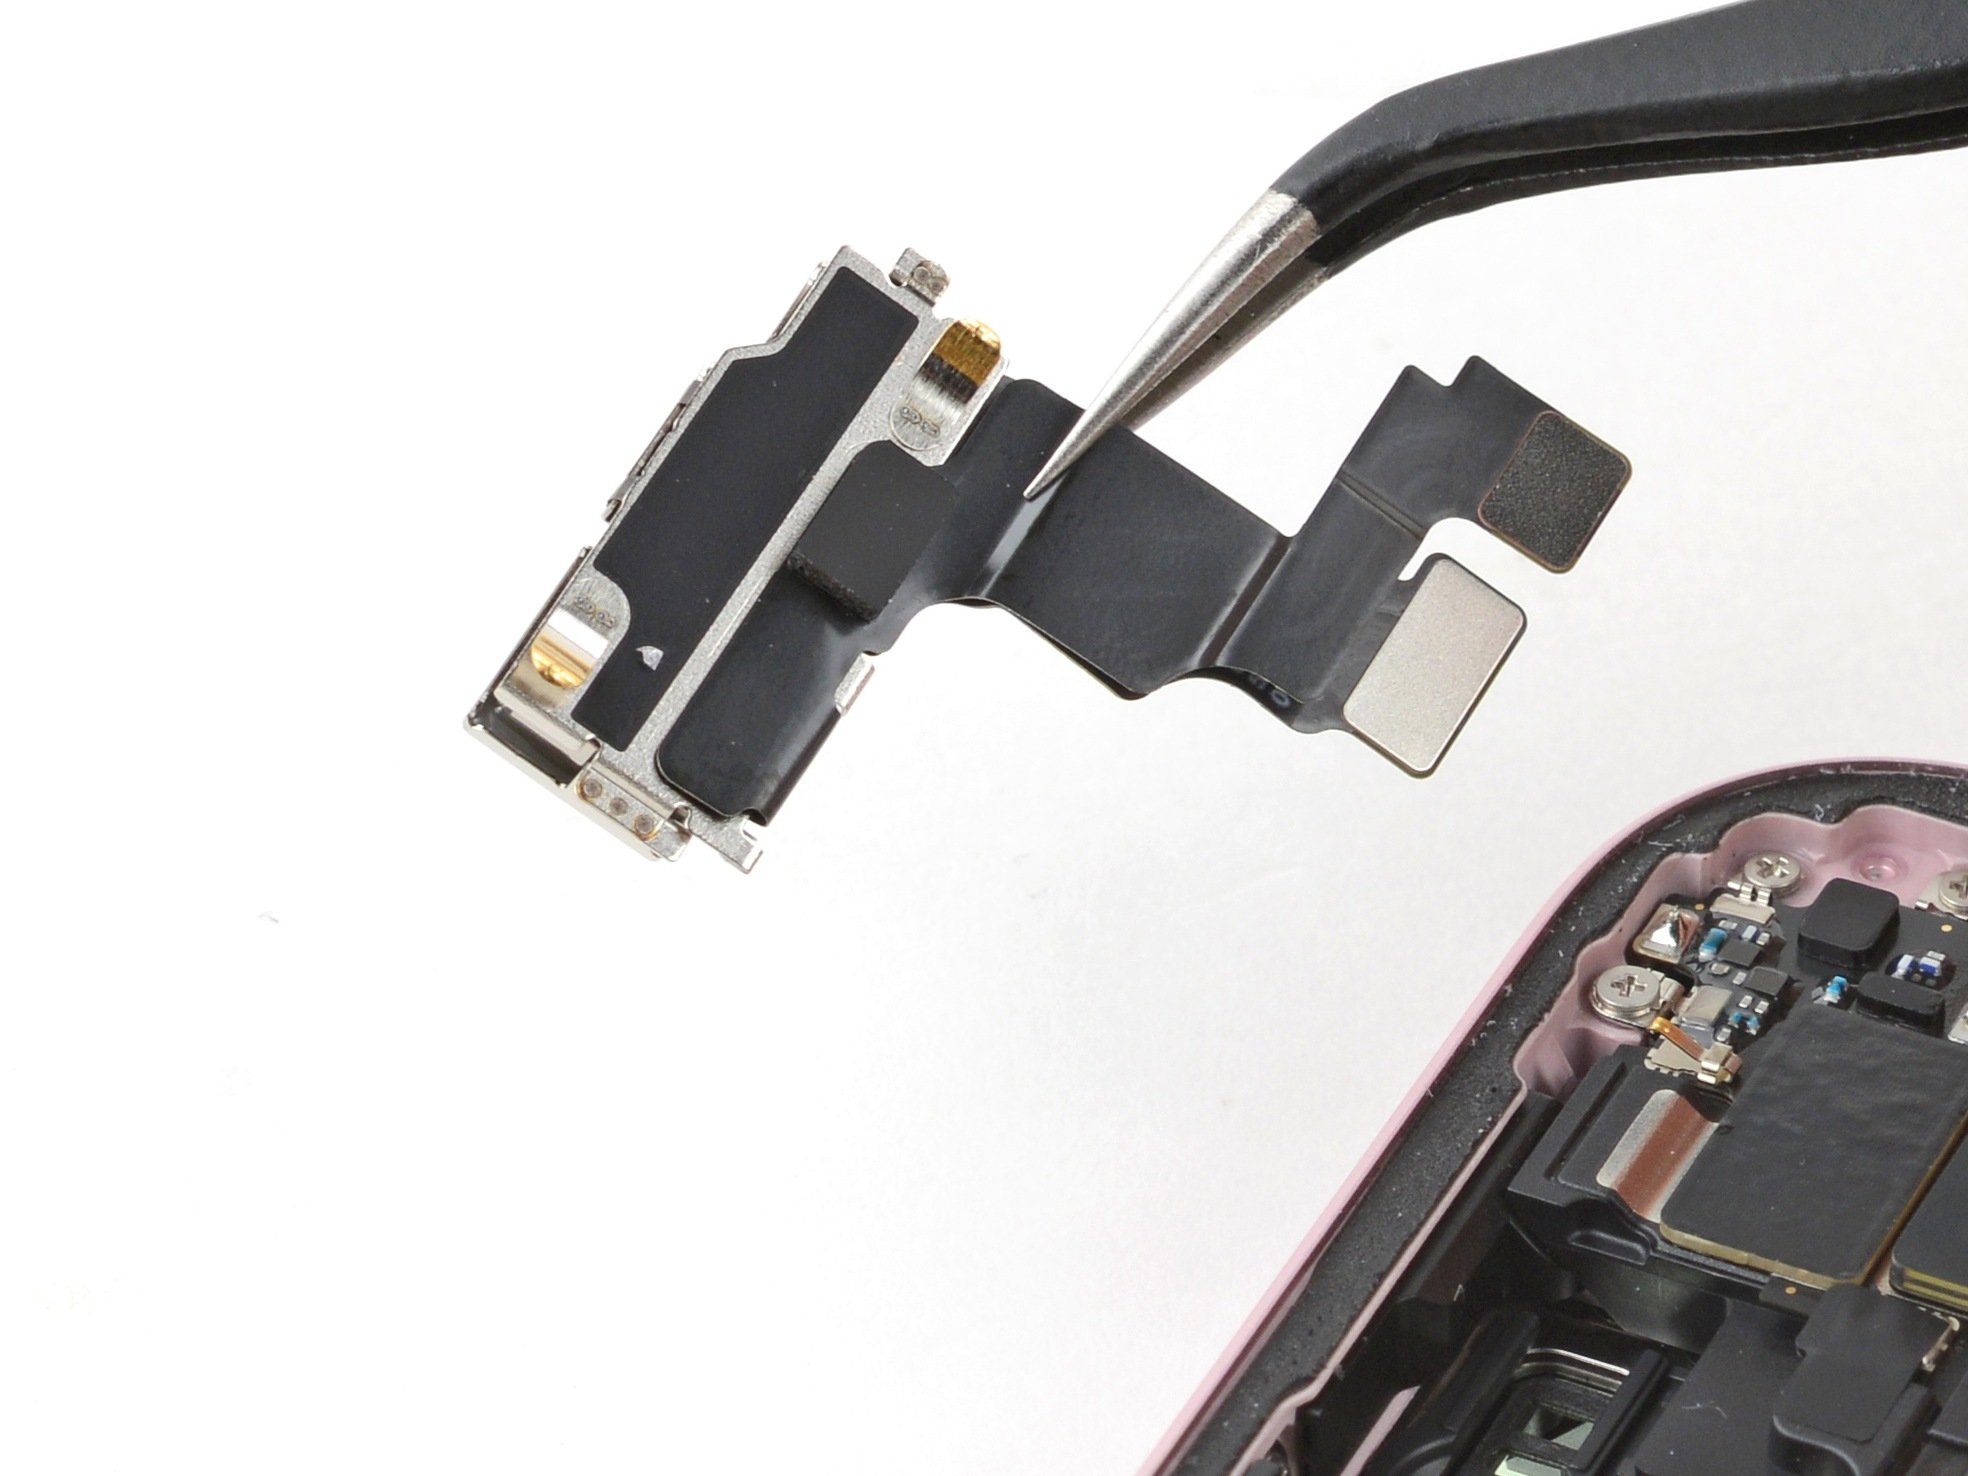
- Gently slide the tip of your opening pick under the connectors for the antenna, front sensors, and front camera—there are three in total—and carefully pry them up to disconnect. Keep it smooth and steady!
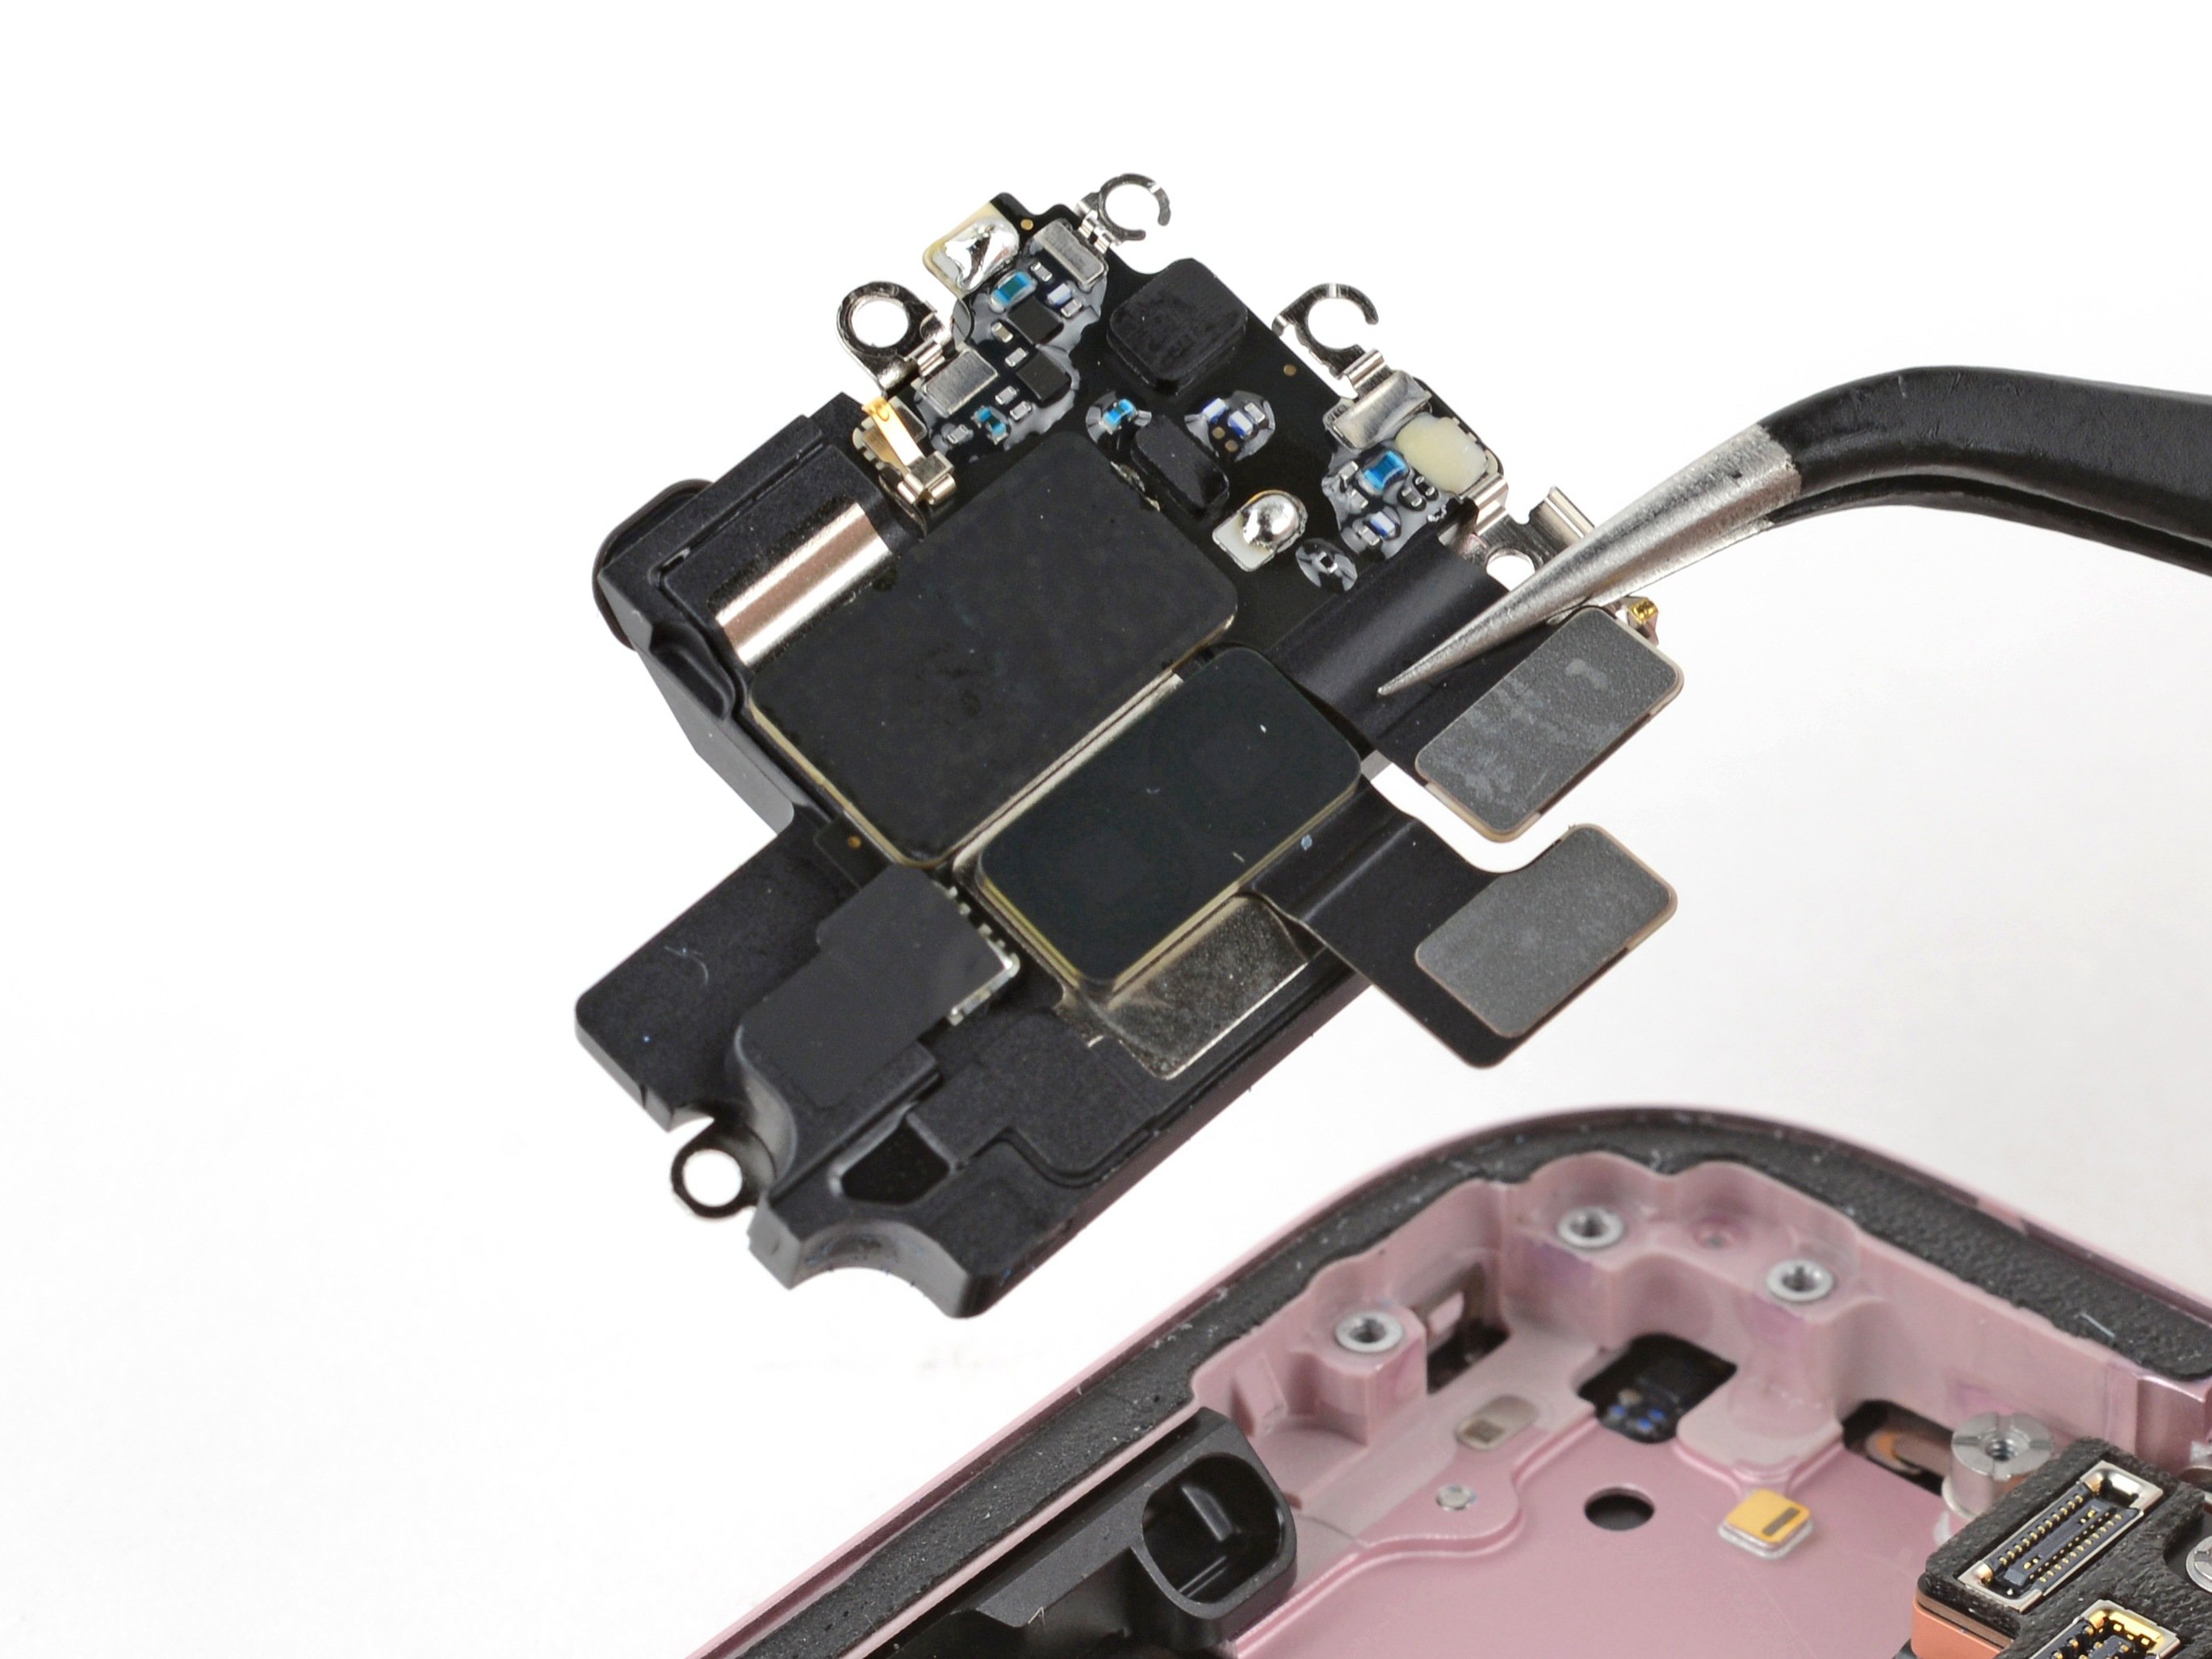
Step 27


- Gently grab the front camera and sensors using tweezers or your fingers, and carefully lift them out of their snug little home in the frame. Once they’re free, just set them aside and you're one step closer to success!