iPhone 14 Pro Rear-Facing Camera Assembly Replacement
Duration: 45 minutes
Steps: 28 Steps
Follow this guide to swap out the rear-facing camera assembly on an iPhone 14 Pro. It’s based on the A2890 (international) model, so if your iPhone 14 Pro is a different version, things might look a bit different, but the steps stay pretty much the same. Heads up: on iOS 18 and later, you can calibrate brand-new genuine camera modules using Apple’s Repair Assistant. Make sure to have replacement adhesive on hand to secure the screen properly when putting your phone back together. Keeping your device water-resistant depends on how well you reapply the adhesive, but just so you know, your phone will lose its official IP (Ingress Protection) rating after this repair.
Step 1


- First things first, let’s power down your iPhone before we dive into this adventure!
- Next up, grab your trusty pentalobe P2 screwdriver and carefully remove the two screws, each measuring 6.8 mm, from the bottom edge of your iPhone.
Step 2


Watch out! If you slide the opening pick in too deep, it could poke parts it shouldn't. Mark your pick to keep things safe and sound.
Want to get fancy? Mark the other corners of your pick for different depths.
Or, get creative—tape a coin 3 mm from the tip to make a DIY depth guard.
- Take your pick tool and measure 3mm from the tip. Mark that spot with a permanent marker, so you know exactly where to start your magic.
Step 3


Make sure to rock those safety glasses to keep your peepers safe from any sneaky glass shards that might escape during the repair adventure.
Got a cracked iPhone screen? Keep those sharp shards in check and save your fingers by taping over the glass before you dive into the repair.
If the suction cup won't stick, no worries—you can carefully superglue it to the screen to get the job done.
- Place overlapping strips of clear packing tape across the iPhone's screen until the entire front is nicely covered.
- If the suction cup isn't sticking in the next steps, no worries! Just fold a sturdy piece of tape (like duct tape) into a handle and give the screen a lift with that instead.
Tools Used


Step 4


The next three steps roll out the Anti-Clamp, Salvation Repair’s own gadget for making screen opening a breeze. If you’re not rolling with an Anti-Clamp, jump ahead three steps for a different approach.
Need the lowdown on working the Anti-Clamp? Check out the dedicated guide for all the details.
If your iPhone’s surface is slicker than a bowling alley, slap on some tape to give the Anti-Clamp better grip.
- Give the blue handle a little tug to unlock those Anti-Clamp arms.
- Slide the arms over the left or right side of your iPhone—whichever feels right.
- Place the suction cups near the bottom of your iPhone—one on the front, and one on the back.
- Gently squeeze the cups together to create suction and get a good hold on your iPhone.
Step 5


- Pull that blue handle forward to lock the arms in place—nice and steady.
- Twist the handle clockwise a full 360 degrees, or until you feel the suction cups starting to stretch. You've got this!
- Double-check that the suction cups stay aligned. If they start drifting out of sync, just loosen them up a bit and realign the arms. No big deal!
Step 6


Take it easy! Only twist a quarter turn at a time, and give it a minute to chill between those turns. Let the Anti-Clamp and a little patience do the heavy lifting for you!
For the full scoop on how to wield a hair dryer like a pro, be sure to check out this guide.
If the Anti-Clamp isn't opening up enough space, just heat things up a bit more and give the handle a little twist—about a quarter turn should do the trick!
- Place your iPhone on something sturdy, like a hardcover book, so it stays steady and flat. This makes things easier when you move on to the next steps.
- Use a hair dryer to gently warm up the bottom edge of your iPhone. The screen should get warm enough that it feels a little too hot to the touch.
- Give it a minute to let the adhesive soften up and create a small gap between the screen and the body.
- Once that gap is there, carefully slide an opening pick under the screen's plastic bezel. It should fit right in thanks to the Anti-Clamp's help.
- You can skip the next two steps, they’re not needed.
Tools Used

Step 7

Don't keep your hair dryer locked in one spot for too long. Move it around a bit, give it some space to breathe. It'll thank you later!
Got your suction handle ready? Follow the next two steps to gently pop that screen loose.
- Give that bottom edge of your iPhone some love with a hair dryer or heat gun! Warm it up for about 90 seconds, or until it feels just a bit too toasty to touch. You're getting closer to that screen magic!
Tools Used


Step 8


- Stick a suction handle near the bottom edge of the screen—just steer clear of the very edge to avoid a glass-tastrophe.
- Give the suction cup a steady, confident pull to open up a tiny gap between the screen and the frame.
- Slide an opening pick into that gap, just underneath the plastic bezel of the screen. Nice and easy!
The adhesive that's keeping the screen in place is pretty tough. Getting that first little gap open will require some muscle. If you're stuck, don't panic—just add a little more heat and gently wiggle the screen up and down. This will help loosen the adhesive until you've created enough space for your tool to slide in. Stay patient, you'll get there!
Tools Used
Step 9


- Grab your hair dryer and warm up the right side of your iPhone (yep, the one with the power button) for about 90 seconds. Aim for a temperature that’s hot—but not so hot you want to drop it!
Tools Used
Step 10


Keep that pick under 3 mm, or you might accidentally poke something you didn't mean to!
- Gently slide your opening pick around the bottom right corner of the iPhone to break free its adhesive grip.
- Keep the momentum going as you glide the pick up the right edge of the iPhone until you reach the top right corner.
- Once you're at the top right corner, leave the pick in place for now and take a breather before moving on.
Step 11

- Grab your hair dryer and warm up the top edge of your iPhone for about 90 seconds, or until it feels just a bit too toasty to touch.
Tools Used
Step 12


Keep your pick shallow—no deeper than 3 mm—to avoid messing with those delicate top sensors.
- Gently glide that trusty opening pick around the top right corner of your iPhone to break free the top adhesive. You're doing great!
- Keep that pick nestled in the top left corner while you move on to the next step. You're on a roll!
Step 13


- Grab a hair dryer and give the left edge of your iPhone a gentle warm-up for about 90 seconds. You’ll know it’s time to stop when the screen is just shy of being too hot to touch.
Tools Used
Step 14

Heads up: there are some super-sensitive cables chilling along the left edge of your iPhone. Keep your pick away from that area to avoid accidentally messing with them.
Step 15


The cables along the left edge can be a little tricky, so be extra careful when using a pick here. Try this alternate method to gently separate the left adhesive instead.
Gently twist it open, nice and easy.
If the adhesive is being stubborn, give the left edge a little heat boost and try again.
- Slide a second opening pick into the bottom left corner of your iPhone.
- Gently twist both picks at the same time until you hear the satisfying click of the left edge clips giving way.
Step 16


No handy prop for your screen? Your suction handle's got your back—just lean it against that and keep on fixing.
- Pop that suction handle off the screen—smooth move!
- Twist your iPhone so the right edge is chillin’ closest to you.
- Flip open the screen from the right, just like cracking open a fresh book.
- Prop the screen up against something sturdy so it stays out of your way while you work your magic.
- When you’re putting everything back together, line up the top clips, gently press the top edge down first, then snap the rest of the screen into place. If the snap isn’t happening, double-check those perimeter clips—sometimes they get a little bent out of shape.
Tools Used
Step 17


As you tackle this repair, keep an eye on each screw and make sure it finds its way back home just like it came out. This will help you avoid any mishaps with your iPhone.
- Grab your trusty Y000 screwdriver and loosen up the eight screws holding down the battery connector cover:
- If you’re putting things back together, this is a solid time to power up your iPhone and make sure everything’s working before you lock that screen down. Just don’t forget to shut your iPhone off again before you get back to business.
- Five screws at 1.3 mm—think of them as tiny guardians.
- Two screws at 1.6 mm—short and sweet.
- One screw at 1.9 mm—the solo long ranger.
Step 18


- Grab the connector cover with your trusty tweezers and give it a gentle slide downward to free those flex cables. You're doing great!
- Now, carefully lift off the connector cover and set it aside. Almost there!
Tools Used

Step 19


Watch out for that black silicone seal around the board connections—it’s like a tiny superhero cape protecting against water and dust. Treat it with care so your device stays safe and sound.
- Grab your trusty spudger and gently pop the battery connector straight up—think of it like unplugging your phone’s energy drink.
- Once it’s free, give the connector a little nudge away from the logic board. This keeps your phone powered down while you work your magic.
Tools Used

Step 20


- With the pointy end of your spudger, gently pop up the first display cable connector—think of it like unplugging a tiny Lego brick.
- When you're reconnecting, line up the connector carefully and press down one side until you feel it click, then do the same for the other side. Skip pressing in the middle—trust us, those pins are delicate and don't appreciate being bent.
Tools Used
Step 21


- Take the pointed end of your spudger and gently pop the second display cable connector straight up out of its socket. Easy does it—no wrestling required!
Tools Used
Step 22


- Take off the screen carefully.
- Clean the areas with isopropyl alcohol (>90%) and put fresh adhesive where it's needed.
- While putting everything back together, stop here if you want to swap out the screen adhesives.
Step 23

- Grab your Y000 driver and remove the five screws holding down the rear-facing camera assembly cover:
- One screw needs your Phillips screwdriver—it's 1.7 mm long.
- Four of these are 1.5 mm-long Y000 screws.
- And finally, one lonely 1.3 mm-long Y000 screw.
Step 24


Watch out for that tiny metal edge in the top right corner of the rear-facing camera assembly cover—it's snugly held in place by the phone frame.
As you put everything back together, take a moment to align the rear-facing camera assembly cover just right. Give that little metal edge a gentle nudge back into its cozy spot in the frame!
- Snag the rear-facing camera assembly cover with your trusty tweezers.
- Slide the cover toward the volume buttons to pop its little metal edge free from the frame. Give it a gentle wiggle if it’s feeling stubborn.
- Lift away the rear-facing camera assembly cover and set it aside like the pro you are.
Tools Used
Step 25


- Carefully use a spudger to pop the ultra wide and telephoto lens cable connector straight up and out of its socket.
Tools Used
Step 26


- Grab your spudger and gently pry the wide lens cable connector straight up to unplug it from its socket.
Tools Used
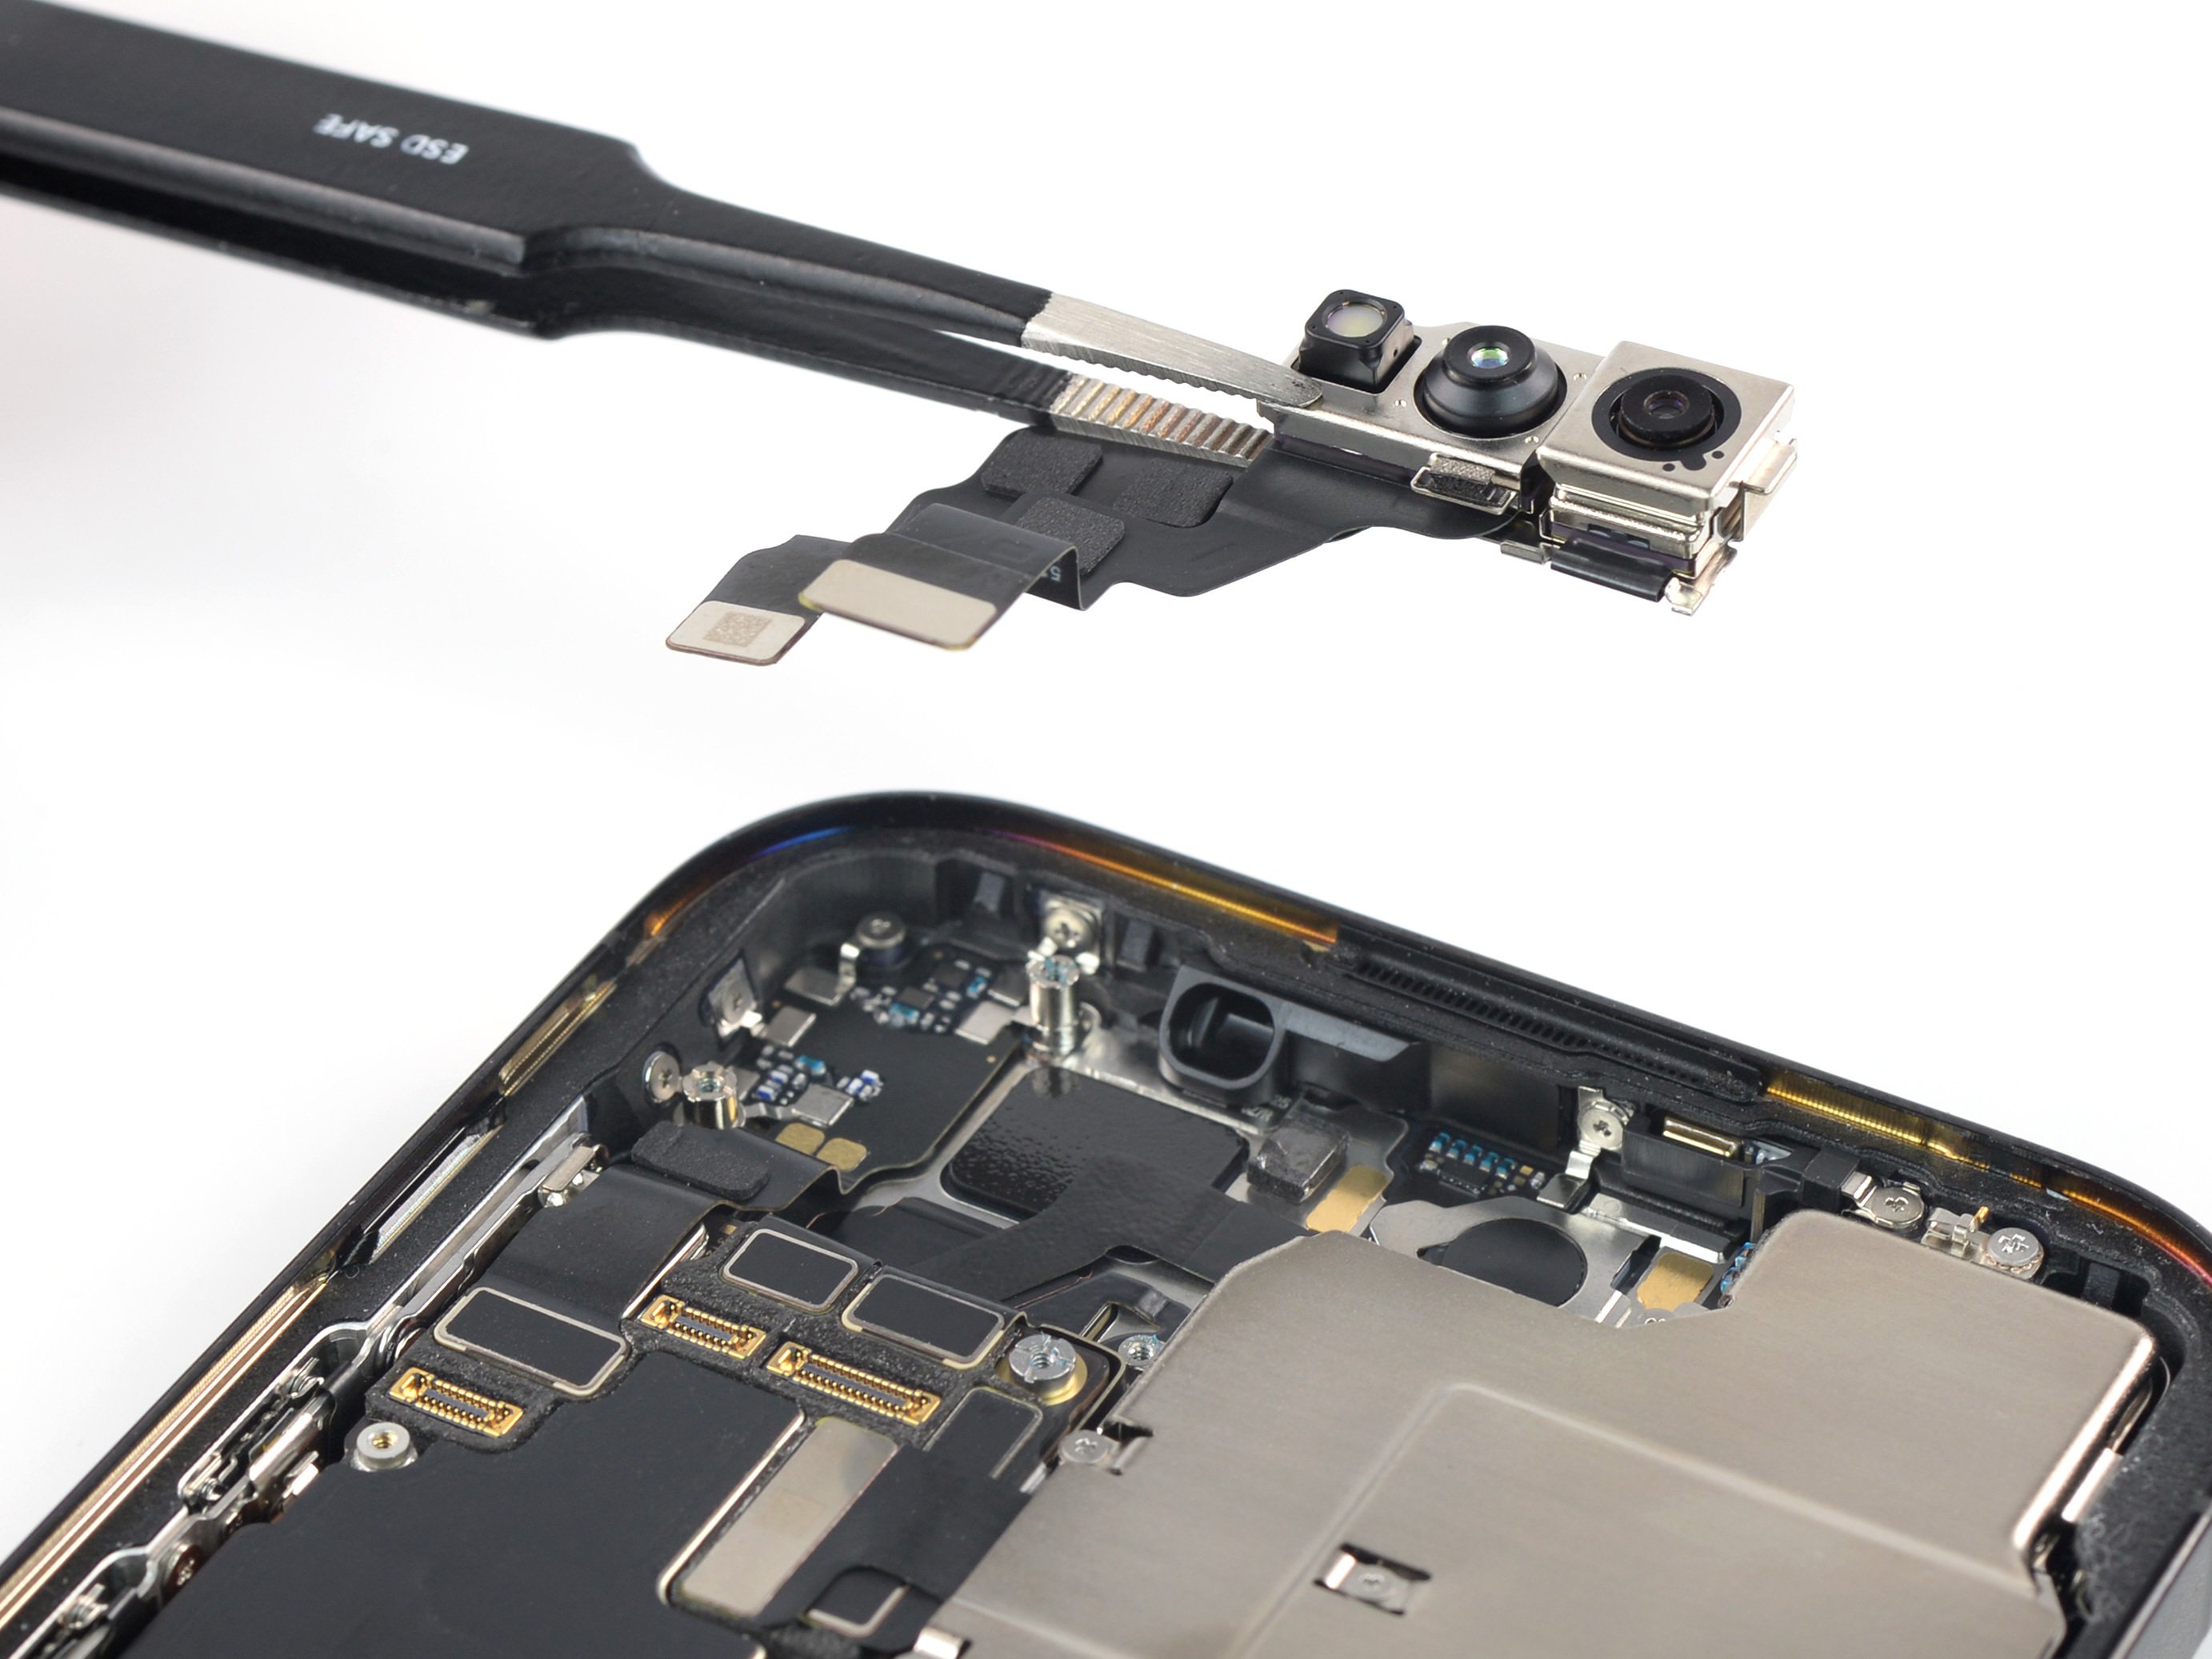
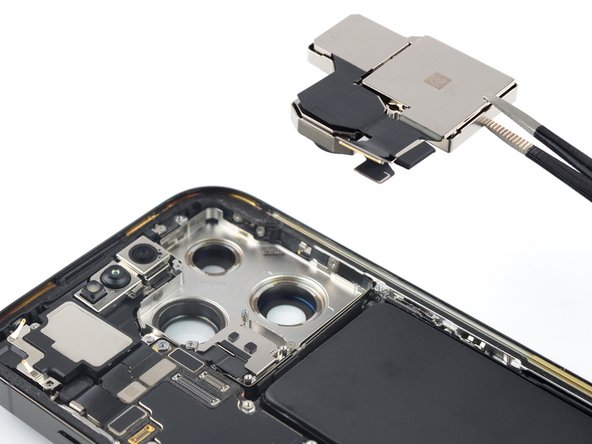
Step 27


- Slide the sharp tip of a spudger beneath the bottom edge of the rear-facing camera assembly.
- Gently pry upwards with the spudger to free the rear-facing camera assembly.
Tools Used
Step 28

- Give your device a test drive before locking everything down with new adhesive.
- Check out your replacement part next to the original—make sure you move over any leftover bits or peel off any sticky backings before installing.
- Ready to put things back together? Just follow these steps in reverse and you'll be golden.
- If your new part needs a little tuning, you can calibrate it with Apple's Repair Assistant (iOS 18 or later). Update your device, pop into Settings → General → About → Parts & Service History, hit Restart & Finish Repair, and follow the prompts.
- Got leftover parts? Recycle them responsibly with an R2 or e-Stewards certified recycler.
- If things aren’t working out, try some basic troubleshooting or drop your questions in our Answers community. And if you need a hand, you can always schedule a repair.