Nvidia Shield Tablet Motherboard Replacement
Duration: 45 minutes
Steps: 7 Steps
Ready to breathe new life into your Nvidia Shield Tablet? This step-by-step guide will walk you through replacing the motherboard, and Salvation Repair is here to help if you need it. Follow along, and you’ll be back to gaming and streaming in no time. If you’re not feeling confident, you can always schedule a repair.
Step 1


– To kick things off, go ahead and take out that stylus from your tablet.
Step 2


Time to suit up! Slap on that anti-static wrist strap—your motherboard is officially in the danger zone. With the casing off, it’s extra sensitive to your touch and any sneaky electrostatic shocks. Let’s keep things smooth and shock-free!
– Place the tablet so the buttons, microSD slot, and stylus port are all facing you.
– Pop open the microSD slot cover.
– Grab the flat end of your trusty spudger and gently wedge it into the case starting at the microSD slot. Slowly glide the spudger along the inner edge to carefully pry the case open.
Tools Used


Step 3


– As you start removing the case, keep an eye out for the small clips on the edges—they like to hang on a little longer than expected.
– Once the case is off, go ahead and set the old casing aside. You’re almost there!
Step 4

Don’t forget to strap on your anti-static wristband — it’s the superhero cape for your electronics during this step!
– Gently grab those precision tweezers and unplug the ribbon cable with care. You’ve got this!
Tools Used
Step 5


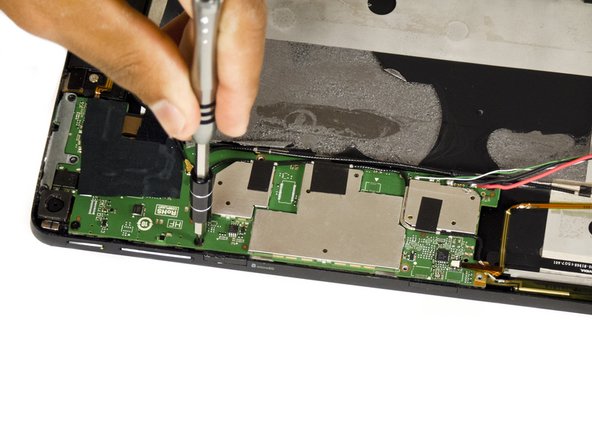
– Let’s get those screws out of the way! Start by unscrewing the two 6.5 mm Phillips #00 screws and then tackle the seven 3.0 mm Phillips #00 screws. You’ve got this!
Step 6


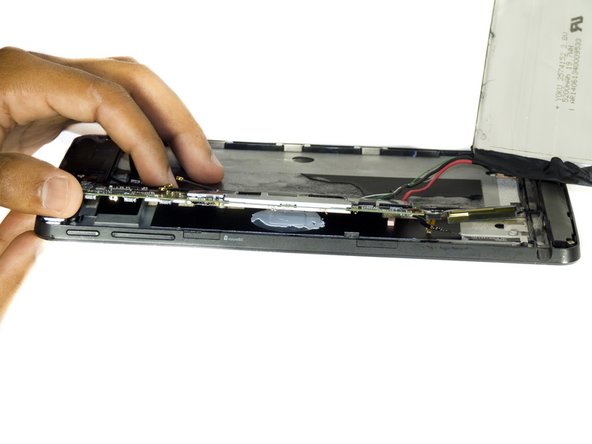
Under the right side of the board in the first Shield, you’ll find the stylus ribbon cable chillin’. On the flip side, under the left end, there are two more cables connected to the cameras. Make sure to gently loosen those camera cables before you lift the board to keep everything happy and safe.
– Grab your tweezers and gently unplug the three black antenna cables from the motherboard—steady hands make happy devices!
– Use the flat tip of your spudger to carefully lift the motherboard up; think of it as giving it a gentle nudge to say hello.
Tools Used
Step 7

– Gently desolder the positive and negative battery cables from the motherboard.
– Keep track of which wire goes where—no one wants to mix up the wires when resoldering!
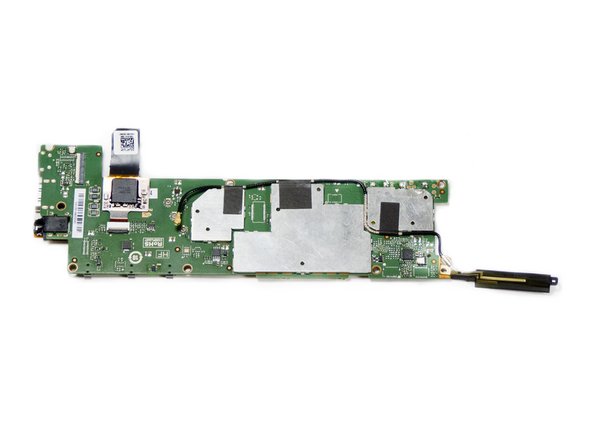
– Now, the motherboard should pop right off.
Success!