AirPods Teardown
Duration: 45 minutes
Steps: 19 Steps
Apple EarPods used to come with every iPhone until the headphone jack made its exit after the iPhone 6s. Enter the AirPods: Apple’s answer to a world without wires. Are they worth the buzz? Let’s take a closer look. Grab your favorite headphones—wired or wireless—and let’s dive into this teardown. Want more repair tips and updates? Follow us on Instagram, Twitter, and Facebook!
Step 1


– Ready to see what’s inside Apple’s latest pocket-sized wonders? Let’s check out the details:
– Each AirPod tips the scale at just 0.14 oz (4 g), and the charging case comes in at 1.34 oz (38 g).
– AirPods are sized at 0.65″ × 0.71″ × 1.59″ (16.5 mm × 18.0 mm × 40.5 mm), while the charging case is 1.74″ × 0.84″ × 2.11″ (44.3 mm × 21.3 mm × 53.5 mm).
– Bluetooth and Apple’s W1 chip keep you wire-free and connected.
– Microphones, optical sensors, and a motion accelerometer work together to tell when the AirPods are in your ears.
– The beamforming microphones and a second accelerometer help block out background noise, so your calls sound crystal clear.
– AirPods can keep playing for up to 5 hours, and the charging case offers up to 24 hours of extra listening time.
Step 2


If you had X-ray vision, you’d get a complete view of the whole process. Stay tuned for some detailed scans of the AirPods as we break it all down in this teardown.
– Let’s take a quick look at your AirPods — featuring the iconic Apple Egg design! On one end, you’ll find a sleek charging case with a Lightning port to top up its battery. Inside each AirPod housing, nestled deep within, are tiny contacts that keep the ‘Pods powered up with their own onboard batteries. And right at the top of the case, there’s a small LED indicator that lets you know when all three batteries need some love. If you need help, you can always schedule a repair.
Step 3


Alright, let’s cut to the chase and get started with this repair. We’ll walk through each step clearly so you can fix it up in no time. If you run into any trouble, remember you can always schedule a repair for expert help. Let’s get to it!
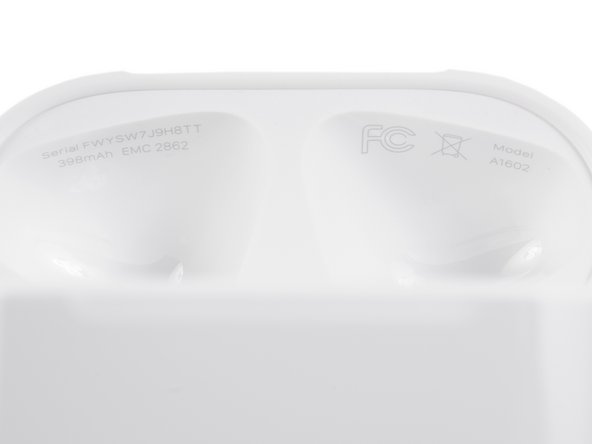
– The charge case now sports a fresh model number—A1602—and reveals the case’s total power capacity: 398 mAh. Nothing like a little extra juice to keep things running smoothly.
– Before we wrap up the teardown on the charge case, let’s take a quick glance at the setup button on the back. If Apple’s fancy instant sync feature isn’t playing nice, this button is your backup plan to get things connected the old-school Bluetooth way.
Step 4


– The earbuds are dotted up with grilles for speaker action, tiny microphone holes for those noise-canceling secondary mics, and some black dots hiding the IR proximity sensors.
– Each ‘Pod sports its own unique model number—A1722 for the left, A1523 for the right—and the corresponding FCC IDs, BCG-A1722 and BCG-1523.
– X-rays give us a sneak peek at what’s going on inside: grilles, the microphone, and the rest? Well, that’s part of the fun to uncover!
Step 5
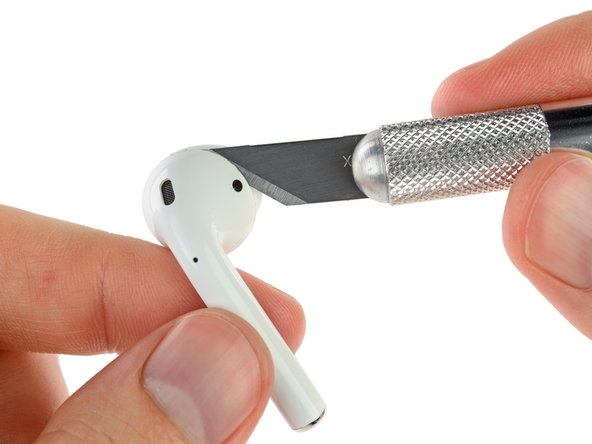


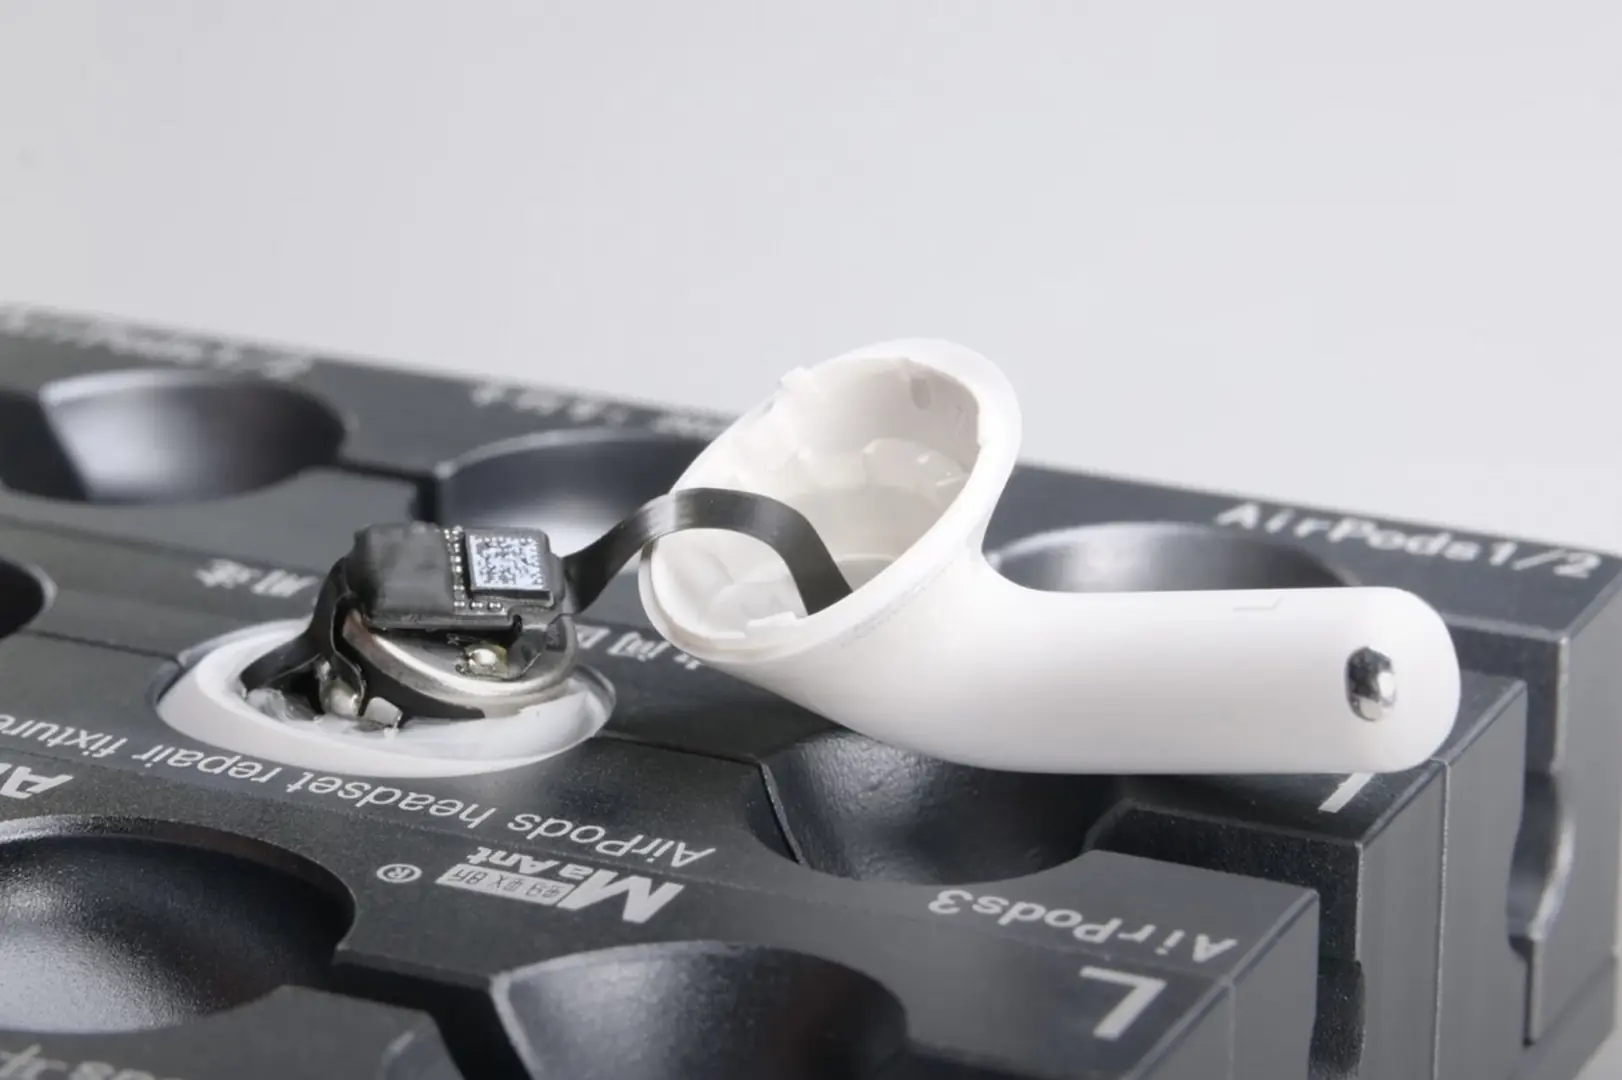
– Since there are no screws in sight, we’re going to have to get creative and use a bit of heat and a trusty knife to work our magic.
– Once the heat’s on, it’s time for a little slicing action—just like a pro (but safer, of course).
– For the final touch, we bring in an opening pick. A quick twist and voilà, the speaker part comes right off, revealing some fascinating internals.
Step 6


– Cracking open this device reveals a compact world of electronics—nothing boring here.
– As we start removing boards, cables, and other tiny parts, we can’t help but think of a certain smartwatch’s repair shenanigans (looking at you, Apple Watch).
– If there were a contest for squeezing high-tech components into the smallest possible space and gluing them in for good measure, Apple would definitely have the edge.
– Now, they’ve even managed to fit the most adorable (and probably tiniest) coaxial connector we’ve ever seen.
– Off to the side, you’ll spot one of the two IR proximity sensors AirPods use to check if they’re snuggled in your ear.
Step 7


– At this stage, we’re taking a brief pause—what’s left inside the earbud is a tangled mess of wires and glue, and nothing’s eager to come out easily. So, let’s shift our focus to the stem, hoping for a new angle of attack. Instead, we’re met with a cascade of glue. That shiny metal cap serves as the contact point for charging the AirPod and surrounds the main microphone. Behind the thick glue, we spot the tiny end of the battery cable. Gently ripping out the glue plug uncovers a miniature battery held in place with tiny spot welds. Looks like these batteries are not exactly DIY-friendly for replacement or recycling, so proceed carefully.
Step 8


– After checking all the usual ways in, it’s time for the big move. Grab your trusty tool—let’s get surgical.
– Peeling back the membrane with care uncovers what looks like an antenna sitting right on top of the main battery.
– Patience may not be our strongest suit, so it’s time for pliers. Remove the rest of the casing and get ready for the fun part—accessing the good stuff inside.
Step 9


– Once you’ve removed the plastic casing, you can gently peel away that long antenna from the battery. This part of the design sheds some light on how AirPods keep connected — that hanging boom isn’t just for looks, it actually helps boost reception. As you carefully peel back more glued-on cables and tape, you’ll spot some markings etched into the battery. Looks like this one’s a 93 milliamp-hour battery, which is just a bit over 1% of the charge capacity found in an iPhone 7. If you need help with any of these steps, you can always schedule a repair.
Step 10


If these are test points, finding the right one can be like trying to spot Waldo in a sea of look-alikes—challenging but doable with patience. Take your time and stay methodical, and you’ll get there.
– Carefully peel back the flexible circuit to reveal a shiny gold array! They might look like test points, but these ones aren’t labeled, so take your time to identify them.
– Follow the cable as it winds into a detailed speaker assembly that contains a proximity sensor and some antenna lines. Keep your tools steady and go slow to avoid any mishaps.
Step 11


– Let’s fire up the microscope and check out these itty-bitty chip labels:
– The Apple 343500130 is likely doing the wireless heavy lifting as the W1 chip.
– Cypress CY8C4146FN—this one’s a programmable system-on-a-chip.
– Maxim MAX98730EWJ keeps things sounding crisp as a low-power stereo audio codec.
– Texas Instruments TPS62743: a 300 mA DC-DC buck converter for power efficiency.
– Bosch Sensortec BMA282: handling all things motion as an accelerometer.
– STMicroelectronics chip: combines accelerometer and gyroscope action.
– Chances are, we’ve also got a serial flash memory chip hanging out here.
Step 12


– The AirPods are pretty much done for, so we shift our focus to their sleek little case…
– Our nice guy Jimmy can’t quite get the charging case open—it’s a tough one.
– Time to grab something with a little more grip. Don’t worry, there’s just a slight bit of pressure here…
– Heads up: this is definitely not the safest method, but hey, the dentist says we only bled because we’ve been slacking on flossing.
– Finally, we manage to pull the ‘pod holder out of the case, and voilà—there’s the chunky battery, front and center.
Tools Used

Step 13


– With the cable pod removed, but still connected by a tangle of ribbon cables, we pull off that status LED.
– With some more dental fortitude, we’re able to separate AirPod tubes from the charging bracket, freeing them from the cable spaghetti.
– And while we’re at it, we wrestle the head off the capsule, pulling the hinge mechanism out of its gooey green slot.
Step 14


And in case you noticed, yes, half of the status LED flex cable did fall behind .
Oh look, a ZIF connector! At least recyclers won’t have to break out a soldering iron after shedding blood, sweat, and tears to tear through the outer casing.
– Our tough little charging case is quite the opponent, giving our weary tools a run for their money. Sometimes, a little Dremel magic is just what the doctor ordered!
– So, what’s hiding behind that robust exterior? You guessed it—a battery! It’s snugly nestled in a warm spot within that sturdy polycarbonate fortress.
– Once we get it out, we’ll notice some sneaky adhesive that was putting up a fight—and a single cable connecting the battery to the logic board of the charging case. Keep an eye on that!
Step 15


Get ready for something small – really small!
To put things into perspective, the battery in an Apple Pencil is 0.329 Wh, and a Series 2 Apple Watch has a 1.03 Wh cell. So, this battery is actually the largest of the tiny ones we’ve seen lately.
– Popping open the case reveals the beefiest battery we’ve seen today—finally, some real muscle under the hood.
– With a 3.81 V, 1.52 Wh lithium-ion cell, this powerhouse packs about sixteen times more juice than those tiny cells hiding in the AirPods’ stems. Translation: you’ll get several full refuels for your buds before the case itself needs a pit stop.
Step 16


Electrical switches can sometimes feel like a puzzle. But don’t worry, this one is likely a simple pushbutton switch! Just a little press on that button and voilà – the circuit closes and the current starts flowing. That current is what the circuit reads as input. See? Easy peasy!
– The sync button is its own little clicky unit, lined up to meet some springy contacts on the main board.
Step 17

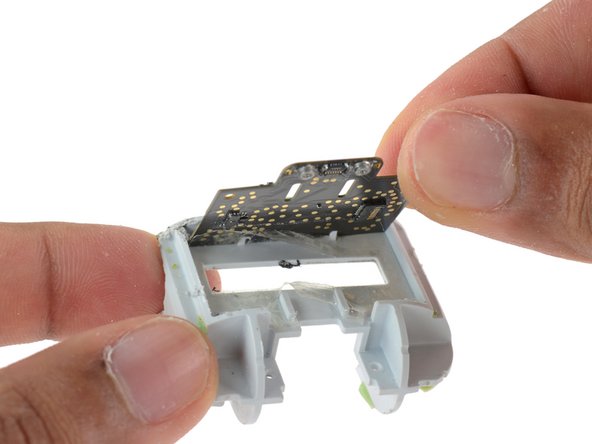
The logic board is held in place with quite a bit of sticky tape.
– Use a Phillips screwdriver to loosen a couple of screws securing the Lightning connector, then gently disconnect its press connector from the back of the logic board. Once free, you can remove it from the device. Keep in mind, the Lightning port is modular—so if it wears out, you can replace just that component without much hassle. If you need help, you can always schedule a repair.
Step 18
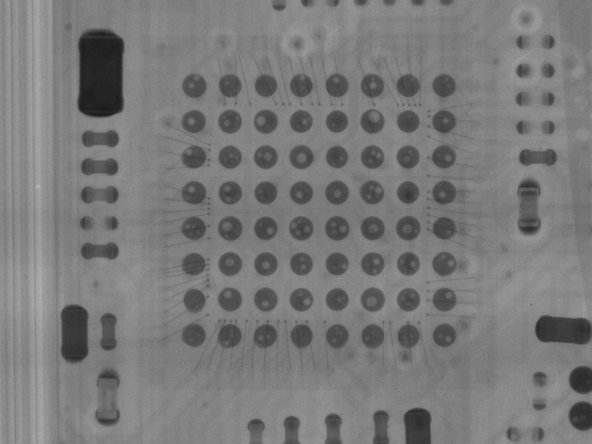


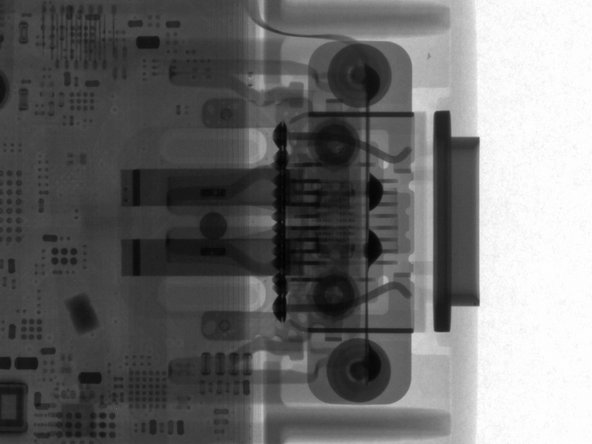
Our X-ray peek reveals some patchy soldering in this chip—those little gaps, called voids, hint at a less-than-perfect job or a rush to get things out the door. Maybe these hiccups with the AirPod case are why the release took a little longer.
– Let’s explore the key silicon components that keep this charging case ticking: the STMicroelectronics STM32L072 ARM Cortex-M0+ microcontroller, the NXP CBTL1610A3 port controller IC (famous from iPhone 6s, SE, and iPad Pro models), the Texas Instruments BQ24232 power management chip, the Maxim MAX9028 1.8V comparator, the AMS AS3441 power and communication interface (probably), and likely some ON Semiconductor regulators. Understanding these parts helps us get a grip on how this device powers up and communicates. If you need a hand, you can always schedule a repair.
Step 19


– After a bit of elbow grease and some trusty glue, here’s what you’ll find:
– Check out the incredible X-ray images from this teardown, thanks to our clever pals at Creative Electron. Shout out to them!
– Quick update: A clever method has been discovered to open the charging case with less hassle—just give it a gentle squeeze in a vise. If your battery’s toast and you’re feeling adventurous, why not give it a shot?
– You’ll end up with a bunch of ‘pod parts…
– and a variety of case components.