iPhone 14 Plus Earpiece Speaker Replacement
Duration: 45 minutes
Steps: 31 Steps
Follow this guide to swap out a busted earpiece speaker on your iPhone 14 Plus. We based this walkthrough on the A2886 (international) model, so if your iPhone 14 Plus is a different version, things might look a bit different, but the steps should stay the same. You'll want some replacement adhesive handy to stick the screen back on when you’re done. Your phone will work just fine afterward, but keep in mind it will probably lose its IP (Ingress Protection) rating.
Step 1
- First things first: power down your iPhone before you get hands-on.
- Flip your phone over and take out the two 6.8 mm pentalobe P2 screws at the bottom edge—these little guys are guarding the entrance.
Step 2
If the pick goes in too deep, it could harm your device. To avoid that, mark the pick before you start so you can keep everything safe and sound.
Feel free to mark the other corners of the pick too, just to be extra careful with your measurements.
Alternatively, tape a coin about 3mm from the tip of your pick for a simple, quick guide.
- Take your trusty measuring tool and mark a spot 3 mm from the tip of the opening pick with a permanent marker. It's like giving it a little fashion statement before the big job!
Step 3
Put on your trusty safety glasses to keep those peepers protected from any sneaky glass shards that might decide to take a little adventure during the repair.
Got a cracked rear glass on your iPhone? Keep those shards in check and protect your fingers by taping over the glass before you dive into the repair.
If the suction cup isn’t sticking, try a little trick: superglue it gently to the rear glass to get a better grip.
- Take some clear packing tape and lay it over the back glass of your iPhone, overlapping the strips until the whole surface is covered.
- If the suction cup isn't sticking in the next steps, grab a piece of strong tape (like duct tape), fold it into a handle, and lift the back glass using that instead.
Tools Used
Step 4
Don't park your hair dryer in one spot for too long! Keep it moving to avoid overheating.
- Grab a hair dryer or heat gun and warm up the bottom edge of your iPhone for about a minute and a half, or until the rear glass feels a bit too toasty to touch.
Tools Used
Step 5
The glue holding the rear glass is super stubborn—getting that first gap open will take some muscle. If it’s not budging, hit it with a bit more heat and gently wiggle the glass up and down. This will help soften things up until you can sneak your opening pick in.
- Grab your suction handle and place it gently on the bottom edge of the rear glass, making sure to stay a bit away from the very edge.
- Now, pull up with steady, firm pressure on the suction cup to create a tiny gap between the rear glass and the frame.
- Once you’ve got that gap, slide an opening pick into it to keep things moving.
Tools Used
Step 6
- Grab a hair dryer and warm up the left edge of your iPhone for about 90 seconds, or until the back glass feels just a bit too toasty to touch.
Tools Used
Step 7
Keep your pick's adventure under 3 mm — going deeper might poke the wrong spots and cause trouble inside!
- Gently glide the opening pick around the lower left corner and up the left edge of the iPhone, cutting through the adhesive that keeps the rear glass snugly in place. Remember, a little finesse goes a long way!
Step 8
- Grab a hair dryer and warm up the right side of your iPhone (the one with the power button) for about 90 seconds, or until the back glass feels just a bit too hot to handle.
Tools Used
Step 9
Heads up! There’s a super-sensitive cable running along the right edge of your iPhone. Keep your pick far away from this area, or you might accidentally give that cable a bad day.
Step 10
Keep your pick under 3 mm, or you might find yourself in a pickle with the charging coil cable!
- Place your pick gently at the bottom edge of the iPhone and glide it up the right side to keep peeling away that stubborn adhesive. Keep it steady, you're doing great!
Step 11
- Grab your hair dryer and warm up the top edge of your iPhone for about 90 seconds, or until that rear glass feels just a bit too hot for comfort.
Tools Used
Step 12
- Slide your pick under the top right corner of the phone, then glide it around that corner and halfway along the top edge.
Step 13
Hold off on fully separating the rear glass for now — there's a delicate ribbon cable still linking it to the logic board.
Don't push the pick in too deep — no more than 3mm, or you might risk damaging or messing up the camera array.
- Slide your trusty pick under the top-left edge of your phone. Give it a little wiggle as you move it around the corner and across halfway along the top edge. You've got this!
Step 14
Watch out for the short charging coil flex cable—handle it gently to keep things chill!
- Gently detach the suction handle from the back glass.
- Carefully open your iPhone by tilting the rear glass up from the left side, just like you're opening a book.
- Prop the rear glass against something sturdy so it stays in place while you work on the phone.
- When putting everything back together, position the rear glass, line up the clips along the top edge, and gently press the top edge into place before snapping the rest down. If it’s not clicking into place, take a quick peek at the clips around the edge to make sure they're not bent.
- If you don’t have anything handy to lean the rear glass against, you can always use the suction handle to support it.
Tools Used
Step 15
Keep a close eye on every screw during this repair and make sure each one goes back exactly where it came from — your iPhone will thank you for it!
- Grab your trusty Y000 screwdriver and carefully unscrew those two tiny 1.3 mm-long screws that are holding the battery connector cover in place. You've got this!
- Now, here’s a little pro tip during reassembly: it's the perfect time to power up your iPhone and check that everything is working like a charm before you seal up the display. Just remember to turn your iPhone completely off again before diving back into the repairs!
Step 16
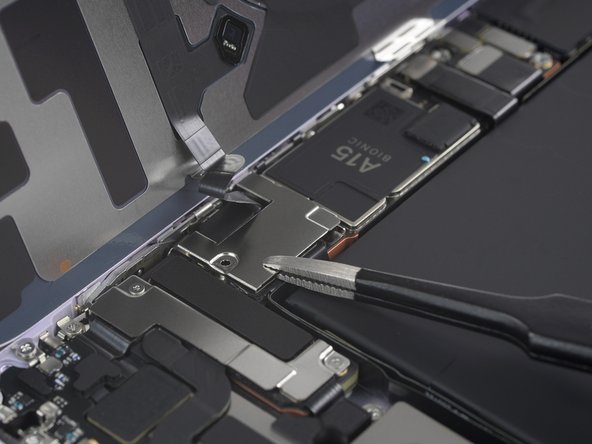
- Grab the battery connector cover with some tweezers and slide it up (towards the A15 print) to pop the top hook free.
- Lift off the battery connector cover.
Tools Used
Step 17
Be careful not to damage the black silicone seal around this and other connections. These seals are your device's secret defense against water and dust, so give them the respect they deserve.
- Grab your trusty spudger and use the pointy end to gently pop the battery connector straight up out of its socket. No need to wrestle with it—just a little nudge will do.
- Once it’s free, bend the connector away from the logic board so it doesn’t sneak back and power up the phone while you’re working. Safety first, tech superstar!
Tools Used
Step 18
- Grab your Y000 screwdriver and twist out the lone 1.0 mm screw holding down the charging coil connector cover. Keep it safe—it's the little guy keeping things together!
Step 19
- Grab your trusty tweezers and gently lift off the cover for the charging coil connector.
Tools Used
Step 20
- Grab your trusty spudger and use its pointed end to gently lift the charging coil cable out of its socket. Just pry it straight up, and voilà! You're one step closer to fixing your device.
Tools Used
Step 21
- Let's start by taking off that rear glass assembly. You've got this!
- Once that's done, grab some isopropyl alcohol (over 90% if you can) and clean up the areas where you'll be applying new adhesive. A little elbow grease goes a long way!
- If you're thinking about swapping out the rear glass adhesives, this is your moment! Just take a breather here during reassembly.
Step 22
- Grab your trusty Y000 screwdriver and let's get to work! Unscrew those two 1.2 mm-long screws holding the front-facing camera assembly cable bracket in place. You're doing great!
Step 23
- Grab a pair of tweezers or just your trusty fingers and gently lift off the bracket that's holding the front-facing camera assembly cable in place. You've got this!
Tools Used
Step 24
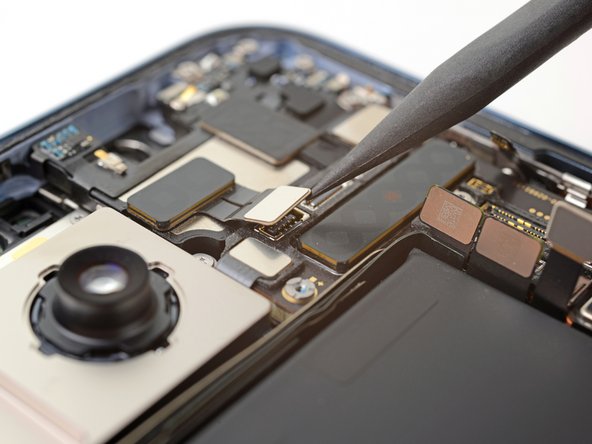
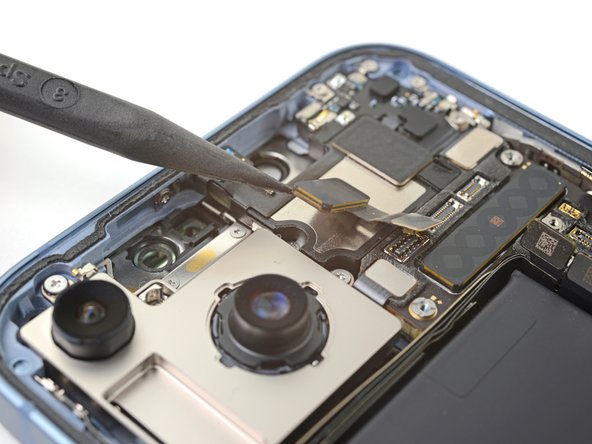
- Grab your spudger and gently pry up those camera and sensor cables, lifting them straight out of their connectors. Nice and easy, just like popping the top off a soda can—except, you know, with a little more care.
Tools Used
Step 25
- Gently grab the front-facing camera assembly with a pair of tweezers or your fingers and lift it out carefully.
Tools Used
Step 26
Up next, we’ll walk you through removing an antenna found in some models. If your device doesn’t have this antenna, go ahead and skip these steps—no need to remove something that isn’t there!
- Grab a spudger and gently pry the antenna cable connector straight up from its socket. Take your time to keep everything smooth and steady. You've got this!
Tools Used
Step 27
The antenna is gently attached to the earpiece speaker. Handle with care, it's not glued down too tightly!
- Slide the tip of your spudger gently under the top left corner of the antenna.
- Give it a little pry to loosen the adhesive holding the antenna in place.
- Carefully lift off the antenna.
Tools Used
Step 28
- Grab a spudger and gently pry the earpiece cable connector upwards, carefully popping it out of its socket.
Tools Used
Step 29
- Grab your trusty Phillips screwdriver and unscrew the eight screws holding that earpiece speaker in place. No sweat!
- Next up, remove three screws, each measuring 1.6 mm in length. Just a few tiny screws, no big deal!
- Then, it's time for two screws that are 1.7 mm long. Slightly longer, but still nothing to worry about!
- Now, unscrew one screw that's a dainty 1.1 mm long. Small but mighty!
- One screw that's 2.1 mm long is next. A little bigger, but you’ve got this!
- Finally, take out one screw that's 1.5 mm long. It’s almost over—hang in there!
Step 30
- Grab your trusty Phillips screwdriver and carefully unscrew the tiny 1.1 mm screw that’s holding the earpiece speaker in place on the frame. It's a small one, so be gentle, and make sure it doesn’t go flying off!
Step 31
The top left edge of the earpiece speaker has a rubber gasket. When putting things back together, make sure the gasket fits snugly into its little home in the frame. It's a small detail, but it keeps everything working smoothly!
- Fire up your device and give it a test drive before sealing everything up—no need to rush into sticky situations!
- Peek at your new part and compare it to the old one. Some bits might need to be transferred, or you might need to peel off any backing before popping it in.
- Ready to put it all back together? Just follow the steps backwards.
- Got leftover parts or old bits? Take them to an R2 or e-Stewards recycler and let them start the next chapter.
- Hit a snag? Try a little troubleshooting, or tap into the Answers community for advice. If things get too wild, you can always schedule a repair.


