iPhone 14 charging coil assembly replacement
Duration: 45 minutes
Steps: 32 Steps
So here's the deal: I wanted to swap out the battery on my iPhone 14. Everything was going well until I tried removing the back cover – and, well, it broke! Had to grab a replacement, so I went ahead and ordered a new glass back cover from eBay with most of the parts already pre-installed. Quick heads up: I'm not an Apple pro – this was my first time doing something like this. It's definitely one of those repairs that requires patience, so take your time and don't rush through it!
Step 1


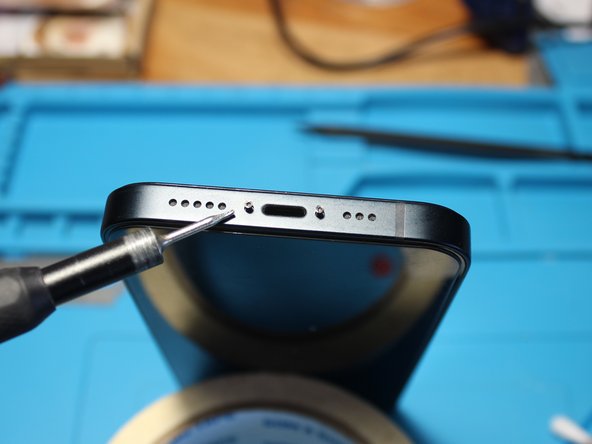
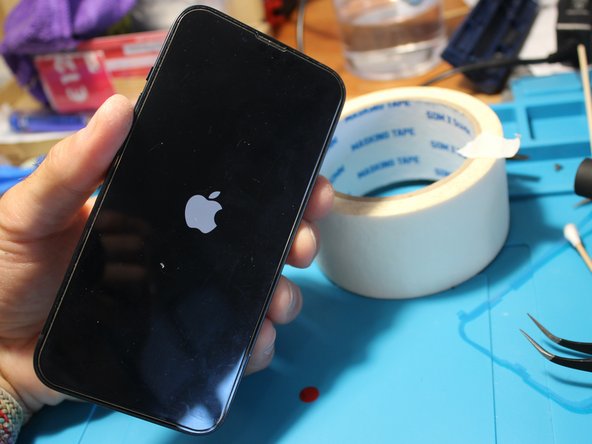
- Before you get hands-on, shut down your iPhone so it’s totally powered off.
- Use a pentalobe P2 driver to spin out the two 6.8 mm screws hanging out at the bottom edge of your iPhone.
Step 2


If you push the opening pick in too deep, it might hurt your device—let’s avoid that! Mark your pick to keep things safe and sound.
Feel free to mark different corners of the pick with various measurements to keep track.
Or, tape a coin onto the pick about 3 mm from the tip to act as a handy depth guide.
- Grab your opening pick and measure out 3 mm from the tip—give it a mark with a permanent marker so you know where the magic happens.
Step 3


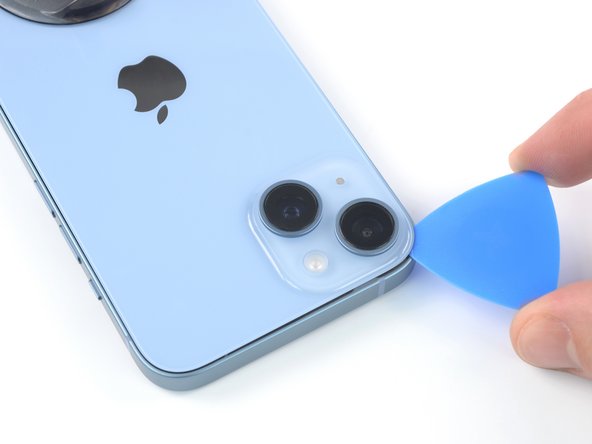
Pop on some safety glasses—just in case any rogue glass decides to make a jump for it during your repair.
Got a cracked rear glass on your iPhone? No worries, just tape over it to keep things from getting worse and to avoid any accidental cuts while you work.
If you're stuck, you can always superglue a suction cup to the back glass to give yourself a little extra grip.
- Place overlapping strips of clear packing tape across the back glass of your iPhone until the entire surface is covered.
- If the suction cup isn't sticking in the next steps, try folding a piece of strong tape (like duct tape) into a handle and use that to lift the rear glass instead.
Tools Used


Step 4

Keep that hair dryer moving—parking it in one spot too long is a no-go!
- Grab a hair dryer or heat gun and warm up the bottom edge of your iPhone for about 90 seconds, or until the rear glass feels just a bit too toasty to touch.
Tools Used


Step 5


The glue keeping the rear glass stuck is pretty tough; getting that first little gap open takes some serious muscle. If you’re struggling to pry it open, try warming it up a bit more, then gently rock the glass back and forth to loosen the adhesive until you can slip your opening pick in.
- Grab a suction handle and stick it to the bottom edge of the rear glass, but steer clear of the very edge, alright?
- Now, give that suction cup a steady pull upwards with some good pressure to open up a tiny gap between the rear glass and the case.
- Slide an opening pick into that gap you've just created.
Tools Used

Step 6

- Warm up the left side of your iPhone with a hair dryer for about 90 seconds, or until the rear glass feels just a tad too hot to handle. You're doing great!
Tools Used
Step 7


Keep your pick to a maximum of 3 mm in depth to avoid any accidental run-ins with the delicate internal parts!
- Gently slide the opening pick around the bottom left corner and up the left side of the iPhone, carefully cutting through the adhesive that’s keeping the rear glass stuck in place.
Step 8

Heads up! There's a sneaky little cable running along the right edge, just beside the volume up button. Steer clear of sticking your pick in there to avoid any oops moments with that cable.
Step 9

- Grab a hair dryer and gently warm up the right edge of the iPhone (that's the side with the power button) for about 90 seconds. The goal is to make the glass just hot enough that it feels a little too warm to touch, but not burning hot.
Tools Used
Step 10


Keep your pick insertion under 3 mm to avoid giving the charging coil cable an unexpected workout.
- Grab your pick and gently slide it into the bottom edge of the iPhone. Glide it up the right side to keep separating that pesky adhesive. You've got this!
Step 11

- Grab a hair dryer and warm up the top edge of your iPhone for about 90 seconds, or until the back glass feels just a tad too hot to handle.
Tools Used
Step 12


- Slide your pick under the top right edge of the phone, then gently glide it around the top-right corner and halfway along the top edge. Keep it smooth and steady!
Step 13


Hold off on peeling the rear glass completely just yet—there's a delicate ribbon cable still hooking it up to the iPhone’s logic board.
Keep that pick insertion shallow—no more than 3 mm—to avoid messing up or smudging the camera array.
- Slide your pick under the top-left edge of your phone. Gently work it around the corner and along the top edge until you're about halfway. You're doing great!
Step 14


Handle that short charging coil flex cable with care; we want it to stay happy and healthy!
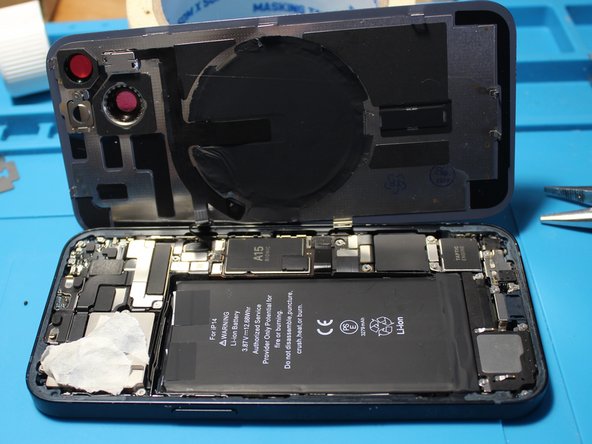
- Gently peel off your suction handle from the rear glass.
- Carefully swing open your iPhone by lifting the rear glass from the left side, just like opening the back cover of a book.
- Prop the rear glass against a nearby object to keep it steady while you work on your phone.
- When putting it back together, position the rear glass, line up the clips along the top edge, and press down gently until it snaps into place. If it’s being stubborn and won’t click, double-check the clips around the edges to make sure none are bent or out of place.
- No handy object nearby? No worries — your suction handle makes a great stand-in to keep the glass propped up.
Tools Used
Step 15


Keep a close eye on every screw during this repair and make sure each one goes back to its original spot—your iPhone will thank you for it!
- Grab your trusty Y000 screwdriver and unscrew those two 1.3 mm screws holding the battery connector cover in place. You've got this!
- Now, while you're at it, why not power on your iPhone to check if everything's working before sealing up the display? Just remember to turn it off completely before diving back into your repair.
Step 16


- Grab the battery connector cover with your trusty tweezers and gently slide it upwards towards the A15 print to unhook the top latch.
- Carefully take off the battery connector cover.
Tools Used

Step 17


Be careful not to harm the black silicone seal around this and other board connections. It's there to give your device an extra shield against water and dust, so keep it in one piece for that extra bit of protection!
- Grab the pointed end of your spudger and carefully pry the battery cable connector straight up from its socket to disconnect it.
- Once free, gently bend the connector away from the logic board so it doesn’t accidentally touch the socket and power up the phone while you’re working.
Tools Used

Step 18


- Grab your Y000 screwdriver and take out the single 1.0 mm-long screw that’s holding down the charging coil connector cover.
Step 19


- Grab a pair of tweezers and gently lift off the charging coil connector cover. Take it easy, you got this!
Tools Used
Step 20


- Grab the pointed end of a spudger and carefully pry up the charging coil cable connector from its socket. A little nudge straight up and you're golden.
Tools Used
Step 21


- Let's kick things off by gently taking off the rear glass assembly. You've got this!
- Time to tidy up! After cleaning the necessary spots with some isopropyl alcohol (make sure it's over 90%), apply fresh adhesive where it's needed. Stick with it!
- Hold your horses during reassembly if you're thinking of swapping out those rear glass adhesives. Take your time, it's all part of the fun!
Step 22

Take it slow and steady here. Any leftover glass or sticky bits can make the backglass more likely to crack again.
- First, it's time to tackle the adhesive and any leftover glass pieces stuck to your iPhone frame. Don’t worry, it’s not as bad as it sounds!
- The adhesive can be pretty stubborn, so grab a razor and a pair of tweezers to help you gently peel it off. Trust me, this method does wonders!
Tools Used
Step 23


- Unscrew the Y000 screw that’s keeping the flash clip in place.
- Gently lift the clip off and keep it safe along with the screws and other parts—trust us, you'll need them later!
Step 24


- First, gently remove the clip holding the microphone in place. A pair of tweezers will do the trick, just slide them under the side openings—take your time, no rush!
- Once you've got the clip out, you'll spot a small cushion between it and the microphone. Pretty neat, right?
Tools Used
Step 25


- Before moving on, you'll need to transfer the microphone grill to the new backcover. I used a bit of hot air to loosen it up from the old one – take your time with this step!
- Don't forget the clip holder and cylindrical grill – they're important for making everything fit together snugly.
- A little adhesive goes a long way here. Apply just enough to get a solid grip on the new cover and make sure everything stays in place.
Step 26


- Grab your trusty hair dryer or heat gun and gently warm up that back cover. It's all about the love, right?
- With a spudger or some flat tweezers, carefully lift up those ribbon cables as shown in the image. Treat them like the delicate treasures they are!
- Once you've freed the holding clip, you can nudge the flash inwards from the back. It's like giving it a little hug!
Tools Used
Step 27


- Heat up the back and aim directly at the charging coil to help loosen that stubborn adhesive.
- Use a razor blade to gently lift the adhesive flaps on the sides. Take it slow, and with a little patience, you should be able to do this without causing any harm.
- Apply more heat to the coil and, using some flat tweezers, carefully slide them between the back cover and coil. It's probably best to start from the bottom to be on the safe side!
Tools Used

Step 28


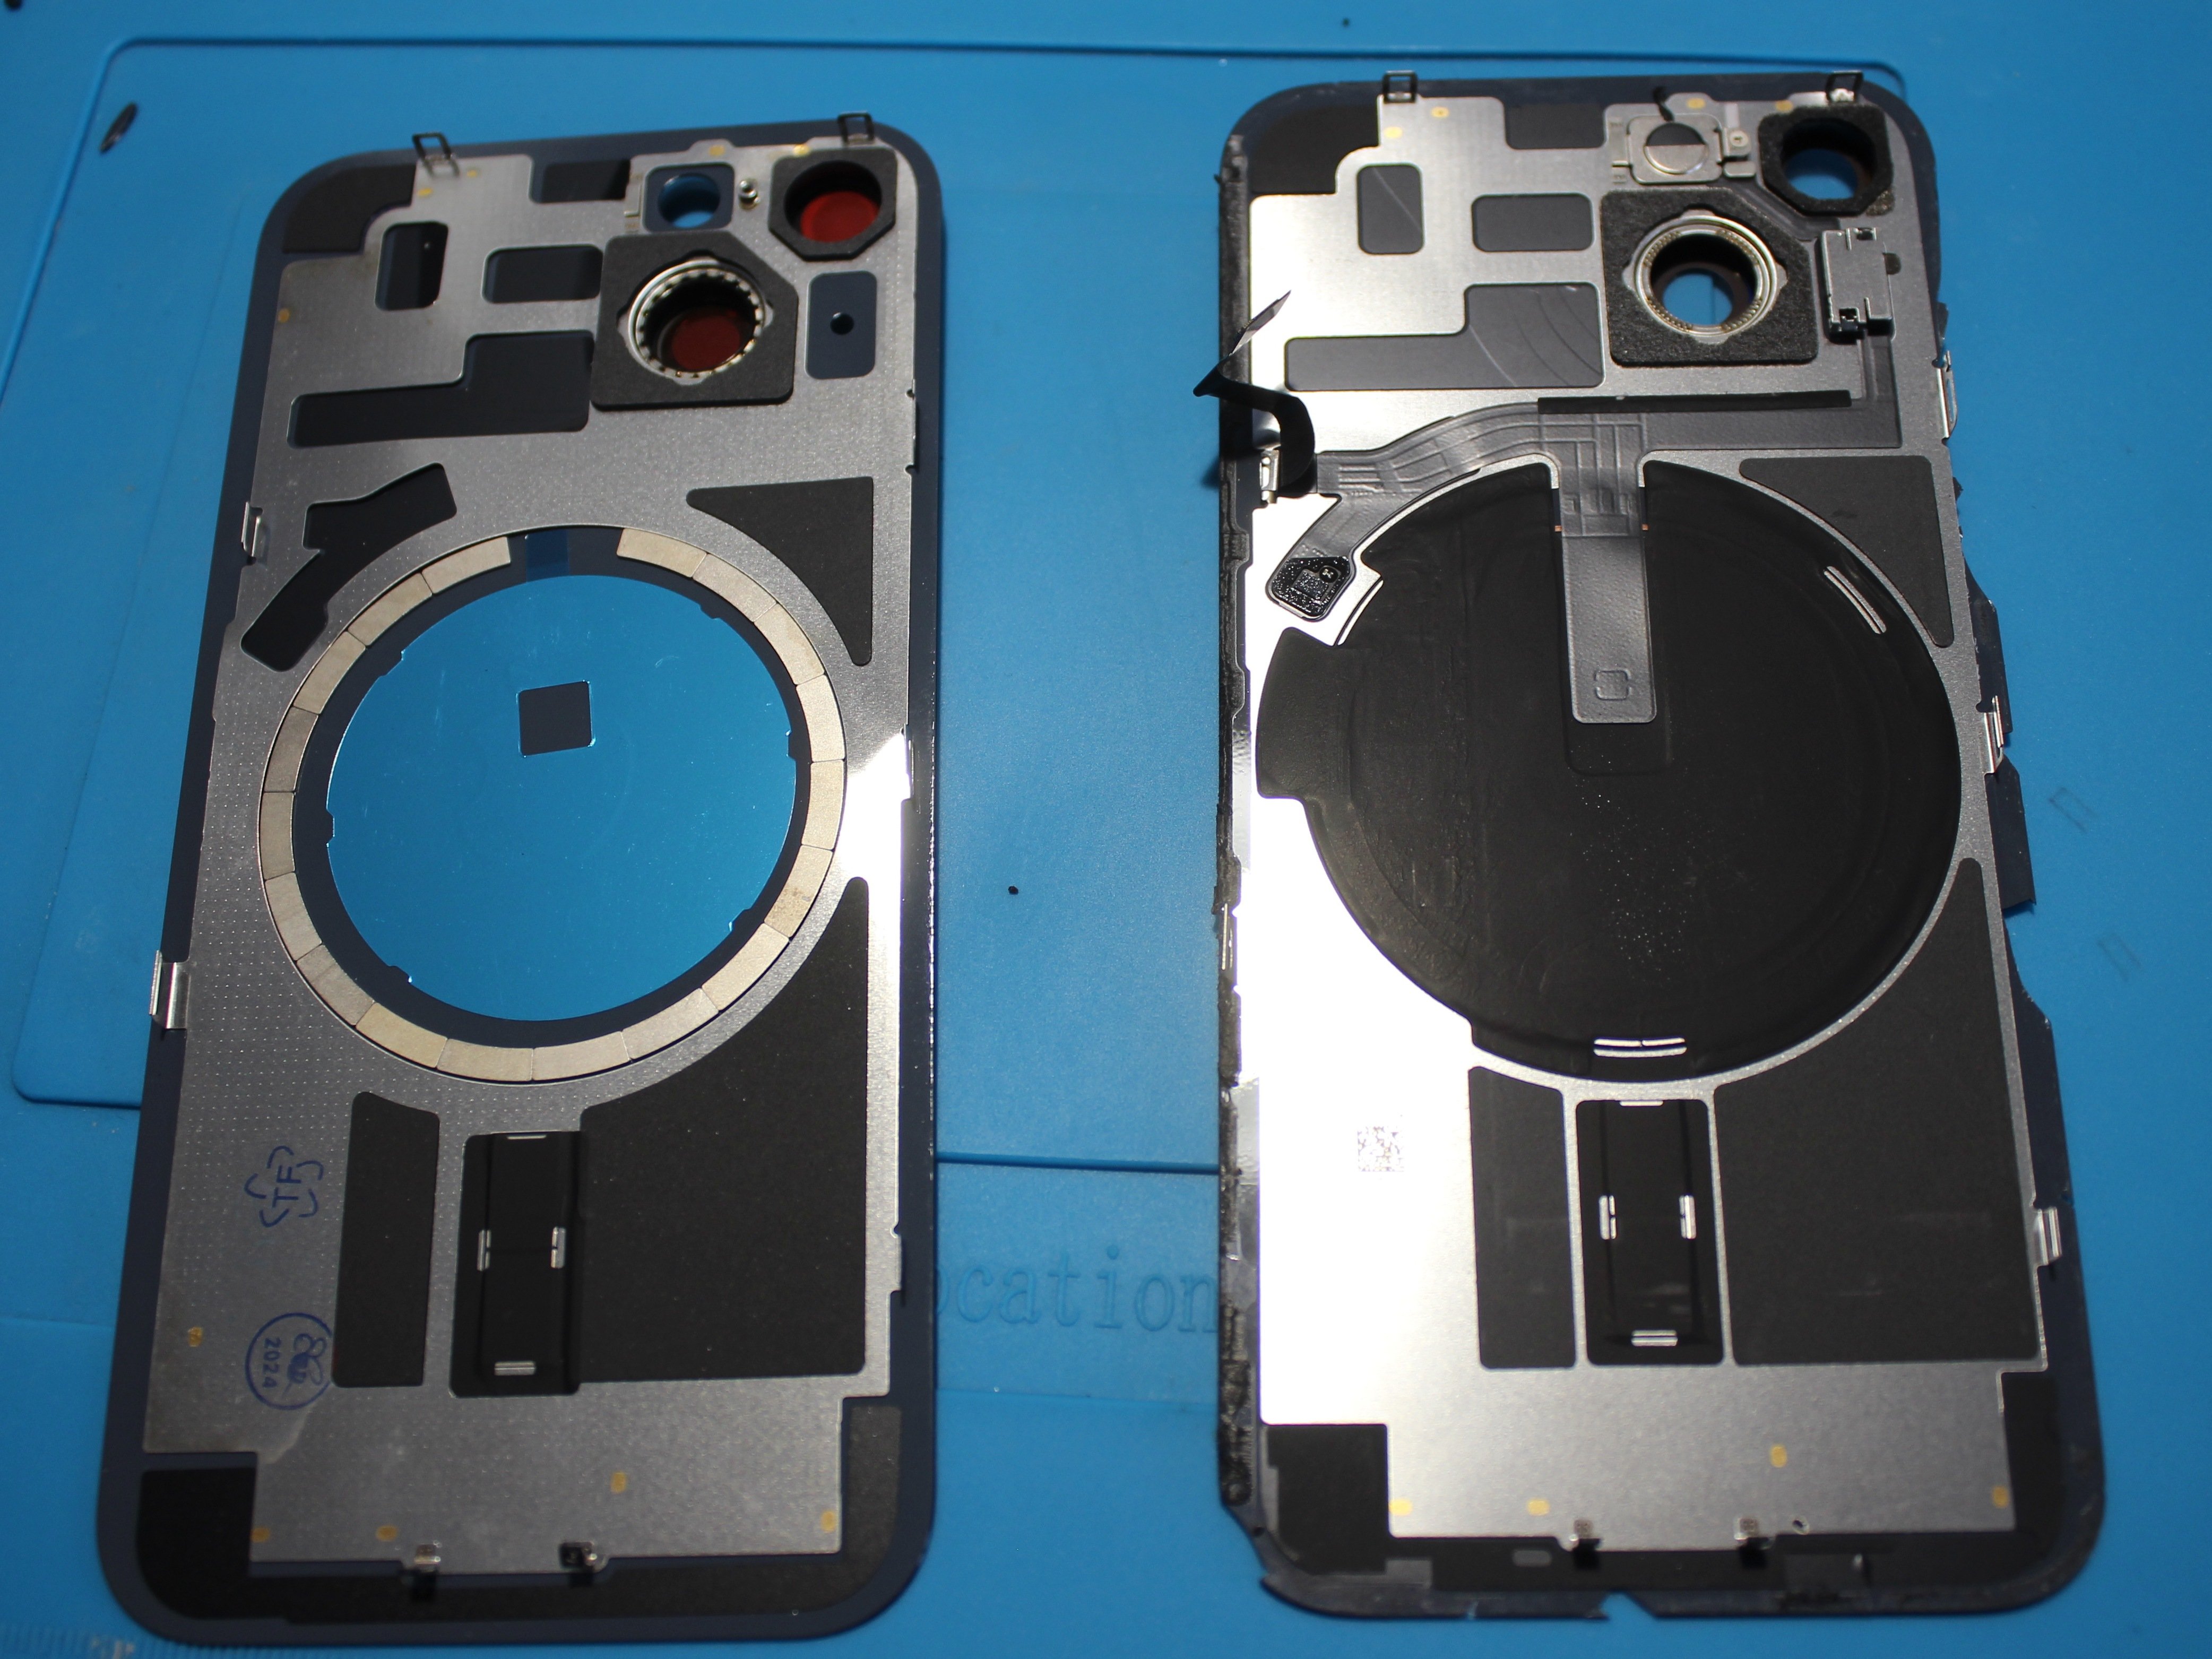
- Take a moment to check out the coil and ensure the copper and connections are in tip-top shape. You want everything to be as smooth as possible!
- If your shiny new backcover is missing its magnets, no worries! Just pop them from the old cover to the new one, and you’ll be good to go!
Step 29


- Gently place the old assembly onto the new backcover, making sure everything lines up just right. The old adhesive should still do the trick, so you can skip getting new stuff unless you really want to.
- Carefully place the flash and microphone back in position. Secure the flash with its clip and don't forget to add the microphone clip to lock it all into place.
Step 30

- Before sealing up that back cover, it's a great idea to give everything a quick test. Just prop that new back glass against something sturdy, reconnect the coil, and then the battery connector. Easy peasy!
- Once you've got everything in place, close up the back cover and power on your iPhone. Fingers crossed, mine worked like a charm right away!
- Now it's time for a little quality check! Test out the video camera with sound and make sure the wireless charging is on point. If anything seems a bit off, don't hesitate to take another look before you wrap up this repair.
Step 31


- Heads up: the camera glass has a red protective film on the inside. Avoid digging at it with anything hard — you don’t want to scratch that glass!
- Grab some cotton swabs or something gentle to clean the camera lenses and glass. Skipping this step might leave your photos and videos looking a bit off.
- Before snapping everything back together, put some glue on the frame again. My battery had an adhesive gasket that worked perfectly for this.
Step 32

- To put your device back together, just work through these steps backwards—easy peasy!
