iPhone 14 Rear Glass Replacement
Duration: 45 minutes
Steps: 21 Steps
Heads up! Before you start taking your device apart, make sure the battery is drained below 25% to keep things safe and sound.
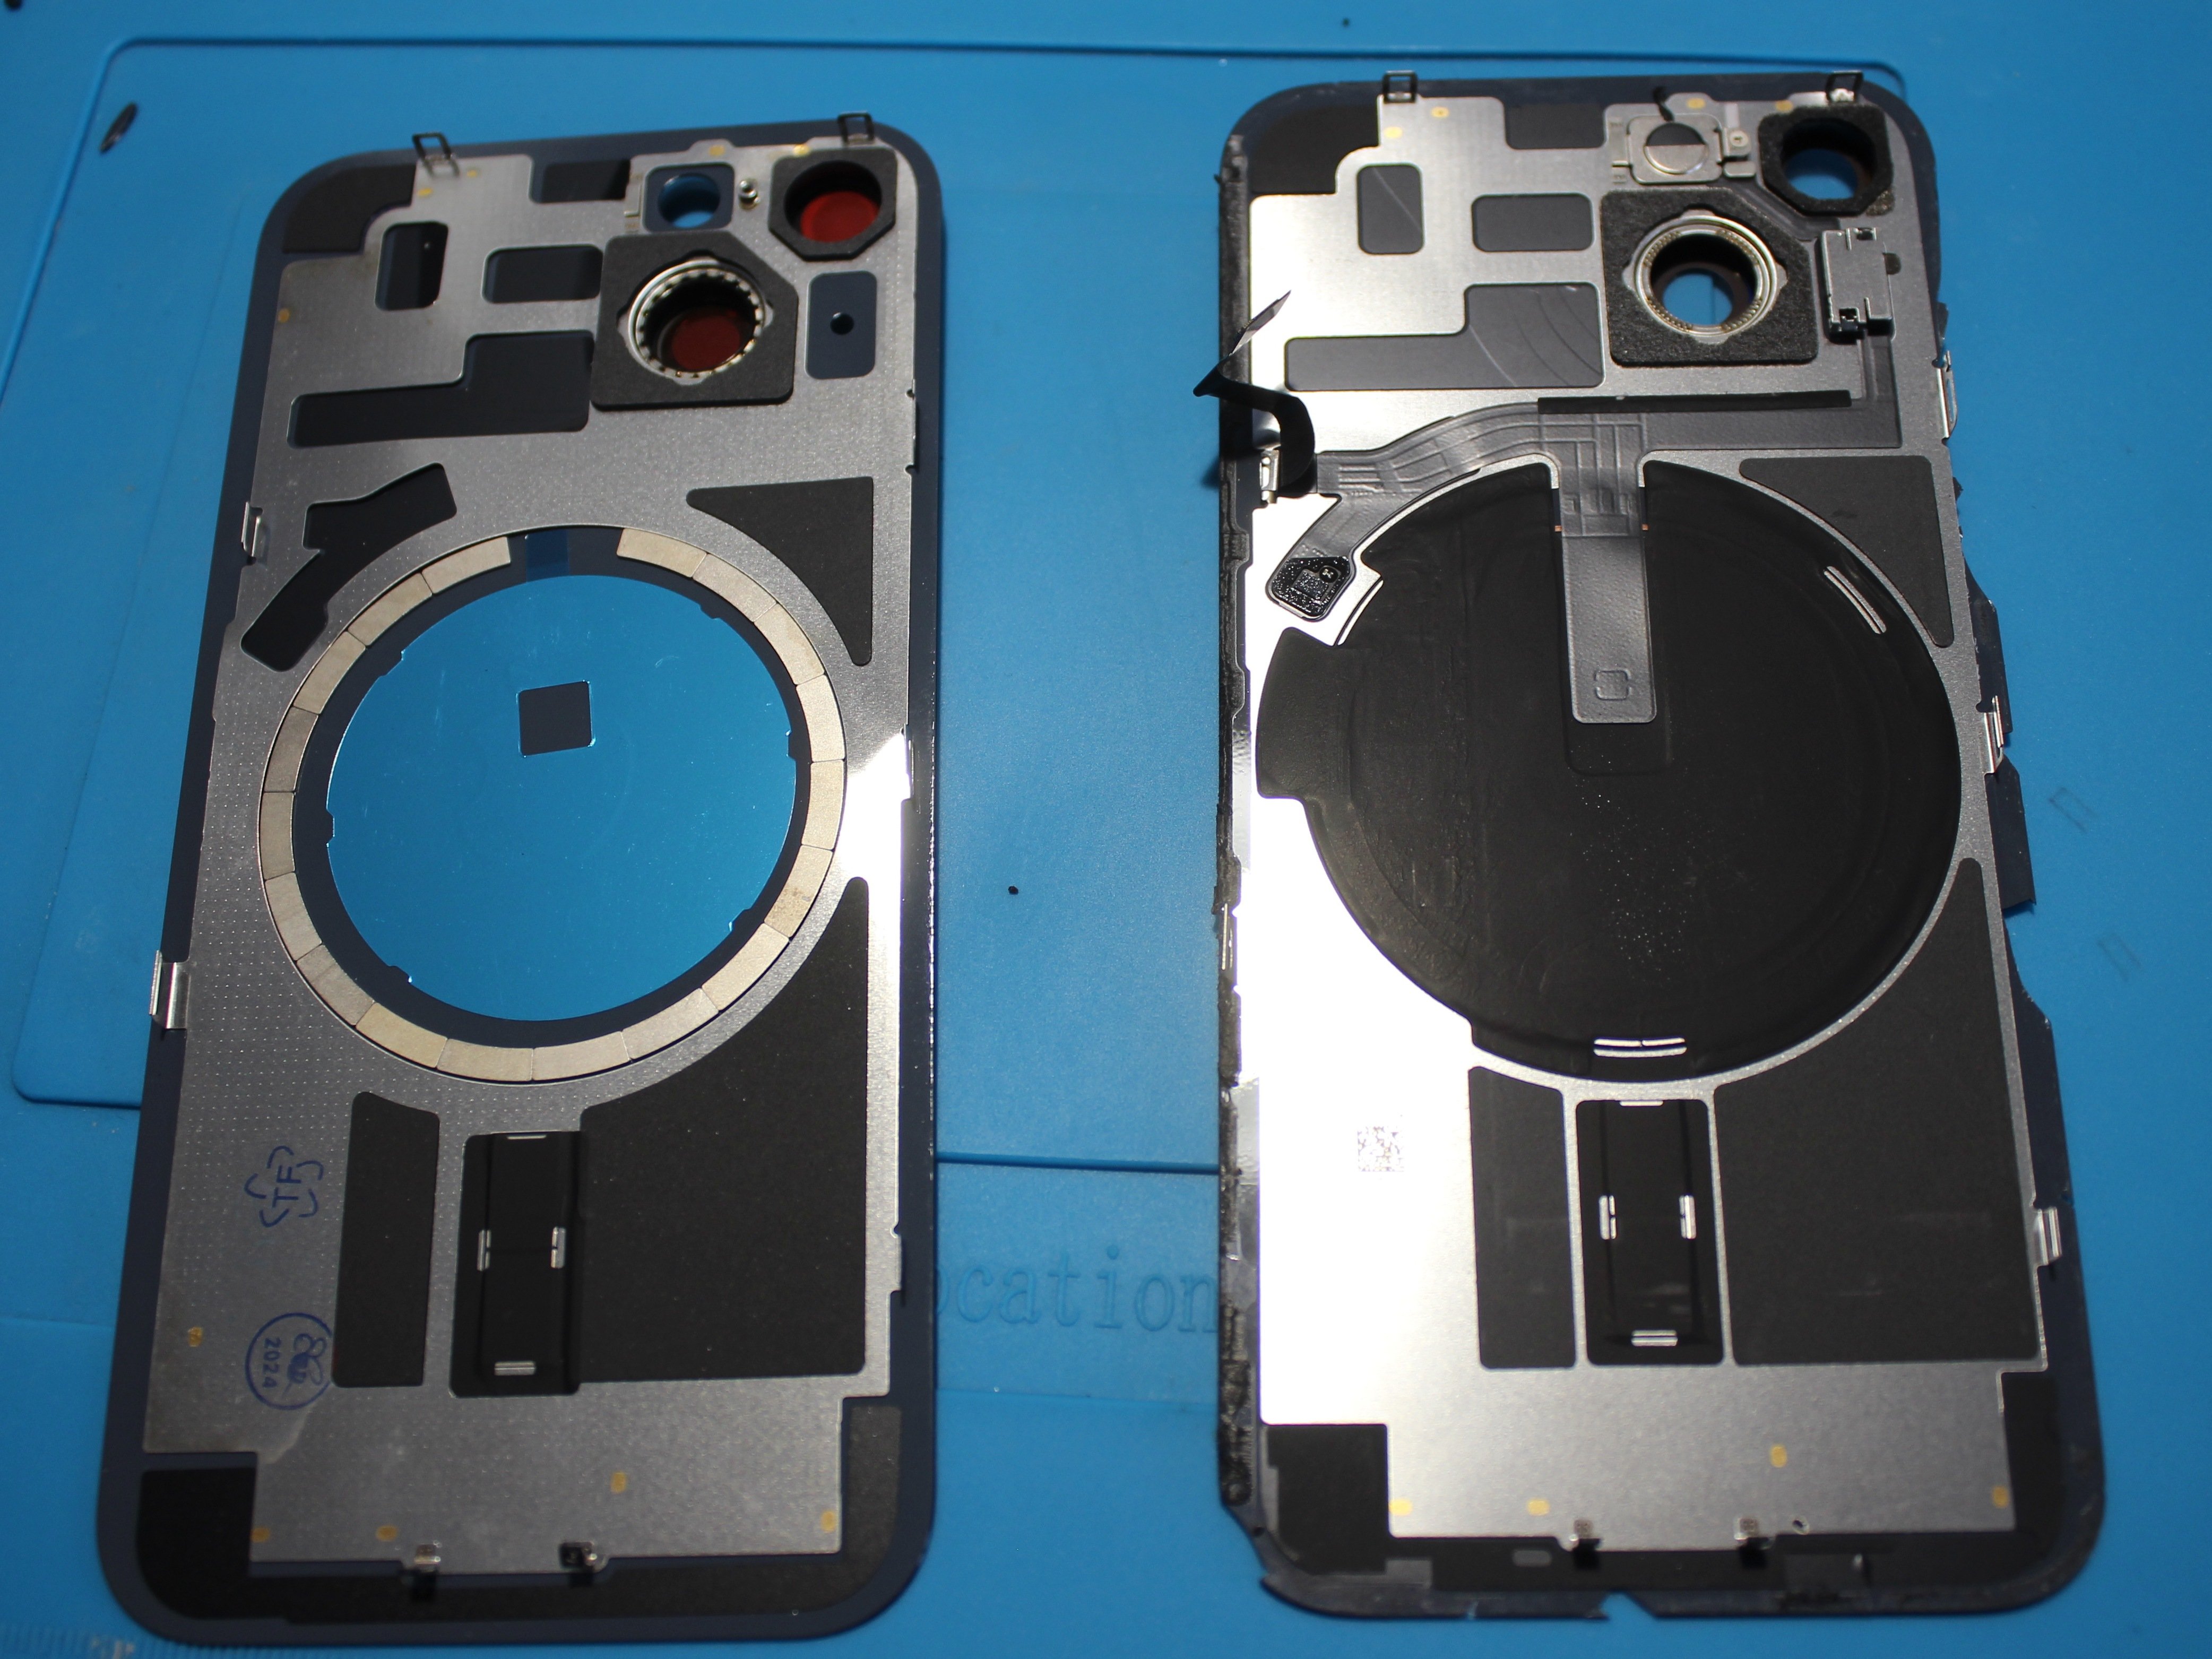
Got a broken rear glass on your iPhone 14? No worries! This guide will help you swap it out smoothly. The rear glass is where the charging coil and rear-facing microphone live, so replacing it means getting your device back in action. This guide is based on the A2882 (international) model, but the process is basically the same for other iPhone 14 models—just keep an eye out for any small visual differences. Safety first: make sure your battery is below 25% before you start. That way, if anything goes wrong, there’s less risk of a fire. If the battery is swollen, be extra careful and take precautions. And here's a pro tip: If you're using iOS 18 or newer, you can pair new, original rear glass parts with Apple's Repair Assistant. Remember, you'll need replacement adhesive when putting the device back together. Everything will work like normal after, but keep in mind that you might lose the IP rating (Ingress Protection). If you're feeling a bit unsure about this repair, don't hesitate to schedule a repair and let the pros handle it!
Step 1


- Make sure to power off your iPhone before you start taking it apart.
- Next, grab your screwdriver and remove the two 6.8 mm long pentalobe P2 screws located at the bottom edge of the iPhone.
Step 2


Pushing your opening pick in too far can cause damage—let's avoid that! Mark your pick to keep track of how deep it goes.
Feel free to mark the other corners of your pick with different measurements for extra precision.
Another trick: tape a coin about 3 mm from the tip of your pick to act as a handy depth stopper.
- Mark the opening pick 3 mm from the tip using a permanent marker to keep things precise.
Step 3


Pop on some safety glasses to keep your eyes safe from any sneaky shards of glass that might get loose while you’re working.
Got a cracked rear glass on your iPhone? No worries! Keep things safe and sound during your repair by taping over the glass to stop any further breakage and protect yourself from any sharp edges.
If all else fails, a little superglue on the suction cup can help it stick to the rear glass for a secure grip. Just make sure you’re careful!
- Start by laying down some clear packing tape over the iPhone’s rear glass. Layer them up until the entire back is covered – the more, the better!
- If the suction cup is being stubborn and won’t stick, no worries! Just grab a strong piece of tape (duct tape works wonders) and fold it into a handle to help lift that rear glass instead.
Tools Used


Step 4

Keep that hair dryer moving! Don't let it chill in one spot for too long.
- Grab a hair dryer or heat gun and warm up the bottom edge of your iPhone for about 90 seconds, or until the rear glass gets a little too warm to touch. Just the right amount of heat should do the trick!
Tools Used


Step 5


The adhesive that keeps the rear glass snugly in place is quite the stronghold! Getting that first gap may require a bit of muscle. If you're struggling to pry it open, no worries! Just apply some extra heat and gently rock the rear glass up and down to loosen that sticky situation until you can slide in your trusty opening pick.
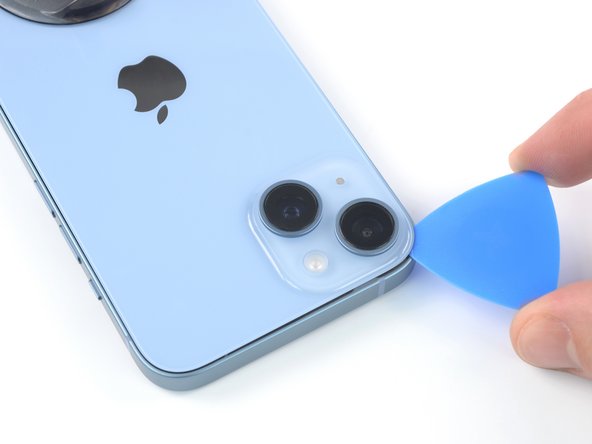
- Place the suction handle near the bottom edge of the rear glass, but make sure to avoid getting too close to the very edge.
- Gently pull up on the suction cup with steady, even pressure to create a small gap between the rear glass and the case.
- Slip an opening pick into the gap you've created.
Tools Used

Step 6

- Grab a hair dryer and warm up the left edge of your iPhone for about 90 seconds, or until the back glass feels just a bit too toasty to keep your fingers on it comfortably.
Tools Used
Step 7


Keep your pick to a depth of no more than 3 mm to avoid accidentally poking something you shouldn’t inside your device.
- Gently slide the opening pick around the bottom left corner and up along the left side of the iPhone, carefully cutting through the adhesive that’s keeping the rear glass stuck in place.
Step 8

Heads up! There's a sneaky little cable running right along the right edge, just beside the volume up button. Avoid poking your pick in there to keep that cable safe and sound.
Step 9

- Grab your trusty hair dryer and give the right edge of your iPhone (that's the side with the power button) a warm hug for about 90 seconds. You're aiming for it to be just hot enough that it makes you think, 'Whoa, that's a bit toasty!' but not so hot that you can't touch it. Let's get that glass ready for some TLC!
Tools Used
Step 10


Be careful not to push your pick in deeper than 3 mm – you might accidentally mess with the charging coil cable.
- Slide your pick back in at the bottom edge of the iPhone, then gently glide it up along the right side to keep loosening that adhesive like a pro.
Step 11

- Grab your trusty hair dryer and give the top edge of your iPhone a warm hug for about 90 seconds, or until the rear glass feels a bit too toasty to touch. You're doing great!
Tools Used
Step 12


- Gently slide your pick under the top right corner of your phone. Wiggle it around the top-right corner and across the top edge until you've made some progress.
Step 13


Hold your horses! Don't go yanking the rear glass off just yet; there's a delicate ribbon cable still hanging out with the iPhone's logic board.
Keep that pick under control and don't shove it in more than 3 mm – you wouldn't want to accidentally mess up the camera array!
- Gently slide your pick under the top-left corner of the phone. Glide it along the edge, making your way around the corner and halfway across the top. You've got this!
Step 14


Take it easy when handling that short charging coil flex cable—don’t stress it out!
- Grab that suction handle and carefully detach it from the back glass.
- Gently swing the rear glass open from the left side, like you're flipping the pages of a book. Easy does it!
- Rest the rear glass on something to keep it steady while you work your magic on the phone.
- When you're putting everything back together, align the clips on the top edge first, and press the top edge into place before snapping the rest down. If it doesn't click, double-check the clips around the edges to make sure they aren’t bent.
- No props nearby? Your suction handle can hold the rear glass steady while you work its magic!
Tools Used
Step 15


Keep an eye on every screw as you go—put each one back in its original spot so your iPhone stays happy and healthy.
- Grab a Y000 screwdriver and unscrew the two 1.3mm screws holding down the battery connector cover. Easy peasy!
- Before you seal everything up, now's a great time to power on your iPhone and test all the features. Just remember to turn it off completely before moving on to the next step.
Step 16


- Grab that battery connector cover with your trusty tweezers and give it a little upward slide, aiming towards the A15 print, to unhook that top latch.
- Now, gently remove the battery connector cover and set it aside.
Tools Used

Step 17


Keep that black silicone seal around the board connections safe—think of it as your device’s superhero shield against water and dust!
- Grab your trusty spudger and use the pointed end to gently lift the battery cable right out of its socket. Keep it steady and just pry it upwards.
- Once disconnected, give the connector a little bend, just enough to keep it from slipping back into the socket. This way, you won’t accidentally power up the device while working on it. Safety first!
Tools Used

Step 18


- Grab a Y000 screwdriver and unscrew the tiny 1.0mm screw holding the charging coil connector cover in place. It's like a mini treasure hunt, just without the gold!
Step 19


- Grab some tweezers and gently pop off the charging coil connector cover.
Tools Used
Step 20


- Grab your trusty spudger and gently nudge the pointed end to lift the charging coil cable connector straight up from its socket. You've got this!
Tools Used
Step 21


- Line up your new part with the original—sometimes you'll need to move over little bits or peel off sticky layers before it fits just right.
- To put your device back together, just follow the steps above backwards.
- Once you’re done, if your replacement part supports it, you might be able to calibrate it through Apple's Repair Assistant on iOS 18 and later. Just update your device, go to Settings → General → About → Parts & Service History, tap Restart & Finish Repair, and follow the prompts.
- Don’t forget to drop off your old electronic parts at an R2 or e-Stewards certified recycler.
- If things didn’t go as planned, take a breath and try some basic troubleshooting. Or if you hit a wall, you can always schedule a repair with the pros.