Nabi DreamTab HD8 Charging Connector Replacement
Duration: 45 minutes
Steps: 11 Steps
The Nabi Dream Table HD8 comes with a sturdy, custom charging cable that’s built to last. However, even the best cables can wear out over time. If you find yourself struggling to recharge your device, experiencing overheating, or watching those charging times stretch, it might be time for a little TLC. Replacing the charging connector or cable is a breeze and should take you no longer than five minutes! Just remember, getting into the device is the tricky part, but once you tackle that, you’ll be back up and running in no time. If you need help, you can always schedule a repair.
Step 1


This step is tailored for the manufacturer’s protective case included with your device. Rocking a different case? No worries—just check out its manual for removal instructions.
– Place the Nabi DreamTab on a non-metallic surface with the screen facing up and the DreamTab logo in front of you. It’s like setting up a mini stage for your repair session!
– Gently take off the red silicone case from your Nabi DreamTab HD8. Just a little tug, and it’s off—like peeling an orange, but much cooler!
Step 2

Heads up! Going past this point will cancel your manufacturer’s warranty. If you’re ready to keep going, just follow these steps closely and with confidence!
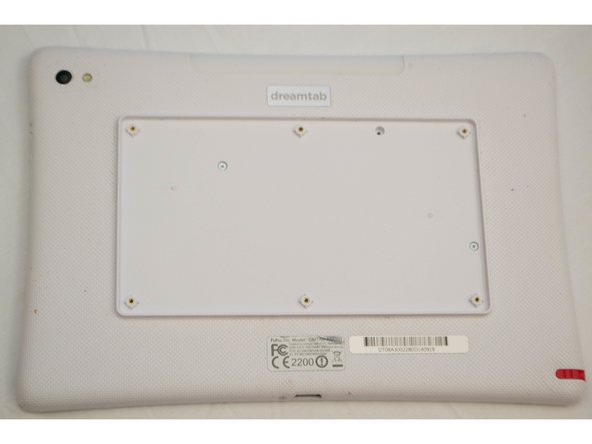
– Flip it over so it’s upside down—think of it as giving your device a fresh perspective. Make sure the small black circular camera is chilling in the upper left-hand corner, right where it belongs.
Step 3
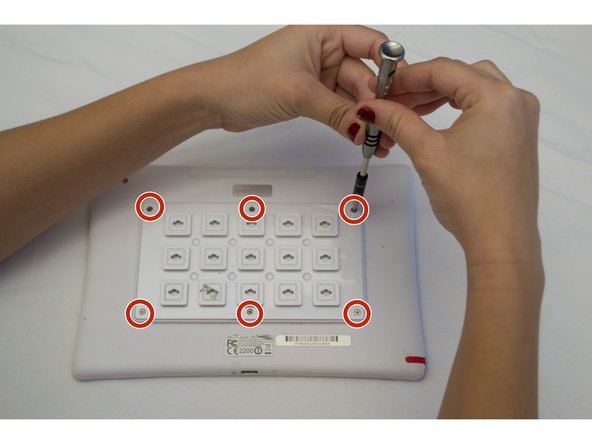
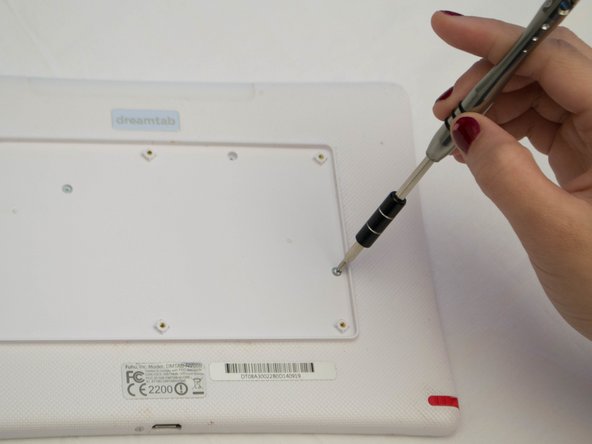
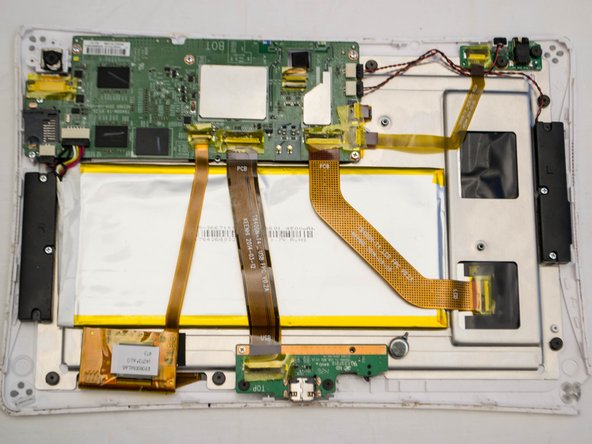
– Grab your JIS #000 screwdriver and take out the six 2.5 mm screws holding the custom grid to the back panel.
Step 4

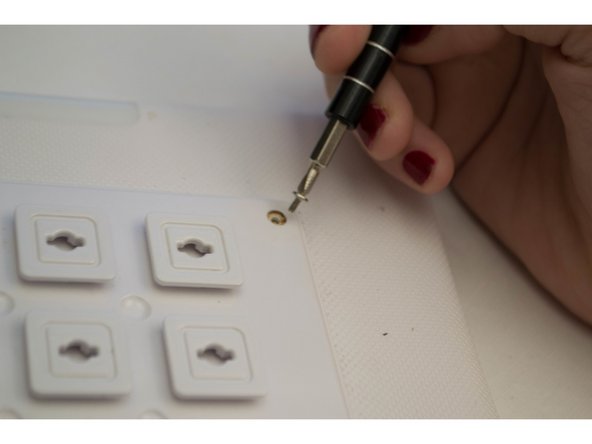
This piece should come off without much hassle. If it gives you some resistance, double-check that all the screws are fully removed. Then give it another go!
Just a heads-up: those golden threads are not screws, so don’t try to unscrew them!
– Grab one of the little raised squares and gently lift off the back plate. Set it aside carefully – you’ll need it later when you put everything back together.
Step 5
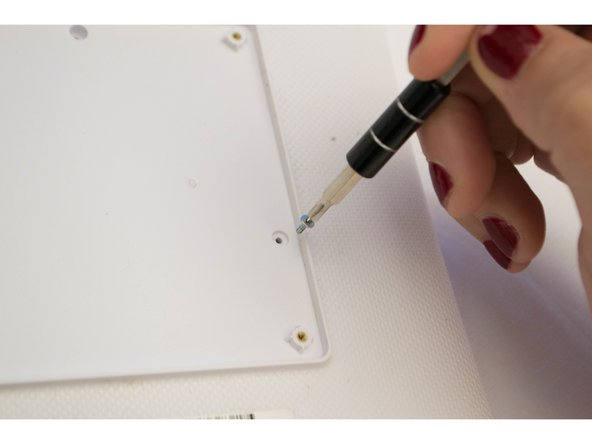

– Grab your J-0 screwdriver and take out the three 3.5mm screws holding the back panel in place.
Step 6
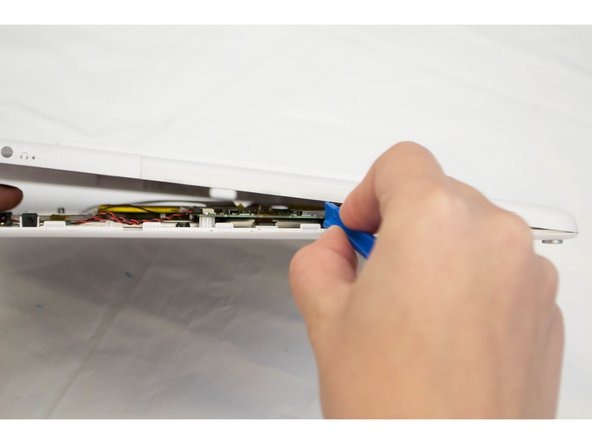


Heads up! There’s a chance you might crack a part of the case here. Take it slow and carefully work your way around the speakers, audio jack, and charging ports to minimize the risk of damage. Patience is key!
Look for a small headphone symbol next to a 3.5mm diameter hole—this is your audio jack, ready to handle all your sound needs!
– First, flip the top of the device towards you, so the audio jack is on the right side – easy peasy.
– Next, carefully wedge the plastic opening tool into the gap where the front and back case panels meet, near the audio jack. This is where the magic happens.
– Now, use a bit of moderate force to pry the device open. You’ll know it’s working when you hear that satisfying clicking sound – that’s the clips unlocking.
– Continue to work your way around the device’s perimeter, using the same prying motion to gently separate the front and back panels. Take your time, it’s almost too easy.
– Once the edges are open, head back to the starting point near the audio jack. You’re doing great, and Salvation Repair is here to help if you need it. If you need help, you can always schedule a repair
Step 7
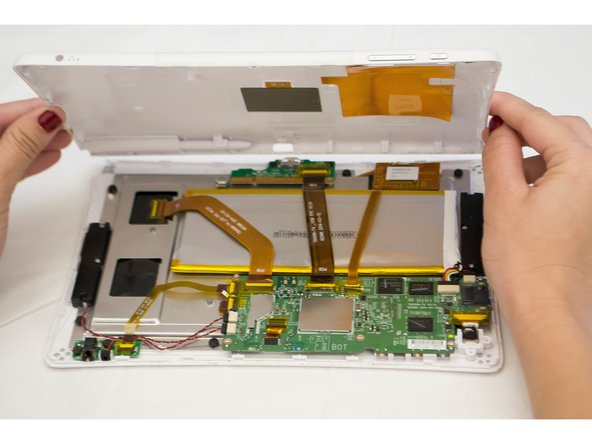

– After you’ve successfully separated the front and back panels, gently place the device back onto the table with the display facing down and the camera positioned at the top left.
– Carefully remove the back panel and give the device a little twist, turning it 180 degrees while keeping the screen facing down.
Step 8
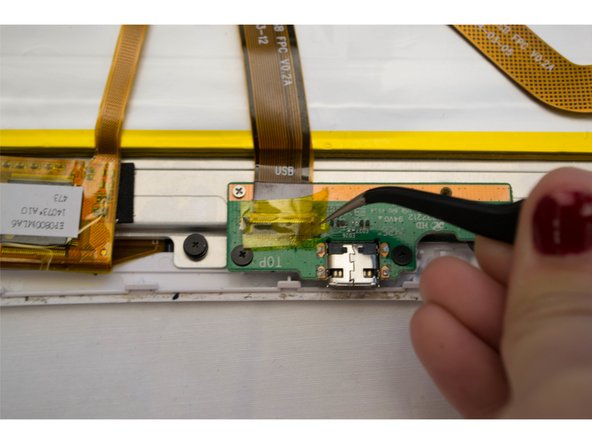

– Carefully peel off the yellow tape from the corner of the connector—think of it like unwrapping a tiny tech present.
Step 9
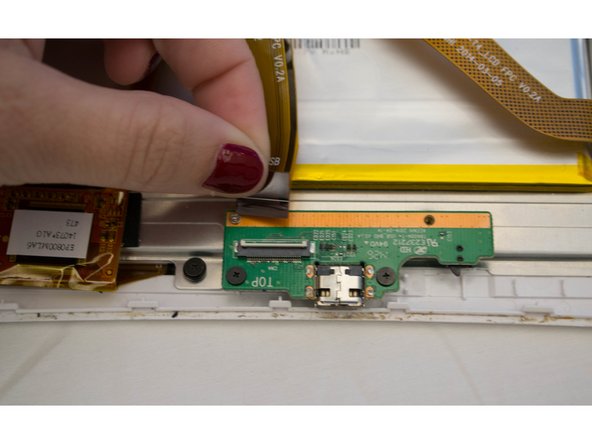

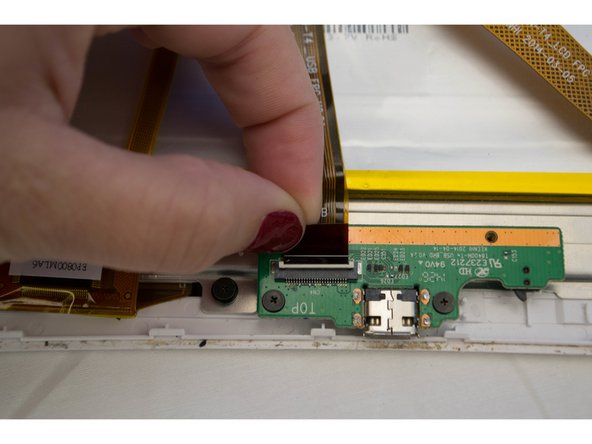
– Release the white lock that’s holding the plastic ribbon in place. It’s like setting the ribbon free!
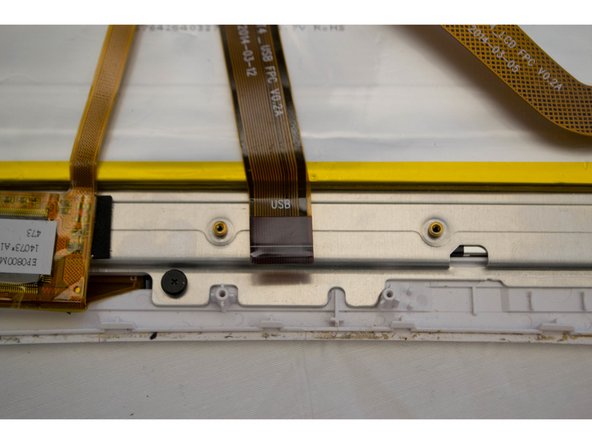
Step 10
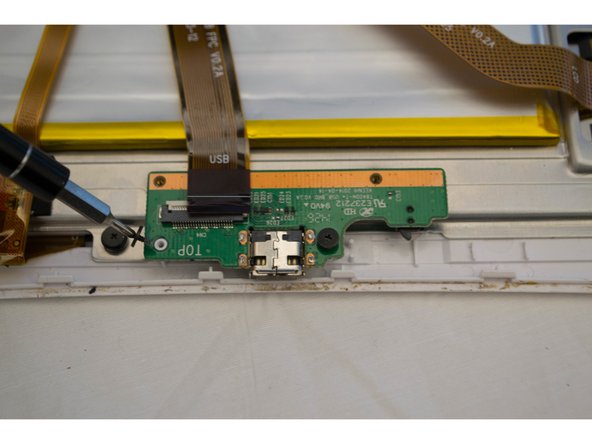


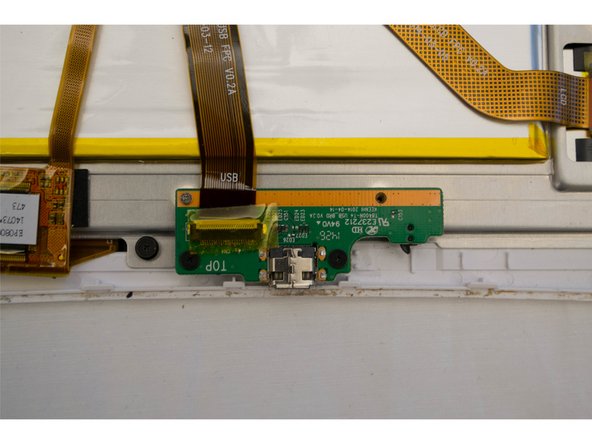
Start off by unscrewing those silver screws—they’re the VIPs of this operation! Once they’re out of the way, you can tackle the rest like a pro.
– Take out the four screws holding down the charging connector.
Step 11
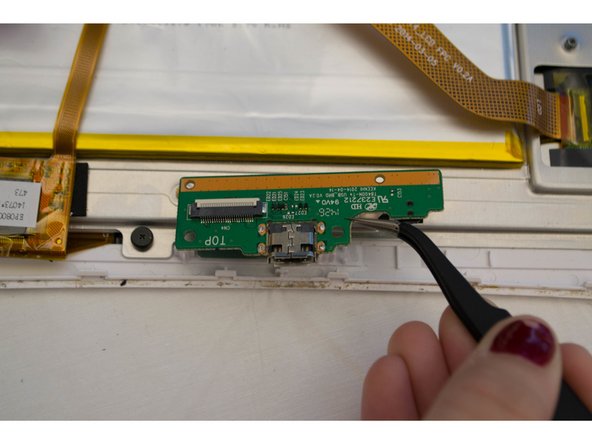

– Now, to put everything back together, just follow the steps in reverse order. It’s like unwrapping a gift, but in reverse. Easy, right?
– If you run into any trouble or need a hand, don’t hesitate to schedule a repair. We’ve got your back.