Nabi Big Tab HD24 Nabi Port Replacement
Duration: 45 minutes
Steps: 16 Steps
Your Nabi tablet comes with four unique Nabi ports, each needing a special USB adapter to hook up USB devices. Before diving in to swap one out, play detective and figure out which port is causing the trouble—since you’ve got four contenders in the lineup!
Step 1

Place the tablet face-down so the screen is resting on the table, ready for action.
– Check out those four bright red rubber stoppers hanging out at each corner.
Step 2

– Gently pry those pesky adhesive strips off your device using your fingers – it’s time to uncover the screws hiding beneath!
Step 3

– Grab your trusty Phillips #1 screwdriver and get ready to tackle those corners! Remove the 9.5 mm screw from each of the four corners – it’s time to get this repair started!
Tools Used

Step 4
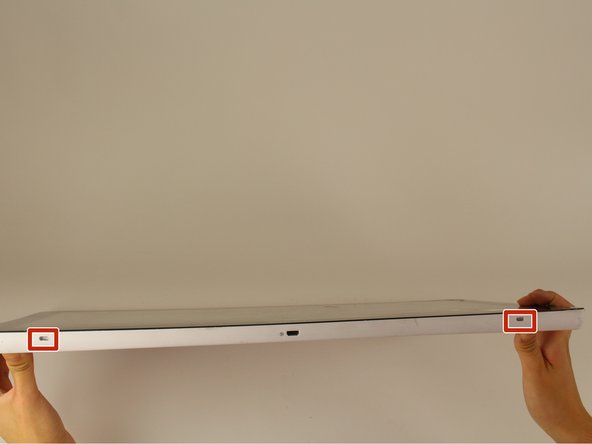
Hey there! Just a quick heads-up: don’t mix up those openings with the charging port or USB ports. Look for the cool little fan icon, that’s the Nabi logo marking the openings. You’ve got this!
You’ll find two at the bottom of the tablet and one on each side—picture yourself holding it like you’re about to dive into your favorite show. Easy peasy!
– Flip your tablet over so the screen is facing up – let’s get started!
– Take a look at the sides of your tablet and find the 4 small openings – they’re pretty hard to miss.
Step 5

– Take a metal spudger and gently slide it into one of the device’s openings. Apply a steady downward pressure to carefully pry it open.
– Repeat this process for the other three openings, ensuring a smooth, even separation.
Step 6


Be cautious when opening your device! There are some sneaky cables inside that connect both the front and back parts. Keep an eye out and be gentle!
– Turn the device over so the back is facing you, like you’re about to get a sneak peek at the innards.
– Grab a plastic opening tool and gently ease the device apart from its hinges. No need to rush—just a little nudge to get it started!
Step 7

– Find that snazzy white port linking the back panel to the circuit board on the rear side of your display.
– Gently tug the plastic connector straight out with care.
Step 8

Watch out for the aluminum foil tape—it’s super fragile and can tear with the slightest tug.
Be gentle with the ribbon cables! There’s a plastic piece glued around them, so pulling them too hard could cause some trouble.
– Gently peel back the aluminum foil tape with your fingers to reveal the ribbon connector hiding underneath.
Step 9

Let the connector chill—leave it unplugged, but still hanging out with the metal display.
– Gently squeeze the two buttons on the sides of the connector, and then detach it from its connections like a pro!
Step 10

– Grab your trusty plastic opening tool and gently slide it under the grey plastic casing that hugs the ribbon cable.
– Give a little downward push to carefully lift the grey plastic away from the metal display.
Step 11

– Spot the two cables cruising along both sides at the bottom of your screen.
Step 12


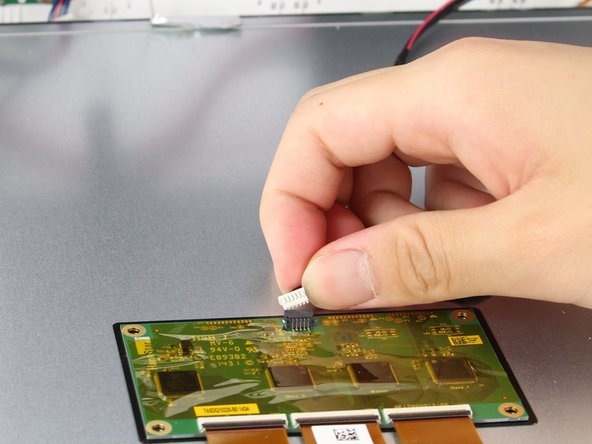
Be gentle when handling the red and black cable, as it’s a bit fragile and might disconnect from the connector if pulled too hard.
– Grab the white plastic piece firmly on both sides with your fingers, and gently lift it straight up – easy does it!
Step 13

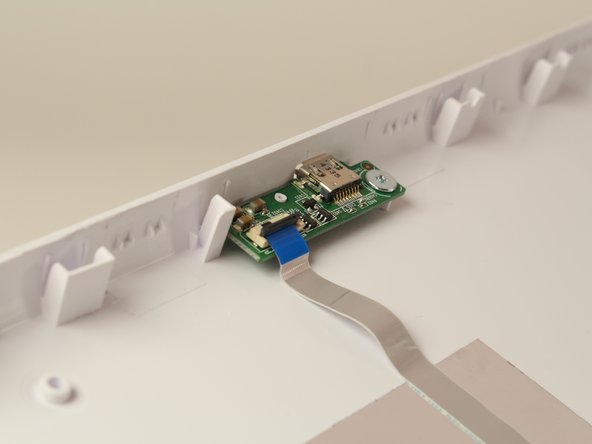
The Nabi Port’s circuit board has a ribbon connector hanging out like it’s ready for a dance-off, and at the end of that ribbon, you should spot a blue strip of tape securing it to the board. Keep an eye on that—it’s an important player in this repair mission!
– Find the malfunctioning Nabi port—there’s one on each side of the tablet, like tiny doorways to connectivity. Time to track it down and get this device back in action!
Step 14

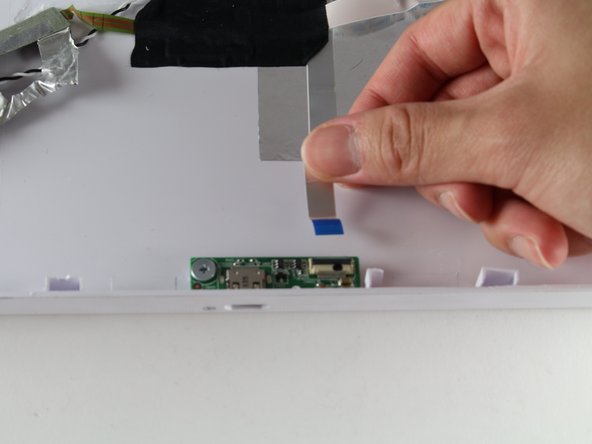
– Find the little black tab that’s holding the blue end of the ribbon cable snugly to the Nabi port.
– Gently lift that black tab to set the ribbon cable free.
Step 15

– Gently pull the ribbon connector straight away from the circuit board to release it from its connection.
Step 16

– Now that you’ve got everything back together, just reverse these steps to reassemble your device. It’s that simple!
– Feeling confident? Great! If you run into any hiccups, don’t hesitate to schedule a repair for expert help.