iPhone 13 WiFi Chip Replacement
Duration: 45 minutes
Steps: 10 Steps
For a long time, independent repair shops faced a tough challenge with Wi-Fi repairs on iPhone 12 and newer models due to Apple's part pairing system. But guess what? Salvation Repair has cracked the code! This is a significant leap forward in iPhone repairs since the iPhone 12 came out. In this guide, we're excited to walk you through the process of fixing the Wi-Fi chip on an iPhone 13. And the best part? This method works for iPhone 12 and later models too! So, roll up your sleeves and let’s get started on this repair adventure!
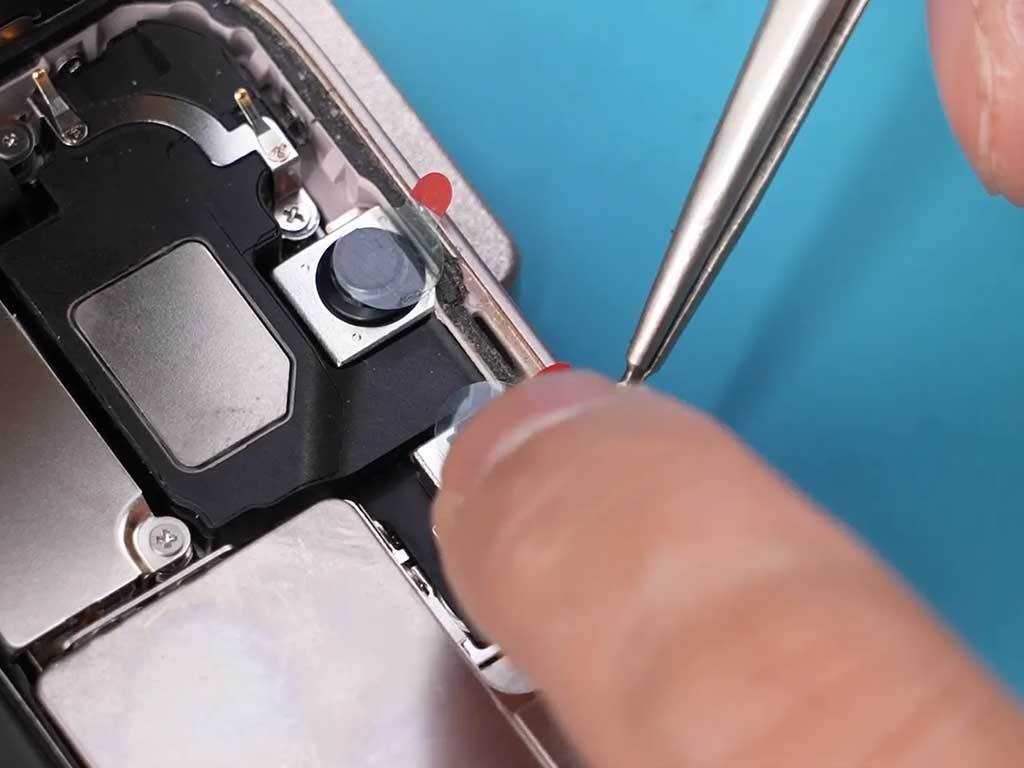
Step 1

- Place protective stickers over the cameras to keep them safe.
- Carefully take out the motherboard and separate it into parts.
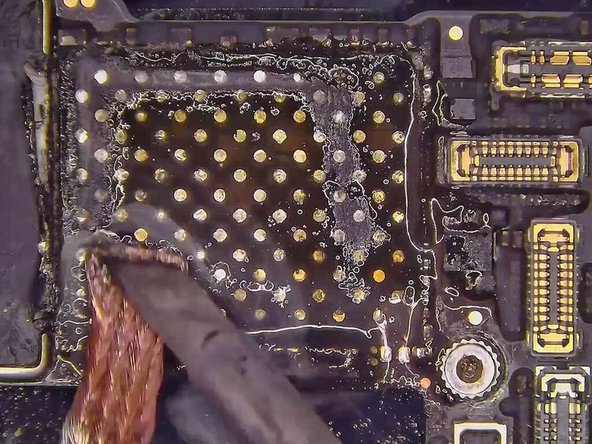
Step 2

- Check the circuits connected to the Wi-Fi module to ensure everything's running smoothly.
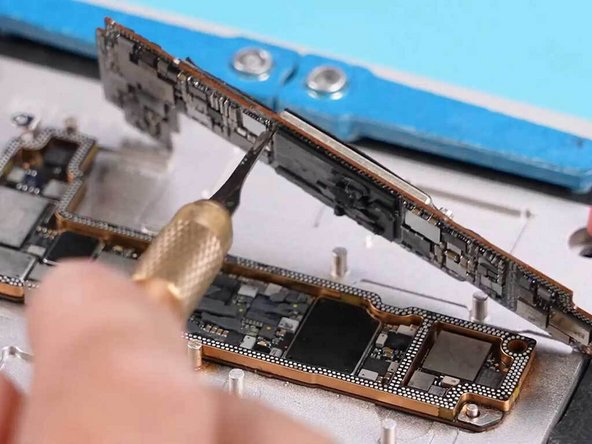
Step 3

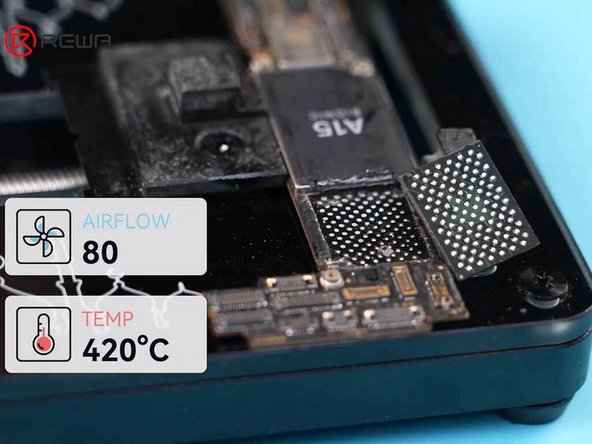
You can't grab the Wi-Fi serial number just by hooking up your iPhone to the programming software. Time to roll up your sleeves and remove the NAND chip.
- Time to warm up that NAND chip! Grab your hot air gun, set it to a toasty 420°C with an airflow of 80, and give the chip some even heat love.
- Now, let's gently pry that NAND chip up like it's the last slice of pizza!
- Next up, show some soldering pad love by applying a bit of flux to the area around the NAND chip.
- Finally, use some braid and a soldering iron to tidy up the soldering pad by removing the leftover solder. You're doing great!
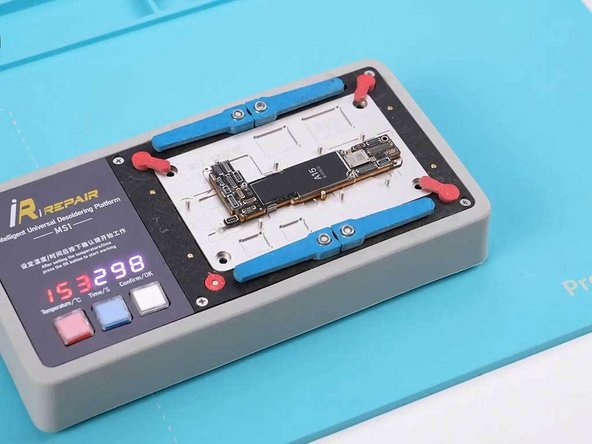
Step 4
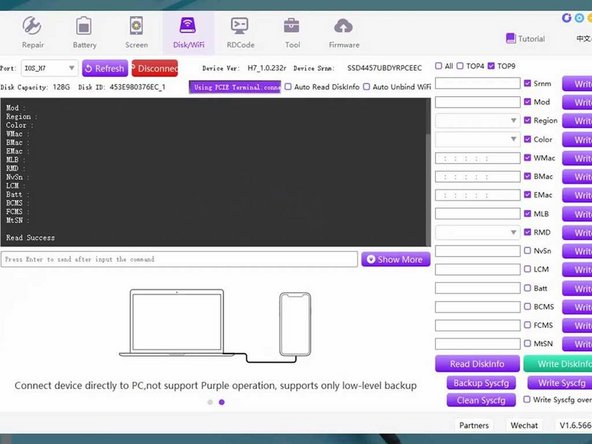

- Pop the NAND chip into your Luban programmer—like plugging in to the future.
- Hook up the programmer to your PC and fire up the software.
- Hit the 'Check Factory Data' button to let it work its magic and read the EcID from your iPhone.
- Jot down the EcID straight from the NAND chip. Smooth moves!
Step 5

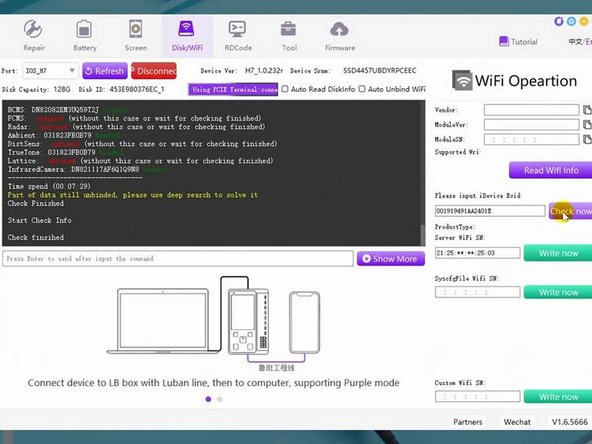

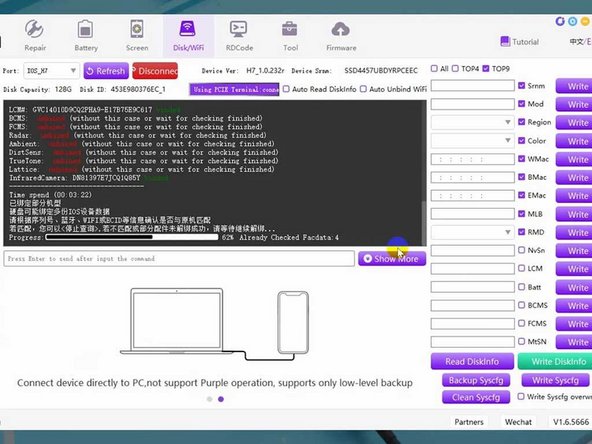
- Pop a brand new Wi-Fi module into the Luban programmer to get that Wi-Fi SN written in.
- Grab the EcID and navigate to WiFi Operations in the menu.
- Paste that EcID in and hit 'Check now.'
- Then, go ahead and click 'Write now.'
- Boom! The Wi-Fi SN is now happily written into your new Wi-Fi module.
Step 6

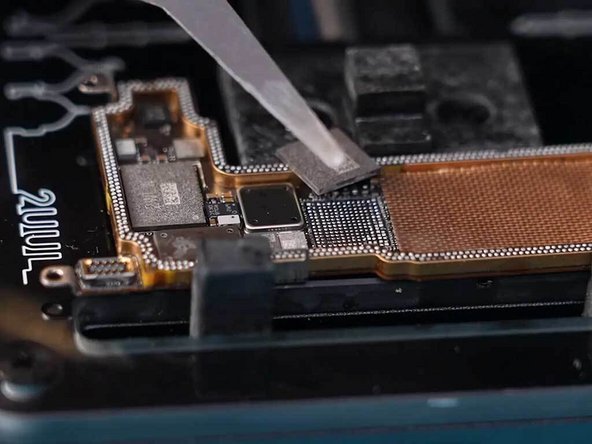
- First things first, let's set the stage by placing the signal board onto a fixture. It's like giving it a comfy chair to sit on!
- Now, we want to keep our other components safe and sound, so grab some Kapton tape and give them a cozy little cover.
- Next up, it's time to heat things up! Use a hot air gun on the Wi-Fi module and grab a pry knife to gently peel away those edge adhesives like a pro.
- With a little finesse, pry up the Wi-Fi module. You're doing great!
- Last but not least, let’s add a splash of flux to the soldering pad of the Wi-Fi module. This will make sure everything connects smoothly.
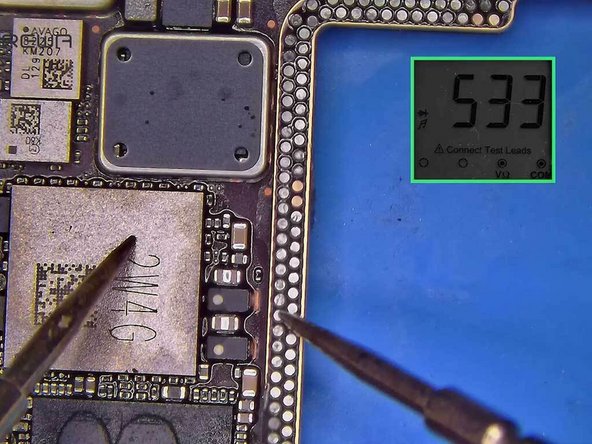
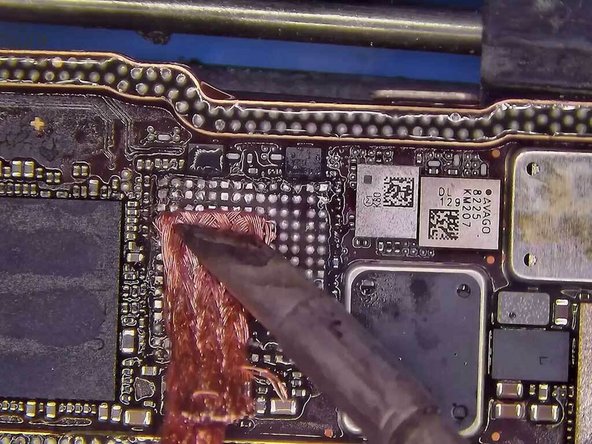
Step 7

- Zap those tins off the soldering joints on the signal board—clean workspace, happy life.
- Kick the tins off the soldering joints of the logic board too. No leftovers allowed.
- Line up your shiny new Wi-Fi module (with SN) right on the soldering pad. Get it cozy.
- Fire up your hot air gun to 380°C, set airflow to 60, and solder on that new Wi-Fi module like a pro.
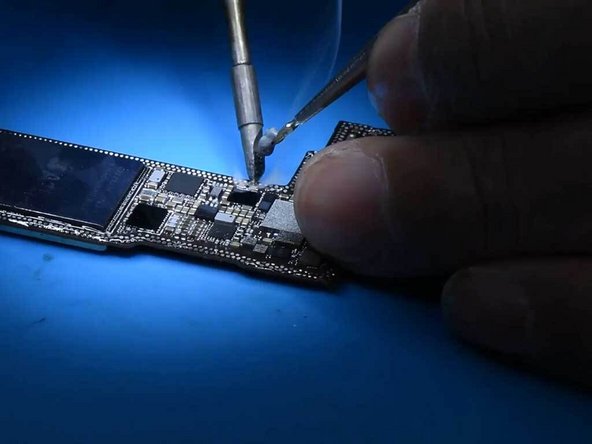
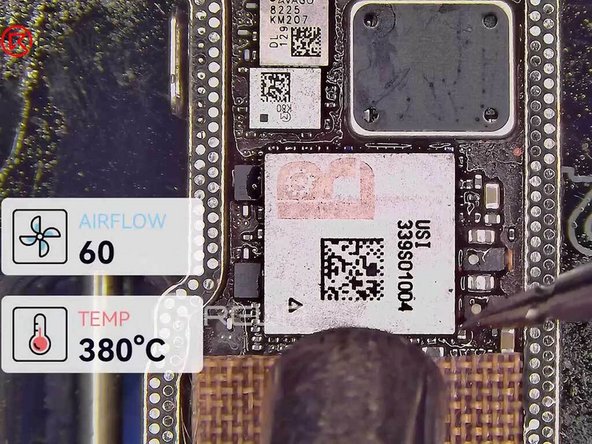
Step 8

- Use a hot air gun set to 380°C with a gentle airflow of 60 to carefully solder the NAND chip in place.
Step 9

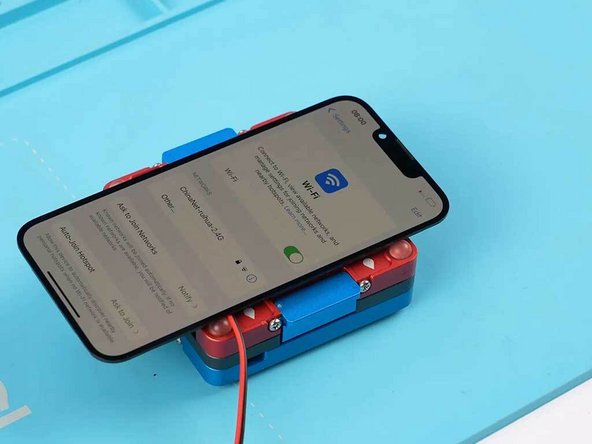
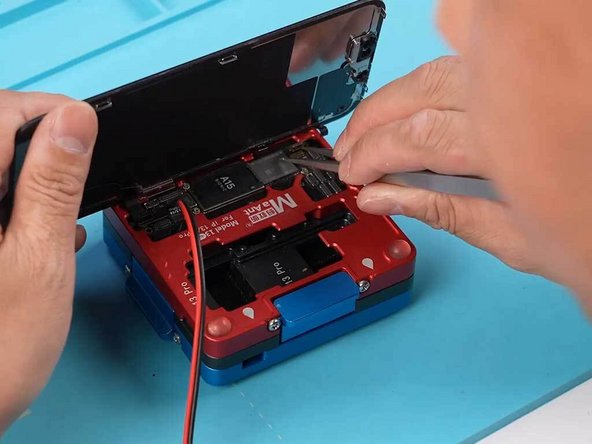
- Place the logic board and signal board into a test fixture designed for motherboard layers.
- Attach the iPhone 13 screen cable along with the power cable.
- Carefully use tweezers to trigger the power-on sequence.
- Your iPhone 13 should light up and power on without a hitch.
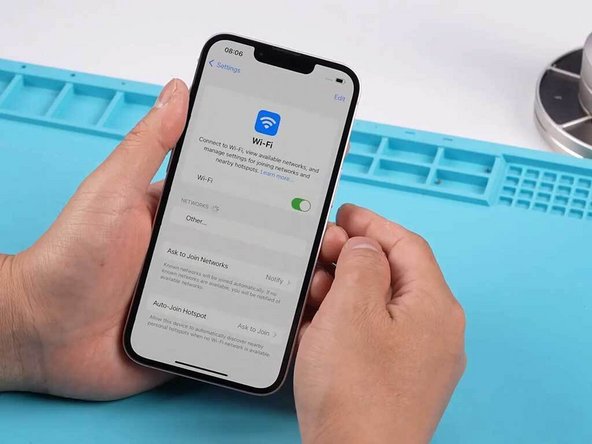
- Head to the settings menu and check that the Wi-Fi toggle is back in action.
Step 10

- Get that signal board and logic board cozy together with a nice soldering job.
- Put the iPhone 13 back together and fire it up to check out the Wi-Fi.
- Give the Wi-Fi a whirl—if it’s cruising along, you’re golden. If it’s still being stubborn, you can always schedule a repair for a little backup.


