
How to fix an iPhone XR stuck on Apple logo
Duration: 45 minutes
Steps: 7 Steps
Step 1


- Looks like this phone took a tumble. After charging, it refuses to power up, gets stuck on the Apple logo, and keeps rebooting like it’s stuck in a loop.
- Next up, we’ll connect the power cable to the motherboard. Good news: there’s no power leakage or crazy current issues on the motherboard.
Step 2


- Now, let's connect your phone to the computer and start flashing to check if the system has gone haywire. Put the phone into recovery mode using a Restore-Easy Cable. Plug in the USB data cable and begin the flashing process. The phone should be ready to go. However, if it still refuses to turn on and keeps restarting, don’t panic – this can happen. If you’re stuck, feel free to schedule a repair for further assistance.
Step 3
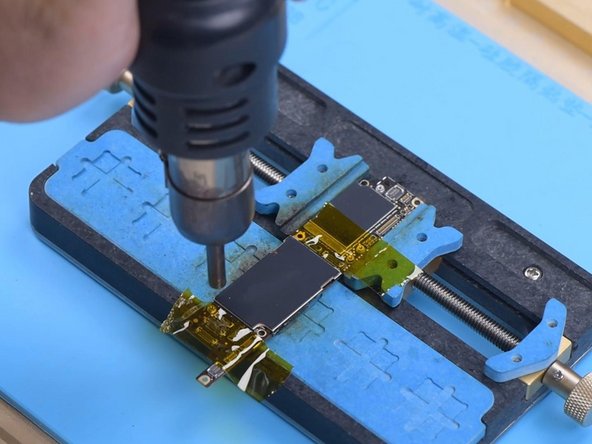


- Looks like the motherboard's acting up! Unplug that flex cable and lift out the motherboard. Peel off any foam and rubber hanging out on the board. Pop the motherboard onto a holder so it doesn’t wander off. Slap on some high-temp tape to cover the connector and keep it safe. Grab a vertical hot air gun and set it to 380℃—time to take off the shielding cover!
Step 4

- Take a moment to check each inductance around the power IC using a Hot Air Gun set to 280℃. We want to see if any of them are feeling a bit loose. If they are, that's a sign of pseudo soldering! If they're snug as a bug, but the phone still decided to play the restart game after charging, it might be time to swap out that USB IC.
Step 5


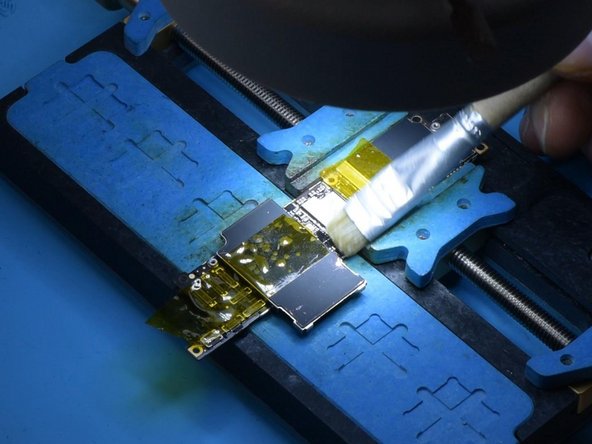
- Time to tidy up that thermal grease! Grab your Sculpture Knife and get to work. Next, give your CPU a cozy shield by covering it and securing it with some high-temperature tape. Now, let’s tackle that pesky black adhesive around the USB IC. Use your Hot Air Gun set to 280℃ to soften it up. Once it's nice and ready, crank up the heat to 380℃ to pry up the USB IC. Don't forget to add some Paste Flux for a smooth operation! Now, it’s time to remove the tin on the bonding pad using your trusty Soldering Iron set to 365℃. You're doing great!
Step 6

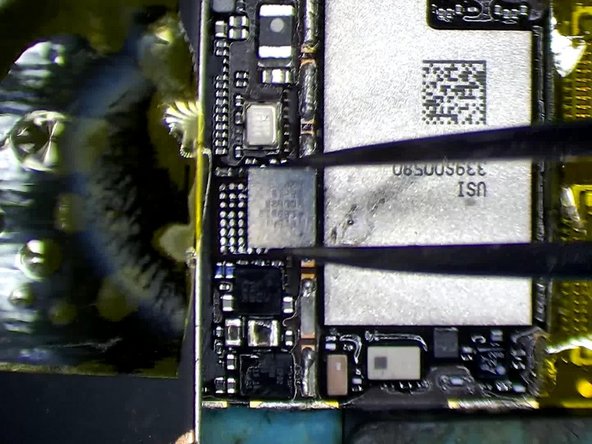
- Heat up the solder wick with rosin using a Hot Air Gun set to 380℃ to melt away the tin like a pro. Slap on some paste flux to get things ready. Place the fresh USB IC carefully in its spot. Give it a nice soldering session with the Hot Air Gun at 380℃ again. Once the motherboard cools down, wipe it clean with PCB Cleaner to finish off the job!
Step 7


- First, let's connect the motherboard with the power cable. Give a little love by shorting pin 10 on J4300 to the ground—this will get the boot-up party started! You should see the boot current behaving just right.
- Next up, let's get that motherboard installed! Connect the display and battery, and voilà—the phone powers on like a champ!


