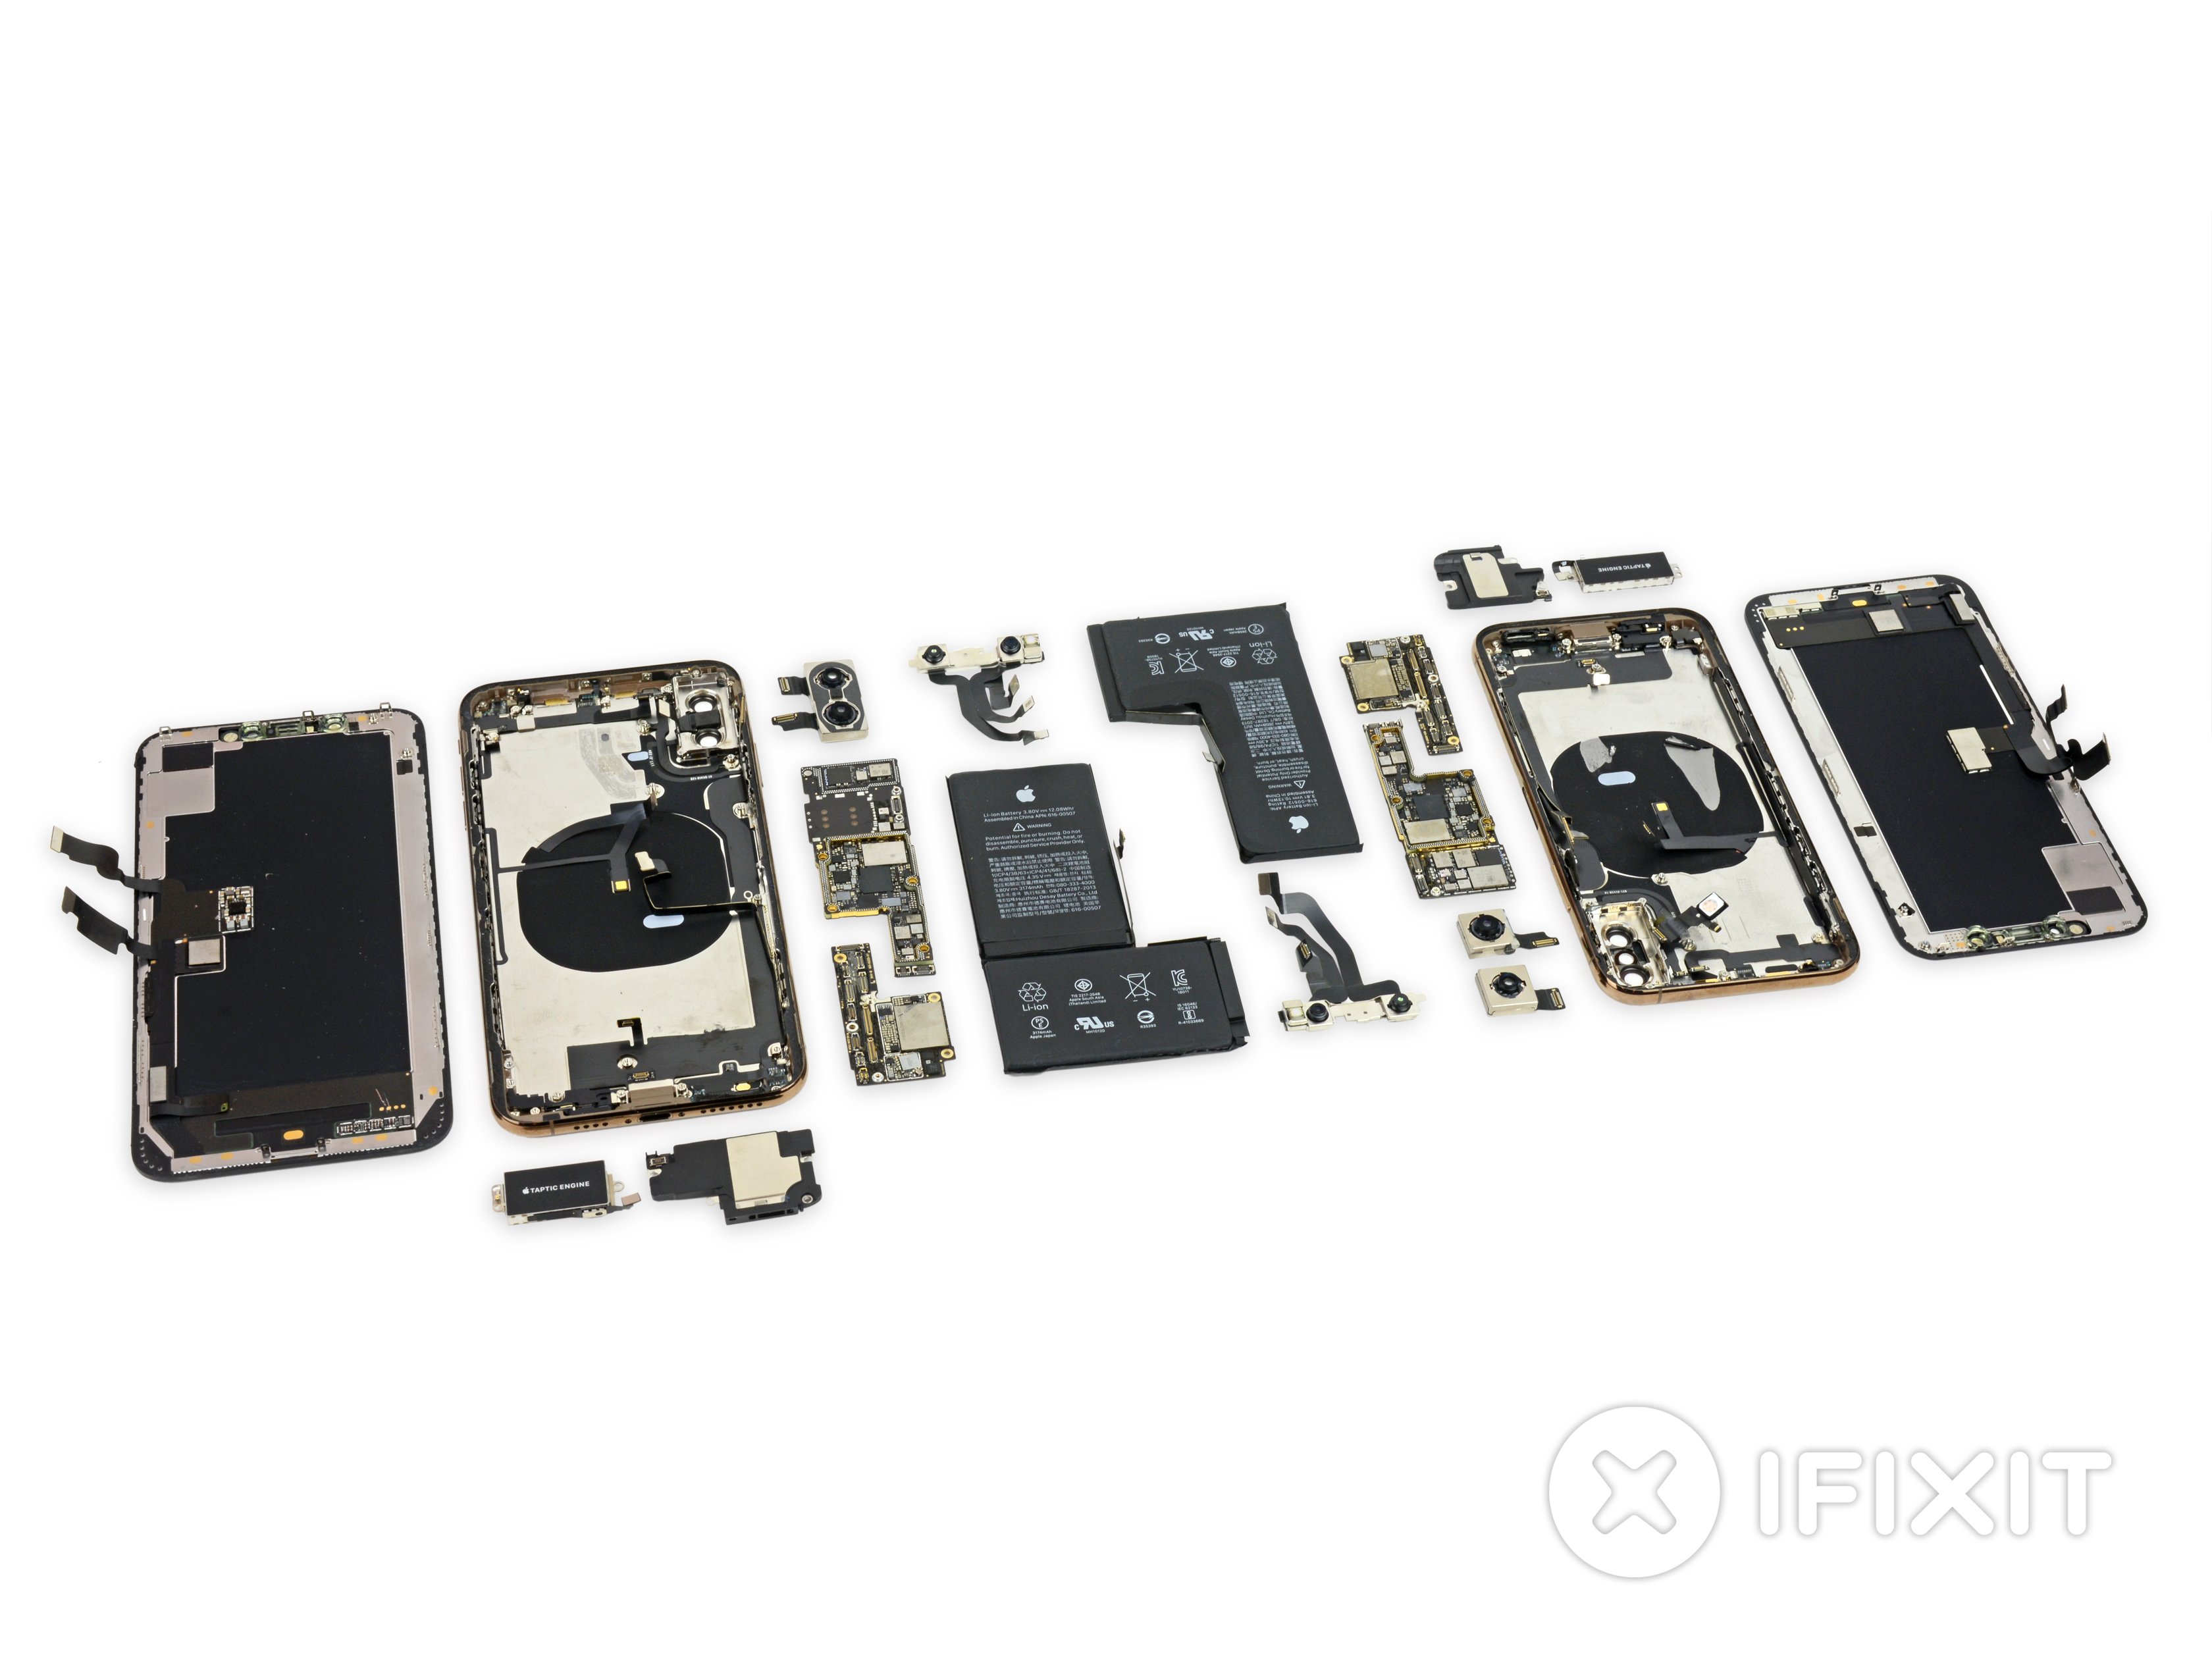
iPhone XS Max Earpiece Speaker and Front Sensor Assembly Replacement
Duration: 45 minutes
Steps: 33 Steps
Heads up! This part is specially matched to your unique iPhone right from the factory.
Follow these steps to remove or transfer the earpiece speaker and front sensor assembly on your iPhone XS Max. This assembly includes the earpiece speaker, microphone, ambient light sensor, flood illuminator, and proximity sensor. Since this part is paired to your specific iPhone from the factory, it needs to be moved from your old display to the new one during any screen replacement. The flood illuminator plays a key role in Face ID security, so if it gets damaged or isn’t installed correctly, Face ID won’t work. Swapping it out for a new part won’t fix this either, so handle all components with care. If something goes wrong, only Apple can restore Face ID functionality.
Step 1
Before diving in, make sure your iPhone's battery is below 25%. A fully charged battery can be a little too feisty and might cause some serious sparks (literally) if punctured. Better safe than sorry!
- First things first—power down your iPhone before diving in. Safety first, always!
- Grab your pentalobe screwdriver and remove the two 6.9 mm screws at the bottom of the phone. Easy peasy!
- Heads up! Opening up your iPhone’s display will mess with its waterproof seals. Be sure to have replacement seals on hand before you go any further. Or, if you’re not replacing them, just be extra careful around water when you put everything back together. We’ve got you covered, but make sure you’re good to go!
Step 2
Watch out! If you push that opening pick in too deep, you might end up causing some unwanted damage to your device. Take a moment to mark your pick so you keep it in the safe zone!
Feeling fancy? You can also put your own spin on it by marking the other corners of the pick with various measurements.
Or, for a fun little hack, tape a coin about 3 mm from the tip of your pick. It's a clever way to keep your device safe while you work!
- Grab your trusty opening pick and measure about 3 mm from the tip—then, with a permanent marker, make your mark!
Step 3
Pop on some safety glasses—your eyes deserve VIP treatment if any glass decides to break loose during the repair.
Got a cracked screen on your iPhone? No worries, just tape over the glass to keep the breakage in check and avoid any pesky glass cuts while you're working on the repair.
If you're stuck, you can always superglue the suction cup to the screen to give you a bit more grip during the repair.
- Cover the iPhone’s screen with overlapping strips of clear packing tape, making sure the whole front is sealed up like a shiny glass sandwich.
- If the suction cup won’t stick in the next steps, just fold up some sturdy tape—duct tape works great—into a makeshift handle and use that to gently lift the screen.
Step 4
The next few steps will walk you through using the Anti-Clamp, a handy tool we've created to make the opening process smoother. If you’re not using the Anti-Clamp, no worries! Just skip ahead three steps for a different method.
Want to master the Anti-Clamp? Check out our full guide for all the details!
If your iPhone’s surface is a bit too slick for the Anti-Clamp to grip properly, simply use some tape to give it extra traction.
- Pull the blue handle back to release the Anti-Clamp’s arms—it’s like giving them a little freedom.
- Slide the arms onto either the left or right edge of your iPhone, wherever feels comfy.
- Place the suction cups close to the bottom edge of your iPhone—one on the front side and one on the back.
- Press the cups together to create a solid grip on the spot you want to work on.
Step 5
- Slide the blue handle forward to lock those arms in place.
- Rotate the handle clockwise a full 360 degrees or until you notice the suction cups starting to stretch out.
- Keep an eye on the suction cups to make sure they stay perfectly aligned. If they start to drift, just loosen them a bit and realign the arms before moving on.
Step 6
Turn no more than a quarter turn at a time, then take a one-minute breather. Let the Anti-Clamp and some patience do their magic!
A hair dryer, heat gun, or hot plate can be used to warm things up, but keep in mind—too much heat can mess with the display or the internal battery, so take it easy and proceed with caution.
If the Anti-Clamp isn't creating enough of a gap, try cranking up the heat a little more and give the handle a quarter turn. Patience is key!
- Warm up the iOpener and carefully slide it through the arms of the Anti-Clamp.
- Fold the iOpener so it rests snugly along the bottom edge of your iPhone.
- Pause for about a minute to let the adhesive soften and create a little opening gap.
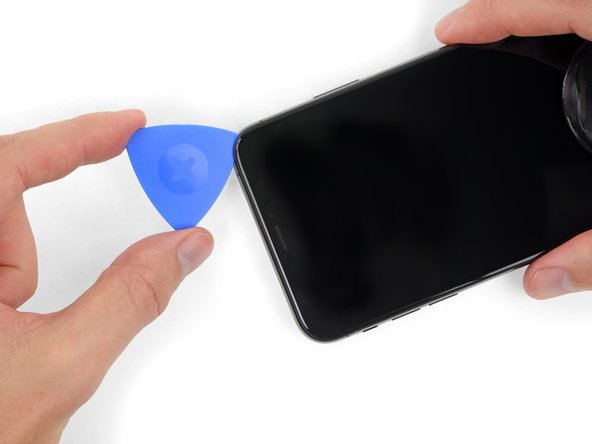
- Gently slide an opening pick into the gap between the screen and the plastic bezel—avoid poking the screen itself.
- Feel free to skip the next three steps.
Tools Used
Step 7
Warming up the lower edge of your iPhone works wonders by loosening the adhesive that holds the display in place. This little trick makes it a breeze to pop it open.
- Grab your trusty hairdryer, heat gun, or even whip up an iOpener, and give the lower edge of your iPhone a warm hug for about a minute. This little heat session will work wonders, softening up that stubborn adhesive lurking underneath.
Tools Used
Step 8
- Grab your suction handle and stick it to the bottom edge of your phone—just steer clear of the curvy part of the glass. You want a good grip, not a slip!
Tools Used
Step 9
The adhesive keeping your display snugly in place is super strong, so getting that initial gap open requires some muscle! If you're struggling to create a space, don’t fret—just add a bit more heat and gently wiggle the screen up and down to loosen the adhesive. Keep at it until you’ve got enough room to slide in your tool. You've got this!
- Grab the suction cup and pull up steadily and firmly to gently create a small gap between the front panel and the rear case.
- Slide an opening pick into the gap beneath the screen and the plastic bezel—make sure to avoid prying directly on the screen.
Step 10
Keep your pick shallow—no deeper than 3 mm, or you might give those internal components an accidental poke they won’t appreciate!
- Take your opening pick for a spin, gliding it around the lower left corner and cruising up the left edge of your iPhone. You're separating the display from the sticky adhesive, so keep it smooth and steady!
Step 11
Hey there! Just a heads-up: there are some super delicate cables hanging out along the right edge of your iPhone. So, let's keep our picks away from that area to avoid any accidental cable mishaps!
Step 12
Keep your pick shallow—no deeper than 3 mm—to dodge those delicate display cables!
- Pop your pick back in at the bottom edge of the iPhone, then slide it up along the right side to keep breaking that stubborn adhesive free.
Step 13
Go easy on those clips—too much muscle and they'll snap! Slow and steady wins the repair race.
Keep your pick to less than 3 mm deep, or you risk poking the sensor array where it hurts.
The upper edge of the display is held in place with a combination of glue and clips, so get ready to tackle that challenge!
- Gently slide the opening pick around the top corner of the display. While doing this, give the display a little tug or wiggle it down toward the Lightning port. It's like giving it a little nudge to help it along.
- Move the pick to the opposite corner and carefully cut through any remaining adhesive holding the display in place. A little patience goes a long way here!
Step 14
- Grab the small nub on the suction cup and give it a gentle pull to release it from the front panel.
Step 15
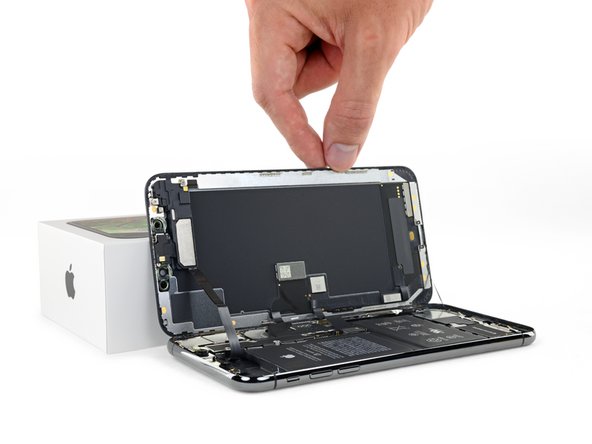
Hold your horses on fully separating the display! There are some delicate ribbon cables still keeping it connected to the iPhone's logic board, and we don't want to hurt them.
- Start by gently lifting the display from the left side, kind of like opening a book—easy and smooth.
- Rest the display against something soft so it stays in place while you work on the rest of the phone. Just make sure it’s stable!
- When it's time to put everything back together, carefully align the top edge of the display first. Snap the top edge in place, then work your way down. If it’s not clicking easily, double-check those little clips around the display—they might be a little bent and need some adjusting.
Step 16
As you go through this repair, keep a close eye on every screw and make sure it lands right back where it started. It’ll help avoid any mishaps and keep your iPhone in top shape. Trust us, your phone will thank you!
- Take out the four Y000 screws holding down the logic board cover bracket. Here's the breakdown:
- Two screws at 1.1 mm
- One screw at 1.5 mm
- One screw at 3.7 mm
Step 17
The bracket might be sticking around with a bit of adhesive. Give it a gentle lift—firm, but not aggressive—to break it free.
- Take off the bracket.
- When putting everything back together, it's a perfect moment to power on your iPhone and check that all functions are working before sealing the display. Remember to fully power it down again before moving on.
Step 18
Be careful not to mess up the black silicone seal around this and other board connections. It’s there to keep the water and dust away, giving your device that extra layer of protection it needs. A little extra caution now can save you from bigger headaches later!
- Gently lift the battery connector from its socket on the logic board using a spudger or your trusty fingernail—like opening a stubborn pickle jar, but with way less brine.
- Tilt the connector away from the board to make sure it doesn’t sneak back and power up your phone mid-repair. Nobody likes unexpected surprises when you’re in the zone.
Tools Used
Step 19
- Let's kick things off by unscrewing the three Y000 screws that are holding down the display connector bracket:
- First up, we’ve got two 1.5 mm screws to tackle.
- And last but not least, there’s one 1.1 mm screw waiting for your attention.
Step 20
- Time to take off that bracket! Gently remove it and set it aside. You're one step closer!
Step 21
- Gently pry open the front panel sensor assembly connector using either the tip of a spudger or your trusty fingernail. You're almost there!
Tools Used
Step 22
- Gently pry up the OLED panel cable connector using a spudger or even your fingernail—just take it slow and easy!
- When reconnecting, line up one side of the connector and press down until you hear a satisfying click, then do the same on the other side. Avoid pushing in the middle to keep those pins happy and avoid any accidental damage.
Tools Used
Step 23
- Pop the digitizer cable connector out of its socket using a spudger or your fingernail—no need to wrestle with it, just a gentle lift will do.
- If your screen decides touch is just not its thing after you finish, unplug the battery and try reseating this connector. Make sure it snaps in securely and the socket's free of dust or any sneaky bits.
Tools Used
Step 24
The front panel sensor assembly flex cable is gently stuck down, so be ready for a little peel action.
- Gently lift the cable until the sticky stuff lets go.
Step 25
- Take off the display assembly with care. It's like peeling an orange, but less juicy!
- If you're feeling fancy and want to swap out the waterproof adhesive around the display edges during reassembly, this is your moment. Pause here and get your waterproof game on!
Step 26
- Let's get started by taking out the three Y000 screws that are holding the speaker/sensor assembly in place:
- One little 1.4 mm screw
- Two slightly bigger 1.5 mm screws
Step 27
Heads up! The speaker is still hanging on by a super thin ribbon cable. Gently handle it so you don’t stretch or tear this delicate little guy.
The earpiece speaker has a gentle grip—kind of like a sticker that doesn’t want to let go.
- Grab your trusty spudger and slide it gently under the top edge of the speaker assembly. Now, flip that speaker down and away from the display’s top edge like you’re turning a page in a really cool comic book.
Tools Used
Step 28
- Fire up your hairdryer or heat gun, or get your iOpener ready, then warm up the top front of the screen for about 1-2 minutes. This helps loosen up the sticky adhesive holding the sensors in place. Easy does it!
Tools Used
Step 29
- Gently slide the tip of your opening pick under the flex cable that's hanging out below the microphone. You've got this!
- Give it a little twist to help separate the microphone, but be super careful not to put too much strain on that flex cable.
- If you're still having trouble, grab your spudger and use its pointy side to finish the job of separating the microphone from its cozy spot in the front panel.
Tools Used
Step 30
Gently lift and hold the speaker aside to get better access. Just watch out for the delicate flex cable—don’t tug on it while you’re working!
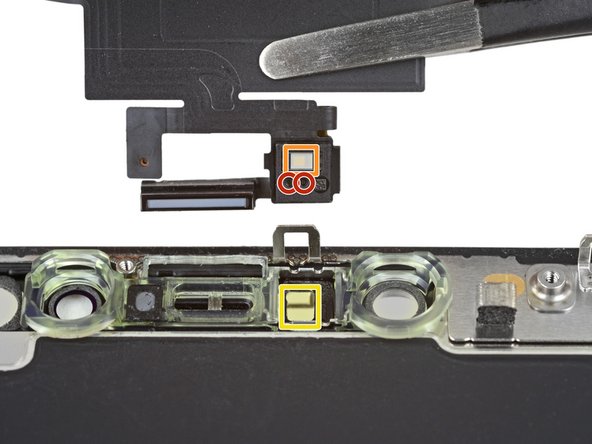
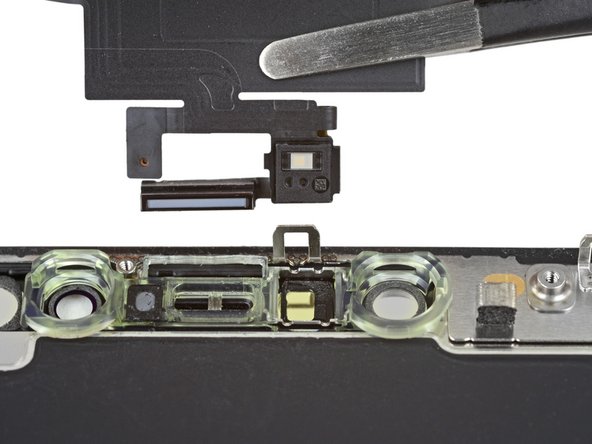
- Starting from the left and moving to the right, slip an opening pick under the flex cable and slide it beneath the proximity sensor and flood illuminator module.
- With a gentle wiggle and a lift, separate the module from its snug spot in the front panel.
Step 31
Heads up! That sensor is still hooked up by a super skinny ribbon cable. Handle it gently—no tugging or stressing, or it might throw a fit!
If the sensor’s still holding on after a few seconds, give it a little more heat and try again. Hang in there—it usually just needs a bit of coaxing!
- Grab your tweezers and gently wiggle the ambient light sensor free from its little home in the display notch.
Tools Used
Step 32
- If you managed to get the ambient light sensor out in one piece (like in the first pic), nice work! Go ahead and jump to the next step.
- If the white diffuser strip decided to stay behind, still clinging to the display (second pic), grab a slim blade or pry tool and gently work it out along the top edge. Warming things up a bit with some heat can make it less stubborn.
- When putting things back together, drop the diffuser into the display first, and make sure it’s facing the right way—the front side is in the first image, the rear is in the third.
- Next, set the ambient light sensor right on top of the diffuser. You’ll need to hold that sensor steady while you put the screws back in for the earpiece and sensor assembly. Once those screws are tightened, the sensor will sit pretty and do its job.
Step 33
- Double-check your new part against the original—sometimes you’ll need to move over some leftover bits or peel off protective stickers before popping it in.
- Put your device back together by simply reversing the steps above.
- When you're done, be sure to recycle your e-waste responsibly at an R2 or e-Stewards certified facility.
- If things didn’t go as smoothly as planned, no worries! Head over to our Answers community for some friendly troubleshooting tips.


