Yoga Tab 3 Pro Rear Panel Replacement
Duration: 45 minutes
Steps: 4 Steps
To get rolling with this guide, grab yourself a Philips #0 screwdriver and a trusty spudger. Let’s do this!
Step 1


Before you start, make sure to power down your device – it’s a simple step that’ll help you avoid any potential risks or damage during the repair process.
– Time to get started! Flip your tablet over so the rear panel is facing up.
– Now, locate the central button and give it a gentle push to lift the support.
– Almost there! Open the support all the way using your hands – it’s easier than you think!
Step 2


Before you start removing screws, take a minute to peel off the adhesive on the back plate. It’s an easy step, but an important one!
– First, let’s get that sticker out of the way. Use your trusty plastic spudger to gently lift it up from one side, and then you can easily remove it with your fingers.
– Next, grab your Philips #0 screwdriver and remove the three screws. You’re making great progress!
Tools Used

Step 3


Watch out for that spudger! Make sure not to poke it too deep into the device, or you might accidentally tickle the internal components. Keep it gentle and steady!
You might need to use a bit of muscle here—the back half is also latched in the center area of the tablet.
Heads up: you’re taking off the rear shell from the front. All the important bits, including the display, stay with the front panel.
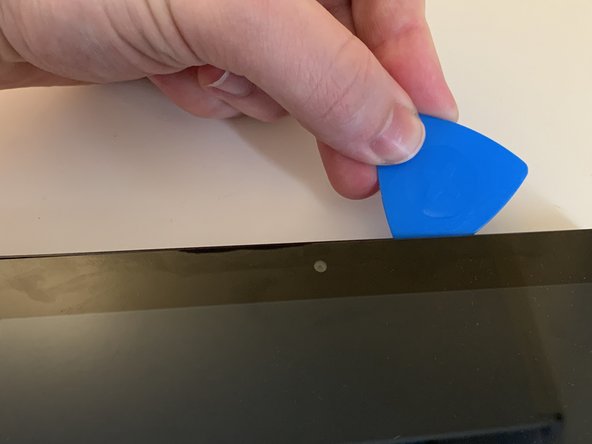
– Start by gently prying apart the two halves. Insert the spudger into the gap between the front and back shells. If you’re feeling adventurous, grab some guitar picks to assist you in this task!
– Repeat this process on all three visible sides, making sure to include those two rounded edges as well.
Tools Used
Step 4

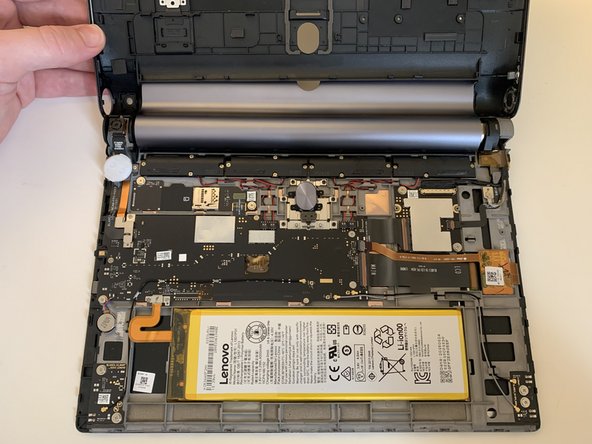

Be mindful of the two side buttons and the central one – they have a habit of popping off the rear shell. Don’t worry, you’ll just need to pop them back in place during reassembly. Easy peasy!
– After you’ve unlatched all those sneaky internal clips, the rear panel will pop right off like it’s saying, ‘Freedom at last!’