Yoga Tab 3 Pro Battery Replacement
Duration: 45 minutes
Steps: 10 Steps
Alright, here’s what you’ll need to get started: a trusty Philips #0 screwdriver, a spudger for prying things open, and some tweezers to handle those tiny bits. Easy peasy!
Step 1


Before you dive into fixing things, make sure to power off your device. Safety first – we want you to stay in one piece while you make everything work like new!
– Set your tablet face down so the back is looking up at you.
– Press the button in the middle to pop up the stand.
– Grab the stand with both hands and open it up all the way.
Step 2


Before you can get to those screws, you’ll need to peel off the adhesive holding the back plate in place. It’s a simple step that will make the rest of the process a breeze!
– Start by gently lifting the sticker with a plastic spudger, just working from one edge. Once you’ve got it started, your fingers will do the rest—peel it off nice and easy!
– Grab your Philips #0 screwdriver and take out the three screws. They’ll come right out with a little twist—easy peasy!
Tools Used

Step 3


Be careful when inserting the spudger – don’t push it too far in, or you might damage the internal components.
A little nudge might be necessary here since that half is snugly connected in the center of the tablet.
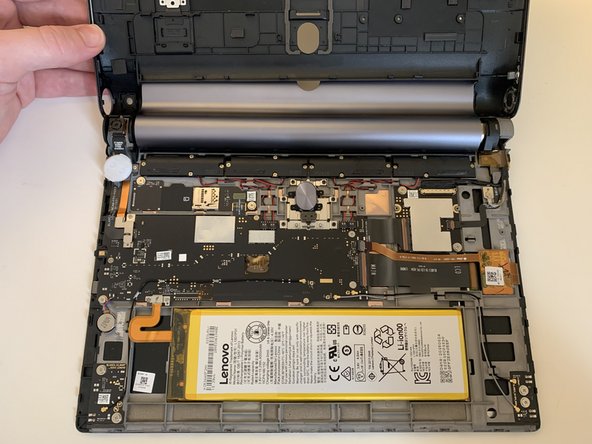
Heads up: you’ll be popping off the rear shell, leaving the front panel and all its internal goodies, including the display, still attached. No need to worry about those!
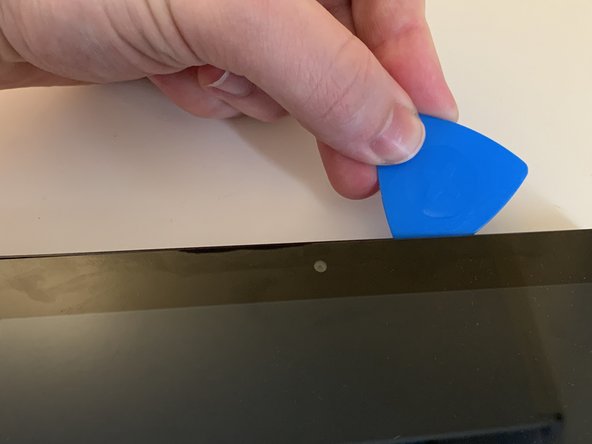
– Time to get this repair started! Begin by carefully prying open the device by inserting the spudger into the gap between the front and rear shells. If you need a little extra help, some guitar picks can come in handy too.
– Repeat this process on the two round side parts and the remaining visible side, working your way around the device to release it from its shell. Take your time and be gentle, and you’ll be done in no time!
Tools Used
Step 4


Keep an eye on those two side buttons and the central one, as they might pop off the rear shell. You’ll need to pop them back in place when you’re putting everything back together.
– Now that you’ve released all the internal clips, you can go ahead and remove the rear panel – it should come off easily now!
Step 5


– Let’s get started! Remove the two screws holding the battery connector plate in place using a trusty Philips #00 screwdriver.
– Next, carefully pry the plate off using tweezers – you’re making great progress!
Tools Used

Step 6

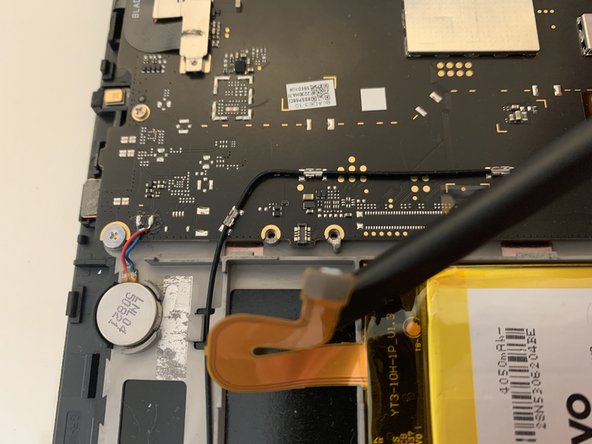
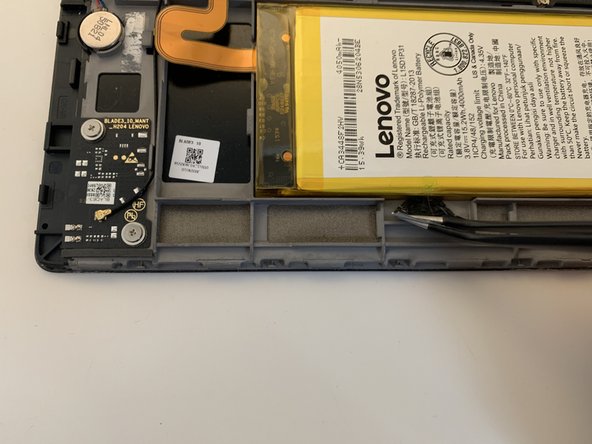
– Grab the flat end of your spudger and gently pry the battery’s connector off the motherboard.
– Once it’s loosened up, just give the connector a little pull to fully detach it from the motherboard.
Tools Used
Step 7


– Grab those tweezers and give a gentle lift to the adhesive pull tabs. You’ve got this!
– Now, using your fingers, lift those adhesive pull tabs up to get things moving!
Heads up! Take your time with this step—slow and steady wins the race. If you’re unsure, double-check before moving on.
Let’s get started with this repair! Take a deep breath, grab your tools, and let’s dive in. If you’re feeling stuck or unsure, don’t worry – we’ve got you covered. Just follow these easy steps, and you’ll be back up and running in no time. If you need help, you can always schedule a repair with our experts at Salvation Repair.
Tools Used
Step 8

Hey there! Just a friendly reminder: don’t push or poke at the battery. It’s a sensitive little thing, and we wouldn’t want it to leak any funky chemicals or go up in flames. Stay safe and keep it cool!
If the adhesive pull tabs decided to break on you, no worries! You can gently try to rescue them using flat-point tweezers or even your fingers. Just be patient and careful, and you’ll be back on track in no time!
– Repeat the same steps for the second adhesive pull tabs to completely get rid of them.
Tools Used
Step 9

If one or both adhesive pull tabs snap on you, don’t stress—just grab a little isopropyl alcohol (90% or higher) to help loosen things up.
– Time to get this repair started! Apply some alcohol near the adhesive pull tabs and let it do its magic
– Insert translation here
– Insert translation here
Step 10

– With all the sticky tape out of the way, the battery should come out without a fight. Gently lift it out and you’re good to go!