
Repair tricks for desoldering & soldering of iPhone X charging IC
Duration: 45 minutes
Steps: 5 Steps
Step 1

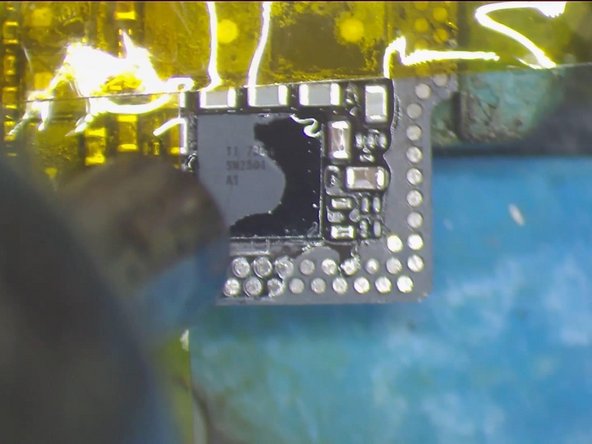

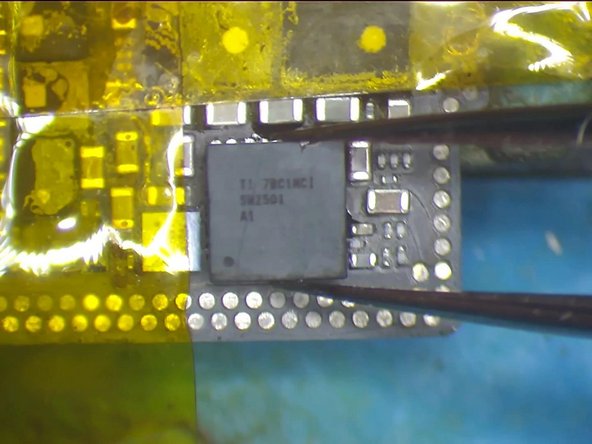
Be gentle and steady when prying up the IC—too much muscle can mess up the chip or its connection pads.
- Start by placing some high-temperature tape on the components surrounding the charging IC to keep them safe from accidental solder bridges or heat mishaps.
- Next, spread a bit of flux paste around the charging IC to prep it for the next step.
- Set your QUICK 990 AD Vertical Wind Hot Air Gun to 330℃ with an airflow of 3. Hold the hot air gun about 5mm to 10mm above the charging IC and heat it gently for 15 to 20 seconds. Then carefully pry up the charging IC and you’re good to go!
Step 2

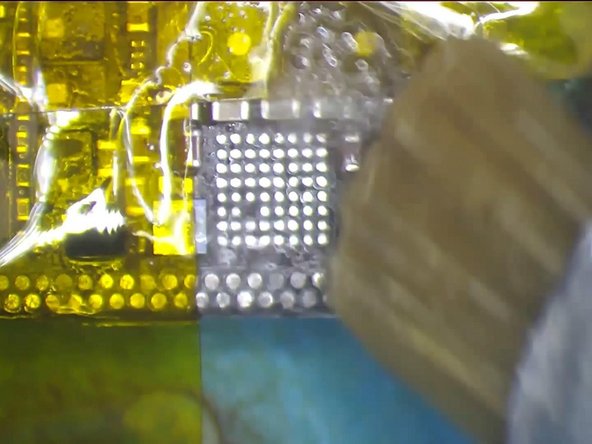

Take it easy when you're working here! A little too much force could lead to some accidental soldering or bridges between components. Just go steady and smooth, and you'll be fine.
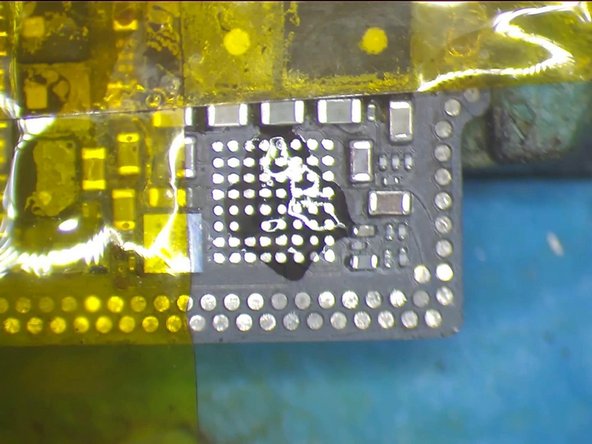
- Next up, grab some medium-temp solder paste and apply it to the bonding pad. Heat things up with your trusty QUICK 990 AD Vertical Wind Hot Air Gun at 280℃, air flow setting 3. Let the magic happen!
- While that’s heating, take your Soldering Iron set to 360℃ and clean those solder joints on the bonding pad. When you're done, give the pad a good cleaning with a rosin-soaked solder wick to make sure it's all nice and fresh.
- Finish up by cleaning the whole thing with some PCB Cleaner. Nice and shiny!
Step 3
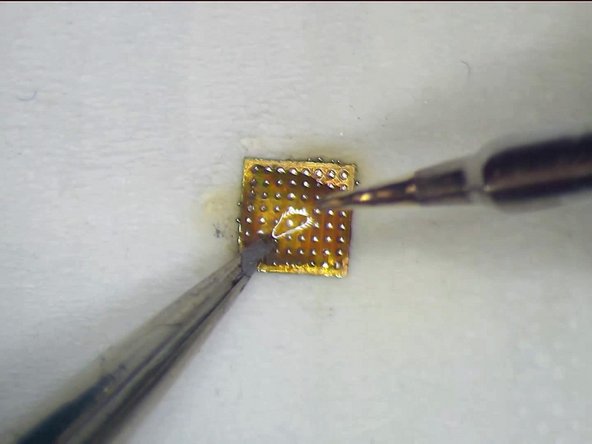

Don't stress too much about those solder joints on the pad! It's totally cool to keep a few around to make reballing a breeze later on.
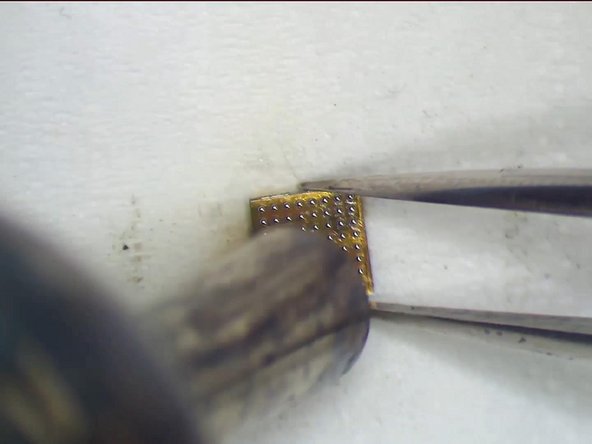
- Alright, let’s get those solder joints on the back of the charging IC shining! Start by adding a bit of medium-temp solder paste to the bonding pad on the backside. Then, give that pad a nice clean with your soldering iron set to 360℃.
- For an extra touch of cleanliness, feel free to add some paste flux. Once you've finished, give it another clean using PCB Cleaner.
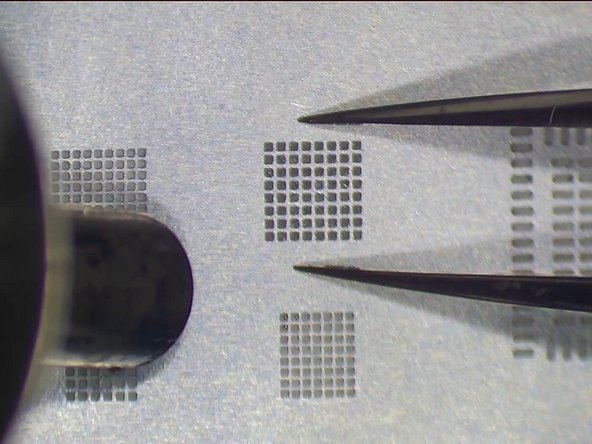
- Now, let’s dive into the reballing fun! Position your BGA Reballing Stencil just right, and then apply some medium-temp solder paste with the BGA Scraper. You're doing great!
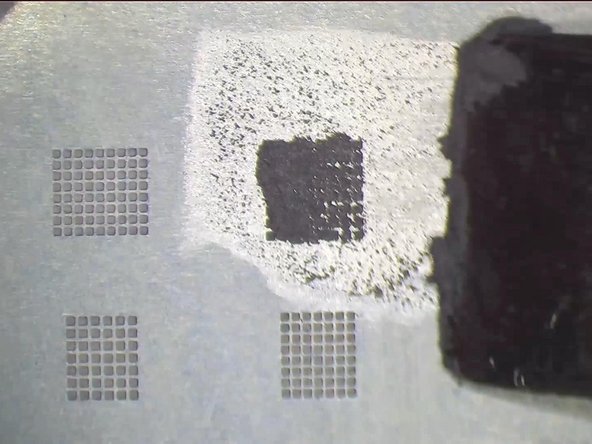
Step 4
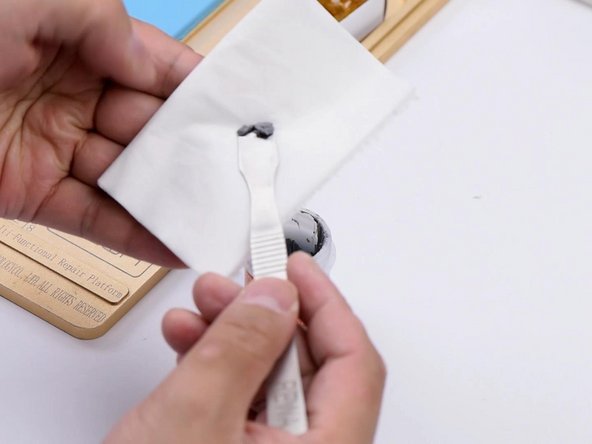
When heating, start with the hot air gun at a distance on the edges and gradually move it closer toward the center for the best results.
- Grab some facial tissue and dab on the solder paste. Give it a gentle wrap—think of it as drying off after a swim. We want the paste nice and dry before moving forward.
- A slightly soggy solder paste can cause unwanted connections during reballing, so let's avoid that drama. Spread a medium-temp solder paste smoothly across the stencil, and swipe away any extra with a lint-free cloth. Use tweezers to press the BGA Reballing Stencil firmly into place.
- Now, fire up the QUICK 990 AD Vertical Wind Hot Air Gun—set it to 300℃ and air flow at 3. This will lock in those solder balls perfectly. Solid connections make for happy repairs!
Step 5
- Put your device back together by following these steps in reverse—easy peasy!
- If you hit a snag or want a hand, don’t hesitate to schedule a repair with us.


