Soundcore Liberty Air 2 charging case Teardown
Duration: 45 minutes
Steps: 10 Steps
My earbuds stopped charging in the case, so after getting nowhere with replacements, I decided to crack open the charging case myself. I’m not totally sure what fixed it, but opening everything up and putting it back together worked for me—not once, but twice! The most likely culprit? Those two charging pins on the bottom circuit board. Check out how I brought my earbuds back to life, step by step, and you just might save yours too.
Step 1

No worries about wires or extra components (only magnets hang out) between the inner and outer casing! Feel free to push it in deep without stress.
– Gently wedge a plastic opening tool or a thin, sturdy prying tool between the inner and outer casing as shown in the picture. Carefully leverage it to lift the inner casing just a little—use a bit of patience here. If you need extra leverage or a sturdier tool, consider grabbing a more robust prying tool. Remember, gentle and steady wins the race. If you need help, you can always schedule a repair.
Step 2


Watch out for those magnets! They might wiggle loose when you’re prying the case open, but no worries – a little glue and they’ll be back in action.
– Once you’ve loosened it up a bit, take advantage of the holes (marked in the image) next to the magnets and outer case to gently pry the inner case out. A little bit of leverage here, and you’ll easily separate the two. You got this!
Step 3

– Grab your Phillips #00 screwdriver and unscrew the two screws hanging out at the bottom of the print plate.
Tools Used

Step 4

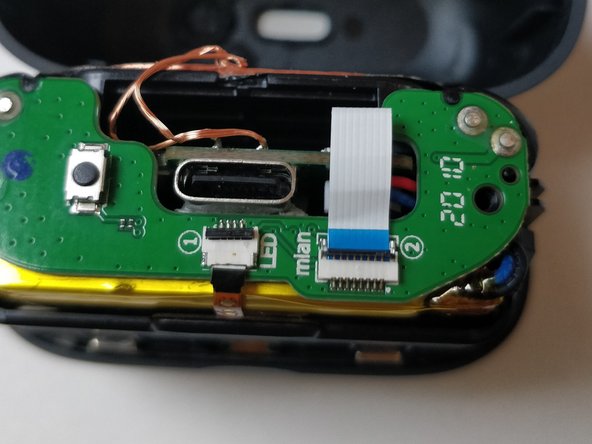

– Gently lift up the black plates, then use your tweezers to unplug the small LED connector (the one with the black tip) and the larger main circuit connector (that’s the blue-tipped one).
Step 5

Heads up: the tiny rubber piece around the charging pins likes to make a sneaky getaway during this step—keep an eye on it so it doesn’t vanish!
– Gently wedge a spudger or pick between the circuit board and the casing, then carefully lift the circuit board out. Take your time—it’s all about patience and finesse. Need a hand? You can always schedule a repair.
Step 6
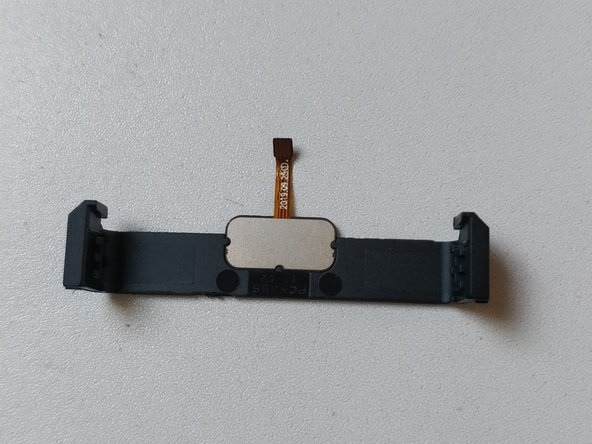

– To remove the LED strip, gently wedge a plastic pick or pry tool between one side of the strip and the case. Carefully lift it out, working slowly to avoid any damage. If you need assistance at any point, you can always schedule a repair.
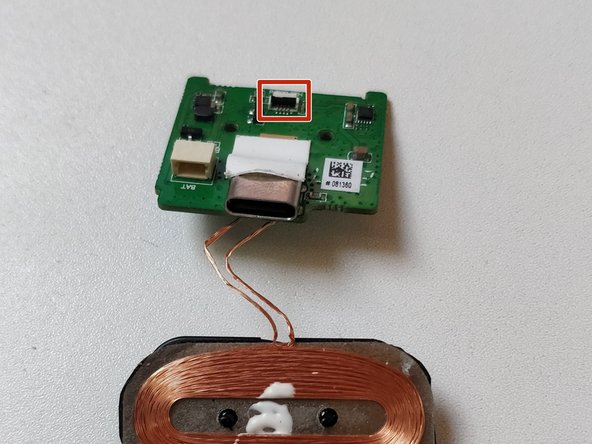
Step 7


When you’re taking it out, go easy—those copper wires hooking the coil to the circuit aren’t exactly swinging from the rafters. Pull too far and you might give them an unwanted haircut!
– This part comes away pretty easily. Just gently pry it open using a pick, tweezers, or a spudger—apply a little leverage and it’ll slide down smoothly. Remember, gentle is the name of the game. If you need help along the way, you can always schedule a repair.
Step 8

Gently wiggle the connector head from side to side, lifting it alternately on the left and right. This will help you loosen it up like a pro!
– Carefully detach the battery connector from the main circuit board using a spudger or a pick. You’ve got this!
Step 9


– Take out the two Phillips #00 screws holding down the main circuit board. Easy peasy.
– You’ll spot a connector cable attached to the print plate. To free it, give the main circuit board a gentle wiggle and pull it out from the inner case. No wrestling required—just patience.
– Putting the main circuit board back in is a bit of a Tetris move. Space is tight! Make sure to lift the black plate at the connector port, plug it in, then close the black plate to lock it down.
Step 10

I didn’t remove the battery. It was stuck to the case with some adhesive tape.
– Ready to put everything back together? Just retrace your steps in reverse order, and your phone will be back in action in no time! If you hit a snag, you can always schedule a repair.
Success!