
iPad Wi-Fi Teardown
Duration: 45 minutes
Steps: 31 Steps
Dive into the iPad Wi-Fi Repair Manual for a complete collection of repair guides! We got an early look inside the iPad recently when some FCC test photos were revealed. Keep in mind, those photos show a pre-production model, while the ones here come from a retail unit. Want to keep in the loop with hardware updates? Follow @ifixit! Our Apple iPad repair manual already includes some guides in the works. Hopefully your screen is still intact, but if not, that’s the perfect place to start. Also, check out the YouTube video slideshow of the teardown! Update 4/5: We've teamed up with ChipWorks to explore the silicon inside the iPad. More photos are on the way.
Step 1

- Guess what? We've got our hands on the latest gadget from Apple—the iPad! We’re super excited to dive into it, so let’s jump right in and see what this beauty has in store for us!
Step 2


- Here's what you'll find inside the box:
- iPad
- Dock Connector to USB Cable
- 10W USB Power Adapter
- Documentation
Step 3


- Ready to meet your new project? The iPad comes in at a sleek 242.8 x 189.7 x 13.4 mm and weighs a comfortable 1.5 lbs—easy to handle as you dive in.
- The upgraded 9.7-inch LED-backlit glossy widescreen with Multi-touch is a treat for movie buffs and book lovers alike, making every swipe and tap a smooth experience.
- Curious about model numbers? The iPad's is A1219. Not super exciting, but if you’ve got the 3G version, it’s A1337—a number only true tech fans will appreciate.
- Of course, we turned it on for a quick peek! But it’s time to power down and get ready to gently open up this stunning device.
Step 4


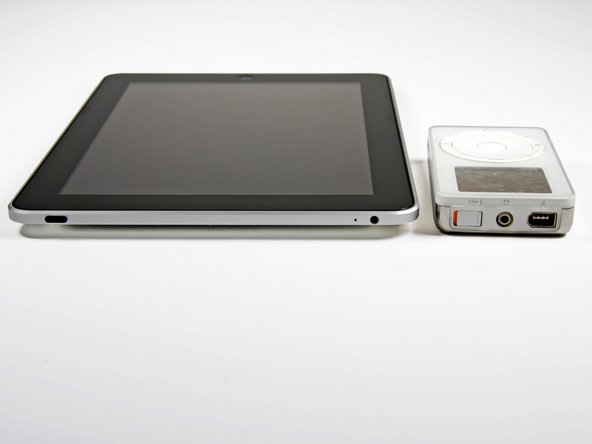
- The original iPad meets its predecessor, the iPod.
- Now, imagine the iPad sitting on top of a MacBook Pro, which is perched on a Dell laptop.
- It's kind of like seeing a flying saucer alongside a horse & buggy.
Step 5

- Gently slide a metal spudger between the display and the back case to carefully pop the iPad open.
- Now that's a device that’s easy on the planet!
- Eco points unlocked!
- Display glass free from arsenic
- No brominated flame retardants here
- LCD display without mercury
- Made with PVC-free materials
- Enclosure crafted from recyclable aluminum and glass
Tools Used


Step 6


- Gently lift the display assembly away from the rear case to get things rolling.
- Peeking inside, you’ll find two massive Li-ion Polymer batteries hogging most of the space in this device.
Step 7

- And... it's powered down. Seriously, we're relieved this step didn’t call for a heat gun.
- Heads up: You might snap a few tabs while popping off the display assembly—just a normal part of the adventure.
Step 8


- Check out that impressive symmetry!
- Both the display assembly and the rear case tip the scales at 350g each. That’s what we call a perfect 50/50 split.
- Notice the empty space up in the top right corner? That’s reserved for the cellular communications board in the 3G version of the iPad.
Step 9


- Check out the display—it's got a little nod to Honeywell's patent #5280371. Fancy, right?
- Looks a bit empty, mostly because the 3G gear decided to take a vacation.
- This bad boy packs a 3.75V, 24.8 watt-hour battery that promises a solid 10 hours of use. For a little comparison, the iPhone 3GS runs on a 4.51 watt-hour battery, while the MacBook Air boasts a powerful 40 watt-hour battery.
- The USB power supply had a makeover just for the iPad! It's a 10W unit brought to you by Foxlink Technology, Ltd., part #A1357 W010A051.
Step 10
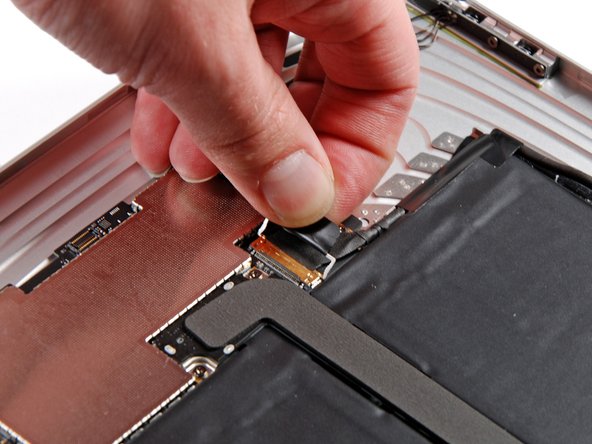
- Unplug the display data cable gently.
- Taking off these connectors is a two-step dance: first, flip up the little locking bar (see the picture), then slide the cable right out of its socket.
- This display data cable connector style is the same one used across all the latest Unibody MacBooks.
Step 11

- Unplugging the connectors for the volume, power, and screen rotation lock buttons. Easy peasy! You're doing great!
Step 12

- The main board is held in place on the back panel by T4 Torx screws.
- Honestly, we’ve never seen Apple go this tiny with their screws before.
Step 13
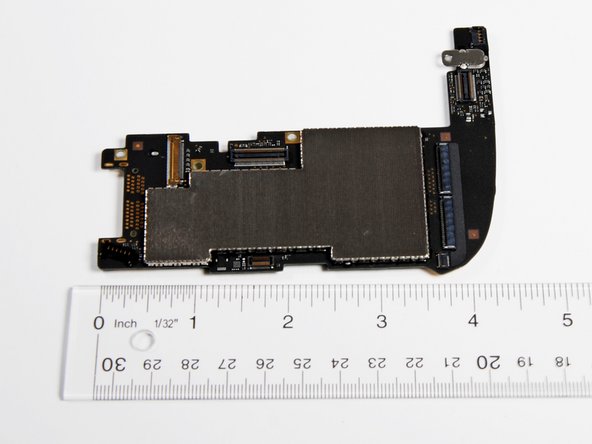

- Here’s a look at the top and bottom sides of the logic board, still rocking that EMI shield.
- Looks like this board was crafted by AT&S — a name we don’t usually spot on Apple’s PCBs.
- The logic board stretches about 4.5 inches wide, covering roughly 60% of the iPad’s width.
Step 14

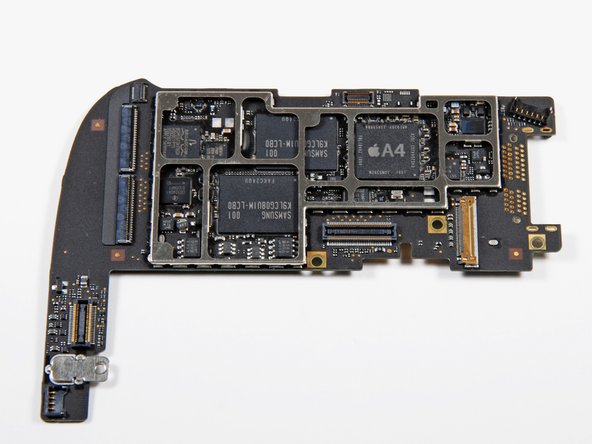
- Pop off that EMI shield from the logic board, and voilà!
- Take a look—this board is a whole new ballgame compared to what we found in the pre-production unit.
- Let's check out the markings on the A4:
- N26CGM0T 1007 APL0398 33950084 YNL184A2 1004 K4X2G643GE
- See that K4X2? That’s a Samsung DRAM part number!
- Looks like Samsung is probably behind the manufacturing of the A4 processor.
- The DRAM was stamped at the end of January, and the processor die was likely made in the third week of February.
- Breaking down the part number reveals there's 2Gb of memory inside. That’s about 128MB per die, totaling 256MB—not 512MB as previously thought.
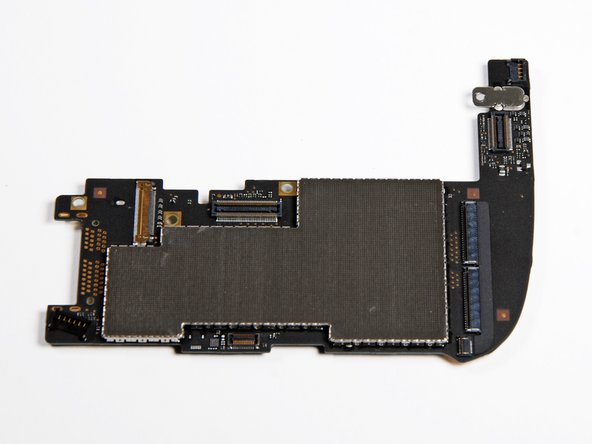
Step 15


- Here's a clear shot of the logic board without the steel EMI shield getting in the way.
- Looks like the memory maker switched things up—from Toshiba in the FCC teardown to Samsung on this model.
- Check out the Broadcom BCM5973, the I/O controller holding things together.
- The Apple A4 chip is way better marked than what we saw in yesterday’s FCC photos—nice and neat.
- Texas Instruments CD3240A1 is handling the touch screen duties here.
- NXP's L061 01 4 ZSD950 chip is also on board.
- Samsung K9LCG08U1M packs 8 GB of NAND flash storage in this device.
- We really appreciate how Samsung’s chip numbers are way easier to decode.
Step 16

- Check out this reverse view of the logic board!
- That shiny gold strip along the curved edge is likely there to help keep everything grounded against those "steps" in the aluminum rear case. Pretty neat, right?
- Keep an eye out for Apple part #820-2740-A.
- Oh, and the Apple IC on this side of the board is marked 338S0805. Make a note of that!
Step 17


- Start by unscrewing the lone screw that holds the dock connector cable snugly against the rear case. Easy peasy!
- Just a heads up, this RF/data cable is missing any GPS components. For a sneak peek at where the GPS finds its home in the 3G version, check out the FCC iPad teardown.
Step 18


No worries! That capacitor near the lower right corner of the Broadcom chip didn't just decide to take a vacation. It got a little too cozy when we cranked up the heat on the steel casing to take it off. It's all part of the adventure!
- The 802.11n WiFi and Bluetooth card is chillin' as part of the dock connector cable—talk about multitasking!
- Peek-a-boo! Hidden beneath the case, you'll find:
- The Broadcom BCM4329XKUBG, flexing its 802.11n WiFi, Bluetooth 2.1 + EDR, and even FM radio skills.
Step 19

- The speaker assembly turned out to be a bit bigger than we thought:
- These dual speakers actually give mono sound. Two tiny sealed channels guide the sound toward three audio ports carved into the bottom edge of the iPad. And yes, the audio-out jack gives you stereo sound, as expected.
- The connector on the speakers and other components is similar to the ones found in MacBook Unibody laptops. So, no worries—the iPad's not crammed for space like you might think.
Step 20

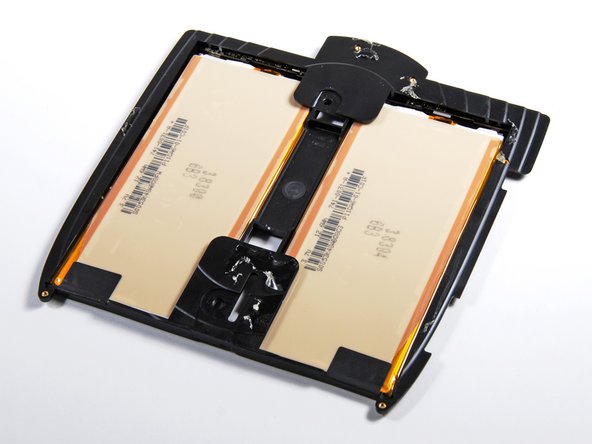

- That's one hefty battery—148g with its case!
- As suspected, this battery packs in two 3.75V lithium polymer cells running in parallel, delivering impressive battery life.
- Battery cell labels you might spot:
- P11GA6-01-C01F
- 741-00310A +
Step 21


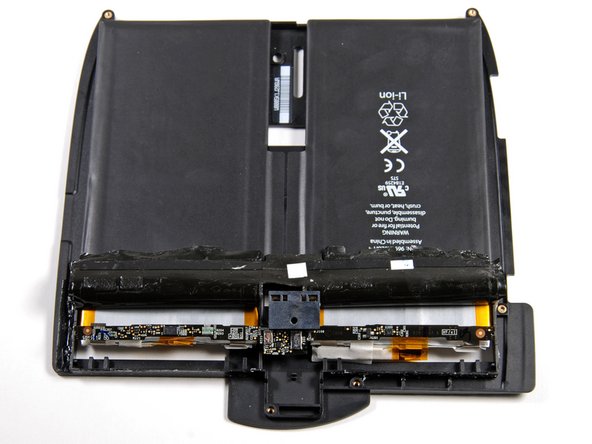
- The iPad's battery is like the big sibling of the iPhone 3G's battery, boasting about five times the power! Talk about a power boost!
- In the second shot, we see the battery cover pulled back, revealing the protective shield and connection circuits for each Li-Poly battery. It's like a peek behind the curtain!
- The third shot showcases the flip side of the battery board, proudly stamped with Compeq. It's always good to know who's behind the magic!
Step 22

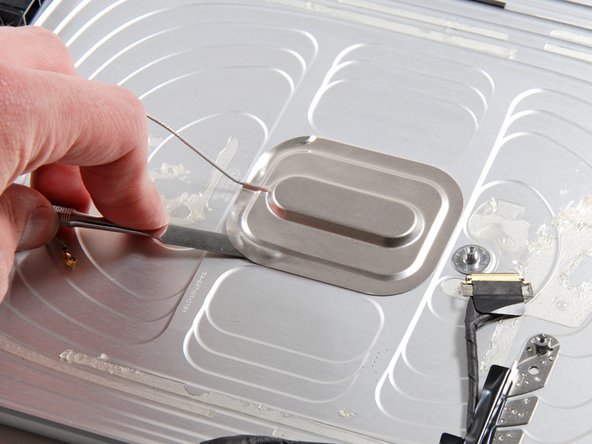

- Check out the sleek rear case! The antenna hiding just behind the apple logo is rocking the same vibe as the ones in the new iMacs.
- Grab your trusty metal spudger and give the antenna a gentle nudge to break it free from the rear case.
- Space is snug in the antenna compartment—there’s even a special pocket reserved for the antenna to chill in.
Tools Used
Step 23

- Check out this close-up of both WiFi antennas—they're packed in tight, so the wireless signal should be solid.
- Adding 3G to a Wi-Fi only iPad isn’t really a practical upgrade. The 3G models come with extra antennas and a special plastic strip on the back panel to boost reception, so it's not just a simple swap.
Step 24


Just like the iPhone, the iPad has a liquid sensor tucked away in its headphone jack. So, if your iPad takes an unexpected dip in water, don’t expect Apple to cover it under warranty.
- Unscrew a couple of screws and gently pull the headphone jack out from the back case.
- Like most portable gadgets, that headphone jack is pretty snug and secure in its spot.
- Right beside the headphone jack is the microphone, sharing the same data cable—so handle both with care!
Step 25


Every clip that secures the display assembly to the rear case is held in place by its very own T4 Torx screw. Let's tackle this step together!
- Got a bunch of tiny screws? No, it's just those T4 Torx screws securing each tab to the display assembly. Nothing a little precision can't handle!
- Good news—the home button is a digital switch with its own circuit board. So swapping it out is a breeze!
Step 26


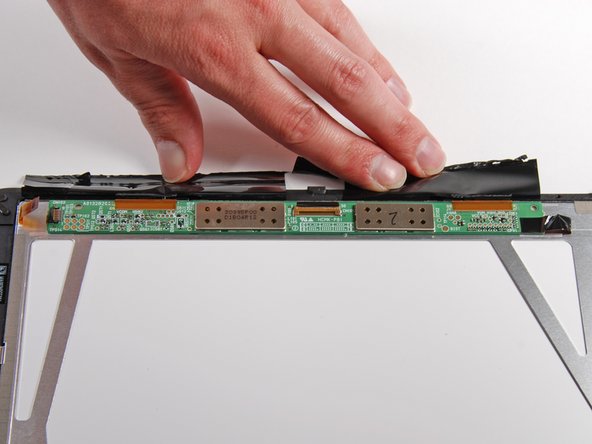
- Carefully break down the display assembly—think of it like opening a book to see what secrets are inside.
- Check out that slim ribbon cable! It’s the superstar connecting the LED driver board to the LED backlights, making sure everything lights up as it should.
- All the brains—LED driver circuits and the magic that connects the LCD to the display data cable—hang out together on one circuit board. One spot, all the action!
Step 27
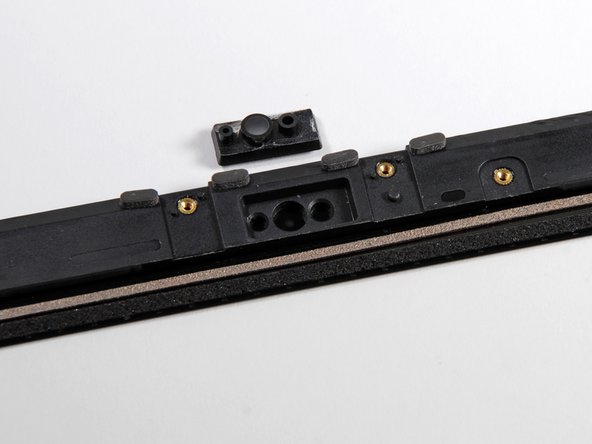

- The ambient light sensor is tucked away in a cozy spot that any camera would be happy to call home.
- We're pretty sure this nook was always meant for the ambient light sensor, and tales of a camera fitting here might've been a bit optimistic. The setup does give off some camera vibes—kind of like the viewports on the MacBook Pro 13" Unibody.
Step 28
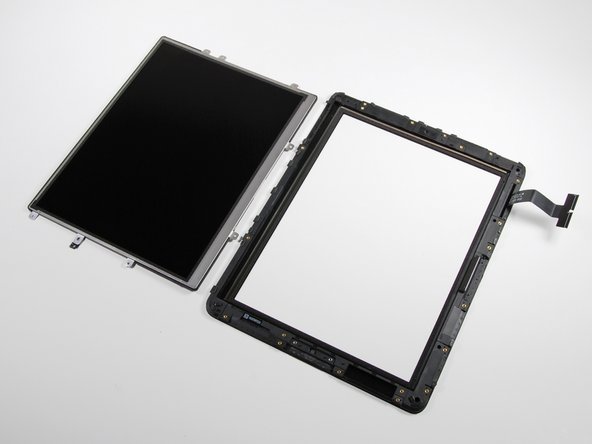


Because the iPad is larger, it needs sturdier glass—think about how much easier it is to bend a long ruler than a short one. The center of the screen gets more pressure, so a thicker glass keeps everything strong and happy.
- The display is snugly glued along the edges, but don’t worry—it can still be separated from the plastic frame with a little patience.
- Let’s talk weight: the display assembly tips the scales at...
- The front glass is impressively thick (about 1.18 mm), which makes sense given the iPad’s size. For comparison, the iPhone’s glass is around 1.02 mm.
- LCD panel weighs in at 153g.
- Front glass clocks in at 193g.
Step 29

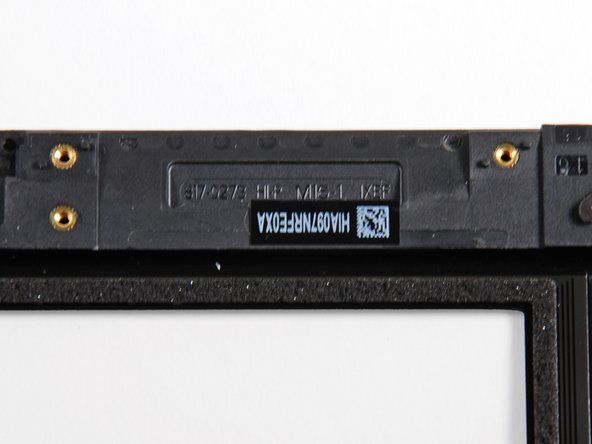
- Check out these front glass/digitizer part numbers for reference!
- The part number found on the display frame says:
- Take a peek at the digitizer cable for this number:
- HIA097NRFE0XA
- 821-0757-A
Step 30


- Carefully peel back the sticker to uncover more part numbers hiding out near the bottom edge of the LCD.
- Here’s what you’ll spot:
- We’re not exactly sure which company crafted this LCD. Got a clue? We’ve come across panels made by LG in other iPads.
- A01327200 EP001A
- 10 1 25 S NE M213
Step 31

- And here’s the grand finale: the full layout shot.
- Check out the weight breakdown: Aluminum back weighs in at 138 grams, Battery is 148 grams, LCD comes in at 153 grams, Glass (plus frame) totals 193 grams, Speaker is a light 17 grams, Main board clocks 21 grams, and all the other bits add up to 27 grams.
- All together, that’s 697 grams—slightly heavier than the 0.68 kg Apple lists. Has anyone else measured their complete iPad?
- Though this iPad is taken apart, we’re just getting started exploring its chips. If you hit a tough spot, remember you can always schedule a repair with us!


