Lenovo Yoga Tab 3 8 Kickstand Lock Replacement
Duration: 45 minutes
Steps: 5 Steps
Your Lenovo Yoga Tab 3 8 is throwing a tantrum with its kickstand lock, huh? No worries, we’ve got this. Before diving in, make sure to back up your important files—better safe than sorry, right? Power down your device to keep yourself safe and avoid any accidental hardware disasters. And hey, those tiny screws? They’re sneaky little things. Keep them organized as you go, and reassembly will be smooth sailing.
Step 1
– First, let’s get started by opening up the kickstand – just press that handy release button in the center and you’re good to go!
– Next, carefully remove the identification sticker with a pair of tweezers to expose the two 2mm screws hiding underneath. Easy peasy!
Tools Used
Step 2
The third 2mm screw on the right might be hiding under an S sticker. Just give it a little scrape, and you’ll be good to go!
– Grab your trusty PH00 screwdriver and unscrew those three 2mm screws lurking beneath the kickstand. You’ve got this!
Step 3
When you’re separating the back from the device, keep an eye on the power button – it might get loose and slip out, so be careful not to lose it!
There’s some sticky stuff hanging out under the SD card slot, so you’ll want to gently apply a little force to break that bond. You’ve got this!
– Begin by sliding a plastic opening tool into the gap along the edge opposite the hinge. This will help you pop out those pesky clips that are keeping the backing in place.
– Continue along the edge and up the sides, gently prying apart the clips with your trusty plastic tool.
Step 4
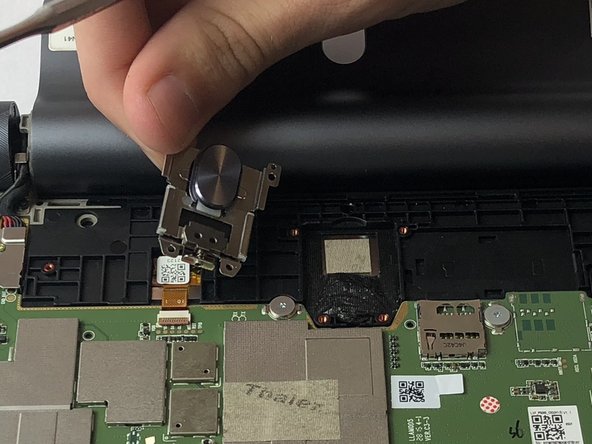
– Find those four little 2mm screws holding the lock in place and give them a twist with your trusty PH00 screwdriver. You’ve got this!
Step 5
– You made it! To put everything back together, just reverse the steps you followed to take it apart. If you need help or want to make sure everything is done correctly, you can always schedule a repair.
–


