
iPad Pro 10.5″ Logic Board Replacement
Duration: 45 minutes
Steps: 28 Steps
Step 1

The screen is glued down pretty well, so you'll need to give that adhesive a little heat therapy before you can separate the two. Grab an iOpener, hair dryer, or heat gun, and gently warm it up to soften the adhesive for a smooth separation.
- Grab your trusty iOpener and chill it right on the bottom edge of the iPad’s screen for about two minutes.
- Keep the heat coming as needed to make sure the adhesive stays soft and doesn’t get all stubborn and hard on you.
Tools Used

Step 2

Take it easy when pulling; too much force might shatter that glass! If you find yourself struggling, a little extra heat can help loosen things up.
If your iPad's screen is badly cracked, be sure to protect your skin and eyes. You can cover the screen with a smooth layer of clear packing tape to hold those glass shards in place and help the suction cup stick. Alternatively, grab a strong piece of tape (duct tape works wonders!) and fold it into a handle for extra grip.
For the best leverage, place the suction cup as close to the edge as you can without going past the edge of the display.
If you’re up for making things even easier, try using the Anti-Clamp, a handy tool we designed for smoother openings. You can find the guide for that here.
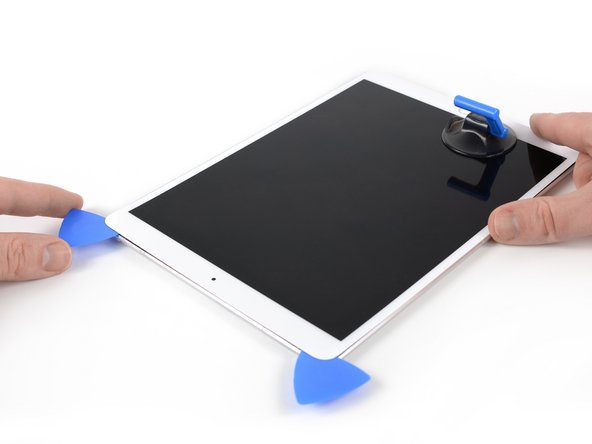
- Grab a suction cup and place it right next to the iPad's home button, then give it a gentle press to seal the deal.
- Now, give that suction cup a firm pull to open up a tiny gap between the front panel and the rear case.
- Once you've got a nice little opening, slide in an opening pick to keep that gap open and make your job easier.
Step 3


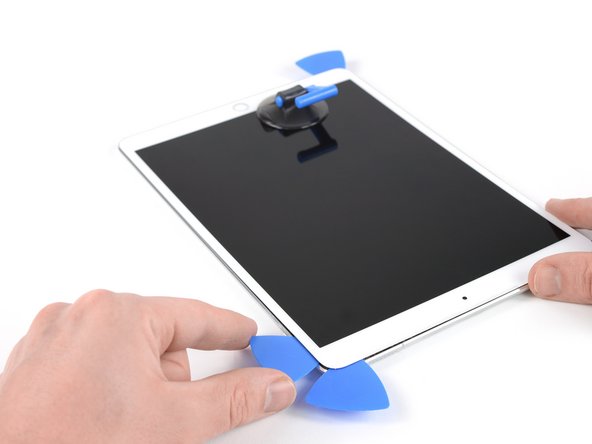
- Gently glide your pick along the edge of the display, slicing through that pesky adhesive as you head towards the bottom left corner.
- Once you’ve made some progress, leave the pick in place for a moment to keep that adhesive from sticking back together.
Step 4


- Warm up the left edge of your iPad for about two minutes, or until it feels just a bit too warm to touch comfortably.
- Now grab a second opening pick and gently slip it into the bottom left corner of the iPad.
- Carefully slide that pick along the left side of the screen to break apart the adhesive beneath it.
- Keep the pick near the top left corner to prevent the adhesive from sticking back together.
- Need a little extra heat? Pop your iOpener back in for a few seconds, just until it’s slightly too hot to touch. Be careful not to overdo it, or your iOpener might overheat.
Tools Used
Step 5

- Warm up the top edge of your iPad for about two minutes, or until it feels just a tad too hot to touch comfortably. Remember, we want it cozy, not scorching!
Step 6


Be careful! The front-facing camera sits right at the center of your iPad's top edge, and it’s a bit of a delicate flower. If you're using your pick, just gently slide the tip in when you're cutting near the camera—no need to go too deep!
- Slide a third opening pick into the top left corner of your iPad, just like a secret agent on a mission!
- Now, gently use that opening pick to slice through the adhesive at the top edge, gliding it over to the top right corner. You're doing great!
Step 7


- Warm up the right edge of your iPad for about two minutes, or until it feels just a little too warm to touch comfortably.
- Place a fourth opening pick at the top right corner of the iPad.
- Gently slide the opening pick down to the bottom right corner to slice through the adhesive.
- Continue sliding the pick around the bottom right corner—feel free to apply more heat if necessary—and cut through the remaining adhesive along the bottom edge, but make sure to stop before you hit the home button.
Step 8


Hold up! Don't pull the display all the way off just yet – it's still connected to the motherboard of your iPad.
- Slide a fifth opening pick into the top of the iPad, just shy of the front-facing camera.
- Gently twist that pick to start separating the display assembly from the iPad.
- If it's still being stubborn, feel free to add a little more heat or cut any leftover adhesive that's holding it back.
Step 9


Be careful not to tilt the display beyond 70°—going too far could cause damage to the delicate ribbon cables.
- Gently lift the display assembly from the top edge and carefully slide it upwards (toward the front-facing camera and headphone jack). This will reveal the screw that keeps the battery power connector securely in place at the bottom. Take it slow and steady—you're almost there!
Step 10


As you go through this repair, keep an eye on each screw and make sure it finds its way back home in the exact spot it came from. It’ll help keep everything in tip-top shape and save you from any unnecessary headaches!
- Unscrew the 1.9 mm Phillips screw holding down the battery power connector—time to set that power free!
Step 11


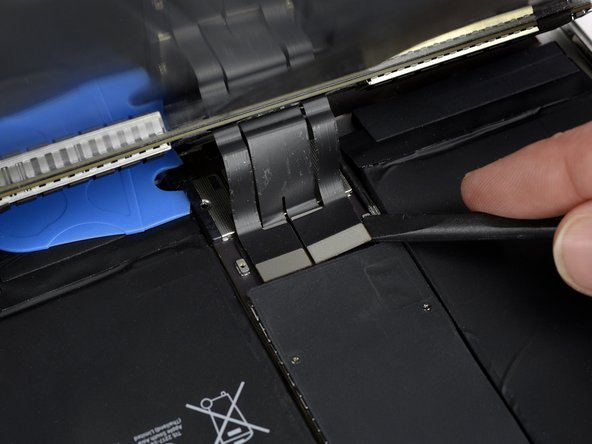
These images show the battery connector hiding under the logic board. Use them as a guide to carefully disconnect the battery.
Notice how the battery connector has cantilever springs that press against the battery contact pads on the logic board. Since both the board and battery are glued down, you'll need to gently slide something thin and flexible between the contact points to safely disconnect the battery.
Step 12

Take it easy while you're isolating the battery with a blocker! Those battery contacts can be a bit temperamental and may bend or break, leading to some serious headaches. You’ve got this, just be gentle!
Avoid shoving the battery blocker under the connector with brute force. If it’s being stubborn, try sliding a playing card under the logic board to gently disconnect the battery instead.
The battery blocker or playing card should glide under the logic board smoothly, without any resistance.
- To disconnect the battery, carefully slide the prong of your battery blocker or the tip of an opening pick under the battery's power connector. This ensures the power circuit is safely interrupted.
- Keep the battery blocker in place while you continue working to avoid any surprises.
Tools Used

Step 13


You might want to tilt the driver just a tad to keep those ribbon cables safe and sound!
- Gently lift the display from the top edge, taking care not to put too much pressure on those delicate ribbon cables.
- Unscrew the two 1.3 mm Phillips screws that are holding down the display connector cover bracket.
- Carefully take off the display connector cover bracket.
Step 14


To reconnect those connectors, align them with care and gently press down on one side until you hear that satisfying click. Then, do the same on the other side. Just a friendly reminder: avoid pressing in the middle! If things get misaligned, those tiny pins could bend and lead to some serious trouble. Let's keep it smooth and easy!
- Grab your spudger and carefully lift the two visible display flex connectors straight up from their sockets to disconnect them without any drama.
Tools Used

Step 15

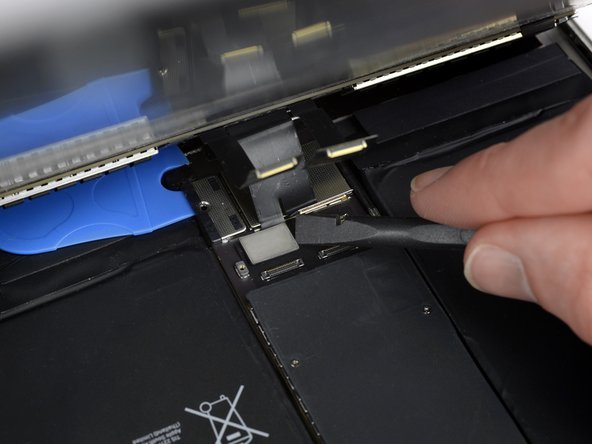

Right below, you'll spot a couple more display cable connectors hanging out.
- Grab your spudger and gently work it under the components to pop them up and disconnect with ease.
Tools Used
Step 16

- Take off the display assembly. It’s time to get that screen out of there!
- Before putting everything back together, make sure to clean off any leftover adhesive from your iPad. Grab some high-concentration isopropyl alcohol (90% or higher) and a lint-free cloth, and give those sticky spots a good clean. This helps the new adhesive stick like it should.
- If you’re planning to reuse the same display, don’t forget to clean off any old adhesive from the back and wipe down the areas where it was stuck using isopropyl alcohol.
- Test out your iPad’s functions to make sure everything is working properly. After that, apply pre-cut adhesive strips to the back of the display following our display adhesive guide before sealing everything back up.
Tools Used

Step 17

- Let's get these screws out of the way! You'll need to remove 10 Phillips #000 screws:
- Eight of them are 1.3 mm – small but mighty.
- And two are a bit bigger at 2.3 mm.
Step 18


- Take off the logic board shield to get access underneath.
Step 19
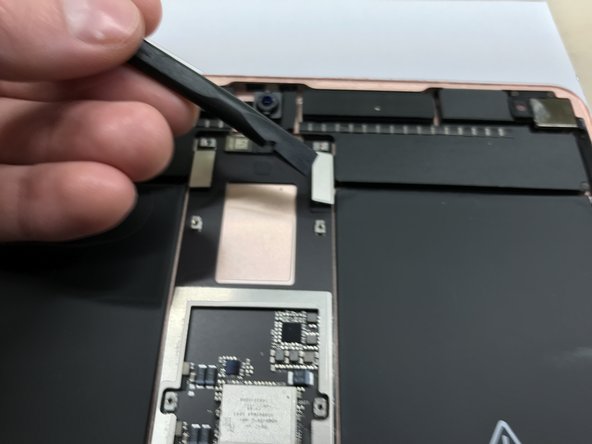

- Gently unplug the front panel connectors for the top left and right sensor arrays (FPC).
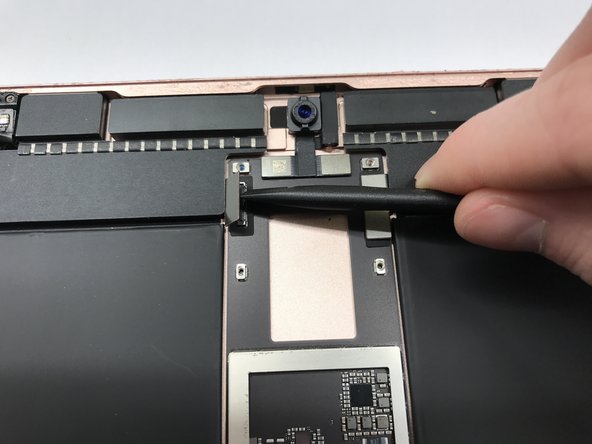
Step 20
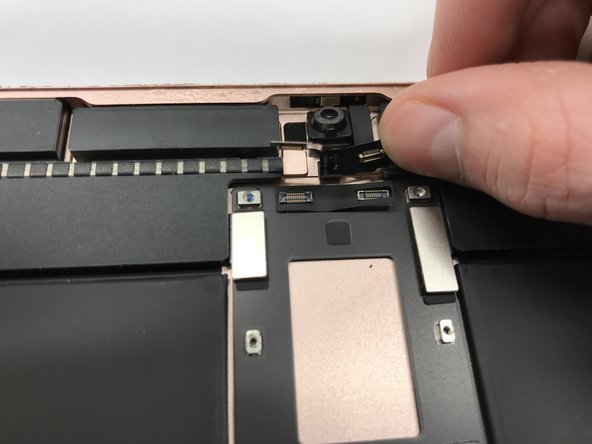

- Gently unplug the front camera FPCs. Take it slow, we don’t want any damage!
Step 21

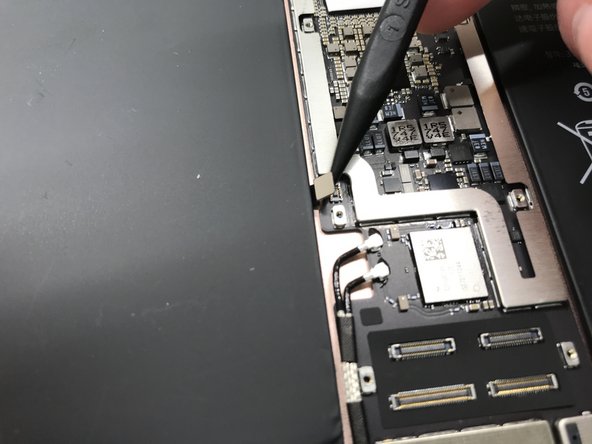
- Unplug that keyboard adapter FPC like a pro!
Step 22


Make sure to grab the cable by the metal shield on the connector and pull it straight up—no wiggling or twisting, we’re keeping it chill!
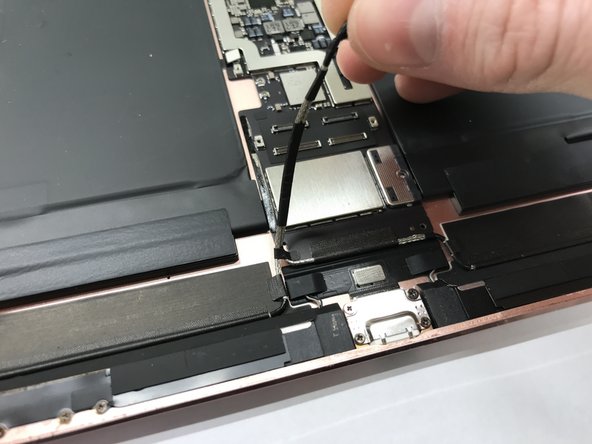
- Gently grab the antenna connectors with your tweezers and give them a careful wiggle to disconnect—smooth and steady wins the race!
Tools Used

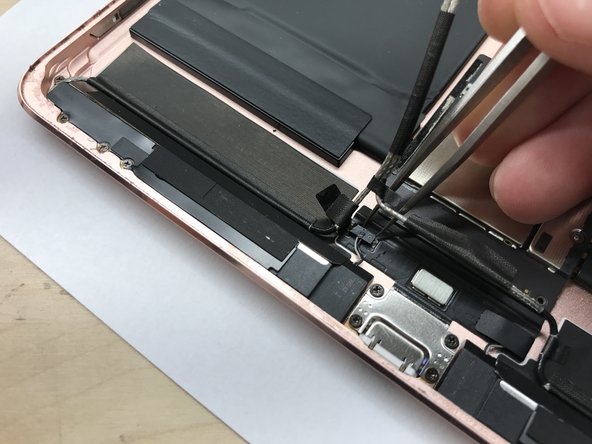
Step 23

- Carefully lift the antenna coax cable up to unplug it from the logic board without causing any trouble.
Step 24

- Gently peel back the tape that's keeping the speaker FPC snug, and carefully disconnect it. You've got this!
Step 25

- Now, do the same for the other speaker FPC – just rinse and repeat! Almost there, keep it up!
Step 26

- Let's get those screws out of the way! Start by removing the following Phillips #000 screws:
- Two little 2.4 mm screws
- And two more that are 1.7 mm long
Step 27

If you want, you can grab some adhesive remover like acetone to gently loosen the sticky stuff. Just be careful not to let too much sneak under the battery, or it might mess with the battery adhesive holding things together.
- Warm up the back of the iPad to help loosen the adhesive that's keeping the logic board snugly attached to the housing.
Step 28


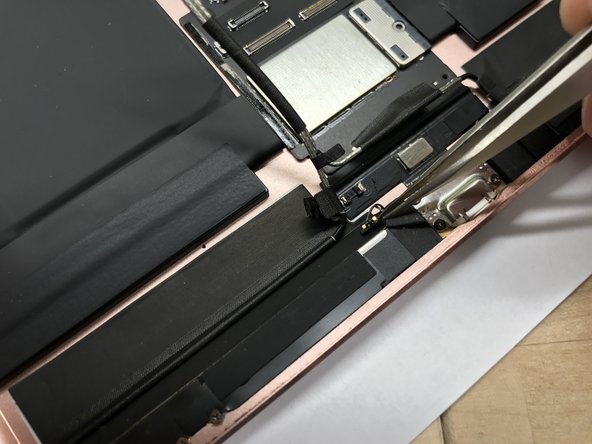
- Gently work your way around the top of the logic board to break the adhesive seal. No need to rush, just take it easy.
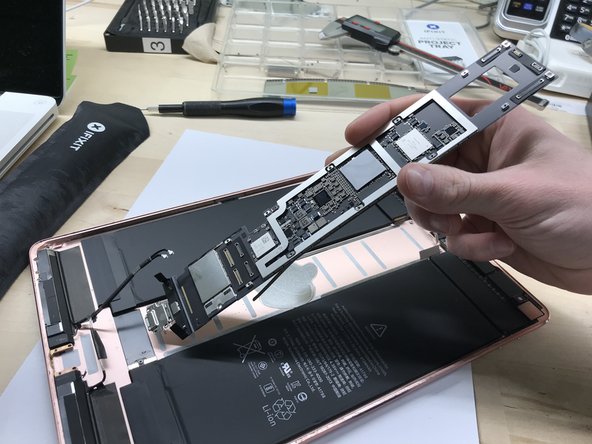
- As you lift the board, make sure all the connectors clear the logic board—think of it like making sure everyone gets off the bus safely.
- Carefully pull the logic board with the lightning connector away from the main housing. A little wiggle, and it should come free!