
iPad 9 (2021) Screen and Touch Glass (WiFi & Cellular) Replacement
Duration: 45 minutes
Steps: 21 Steps
Here’s the deal: fixing your tablet at your kitchen table is totally doable, but keep in mind—it’s no walk in the park. This gadget can be a bit tricky to repair, and a little extra care goes a long way. Before diving in, make sure you know the safety rules and have the right tools on hand. Trust us, taking these steps will help you avoid making costly mistakes. Best of luck!
Step 1


- Sometimes, success comes down to having the right idea. In this case, your screen is totally shot.
- If both the digitizer and matrix are beyond repair, don't stress! Just remove the broken parts and swap them out. But before diving in, it’s a good idea to double-check that your iPad is still working, despite the screen's condition. You can easily do this by connecting it to your computer. If it pops up, you're good to go!
- However, if your computer doesn't recognize your iPad, it means the damage is probably a bit more severe. If that's the case, it might be time to schedule a repair and let the pros take over.
Step 2


Also handy to have: some cosmetic sticks, about 100ml of isopropanol, a pair of tweezers, a PH00 star screwdriver, a thin plastic tool for gently disconnecting battery pins, and a soft guitar pick to keep things smooth and scratch-free.
- Model 9 has its LCD display and digitizer as two separate parts, so keep that in mind when you’re replacing them.
- When you're picking out a replacement digitizer, double-check that it has adhesive already attached. If not, don’t forget to grab an extra sheet of adhesive.
- Since the glass can break into tiny shards, it’s a good idea to wear safety glasses. After all, you’ve only got one set of eyes, so protect them! And if you’re feeling extra cautious, consider throwing on some protective gloves too.
- A small plastic blade will be super useful here. The plastic piece I mentioned earlier should be thin yet sturdy. If you’re in a pinch, a well-cut piece of paper from a notebook (non-conductive, of course) will work too!
Step 3

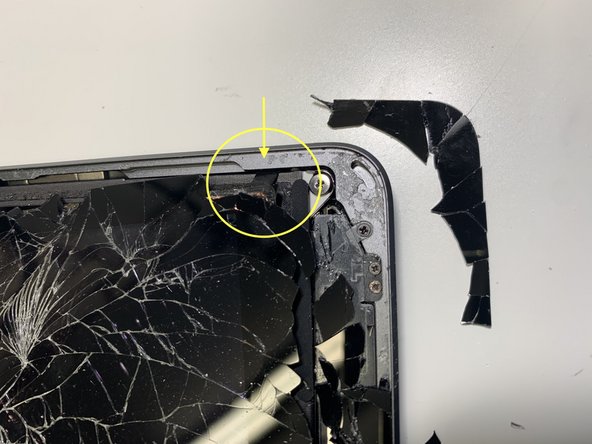
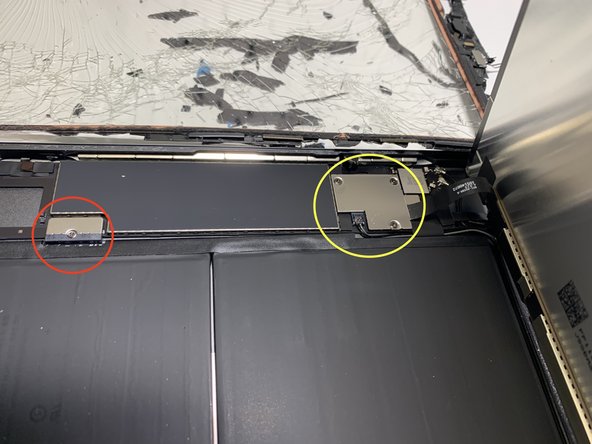
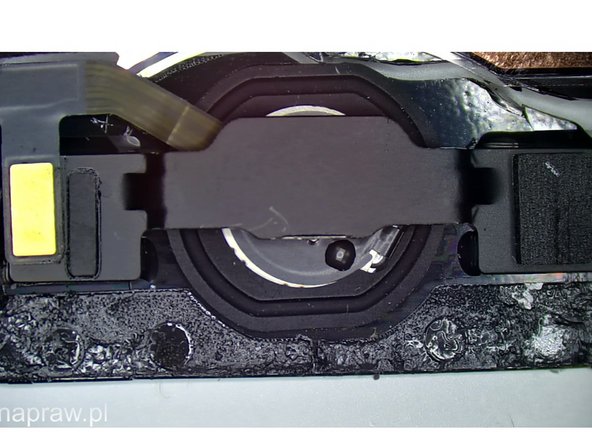
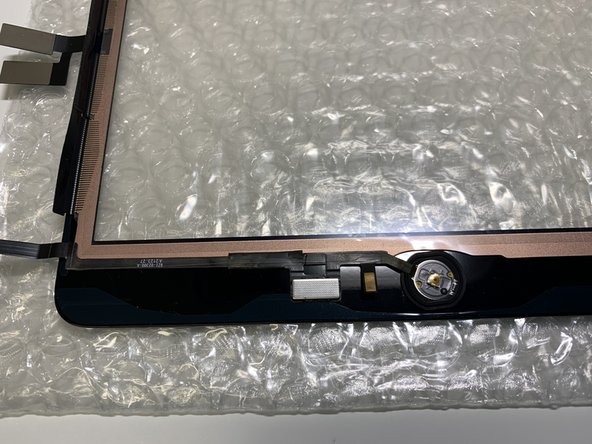
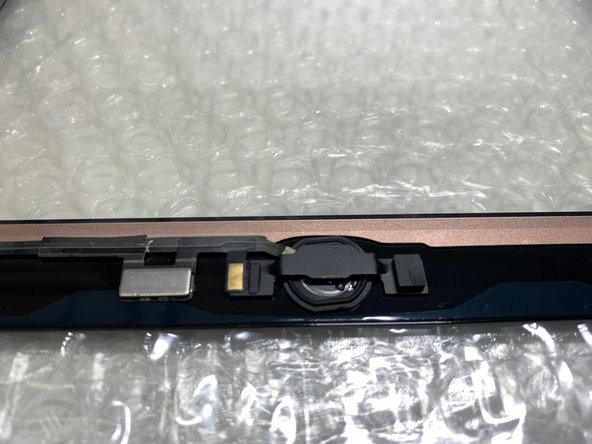
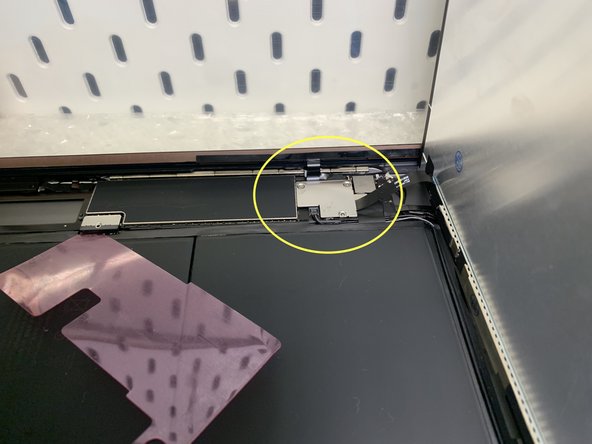
In the spot highlighted by the red rectangle, you'll find a tape connecting the Home button and Touch ID function (it's attached to the glass). Be careful with it – this little gem is one of a kind!
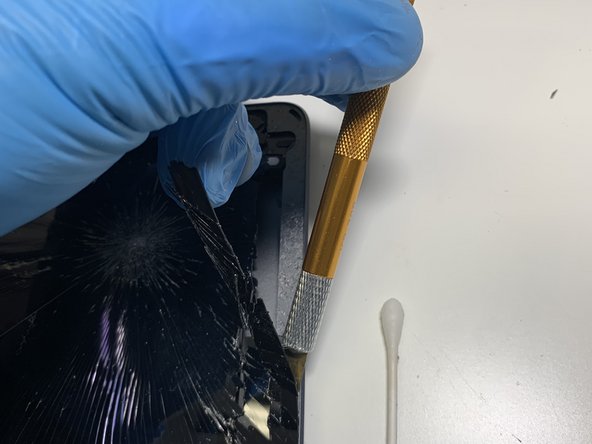
- Let’s kick things off at the spot marked with a cheerful yellow circle! Just follow the purple arrows on either side, but remember to hit the brakes before you reach the bottom edge!
- A little drop of isopropanol along with a spatula or a slim, flat screwdriver will be your trusty sidekick as you navigate every few inches.
- The yellow circle highlights the Touch.ID tape that runs from the digitizer beneath the display. Be gentle with this bend—it's a bit on the sensitive side!
Step 4


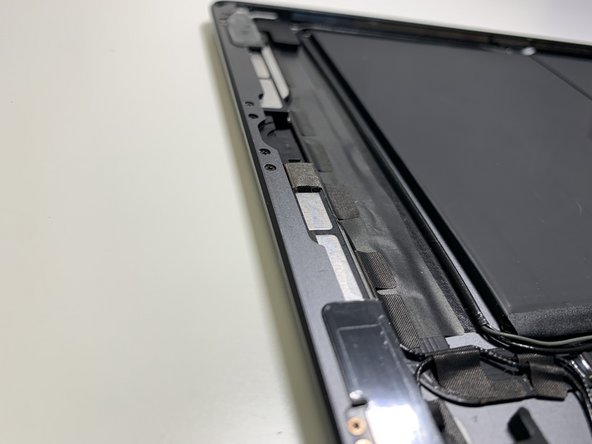
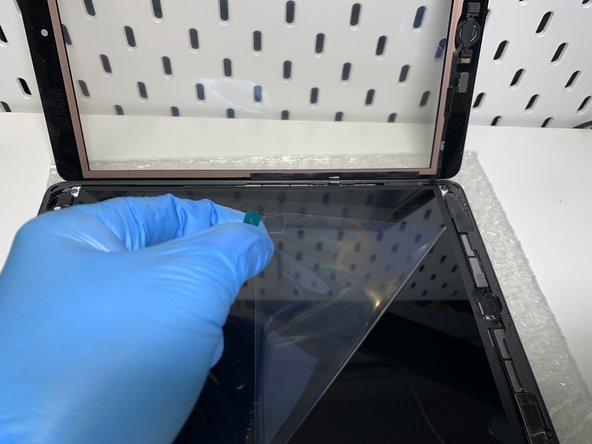
Hey there! If your display is still shining bright and you’re not swapping it out, let’s keep that screen pristine! Avoid touching the display surface (the black part) because those pesky fingerprints are tough to wipe away. Pro tip: slip on some nitrile gloves (just like I do) to keep everything smudge-free and fabulous!
- Hold your horses on peeling that button tape off the digitizer just yet! There’s a nifty shortcut that’ll give you plenty of room to work your magic.
- So, what’s this shortcut? It’s all about disconnecting the whole assembly! Start by disconnecting the battery voltage, then gently take out the matrix and digitizer along with that Touch.ID button tape.
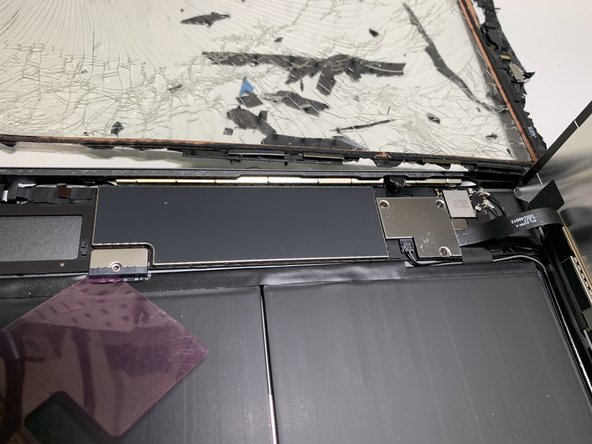
- Check out the red circles marking the screws that are holding the matrix in place.
Step 5

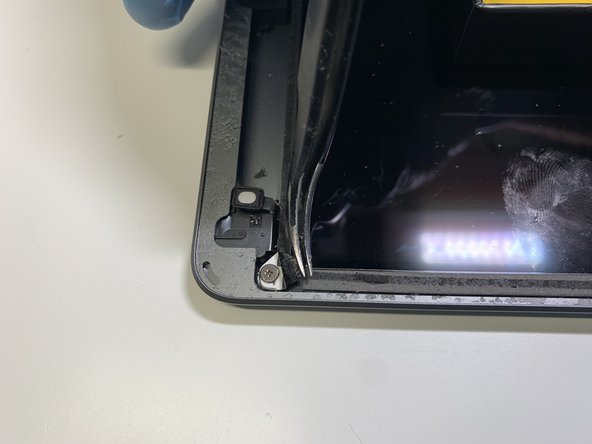
- The northern screws are hiding under some isolator tape. Carefully peel it back without ripping—keep that tape safe! The southern screws might be covered with some black glue, but no stress there. Just unscrew them as usual; the glue will flex a bit.
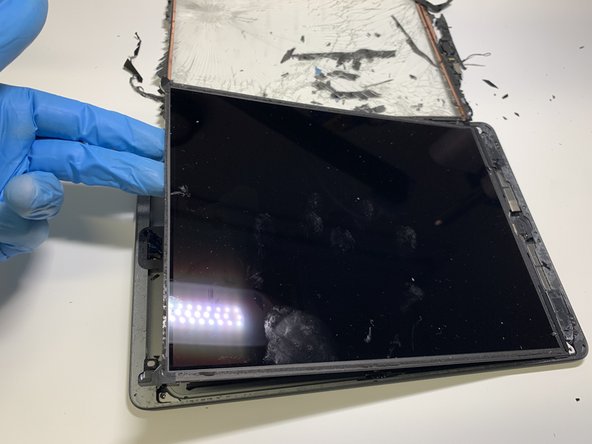
- Once the matrix (held by 4 screws) is loose, gently lift it up from the northern edge. Keep an eye on those signal tapes connected to the motherboard so nothing gets tugged or torn.
Step 6

Heads up! If the separating layer is too thick, it can cause mechanical damage to the pins and side current contacts. This is actually the top reason tablets end up here, usually from repairs done by folks who might not have the right experience.
- So, your matrix is broken? No worries, it happens! If yours is still in one piece and you're not planning to swap it out, just avoid touching that display surface (you know, the black part). Fingerprints are tough to get rid of!
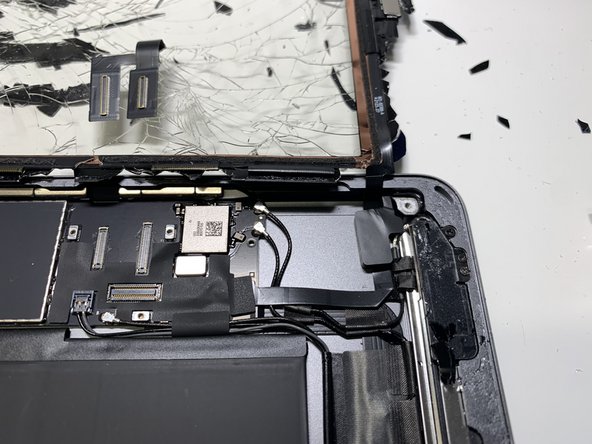
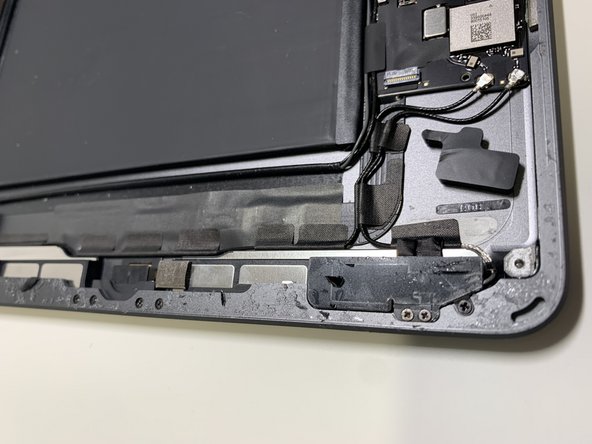
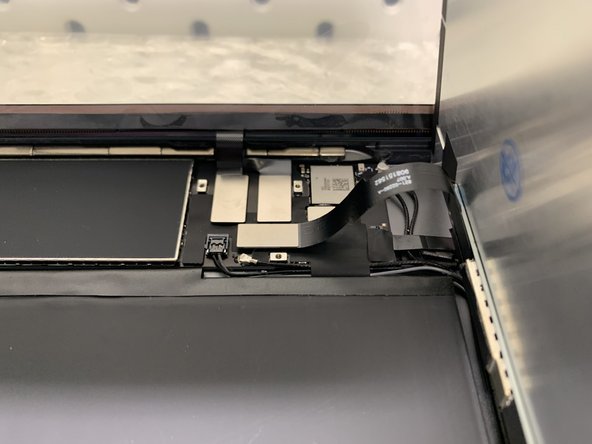
- As you gently lift the matrix, you'll spot the motherboard and the connected battery underneath. The red circle? That's a power supply point that you should disconnect first. And the yellow circle? That's where the digitizer and screen connect to the motherboard.
- For the safest way to remove power from the motherboard, go for the power connector. Just slide a thin, non-conductive layer between the power pins—especially the negative ones—to keep things safe and sound.
Step 7


Heads up! Avoid touching the display surface (the black part) to keep those pesky fingerprints away—they’re a real pain to clean off.
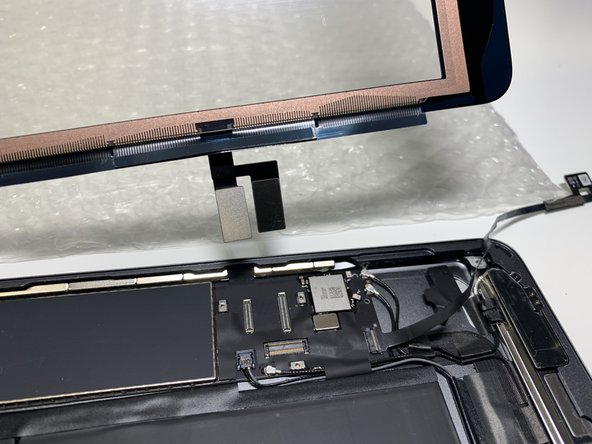
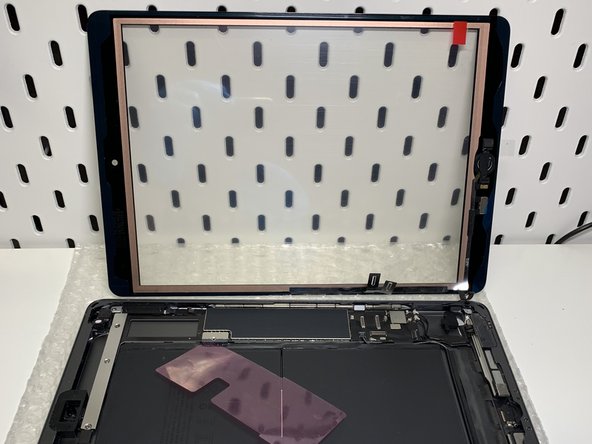
- Once you’ve unscrewed the cover, you'll find three connectors waiting for you: two parallel ones (that’s the digitizer) and one perpendicular (yep, that’s the matrix). Gently unclip them, and you can remove the matrix. If it’s damaged, like in my case, it’s time to say goodbye. But if it’s still good and you’re not swapping it out, just stash it somewhere safe.
- You’ll also see a couple more wires and a flat strip still connected. Unless you’re going all in and removing the motherboard (which I don’t think is necessary here), no need to stress about these. The only one you’ll need to keep an eye on is the flat tape – that’s for the Home button and Touch.ID functionality.
Step 8


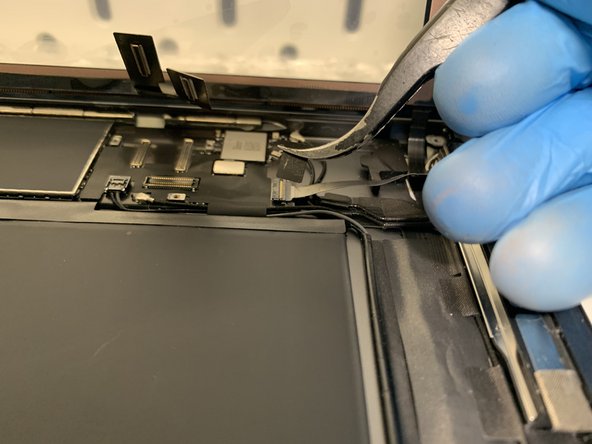
- This connector is a bit unique compared to the others you've seen so far. Gently peel back the protective tape, then carefully flip up the lock bar on the opposite side of the tape.
- Next, remove the tape from the now-unlocked port, peel it away from the case, and set it aside safely.
Step 9


Beware of sneaky glass particles! They love to hang out on the button elements and can cause scratches and cracks on your shiny new digitizer glass over time. So, let's give that tablet a thorough clean-up, making sure to banish any glass bits and dirt from all surfaces, especially those pesky edges!
- Great news! You've successfully disconnected the digitizer from your tablet. If your digitizer is still in one piece, you can breeze right past steps 10 and 11. But if it's shattered like mine, pay close attention!
- The entire home button strip is a clever little assembly of connected sections, some with a sprinkle of electronics, a clicking button, and a crucial bracket that keeps everything running smoothly.
- This whole setup features three key players: a tape with a button, a metal bracket, and a button-sized round washer (which, in my case, was stuck to the button's body). Be sure that washer doesn't get left behind on the glass. Give the entire assembly a thorough clean-up to get rid of any pesky glass shards and dirt!
Step 10


Tiny glass shards hanging out on the button parts can sneakily scratch and crack your new digitizer glass down the line. Take a moment to give everything—edges included—a good clean to kick out all those glass bits and grime.
- Take your time and tread carefully at this point. Make sure to clear away any tiny shards of glass from the sticky surfaces, or gently eliminate any leftover adhesive using a cotton swab and some isopropanol. You've got this!
Step 11

- Tiny shards of broken glass hanging out on the contact surface of the housing? When you press the new digitizer glass and button tape down, those little troublemakers can scratch or even crack the fresh glass. So, take a moment to make sure everything is sparkling clean and totally particle-free.
- And hey, don't forget to tidy up your workspace! Stray glass bits left on the table can leave some seriously ugly scratches on the case. Clean space, happy repair.
Step 12


Make sure to peel off that battery protection layer tucked between the motherboard pins and the battery. Then, tighten the screw in the port so everything stays snug and connected.
- Alright, this step might not be the most fun, but it’s super important. These days, many of us grab non-original spare parts—usually because they’re cheaper or the real deal is hard to find. Heads up though: especially those from China can sometimes be incomplete or just not work right.
- Plug in the brand new parts to your tablet and give them a test run. If you keep those protective films on, returning faulty parts and getting a replacement or refund is way easier. Once you peel off that film, sellers might try to blame you for any issues, so don’t remove it until you’re sure everything works.
- Make sure to check all the new components thoroughly, especially the touch layer. If you spot any “dead lines,” unplug the digitizer and send it back to your seller. Oh, and before you do any of this, remember to take out the screw securing the battery port and protect the motherboard and battery pins.
Step 13


Avoid pressing down on that adhesive tape! The connection paths for the digitizer in this area are super tiny—less than 1mm! It's a delicate spot, and a little too much pressure could lead to some pesky dead lines on your touch surface (it was working just fine in the last test, right? 😊)
- Lay the digitizer flat on a clean surface right in front of you. Heads up: the inner touch side has a clear protective film too. Carefully flex the area around the connection tapes—don’t let the tape stick to the foil, make sure it sticks to the correct part of the screen.
- Peel off the tape that’s covering the adhesive on the inside of the tapes. This adhesive side is what will bond to the digitizer glass.
- Gently press the tape down onto the digitizer surface. The glue isn’t super strong, but it’s enough to hold things in place for now. Then, cover the taped area with the digitizer’s protective film you removed earlier. This little trick keeps the tape from peeling off.
Step 14


In this case, the button tape slightly overlaps the digitizer by about 0.5mm, and that’s totally fine!
- Place the button where it belongs, and give that glass a good once-over to ensure all dirt and debris from the old digitizer is gone!
- Guide the cable along the digitizer's edge to the left, keeping it parallel to the screen's bottom edge. Whether or not the tape overlaps the digitizer layer (that's the one with those tiny copper wires) depends on how the replacement shield is designed. In the original models, there's a sweet little 0.5mm gap to work with.
- Position the home button bracket just right and secure it in place. For the originals, a thin layer of hot glue gives it that extra hold.
Step 15


- Attach the metal Home button bracket so that the round part lines up perfectly with the button’s micro-switch — this is key for the whole button to click just right.
- Press the rest of the button tape onto the glass. If your screen adhesive is already stuck inside the glass like mine, be careful not to stick the button to the protective film covering the adhesive. Gently lift that protective film and tuck the button elements underneath before sealing it back down.
Step 16

Double-check to ensure you haven't misplaced the battery pin spacer—it’s the little hero that keeps the power away from the motherboard!
- You're almost there! :) Time to get a little crafty—apply some glue to the edge of the screen or the housing, depending on your setup. If you snagged a screen with glue already attached (like I did), you're ready to move on to the next step!
- Having a support for the screen is super handy! Position the screen so it's standing tall and straight against the housing, then connect that Home button ribbon with care.
Step 17

Just a friendly reminder to double-check that the plastic piece keeping the battery pins and motherboard apart is in its proper place. If it's not, you might end up giving your tablet a little shock— and not the good kind!
- Let's get those connections sorted! First, connect the digitizer with both plugs. Make sure those connection ribbons are bending inwards—like a warm hug for your tablet! As you close it up, ensure the tapes tuck neatly under the housing edge.
- Now, place the matrix straight up against the housing and plug that connector right into the port. Feel free to secure it with a connector bracket. Don't forget to remove the plastic cover from the battery port and tighten that screw back in place. Now it's time for a little test run!
Step 18


- Carefully place everything back where it belongs, but remember to keep that protective foil intact over the glue and screen surface. Give the screen, touch, and buttons a quick test drive. If all systems are go, you’re ready to roll on to the next step!
Step 19
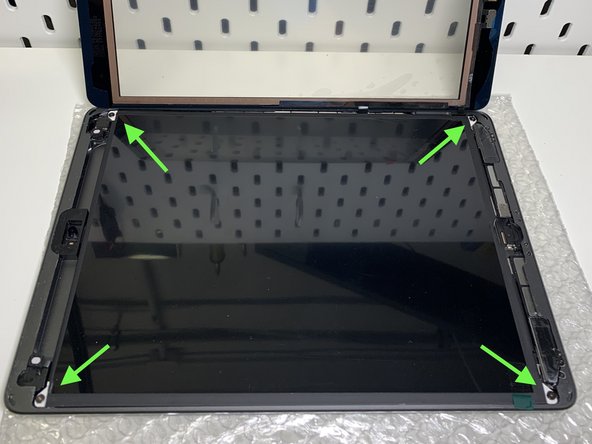

- Place the matrix carefully in the correct spot and tighten the securing screws (look for the green arrow). If the holes are clear, you can gently poke through the membranes with a thin screwdriver or similar tool.
Step 20
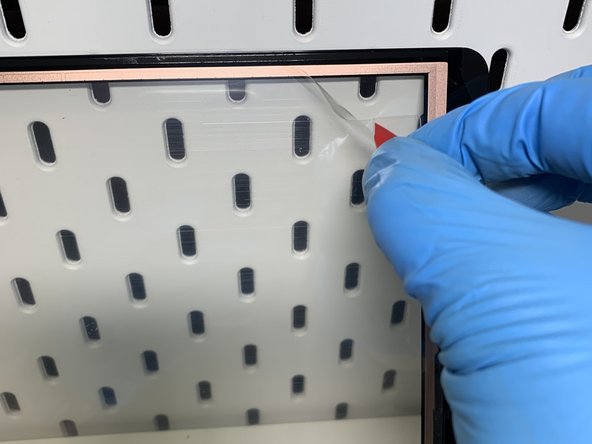

Heads up: keep your fingers off the surface covered by the protective film! Any fingerprints or smudges will be a real pain to clean off later.
- Peel off that protective film covering the screen adhesive like a pro!
- Take off the protective film from the digitizer—it's like unwrapping a present!
- Don't forget to remove the protective film from the matrix (you've got this, trust me!)
Step 21


- Alright, it wasn’t a walk in the park, but you just kept a good chunk of cash in your pocket. Most repair shops charge between $150 and $200 for replacing a screen and digitizer.
- I grabbed the matrix for $42 and the digitizer for $12. Total damage: $54. So, by putting in some elbow grease, I saved around $150. Feeling good about what you did? Absolutely priceless.