iPad 7 Left Speaker Replacement
Duration: 45 minutes
Steps: 59 Steps
Ready to swap out that left speaker in your iPad 7? Let’s dive in! Just a heads-up, this guide is for the LTE version, so if you’re rocking the Wi-Fi model, you’ll want to check out the other guide. When isolating the battery, make sure you’re extra careful with the battery blocker—those contacts are delicate, and you don’t want any accidental damage! If you’re feeling brave and skipping the battery isolation step, try to avoid metal tools unless absolutely necessary (like when you’re unscrewing) to keep things safe. Keep in mind, some of these steps come from a previous model, so there are small differences, but don’t worry—everything should work smoothly. If you run into any issues, don’t hesitate to schedule a repair.
Step 1

- Warm up your iOpener and gently press it to the left edge of your device for about two minutes. Take your time and let the heat do its magic.
Tools Used

Step 2


- While the adhesive is softening, keep an eye out for these tricky spots that don’t like to be messed with:
- Front camera
- Antennas
- Display cables
Step 3


The next three steps show you how to use the Anti-Clamp, a handy tool we created to make opening your device a breeze. If you’re not using the Anti-Clamp, just skip ahead three steps for a different approach.
For full details on using the Anti-Clamp, check out this guide.
If your iPad’s surface feels too slick for the Anti-Clamp to grip, try adding some tape to give it a bit more traction.
- Slide the blue handle backward to release the Anti-Clamp's arms.
- Prop your iPad up with something underneath so it sits nice and level between the suction cups.
- Set the suction cups close to the center of the left edge—one near the top and one near the bottom.
- Keep the bottom of the Anti-Clamp steady while pressing down firmly on the top suction cup to get a good grip.
Step 4


- Slide the blue handle forward to lock those arms in place.
- Give the handle a full 360-degree twist clockwise, or keep turning until the suction cups start to stretch.
- Keep an eye on the suction cups—they should stay perfectly lined up. If they start to slip out of sync, just loosen them a bit and realign the arms.
Step 5


Turn only half a twist at a time, then chill for a minute. Let the Anti-Clamp and time do their thing—slow and steady wins this race!
For all the details on how to wield a hair dryer like a pro, take a peek at this guide.
If the Anti-Clamp isn't opening up quite enough, just throw a little extra heat at that spot and give the handle a half turn to the right.
- Take a breather for a minute to let the adhesive loosen up and create a little opening for you.
- If your screen isn’t warming up nicely, feel free to grab a hair dryer and give the left edge of the iPad a gentle warm-up.
- Slide an opening pick under the digitizer once the Anti-Clamp has made enough space for you to work with.
- Feel free to skip the next step.
Step 6


If your screen is looking like a mosaic of cracks, don’t worry! A layer of clear packing tape can help the suction cup stick on. If you’re feeling adventurous, you can also try using some heavy-duty tape instead of the suction cup. And if you really find yourself in a bind, just a dab of superglue can secure that suction cup to the shattered screen. You've got this!
- Once the screen feels comfortably warm, grab a suction handle and stick it to the left edge, as close to the edge as you can get.
- Gently lift the screen with the suction handle, just enough to create a small gap between the digitizer and the frame.
- Slide an opening pick into that tiny gap between the digitizer and the frame, and carefully wiggle it in.
Tools Used


Step 7


It's all good if you can spot the opening pick peeking through the digitizer — just gently remove it. The LCD screen should be fine, but keep in mind you might leave some sticky residue that's a bit of a hassle to clean up.
- Grab a second opening pick and slide it into the gap you just made.
- Gently glide the pick towards the bottom-left corner of your device to break free the adhesive.
- Keep that pick in the corner to stop the adhesive from getting all clingy again.
Step 8


- If your opening pick gets a bit stuck in the adhesive, just give it a little 'roll' along the side of the iPad to keep on separating that sticky stuff. You've got this!
Step 9


- Gently slide the first opening pick up towards the top-left corner of your device to break that stubborn adhesive seal.
- Keep the pick in that top-left corner to stop the adhesive from getting cozy again.
Step 10

- Heat up your iOpener and place it on the top edge of your device for two minutes. Give it a little time to work its magic!
Tools Used
Step 11


- Twist that pick around the top-left corner of your device to break that stubborn adhesive free!
Step 12


Keep the pick away from the front camera lens to avoid any accidental damage. We'll guide you through the steps to keep that lens safe and sound.
- Gently slide the opening pick along the top edge of the device, stopping just before you reach the front camera.
Step 13


- Gently pull the pick out so that just the tip stays tucked between the digitizer and the frame.
- Carefully slide the pick over the front camera to loosen up that sticky adhesive.
- Keep the pick resting near the right side of the front camera before moving on to the next step.
Step 14


- Slide the pick back in and gently glide it towards the top-right corner to fully loosen that stubborn top adhesive.
- Keep the pick wedged in the top-right corner to stop the adhesive from snapping back together.
Step 15

- Warm up your iOpener and gently press it against the right edge of your device for a solid two minutes. You've got this!
Tools Used
Step 16


- Twist that pick around the upper-right corner of your device to break free from the adhesive's grip.
Step 17


The display cables are hanging out around the halfway mark from the bottom of the iPad. When you slide down, pause your journey about three inches from the bottom—don’t go too far, or you might get tangled up!
- Grab a fresh opening pick and slide it gently to the center of the iPad’s right edge.
Step 18

- Warm up an iOpener and stick it on the bottom edge of your device for a cozy two minutes.
Tools Used
Step 19


Hey there! Just a quick heads up—when you're working around the corner, avoid spinning the pick all the way around. You wouldn't want to accidentally give the antenna a little too much love and end up damaging it!
- Gently slide the bottom-left pick over to the bottom-left corner to break free the adhesive. You've got this!
- Keep that pick in the bottom-left corner before you move on to the next step. You're doing great!
Step 20


Remember, slide the pick toward the home button only, not away from it – the antenna could get a little too much love if you're not careful!
If you need to give this section another go with the pick, just pop it out and reinsert it at the bottom-left corner. No sweat!
- Slide a fresh opening pick into the gap you just made along the bottom edge of your iPad.
- Gently glide that pick over the antenna, stopping just short of the home button.
- Leave the pick resting to the left of the home button before moving on to the next step.
Step 21


Gently slide the pick up to just 1 mm to avoid causing any harm to the right antenna. It’s a small step, but a mighty one!
- Pop an opening pick into the little gap you just made.
- Gently slide the pick under the home button and towards the bottom-right corner, keeping only the tip nestled between the digitizer and the frame.
Step 22


Slide the pick gently towards the home button, and remember not to go the other way! You wouldn't want to accidentally give the antenna a little surprise.
If the pick needs to slide through this section again, just pop it out and slide it back in from the bottom-right corner. Easy peasy!
- Place the pick back in and gently slide it towards the home button to fully detach that bottom adhesive.
- Keep the pick near the right side of the home button as you move on to the next step.
Step 23

- Warm up an iOpener and stick it on the right edge of your device for a solid two minutes to get things nice and toasty.
Tools Used
Step 24


Take it slow and steady here! Make sure the adhesive is nicely warmed up and pliable, and carefully work your pick around to separate all the adhesive. Don’t hesitate to pause and reheat if needed.
If you're feeling a bit of a tug-of-war with those edges, give them a little heat and glide your opening pick along. You've got this!
- Gently twist the two opening picks at the left corners of the iPad to lift the digitizer just a bit, while also peeling away the last bit of adhesive. Easy does it!
Step 25


- Gently lift the left edge of the digitizer to help loosen the adhesive along the right edge of your iPad. You're doing great!
Step 26


- While holding the digitizer steady, gently slide an opening pick between the display cables to free up the last bit of adhesive. You've got this!
Step 27


- Once you've successfully peeled off all the adhesive, carefully open the digitizer like a book and lay it flat next to the iPad, making sure it's nice and parallel.
- When it's time to put everything back together, give the frame and digitizer (if you're reusing it) a good clean with isopropyl alcohol to get rid of any leftover adhesive. Then, slap on some fresh adhesive strips or pre-cut adhesive cards.
- While reassembling, keep an eye on those display cables. Be sure they’re neatly tucked underneath the LCD screen to avoid any damage.
Step 28


- Grab your Phillips screwdriver and get ready to unscrew the four 4.3 mm screws holding the LCD in place. Don't rush—precision is key!
- Keep track of each screw as you go, and make sure it ends up right where it came from. Trust us, your device will thank you!
- If there's any tape blocking your view of the LCD screws, remove it. It’s just in the way, and we want that LCD free and clear!
Step 29


Hold off on yanking the LCD all the way out just yet—it’s still hanging on by a few cables near the home button side.
Gently lift the LCD starting from the front-facing camera end only.
- Gently wedge the flat end of a spudger under the LCD just enough to lift it out of its slot so you can grab it with your fingers.
- Flip the iPad LCD over like turning a page in a book, lifting near the camera and folding it back over the home button side of the rear case.
- Set the LCD down carefully on a clean, soft, lint-free surface to get easy access to the display cables.
Tools Used

Step 30

- Grab a Phillips screwdriver and carefully unscrew the single 2.3 mm-long screw that’s holding the battery connector onto the logic board.
Step 31


Check out these pictures to see what the battery connector looks like tucked under the logic board. Use them as your visual guide while you carefully unplug the battery.
Heads up: the battery connector has cantilever springs on the logic board that press against the battery pads. Since both the logic board and battery are glued down, you’ll need to gently slide something thin and flexible between the contacts to safely disconnect the battery.
Step 32


Handle with care when isolating the battery using a battery blocker. Those battery contacts can be a bit temperamental and might bend or break, leading to some serious damage. Stay sharp and keep things safe!
Make sure the iFixit logo on the battery blocker is facing up like it’s ready for a selfie!
Don't go all Hulk on the battery blocker when you're trying to slide it under the connector. If it's being stubborn, grab a playing card to help disconnect the battery instead. Just think of it as a friendly game of cards!
The battery blocker or playing card should glide under the logic board smoothly, like a cool breeze on a sunny day. After you’ve slipped it in, it should sit at a chill 15-degree angle.
- Carefully slide the battery blocker under the logic board’s battery connector, holding it at a smooth 35-degree angle.
- Keep that battery blocker right where it is while you continue working—no need to rush it!
Tools Used

Step 33

- Grab your trusty Phillips screwdriver and carefully remove the three 1.4 mm screws that are keeping the display cable bracket in place.
Step 34


- Take off the display cable bracket with care—this part can be a little tricky, but you've got this!
Step 35


- Grab your trusty spudger and gently use the flat end to lift the LCD cable straight up from the press connector. Easy peasy!
- When it’s time to reconnect those press connectors, take your time! Start by aligning one side just right and give it a gentle press until you hear that satisfying click. Then, do the same on the other side. Remember, no middle pressing! If you get it misaligned, those little pins won't be happy and could bend, leading to some serious trouble. If things get tricky, just remember you can always schedule a repair.
Tools Used
Step 36

- Carefully lift the LCD off completely and lay it face down on a clean, soft, lint-free spot to keep it safe and sound.
Step 37


- Grab your trusty tweezers and gently peel away the tape that's guarding the home button cable ZIF connector. Take it slow and steady—this part’s all about the finesse!
Tools Used

Step 38


- Gently use the tip of a spudger, an opening tool, or even your trusty fingernail to lift up that little hinged locking flap on the home button cable ZIF connector. You've got this!
Tools Used
Step 39


- Grab your trusty pair of tweezers and gently pull that home button ribbon cable straight out of the ZIF connector. Take it slow, you got this!
Tools Used
Step 40


Be gentle with your iPad! Make sure to pry only on the connectors themselves and steer clear of the socket on the logic board. Your device will thank you for it!
- Grab the flat end of your spudger and gently lift the press connectors on the digitizer cables. Give them a little nudge straight up to disconnect them—nice and easy!
Tools Used
Step 41


Be super careful not to poke or rip that home button ribbon cable!
- Grab your trusty spudger and gently lift the vibration isolator right under the SIM card reader. It's like giving your device a little hug!
- Now, go ahead and take out that vibration isolator. You're doing great!
Tools Used
Step 42


The cable is held in place with a bit of light adhesive.
- Grab a trusty pair of tweezers and gently coax the home button cable away from the rear case. You've got this!
Tools Used
Step 43


Grab your trusty opening pick and gently slice through any leftover adhesive that's still holding the front panel assembly to the frame. You're almost there!
Watch out! If these parts of the digitizer aren't insulated properly, they can accidentally ground out against other components, leading to some pesky touch input issues.
The insulation is a bit of a stealthy ninja—it's not visible to the naked eye and is different from those foam dust barrier strips you might find on many iPads.
- Start by removing the front panel assembly. This is the first step to getting your device back in action.
- If your new display starts acting weird with 'ghost' or 'phantom' touches, don’t sweat it! Just add a thin layer of insulating tape, like Kapton (polyimide) tape, to the highlighted spots on the back of the panel. Most replacement digitizers already have the right insulation, so you won’t need to worry about extra tape unless it’s specified.
- Before you reassemble your device and install the display, make sure to clean up any leftover adhesive from the iPad. A quick wipe down with high-concentration isopropyl alcohol (90% or higher) and a lint-free cloth will do the trick. This ensures the new adhesive sticks like it should and bonds perfectly.
- Once everything’s cleaned up, test your iPad’s functions to make sure everything’s working smoothly. Then, apply the pre-cut adhesive strips to the back of the display using our adhesive guide, and seal it up. Ready to go!
Step 44


- Gently lift the small hinged locking flap on the SIM card reader cable ZIF connector using the tip of a spudger, an opening tool, or even your fingernail. Easy does it, just a little nudge and you're good to go!
Tools Used
Step 45


- Gently grab the SIM card reader cable with a pair of tweezers and carefully pull it straight out of the ZIF connector.
Tools Used
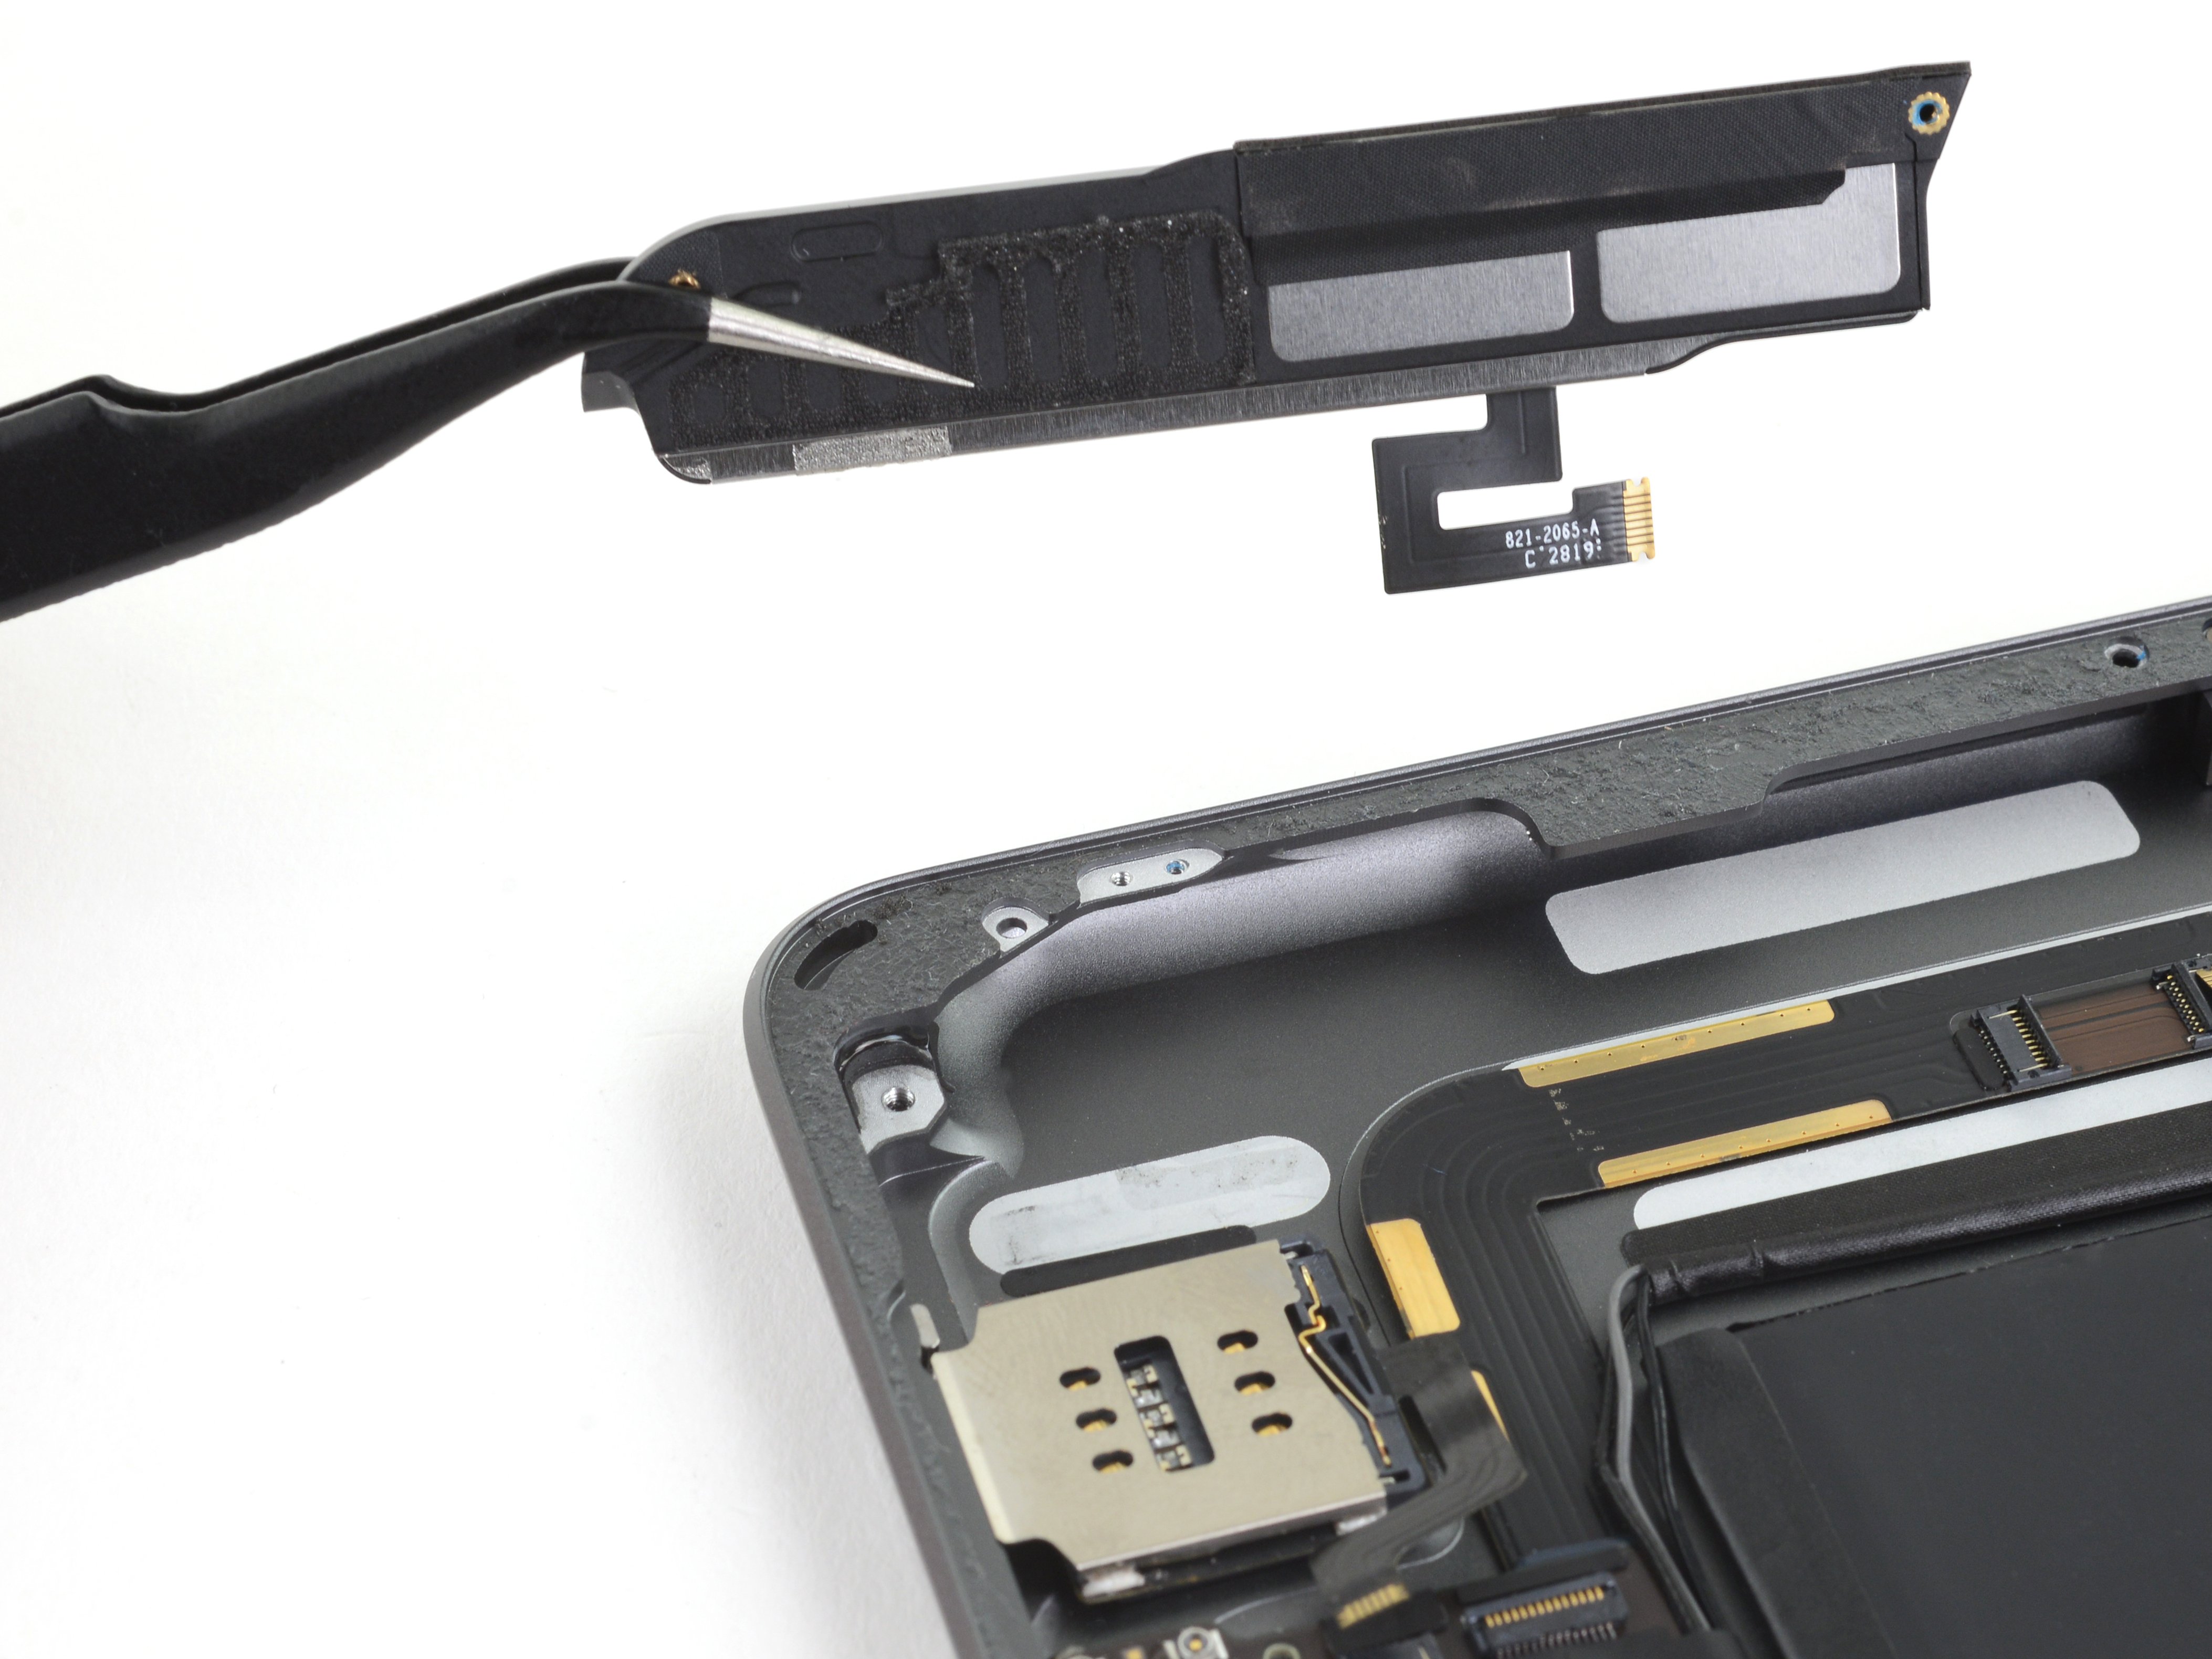
Step 46


There are two antenna cables here, but you only want to unplug the one tucked furthest from the edge.
- Slide the sharp end of your trusty spudger under the left antenna cable and give it a gentle lift straight up to disconnect it. You're doing great!
Tools Used
Step 47


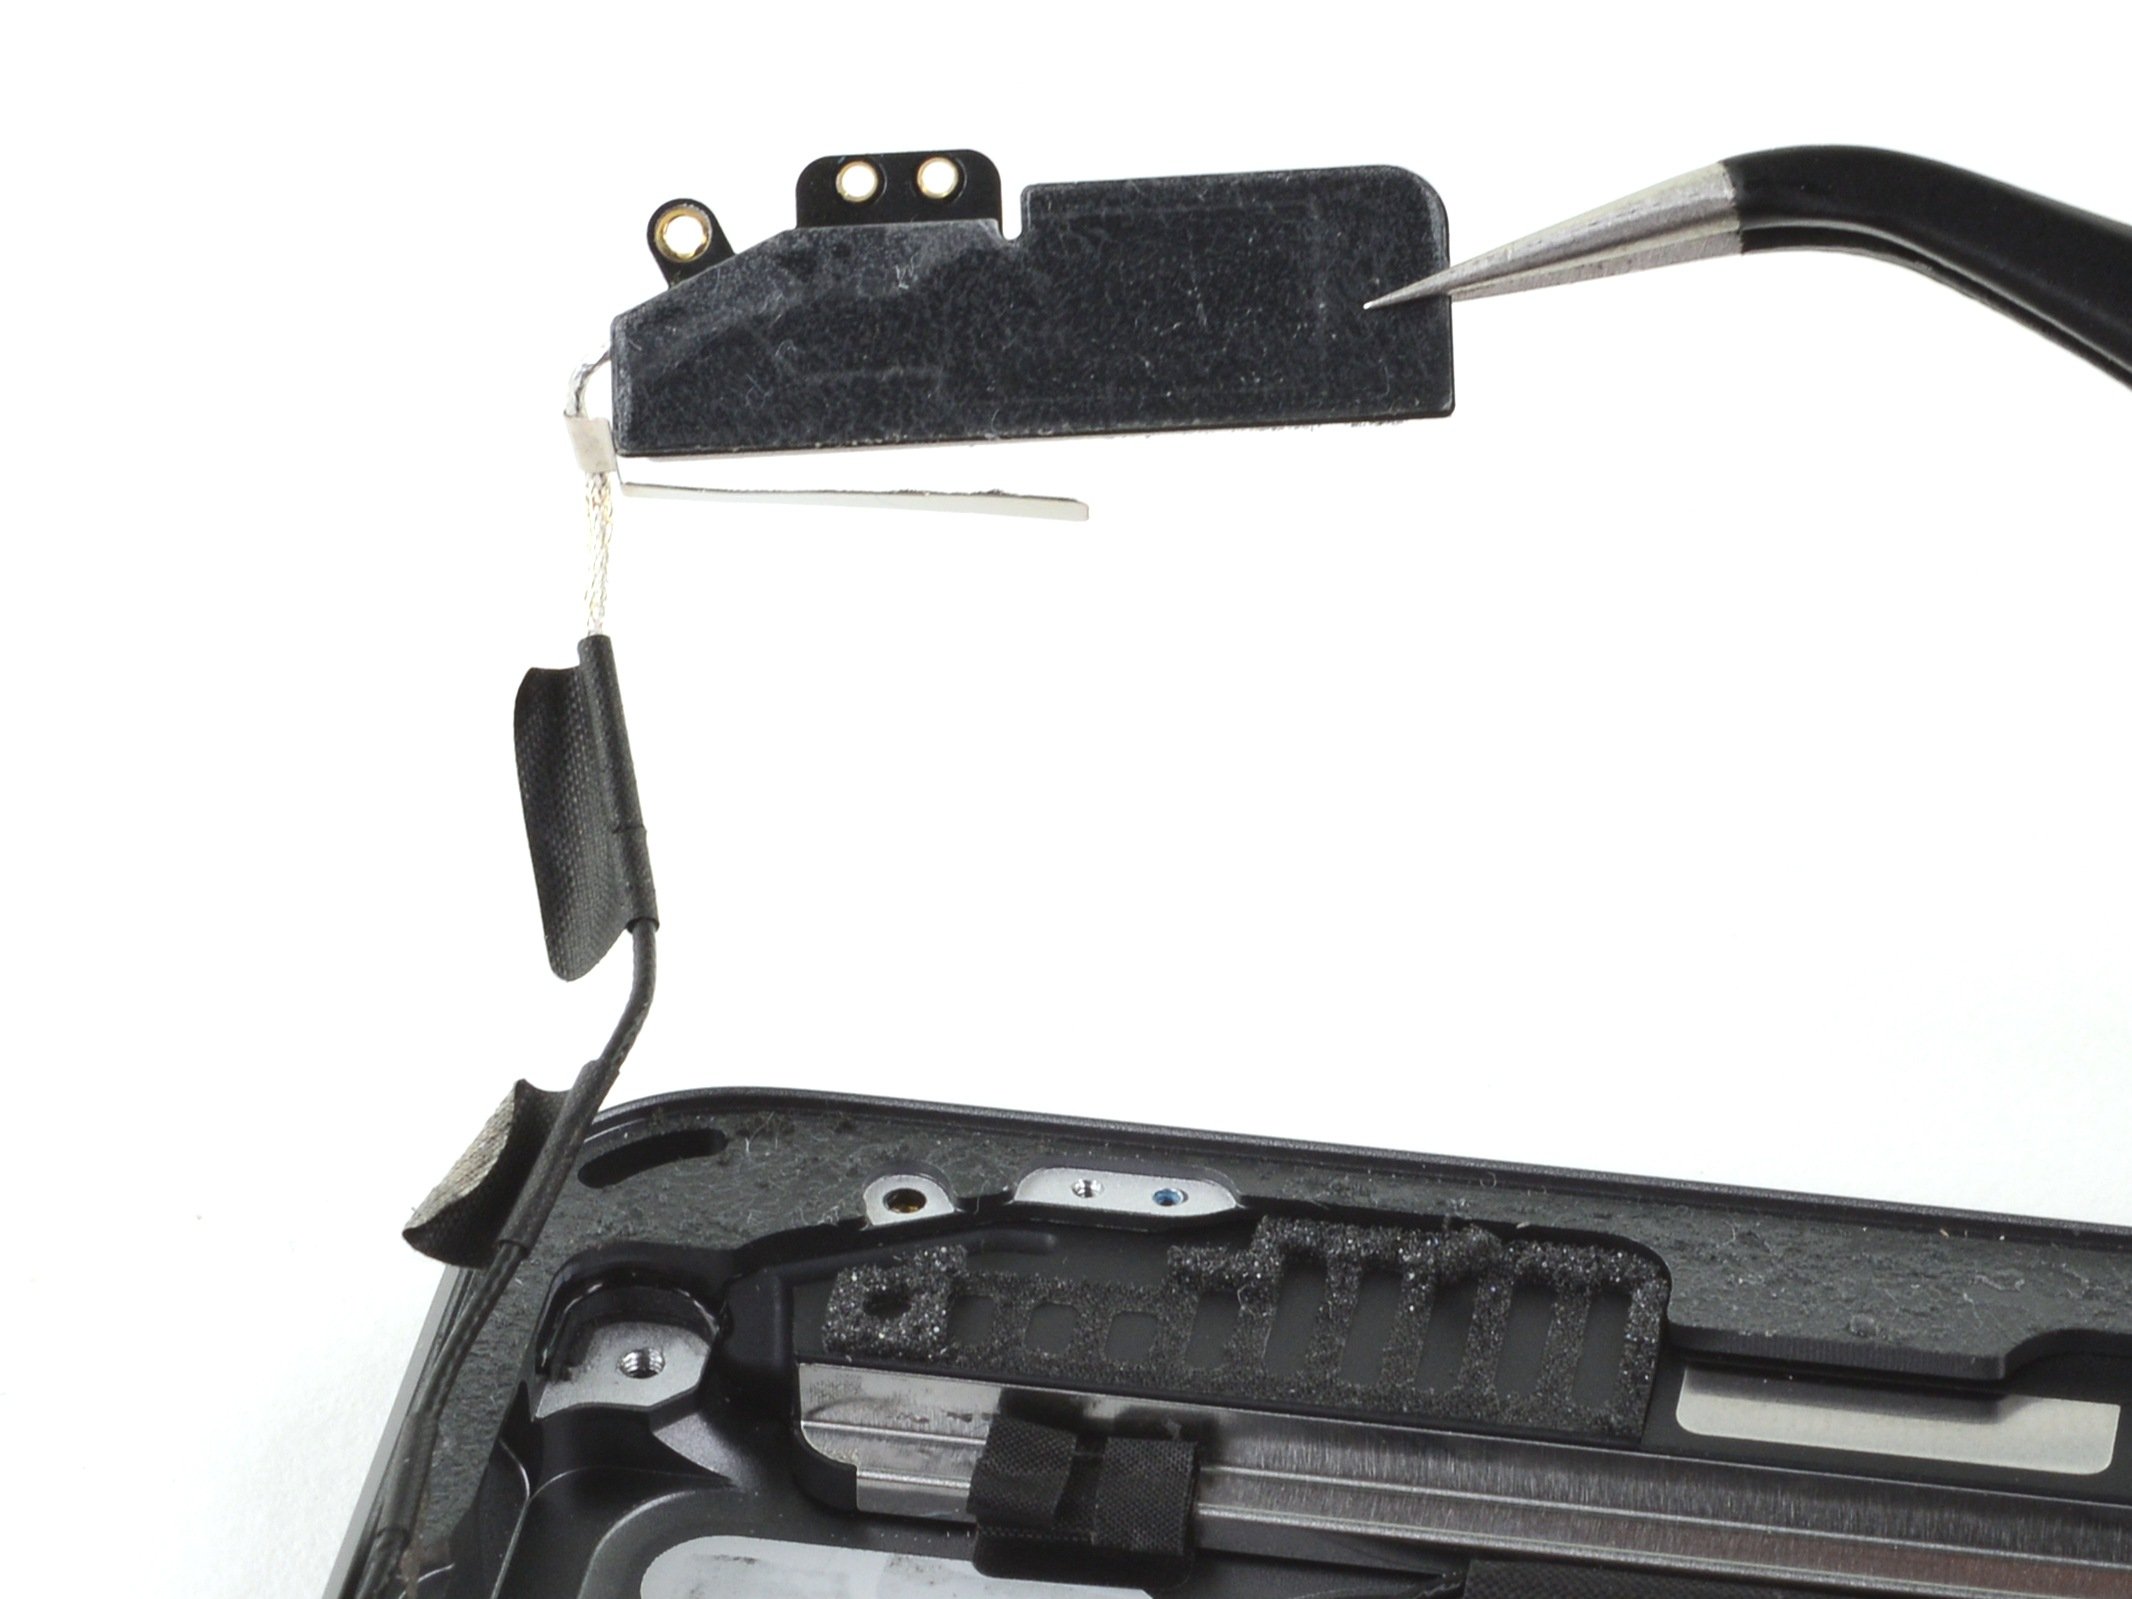
Hold the antenna cable by the cable itself, not the connector. Tugging on coaxial cables by their connectors can cause them to snap. Be gentle—it's the small details that keep everything working smoothly!
The tape holding down the left antenna cable is cozying up under the tape that’s keeping the right antenna cable in place. If you’re having a bit of a struggle, feel free to disconnect and gently peel back the right antenna cable to make things easier.
- Gently lift the left antenna cable from the back case. Take your time – it should come off easily!
Step 48


- Gently keep peeling the left antenna cable away from the rear case, sliding along the bottom edge of your iPad like a pro.


Step 50


- Grab your trusty Phillips screwdriver and get ready to tackle those screws holding the right antenna. Here's what you'll need to remove:
- One screw that's 2.3 mm long – it's the big guy!
- And two smaller screws, each measuring 1.4 mm long – they're the dynamic duo!
Step 51


The antenna cable is secured to the speaker with a small metal bracket. This bracket is tightly crimped onto the antenna and glued to the speaker housing. You'll need to carefully break the adhesive to release the antenna.
- Gently slide an opening pick between the speaker enclosure and the bracket, just like you’re slipping a note under a door.
- Now, glide that pick toward the charging port to break the adhesive's hold—think of it as giving it a little nudge.
- Finally, give the bracket a gentle push away from the speaker to free it from the tape that’s been holding it back.
Step 52


- Slide an opening pick between the antenna and the speaker assembly like a pro!
- Gently glide that pick underneath the antenna to sever the foam adhesive like a ninja.
- Now, carefully lift out the left antenna. You're doing great!
Step 53


You can peel off all the tape or just stop once you’ve got a clear shot at the left speaker ZIF connector.
- Grab a pair of tweezers or just use your nail to carefully lift the tape that’s covering the speaker connectors. A little patience goes a long way here!
Tools Used
Step 54


- Gently use the tip of a spudger, an opening tool, or even your fingernail to lift up the tiny hinged locking flap on the left speaker cable's ZIF connector.
Tools Used
Step 55


- Grab a pair of tweezers and gently pull the left speaker cable out of the ZIF connector, keeping it straight. No rush—take it slow and steady!
Tools Used
Step 56

- Grab your trusty Phillips screwdriver and gently unscrew the 2.3 mm-long screw holding the left speaker in place.
Step 57


- Peel off the tape that’s keeping the speaker snug against the rear case.
Step 58


- Slide the flat end of your trusty spudger into the little groove by the corner of the rear case, right in the speaker housing.
- Gently nudge the speaker away from the rear case; it's like giving it a little push to say, 'Time to move!'
- Now, coax the speaker out from under its cozy shelf on the rear case. It's time for it to shine!
Tools Used
Step 59

- Pop everything back together by reversing the steps you just followed—easy peasy!
- Got old parts? Take them to an R2 or e-Stewards certified recycler and give them a proper goodbye.
- If things didn’t quite click, do a little troubleshooting, or swing by our iPad 7 Answers community for tips and tricks.
- And remember, if you hit a wall, you can always schedule a repair with Salvation Repair for a helping hand.