Lenovo Tab S8 Speakers Replacement
Duration: 45 minutes
Steps: 8 Steps
Ready to give your Lenovo Tab S8 some love? This guide walks you through the process of safely accessing and removing each speaker like a pro—no unnecessary stress, just smooth steps to get the job done. Follow along, take it one step at a time, and soon you’ll have those speakers out with confidence!
Step 1


Watch out for those tiny volume and power buttons when using the spudger—they’re held in place by fragile little bits of plastic that don’t take kindly to rough handling. Go easy and keep them intact!
Power down your device completely before diving in—no accidental surprises, please!
– Carefully slide a spudger into one of the bottom corners where the screen meets the body case.
– Gently glide the spudger along the crack to help pry the case open.
Tools Used

Step 2


Using the wrong screwdriver bits can turn your screw into a stripped mess, making it tough to use. Stay sharp and choose wisely! If you need help, you can always schedule a repair.
– Pop off the cover, then take out the M1.6 x 2 mm screw holding the battery cable using your JIS J000 screwdriver. Easy does it!
– Use the spudger to gently tease up the edges of the tape and peel it away. No need for muscle—just a little finesse!
Tools Used
Step 3


Before you take out the battery, unplug those ribbon cables hiding underneath! They sometimes cling to the battery and could get damaged if you’re not careful.
You’ve managed to pry the battery up a bit – nice work! Now, use your trusty spudger to gently break any glue that’s still holding the battery in place. This will help the battery come out smoothly, and you’ll be one step closer to getting your device up and running again.
– Lift those ZIF connector flaps and gently set the cables free – it’s like a mini liberation for your device!
– Time to coax the battery out – use that trusty plastic card to carefully pry it loose from the device. If you’re feeling stuck, don’t worry, we’ve all been there. Take a deep breath and try again, or if you need help, you can always schedule a repair
Tools Used
Step 4

– Grab a spudger or your trusty fingernail and gently flip up the small locking flap. Once it’s popped open, you can easily slide the cable out from under the camera. You’re doing great!
Tools Used
Step 5
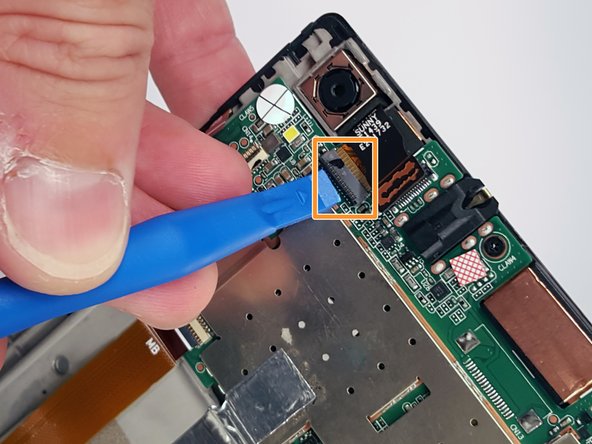

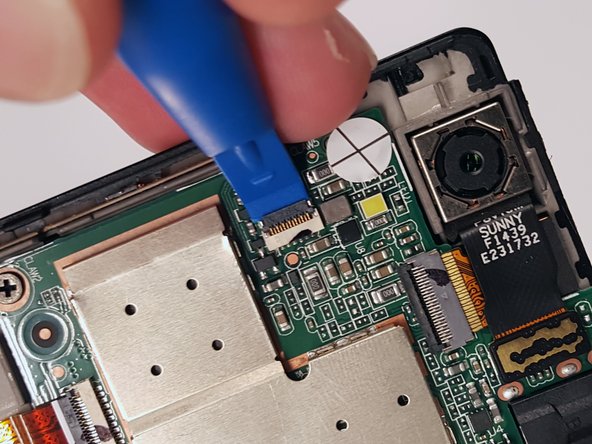
– Pop off the press-fit cable next to the camera—just use your opening tool to gently lift it up. No need to muscle it; a little finesse does the trick.
– Flip up the black bar on the ZIF connector to unlock it, then carefully slide the ribbon cable out. Easy does it!
Step 6
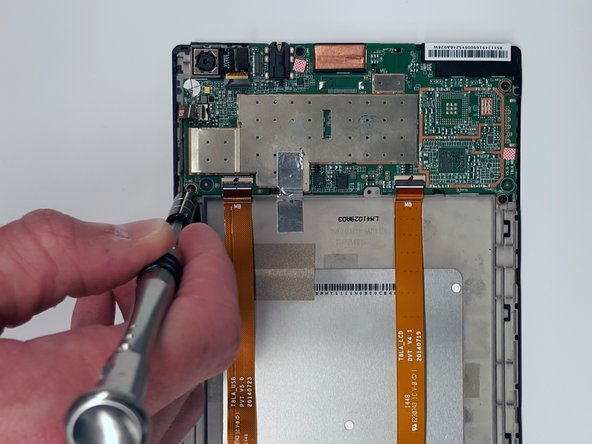

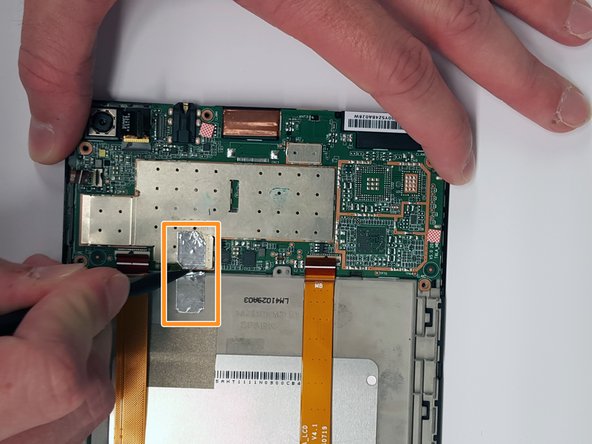
Look for a sneaky screw hiding under a small white circular sticker just below the camera. Peel off the sticker to reveal and remove the hidden screw.
– Let’s get those five M1.6 x 2 mm screws off the motherboard using the trusty JIS J000 screwdriver.
– Now, go ahead and snip or peel off that piece of silver tape from the motherboard.
Step 7

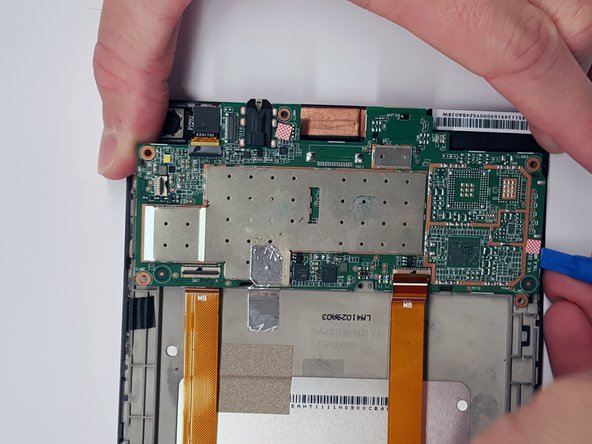

– Take your spudger and work it carefully around each side, gently popping the motherboard out of the frame—steady hands, slow moves, and you’ll have it out in no time!
Tools Used
Step 8
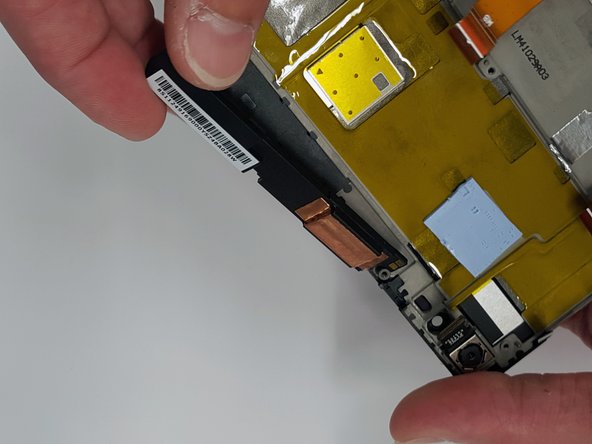

Heads up—the lower speaker wire is stuck to the back case with glue, so take it slow and easy when peeling it off.
– With the motherboard and battery out of the way, it’s time to find both the upper and lower speakers. They’re hanging out right where you left them.
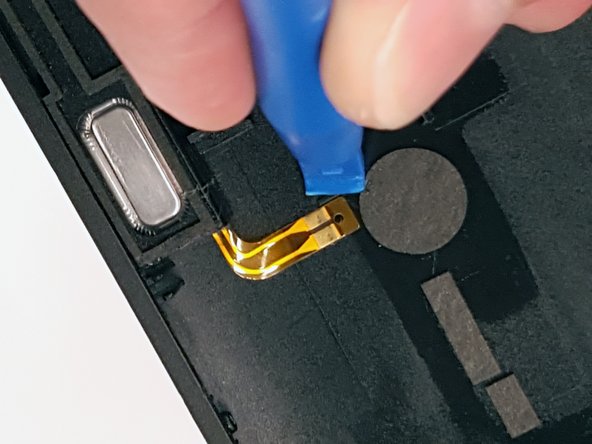
– Use a plastic opening tool with a sharp edge to gently lift up the wire. Easy does it—no need to be a hero!