Lenovo Tab 4 TB-8504F vibration motor Replacement
Duration: 45 minutes
Steps: 7 Steps
Step 1


– Start by locating the microSD slot. It’s your first clue in this repair adventure!
– Take your trusty opening pick and gently slide it underneath the back cover. This is the beginning of your tablet’s transformation.
– Now, move the pick around the edges of the tablet, making sure to work your way around until the back cover pops off. A little patience goes a long way here!
Step 2


– Grab your Phillips #000 screwdriver and remove all 8 screws—like a pro.
– Peel off the tape securing the plate, because it’s time for it to go.
– Use precision tweezers (or just your fingers, if you’re feeling confident) to lift the plate out.
– Heads up: there’s a sneaky screw hiding under the blue ‘s’ sticker—don’t let it fool you!
Tools Used


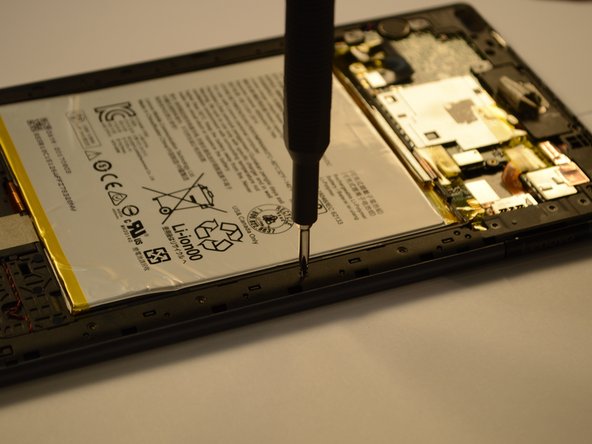
Step 3


– Peel away that yellow tape like you’re unwrapping a gift—steady and smooth!
– Grab a spudger or plastic opening tool, and carefully pop the battery’s ribbon cable loose from the motherboard. Gentle does it!
Tools Used

Step 4


Don’t be rough with the battery—keep it cool and avoid bending or poking it.
– Time to get that battery out! Gently tug on the two stretch release adhesive strips, pulling them away from the battery – not up, or you might damage something.
– Once you’ve removed the tabs, carefully lift the battery up from the frame. You’re making great progress!
Step 5

– Let’s get started by removing 16 screws from the midframe using a trusty Phillips #000 screwdriver .
Tools Used
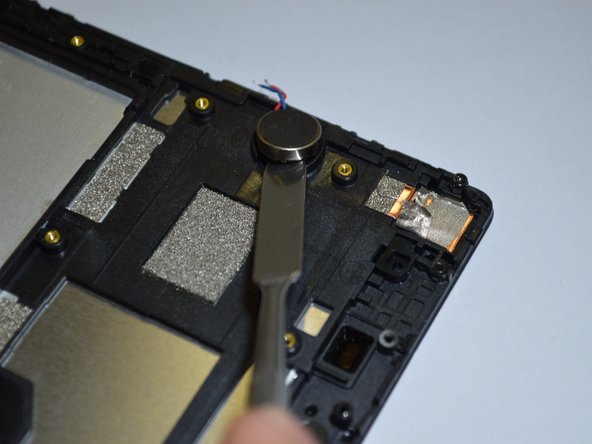
Step 6


– Grab that trusty opening pick and find a sweet spot to gently lift the bracket off your tablet.
– Once you’ve slipped the pick between the bracket and the tablet, glide it around the entire edge to fully release that bracket. You’ve got this!
Step 7

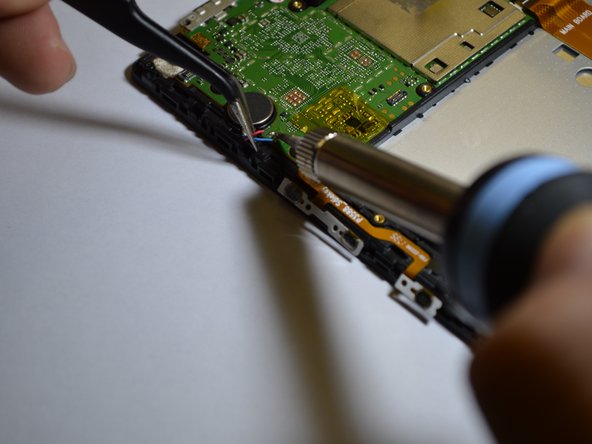
Be careful with that soldering iron! It’s super hot and can be a bit tricky to handle. Stay safe and make sure to use it wisely!
If the wire is playing hard to get with the tin, just turn up the heat on that soldering iron a notch!
– To get your device back in action, simply reverse the steps you followed to take it apart.
– If you need help or want a pro to double-check your work, you can always schedule a repair
