Lenovo Tab 4 TB-8504F Motherboard Replacement
Duration: 45 minutes
Steps: 13 Steps
Step 1


– Kick things off at the microSD slot!
– Grab your trusty opening pick and gently slide it under the back cover of the tablet.
– Now, glide that opening pick all around the tablet until the back cover pops off like a champ!
Step 2


– Grab your Phillips #000 screwdriver and take out those 8 screws.
– Peel off the tape that’s keeping the plate in place.
– Use some precision tweezers (or your fingers, if you’re feeling bold) to lift the plate away.
– Don’t miss the sneaky screw hiding under the blue ‘s’ sticker.
Tools Used


Step 3


– Peel off that yellow tape—like unwrapping a surprise (but, you know, less exciting).
– Grab a spudger or a plastic opening tool and gently pop the battery’s ribbon cable off the motherboard. No forceful yanking—we’re fixing, not breaking!
Tools Used

Step 4


Handle the battery with care—no bending or poking, please!
– Carefully grab those two adhesive strips and give them a gentle tug, but remember, it’s all about pulling away from the battery, not up!
– After you’ve freed the tabs, smoothly lift the battery out from its cozy frame.
Step 5

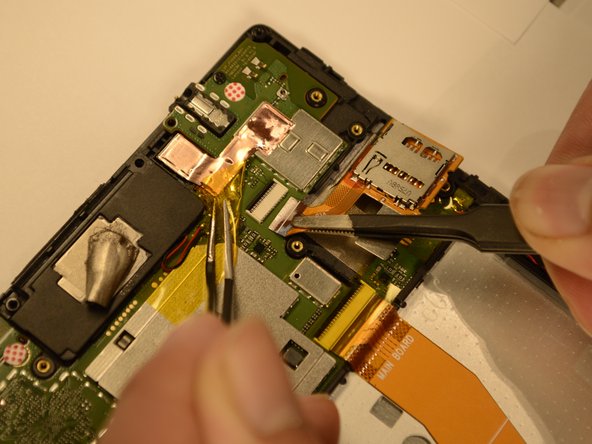
– Let’s get started by locating the yellow tape that’s holding the microSD card reader connector in place. Use your trusty tweezers to gently grip the tape and keep it from getting in the way.
– Next, carefully lift the tab on the microSD card reader’s ZIF connector. Then, gently pull the ribbon cable free – it’s like a little ribbon dance!
Tools Used
Step 6


– Gently lift out the microSD card reader using tweezers or just your fingers—easy does it!
Tools Used

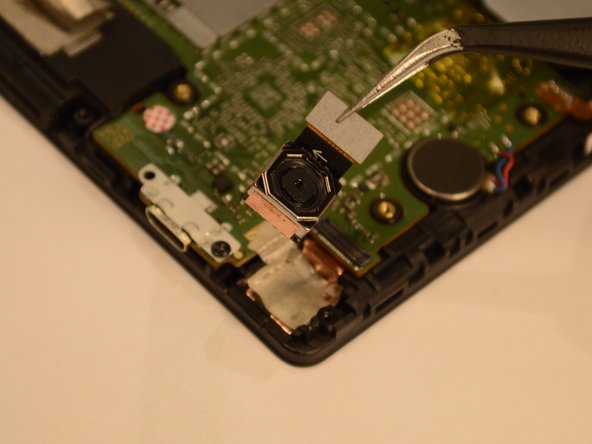
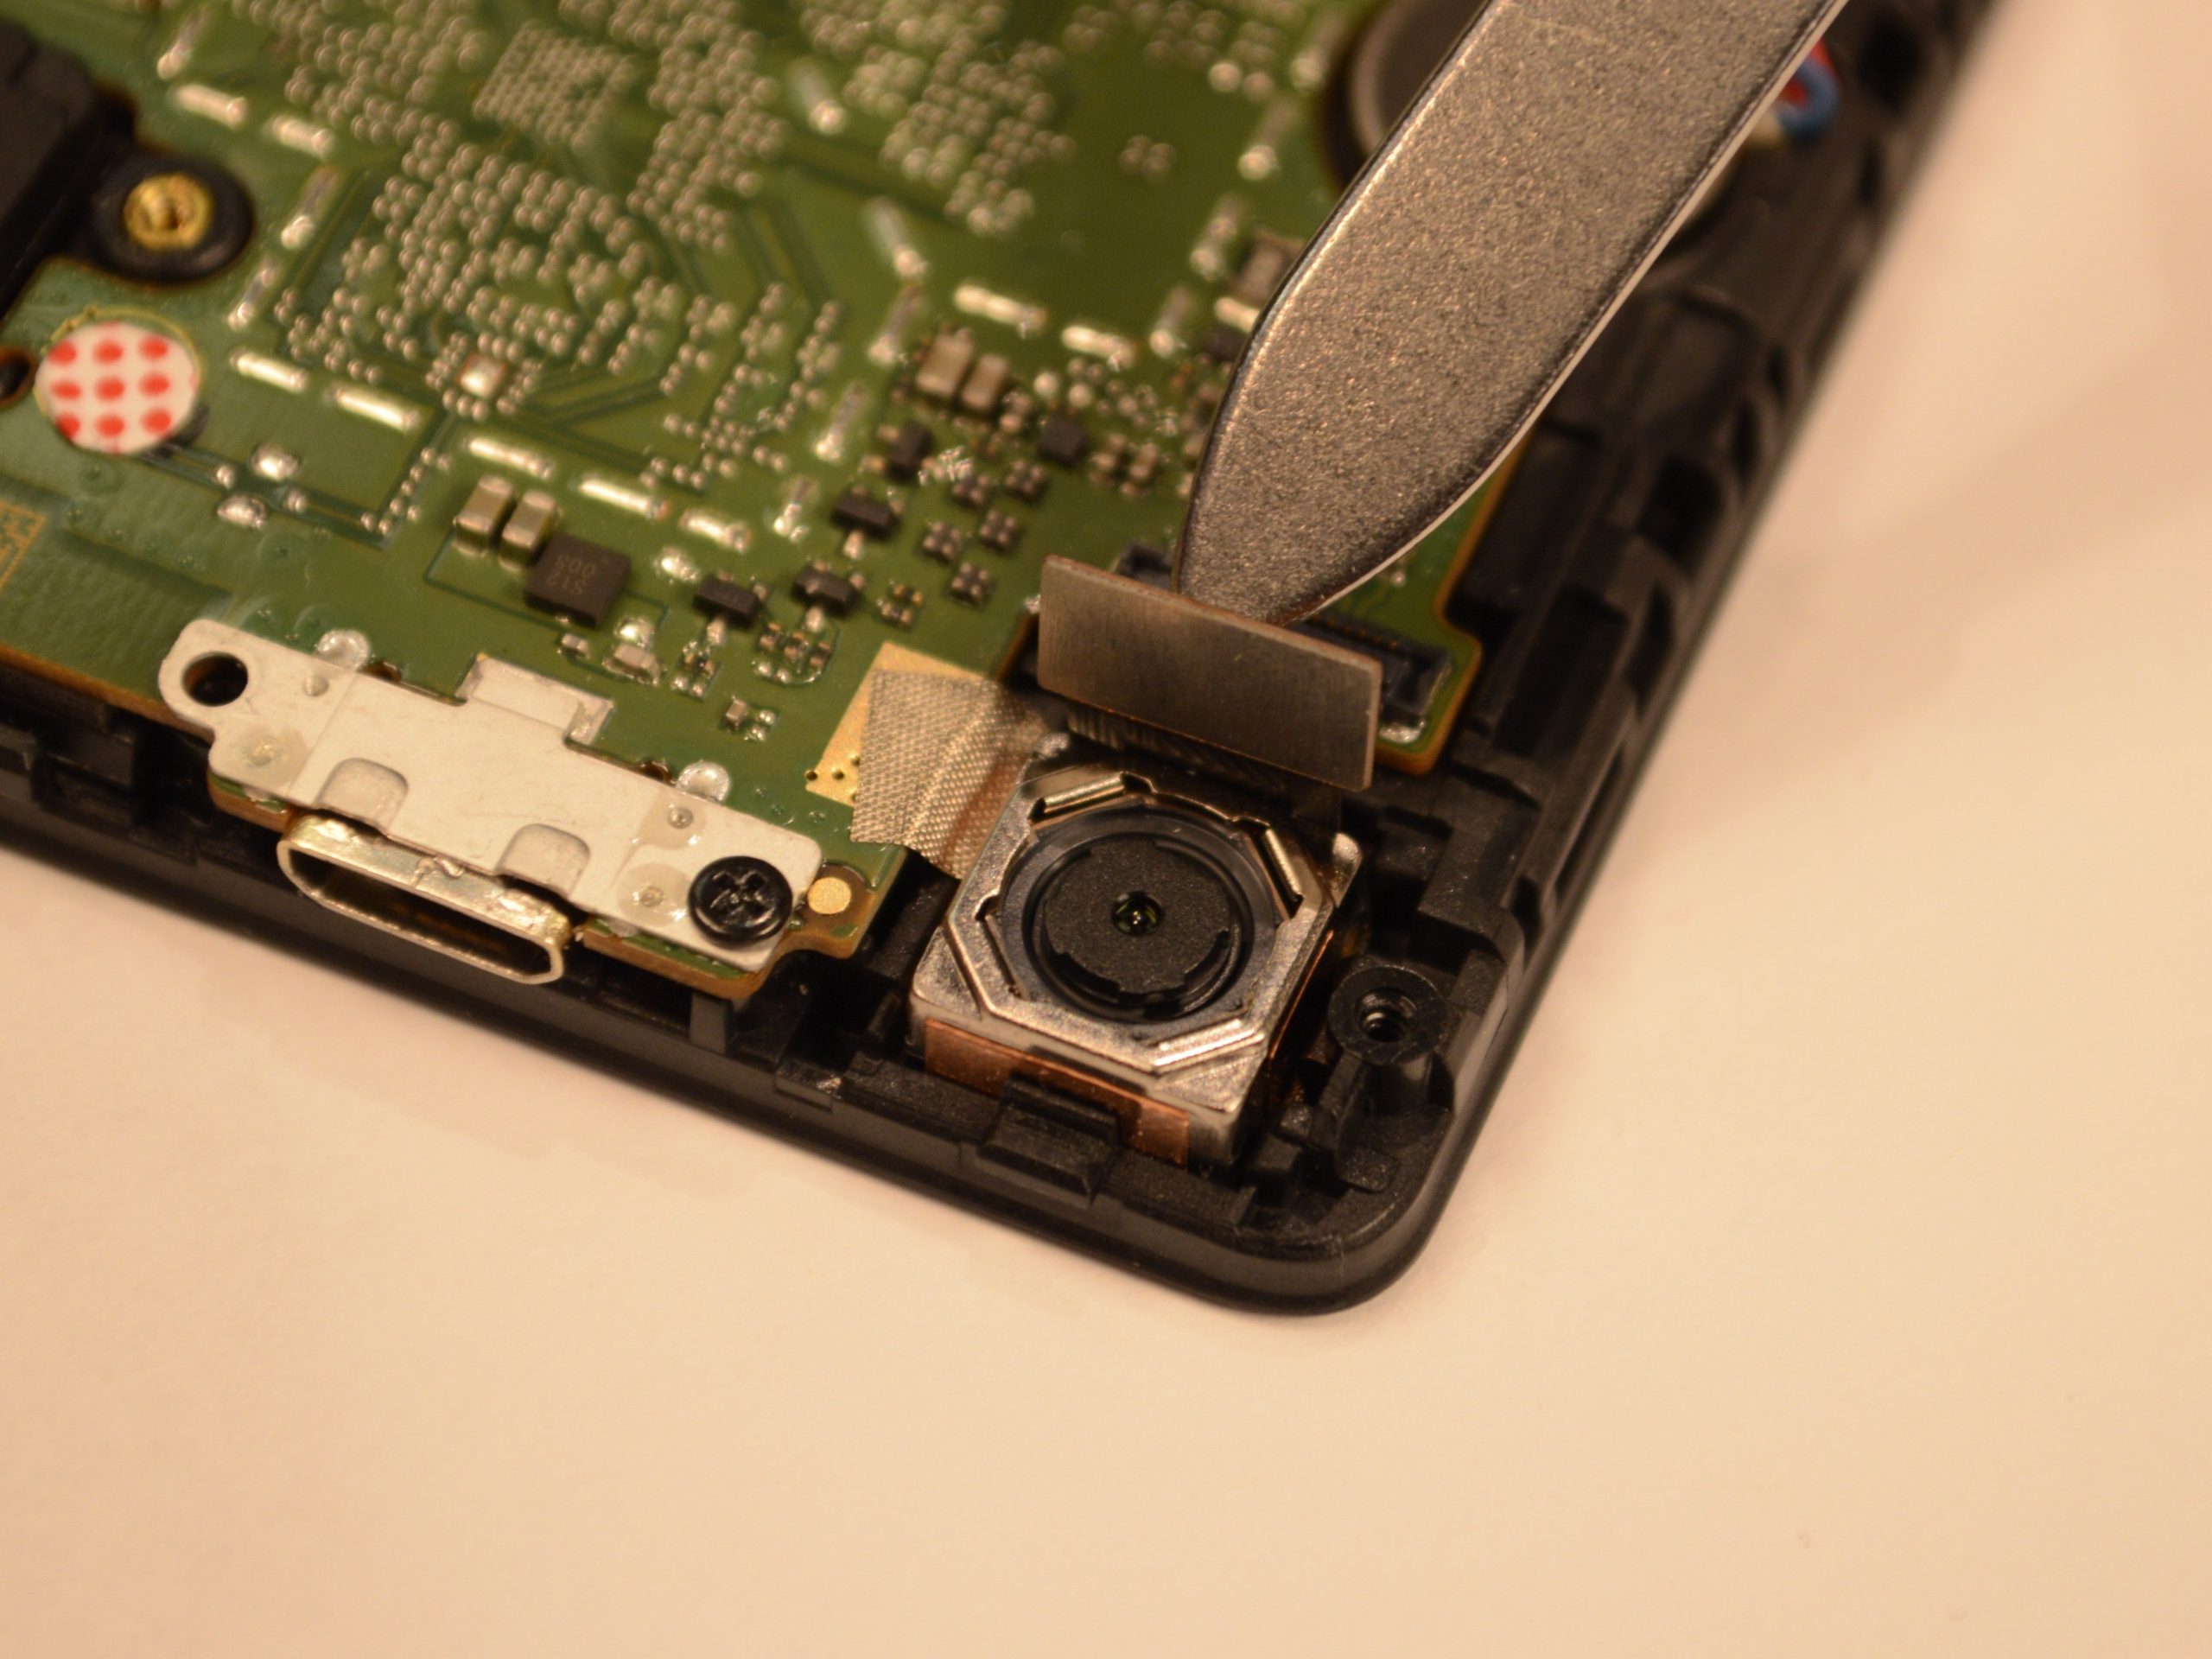
Step 8


– Grab your tweezers and gently lift the yellow tape that’s hiding the front camera. It’s like peeling off a little secret cover!
– Next, carefully disconnect the front camera’s connector from the motherboard with your tweezers. Take it slow, and you’ll have it done in no time.
Tools Used
Step 9
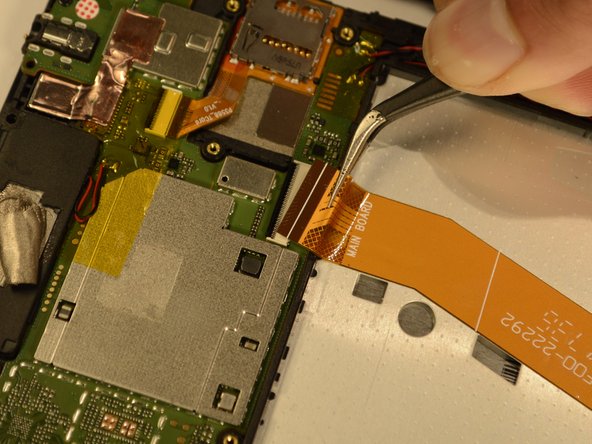

– Grab your tweezers and gently lift the screen digitizer cable away from the motherboard—nice and easy does it!
Tools Used
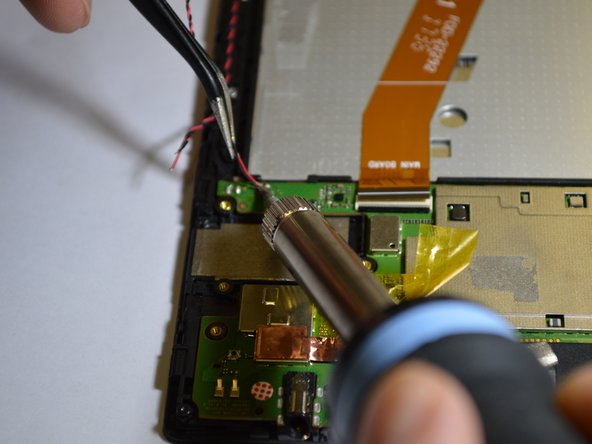
Step 10

Watch out, the soldering iron is sizzling hot! Handle it with care to avoid any pesky burns.
– Time to get those speaker wires off the motherboard! Desolder the two top ones to start making progress on this repair.
Tools Used

Step 11

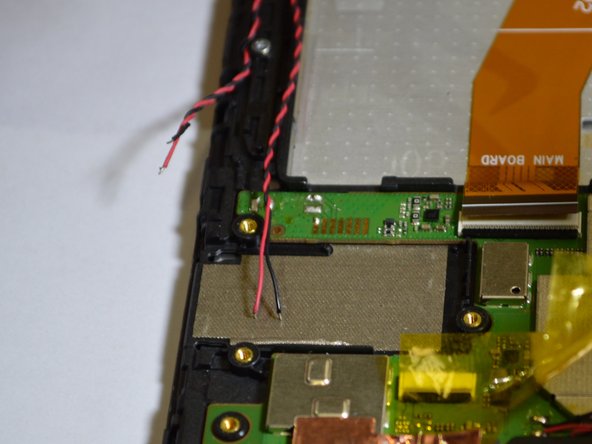
– Time to get those speakers disconnected! Carefully desolder the black and red speaker wires from the motherboard. Take your time, and make sure you’re comfortable with the process before proceeding.
Step 12

– Grab your trusty Phillips #000 screwdriver and carefully unscrew those two little screws holding the speaker snugly against the motherboard. You’re doing great!
Tools Used
Step 13
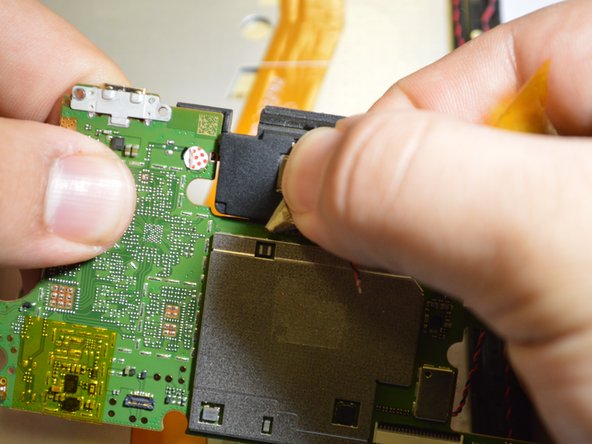

– Carefully lift the motherboard out of the tablet—like you’re raising a trophy, but with way more precision.
– With just your hand (no fancy tools required), gently detach the top speaker from the motherboard. Easy does it!