Lenovo Tab 2 A8 Rear-Facing Camera Replacement
Duration: 45 minutes
Steps: 4 Steps
Ready to give your device a makeover? Let’s start by removing the rear-facing camera. Follow the steps carefully, and soon your device will be back in action! If you get stuck, don’t hesitate to schedule a repair.
Step 1


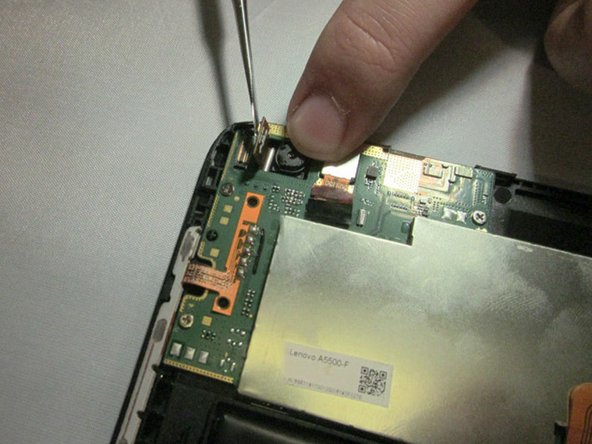
If the seal over the screw is already off, you’re good to go—just move on to the next step.
The screw is pretty tiny, so if you need a hand, grab a pair of tweezers to pull it out.
– First things first, lay that tablet face down on a cozy, stable surface to keep that screen safe and sound.
– Next up, grab your trusty Metal Spudger and gently scrape away the seal covering the screw at the back of the tablet.
– Now, reach for the Phillips #000 Screwdriver and twist away to remove that M1.4 × 2.5 screw.
Tools Used


Step 2


You might need to give it a little oomph to get that back cover off at first.
Just a heads-up: the button tabs inside this device can be a bit loose and may pop out when you open it up.
– Start by gently working your way around the edges of the tablet to release the back cover. A metal spudger will be your best friend here, making the job easier without any hassle.
Tools Used
Step 3

– Grab your spudger and gently lift the camera connector away from the motherboard. It should pop free with a little nudge.
Step 4

– To put everything back together, just work your way back through these steps in reverse. You got this!
– If you need help or want a pro to take a look, you can always schedule a repair.