Lenovo Tab 2 A8 MicroUSB Charging Port Replacement
Duration: 45 minutes
Steps: 6 Steps
Step 1


Already peeled off that seal on the screw? Nice! Go ahead and move to the next part.
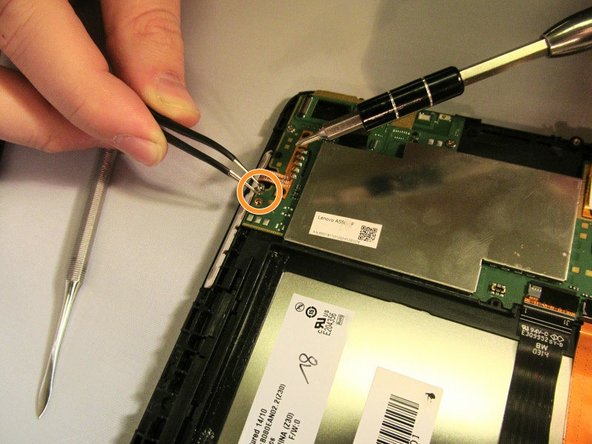
This screw is tiny, so you might want to grab a pair of tweezers for an easier time getting it out.
– Lay the tablet face down on a soft and stable surface—it’ll keep the screen safe and sound!
– Carefully scrape off the seal covering the screw on the back of the tablet using a Metal Spudger. Keep it steady, you’re doing great!
– Grab your Phillips #000 Screwdriver and unscrew the M1.4 × 2.5 screw. It’s tiny but mighty—you’re almost there!
Tools Used


Step 2


You’ll need to give the back cover a little persuasion to pop off—don’t be shy, but no need for heroics.
Heads up! The button tabs inside this device are free agents and will make a break for it when you open the case.
– Start at the edge and work your way around the tablet to pop off the back cover—easy does it! A trusty metal spudger is your best friend for this job.
Tools Used
Step 3


Since those screws are tiny little things, it’s super handy to grab a pair of tweezers to help you remove them.
– Time to get this motherboard loose! Using your trusty Phillips #000 screwdriver, carefully remove the four M1.4 × 2.5 screws that are holding it in place. Take your time, and make sure they’re all out before moving on to the next step.
Tools Used
Step 4


The ribbon cable connecting the screen to the motherboard is locked in tight, like it’s got secrets to keep. You’ll need a steady hand and just the right amount of careful force to unplug it—think of it as persuading it rather than yanking it loose.
– First things first, grab your Phillips #000 screwdriver and remove the M1.4 × 2.5 screw that’s keeping the battery lead attached to the battery. You’ve got this!
– Next up, take a pair of tweezers and gently nudge the battery lead aside so it doesn’t get in the way of the motherboard. A little wiggle goes a long way!
– Now, with those trusty tweezers again, carefully unplug the strip that connects the screen to the motherboard. Easy does it, you’re almost there!
Tools Used
Step 5

The tiny tabs might snap if you yank the motherboard like you’re arm-wrestling it—easy does it!
The button tabs are stuck to the motherboard with a small adhesive strip. Gently remove it to keep the wires intact—no ripping, no drama!
– Gently lift the top edge of the motherboard and slide it out, freeing it from the tiny tabs holding it in place.
Step 6

Now it’s time to take a look at the back side – you’ll notice it’s a bit less crowded than the front, with a lot more green showing. That’s what we’re going for!
– And that’s it! To get your device back in working order, just follow these steps in reverse. If you need help or get stuck, you can always schedule a repair with Salvation Repair.
– You did it!