Lenovo IdeaTab S2109A-F Speaker Replacement
Duration: 45 minutes
Steps: 9 Steps
Get ready to rock your IdeaTab S2109A-F with some fresh speakers! This guide is here to walk you through the steps to swap out those old speakers for new ones, bringing your device back to life. Let’s dive in and make your device sing again!
Step 1


Power down the tablet before diving into this guide. Touching its inner workings while it’s on? Yeah, that’s a no-go—it’s risky business.
– Flip your tablet so the screen faces down, then grab your opening tool and get ready to pop that back cover off.
– Gently work the tool around the edge, giving just a little pressure to lift the back panel—take it slow and steady, and that panel will come right off.
Step 2


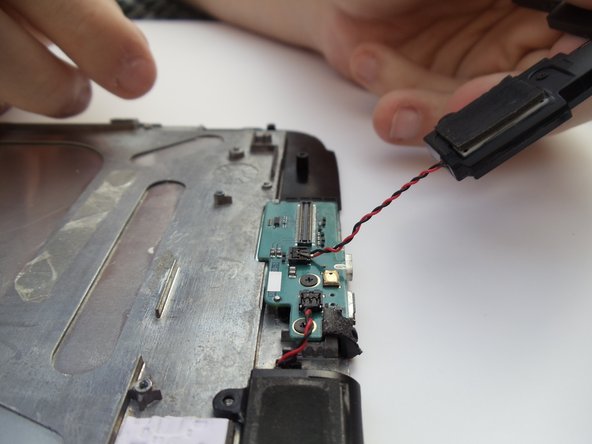
– Get a grip on that battery and gently pry it upwards – you should see a red and black coiled wire making an appearance.
– Now, carefully pull the battery out until the cord is taut, with no slack in sight.
Step 3

– Get a good grip on that battery with one hand, and use your other hand to carefully pinch the two wires closest to where they connect – your index finger and thumb are the perfect pair for the job.
– Now, give those black and red wires a firm but gentle tug – think of it as a little wake-up call, not a wrestling match. You want to coax them out, not yank them out.
– Time to say goodbye to the battery – simply remove it from the device and set it aside for now.
Step 4

– Grab your trusty Phillips #00 screwdriver and take out the ten 2 mm black screws snugly lining the edges of the system board. You’ve got this!
Tools Used

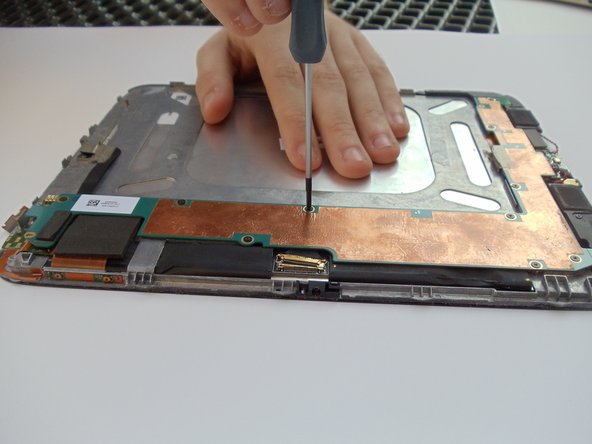
Step 5

– Pop the latch up with your plastic opening tool and gently disconnect the gold connector. Easy does it!
Step 6
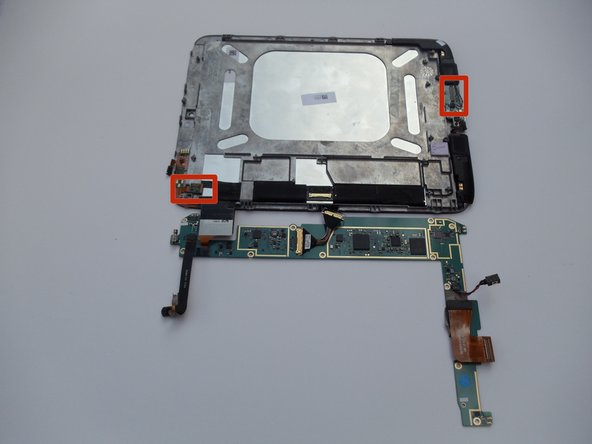

– Gently lift up on the L-shaped board—it’s time for a little separation!
– The top and bottom connection points should pop free like a well-earned high-five.
Step 7

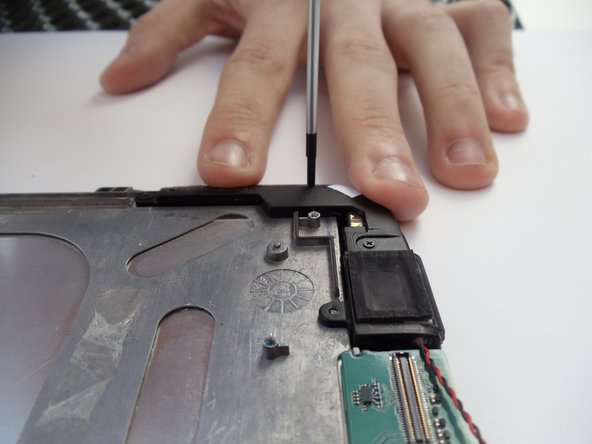
– Grab your trusty Phillips #00 screwdriver and get ready to rock! Unscrew those seven 2 mm black screws that are holding the speakers in place. You’ve got this!
Tools Used
Step 8
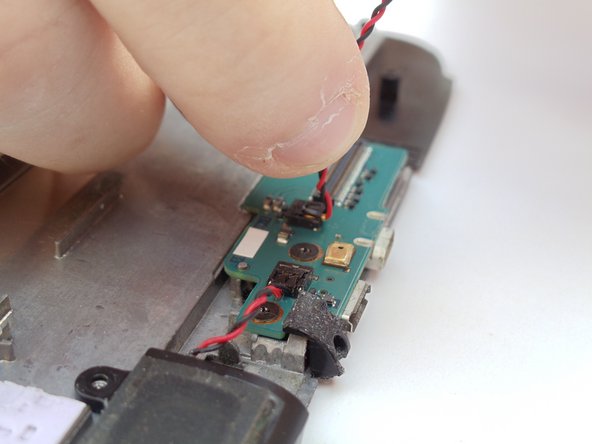

– Gently lift those speakers out of their cozy spot.
– Now, carefully pick up the red and black cable between your thumb and index finger.
Step 9

– Alright, you’ve made it this far—now it’s time to put it all back together! Just follow the steps in reverse, and your device will be good as new. And hey, if things don’t quite snap into place the way they should, you can always schedule a repair.
–