Lenovo IdeaTab A1000L System Board Replacement
Duration: 45 minutes
Steps: 13 Steps
First, find a comfy and static-free spot to work on your device – think of it as setting up your own little repair studio! Clear a table, gather all the necessary tools, and get ready to tackle this step-by-step guide. Having everything you need before you start will save you a headache and help you avoid any potential damage to your device. Now, let’s get started!
Step 1


Before you dive in, make sure your device is switched off—give it a break, it deserves a nap while you work your magic!
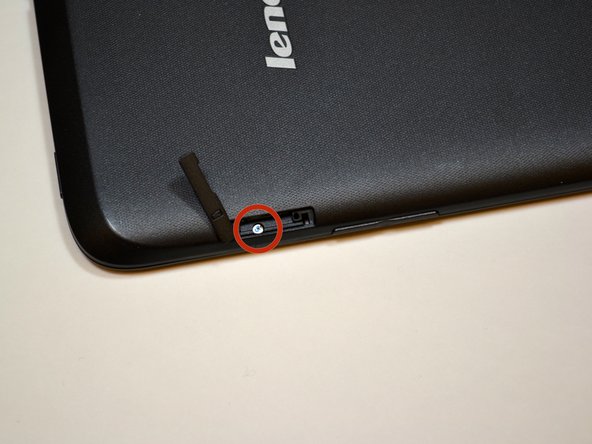
– First up, find that tiny tab with the lock symbol on the upper right side of your IdeaTab, just above the volume buttons. Give it a little nudge with your fingernail to loosen it up.
– Next, grab your Phillips #000 screwdriver and carefully take out the 3.5mm screw—don’t forget to set it aside for safekeeping!
– Now, take your trusty blue plastic opening tool and gently start prying the back panel away from the front panel, beginning right where that screw used to be. Easy does it!
Tools Used

Step 2


– First things first, find that sleek black back plate resting above the battery.
– Now grab your trusty Phillips #000 screwdriver and let’s get those 7 shiny 3.5mm screws outta there—spin them away!
– Next on our list, also with that same screwdriver, let’s tackle the black 4.1mm screw. You got this!
– Now gently lift that back plate off the device and reveal the inner workings. Look at you go!
Tools Used
Step 3


– Grab your trusty plastic opening tool and gently disconnect those battery wires from the system board. Just slide it under that white plastic piece and give it a little nudge upwards.
– Now, let’s get that battery loosened up! Use the plastic opening tool to lift it from all sides. This will help it break free from the adhesive holding it down.
– With a steady hand, carefully place the battery aside. You’ve got this!
Step 4

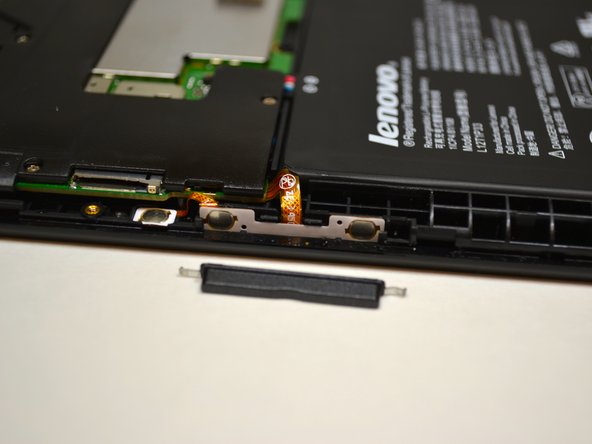
– First, let’s get started by finding the volume button on the right side of your tablet – it’s time to set that volume free! Gently slide the volume button upwards to remove it.
– Next up, locate the power button on the top-left side of your device. It’s similar to the volume button, and you’ll remove it the same way – just slide it upwards.
– If you need help or get stuck, don’t worry, you can always schedule a repair with Salvation Repair to get your device up and running.
Step 5

– First things first, find that volume button mechanism, also known as the FPC.
– Now, the FPC is snugly attached to the device frame. Give it a gentle nudge with a tweezer or a plastic opening tool to pop it off.
– Next up, carefully remove the FPC located to the left of the volume button FPC.
Step 6

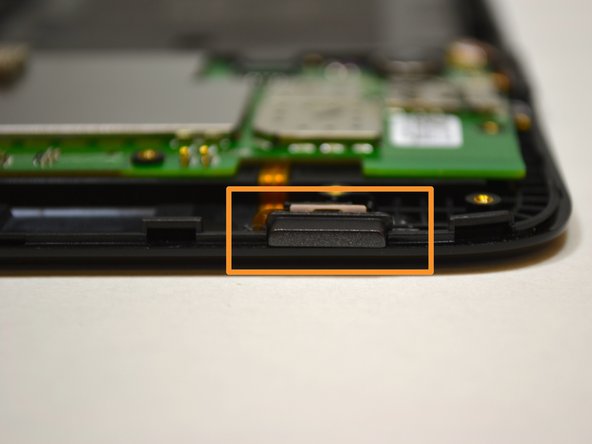
– First up, find that sneaky power button FPC hiding in your device.
– Next, gently coax it out by using a tweezer or a trusty plastic opening tool. Just a little nudge, and it should pop right off!
Step 7

– Gently lift the circular motor unit by pulling it upwards and using tweezers to help pry it free. You’ve got this!
Tools Used

Step 8

If the white connector has a yellow mylar sticker covering it, simply peel off the sticker and proceed with the repair.
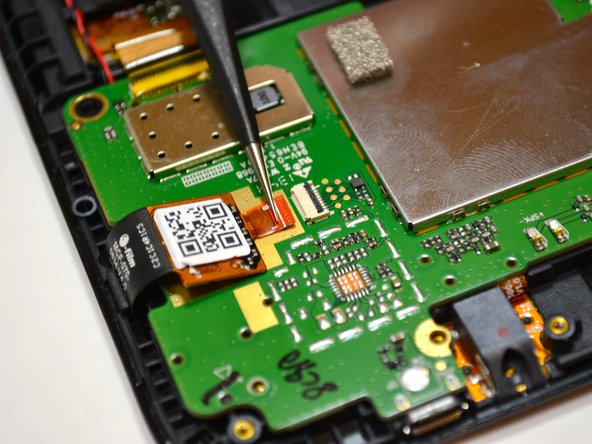
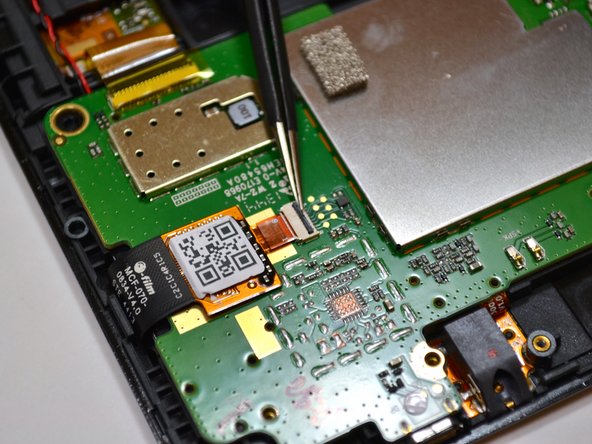
– First up, find that sneaky little component with the QR code on it. It’s like a treasure hunt!
– Next, we need to give this component a little nudge by disconnecting it from the white connector. No pressure, just a gentle touch.
– To detach, grab your trusty tweezers and flip that black piece up to a 90-degree angle. Think of it as giving it a little high-five!
– Once that black piece is standing tall, it’s time to gently pull out those orange wires. Use your tweezers to slide them out horizontally from the white connector. Easy peasy!
Step 9


Look out for a sneaky yellow mylar sticker sitting on top of that white connector. Just peel it off and you’re good to go!
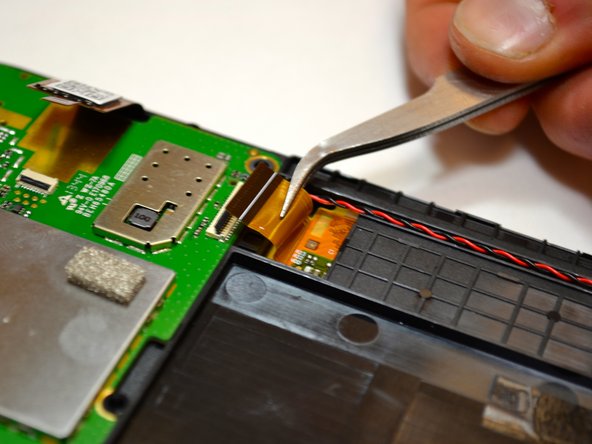
– First, find the orange cable just to the right of the battery tray. It’s easy to miss, but once you’ve spotted it, you’re halfway there!
– Next, grab a tweezer and carefully rotate the black piece on the connector 90 degrees so it’s standing up. This unlocks the orange wires, making them ready to come off.
– Now that the black piece is up, you can gently pull the orange wire away from the connector. Use your tweezer to carefully slide it horizontally out of the white connector, and voila, you’re done!
Step 10

– Grab your trusty #000 Phillips screwdriver and unscrew those two M1.4 3.5mm screws from the system board. Set them aside, and let’s keep moving forward!
Step 11
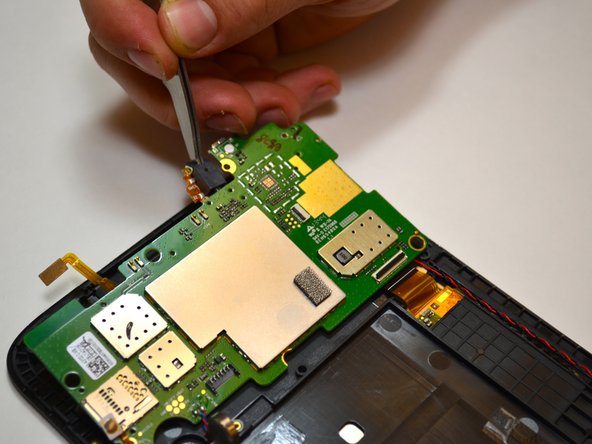

– First, track down the audio assembly – it’s hanging out near the top-right of the device, waiting to be found!
– Time to set that audio assembly free! Insert your trusty tweezers into the circular hole in the black plastic box and gently pull upwards. With a little finesse, it should come loose in no time.
Tools Used
Step 12
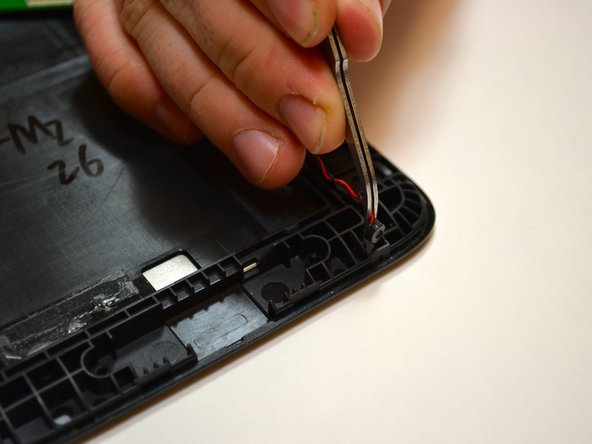

– First up, find the microphone chillin’ at the bottom of your device. We’ve got this!
– Next, gently coax that microphone out of its cozy spot by using tweezers to lift both the black and red cords along with it. You’re doing great!
Step 13

– You’ve done it! The system board is now completely liberated from the device. Gently lift it up and place it on a comfy padded surface, so it can relax a bit. You deserve a high-five for this step!