Lenovo IdeaTab A1000L Audio Jack Replacement
Duration: 45 minutes
Steps: 10 Steps
Ready to bring back your tunes or binge-listening abilities? Let’s swap out that stubborn headphone jack so you can get back to enjoying your shows and playlists in style.
Step 1


Before you dive in, make sure your device is switched off—give it a break, it deserves a nap while you work your magic!
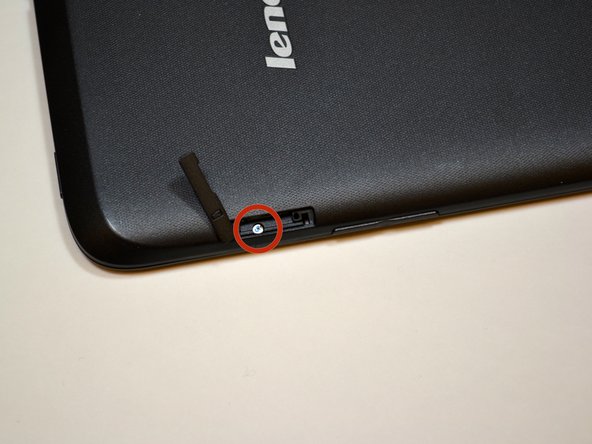
– Find the little tab with a lock icon on the upper right above the volume buttons. Use your fingernail to gently pop that tab loose—no need for hulk strength here.
– Grab a Phillips #000 screwdriver and carefully unscrew the 3.5mm screw. Set it somewhere safe (pocket gremlins love tiny screws).
– Take your trusty blue plastic opening tool and start prying the back panel away from the front, beginning right where that screw was. Gentle moves—think more ‘opening a bag of chips’ and less ‘prying open a treasure chest.’
Tools Used

Step 2


– First, find the black back plate right above the battery. It’s the piece you’ll need to remove.
– Grab your trusty Phillips #000 screwdriver and unscrew the seven shiny 3.5mm screws from the back plate.
– Next, with the same screwdriver, carefully remove the black 4.1mm screw.
– Now, gently lift off the back plate. It should come away without too much fuss.
Tools Used
Step 3


– Grab your trusty plastic opening tool and gently disconnect those battery wires from the system board. Just slide that tool under the white plastic piece and give it a little lift!
– Now, keep that plastic opening tool in hand and give the battery a little love by lifting it up from all sides. This will help it break free from its adhesive hugs.
– Carefully set the battery aside and breathe easy!
Step 4

– Find the volume button mechanism, it’s hiding there! It’s called an FPC and it’s stuck to the device frame like glue. Use a tweezer or plastic opening tool to gently pry it off.
– Now, for the next step—repeat the same process to remove the FPC next to the volume button mechanism. Easy, right?
Step 5

– First up, track down that power button mechanism. It’s hiding somewhere in your device, so go on the hunt!
– Once you’ve found it, give it a gentle pry with a tweezer or a plastic opening tool. It should pop right off without a fuss!
Step 6
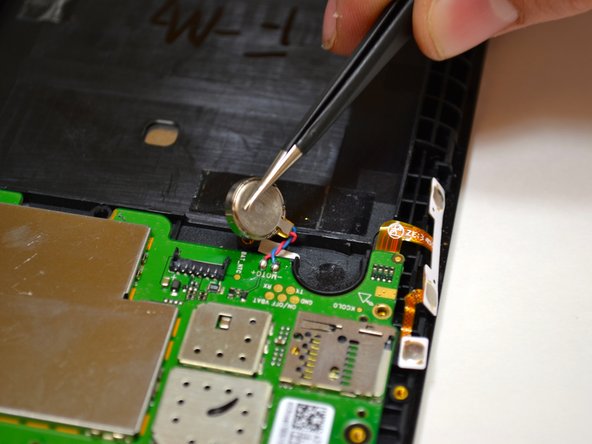

– Lift the circular motor unit straight up with your trusty tweezers—it’ll come right out, easy as pie!
Step 7

If you spot a little yellow mylar sticker on the white connector, don’t fret! Just peel it off and keep moving forward.
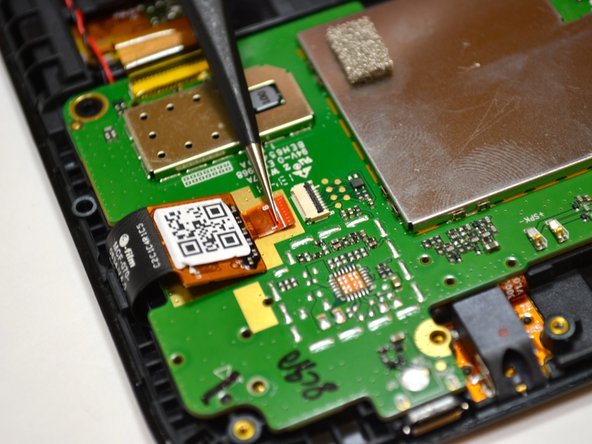
– First things first, find that component flaunting a QR code like it’s the star of the show.
– Next up, you’ll need to break its connection with the white connector. Gently does it!
– To do this, grab your trusty tweezers and give the black piece a gentle twist, rotating it 90 degrees until it’s standing tall and proud.
– With the black piece pointing skyward, you can now liberate those orange wires from their connector home. Use your tweezers to carefully pull the orange wires out horizontally from the white connector. You’re doing great!
Step 8
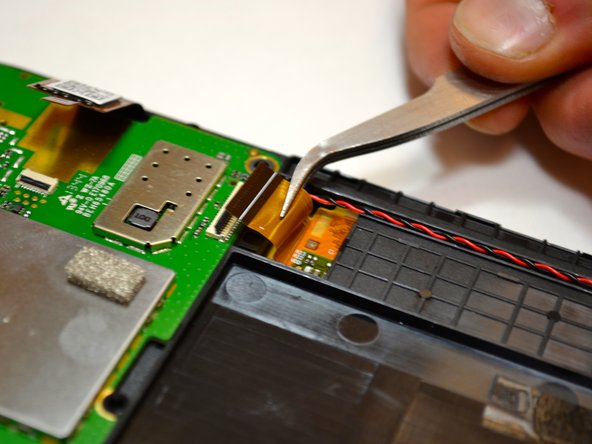
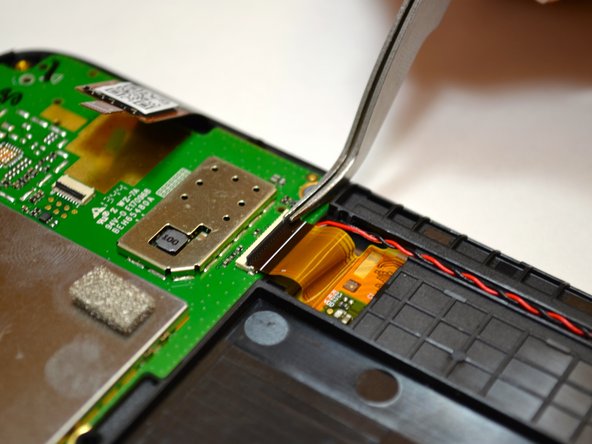

You might spot a cheerful yellow mylar sticker hanging out on top of the white connector. Go ahead and peel it off, then keep moving forward!
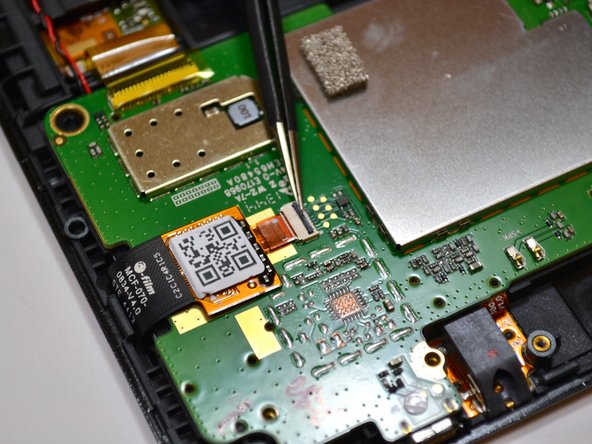
– First things first, find that orange cable chilling to the right of the battery tray. It’s waiting for you!
– Now, to free this little guy, you gotta disconnect it from the white connector. Grab your tweezers and gently lift the black piece up, giving it a cool 90-degree twist so it’s pointing straight up.
– With the black piece doing its thing, you can now slide the orange wires out of their cozy connectors. Just use those tweezers to pull the orange wire horizontally, and voila! It’s out.
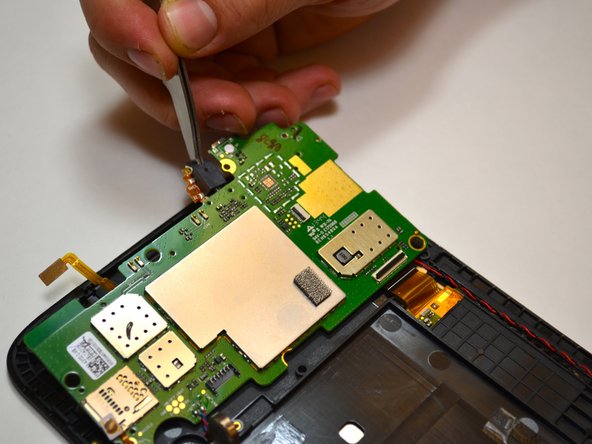
Step 9

– Grab your trusty #000 Phillips screwdriver and unscrew those two M1.4 3.5mm screws from the system board. Set them aside, and let’s keep moving forward!
Step 10


– Find the audio assembly tucked away near the top-right of the device. It’s like a little treasure waiting to be uncovered.
– Gently insert your tweezers into the circular hole in the black plastic box and give it a little pull upwards to release the assembly. Easy does it!
– Now that it’s out, just set the component aside and you’re all done. Simple, right?