Lenovo IdeaTab A1000L 7″ Display Assembly Replacement
Duration: 45 minutes
Steps: 15 Steps
Got a display screen that’s just not keeping up with your style? Let’s walk through swapping it out step by step. You’ll have a fresh screen in no time.
Step 1

Sometimes, there’s a sneaky sticker hiding that screw. Grab your tweezers, peel it off, and take out the screw underneath.
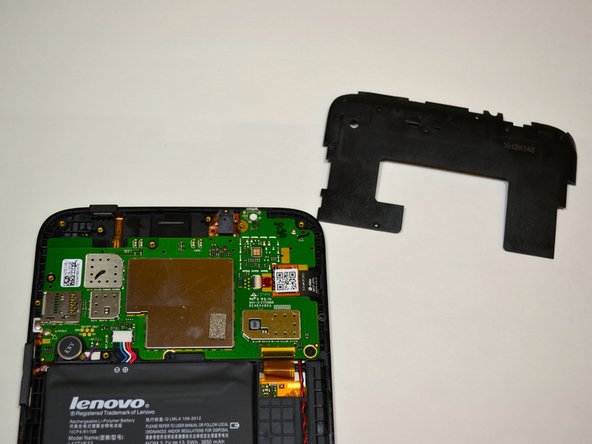
– First things first—shut down your device before you get started.
– Find the little tab with the lock symbol, just above the volume buttons on the top right of your IdeaTab. Use your fingernail to gently pop it open.
– Grab a Phillips #000 screwdriver, remove the 3.5mm screw hiding under the tab, and set it somewhere safe for later.
Tools Used


Step 2

Go slow and easy—prying too hard might turn that plastic back cover into a jigsaw puzzle.
– Take your trusty blue plastic opening tool and gently ease the back panel away from the front at the charging port. Slide the tool along the right edge, popping it open like you’re revealing a secret compartment.
– Keep cruising with your opening tool around the device’s edges to release all the remaining clips. Once they’re all free, lift off the back cover and you’re in.
Step 3

– Find the volume button hanging out on the right side of your tablet.
– Gently push the volume button upward to pop it off.
Step 4

– Grab your trusty Phillips #000 screwdriver and take out the seven shiny silver M1.4 3.5mm screws holding down the back plate.
– Stick with the same screwdriver and remove the single black M1.4 4.1mm screw—don’t let it blend in!
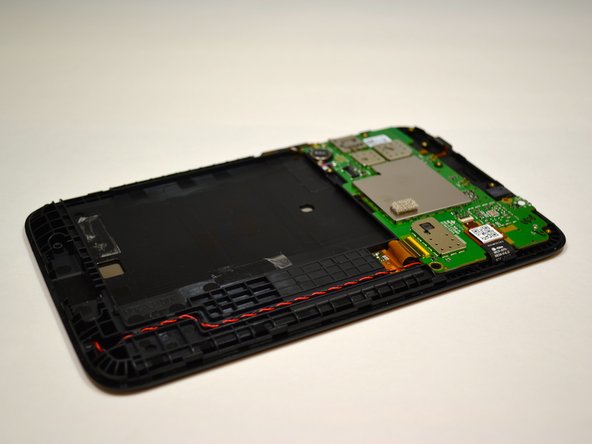
– Carefully lift off the back plate, giving your device a much-needed breather.
Tools Used
Step 5

– First, track down the power key on the top right side of your tablet – it’s time to set it free!
– Now, slide that key upwards and voilà! It’s removed.
Step 6

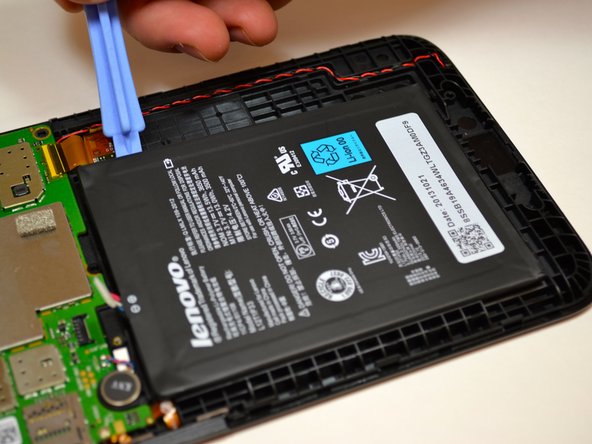
– Grab that trusty plastic opening tool and gently wiggle it under the white plastic piece to disconnect those battery wires from the system board. Give it a little lift and watch those wires pop free!
– Now, let’s loosen that battery! Use your plastic opening tool to carefully lift up on all sides of the battery. This will help it break free from the adhesive grip it’s got on your device. Easy peasy!
Step 7

– First things first, find that volume button mechanism, also known as the FPC. It’s snugly stuck to the device frame, so you’ll need to give it a little nudge.
– Use a tweezer or a trusty plastic opening tool to gently pry it off and set it free from its frame.
– Next, for the FPC located to the left of the volume button mechanism, just repeat the same removal dance you did before. Easy peasy!
Step 8

– Find where the power button is hanging out.
– Gently pop the power button mechanism out using tweezers or a plastic tool—no muscle needed, just a little finesse!
Step 9

– Gently lift the circular motor unit with a tweezer, being careful not to force it. A little tug should do the trick!
Step 10

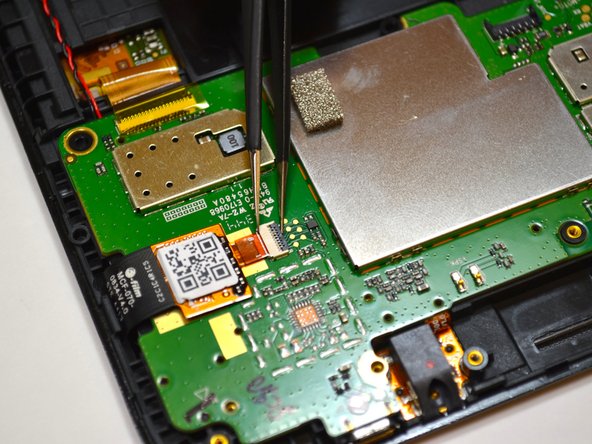
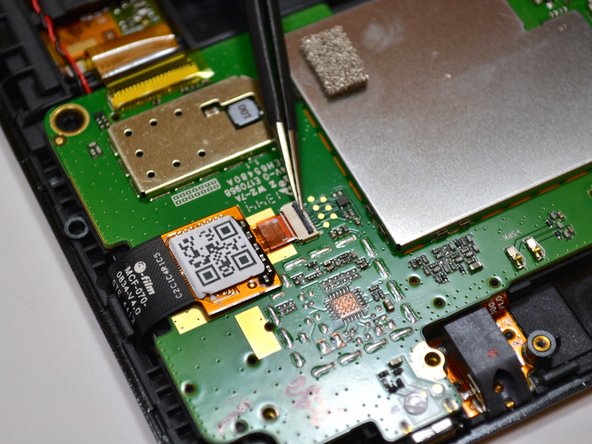
You might find a little yellow mylar sticker cozying up to the white connector. Just peel that sticker away and keep moving forward!
– Spot the part with a QR code—it’s your target for this round.
– Before you can unplug it, you’ll need to separate it from the white connector it’s cozying up to.
– Grab a pair of tweezers and gently twist the little black latch a full 90 degrees so it points straight up. No brute force needed!
– With the black piece upright, go ahead and slide those orange wires straight out and away from the connector using your tweezers. Smooth moves only!
Step 11

Spot a yellow mylar sticker sitting on top of the white connector? Just peel that off and keep going.
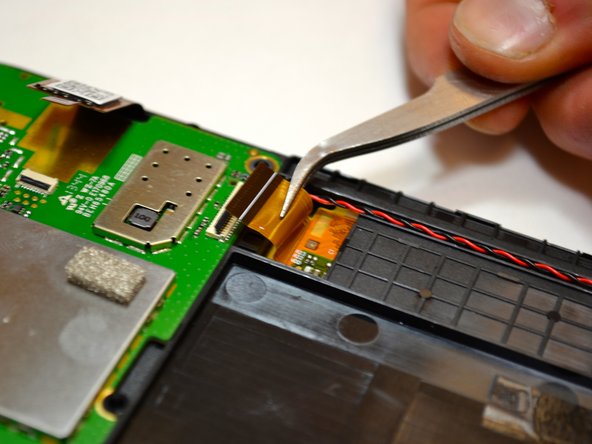
– Spot the orange cable hanging out to the right of the battery tray.
– To set this cable free, you’ll first need to pop it out of the white connector. Grab your tweezers and gently flip the little black latch up and turn it 90 degrees so it stands straight up.
– With the latch up, the orange wires are ready to be released. Use your tweezers to smoothly slide the orange wire straight out from the white connector.
Step 12

– Grab your trusty #000 Phillips screwdriver and unscrew the two M1.4 3.5mm screws from the system board. Set them aside, so they don’t wander off – we’ll need them later.
Step 13

– First, spot the audio assembly hanging out near the top-right corner of your device. It’s like the DJ booth of your gadget!
– Now, gently grab your tweezers and slide them into the circular opening of the black plastic box. Give a little tug upwards to set the audio assembly free!
Tools Used
Step 14
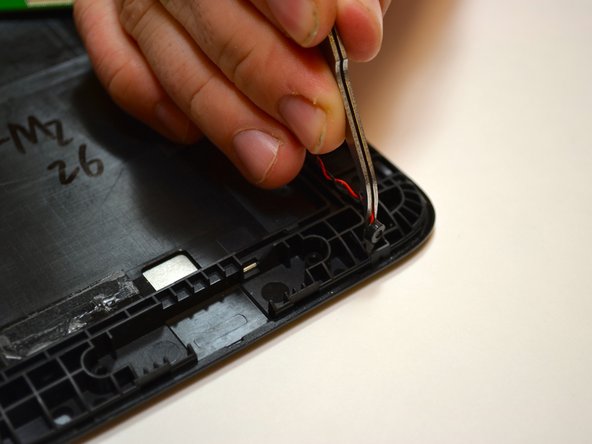

– First things first, find that microphone hanging out at the bottom of your device.
– Next, gently coax the microphone out of its cozy spot by using tweezers to lift up the black and red cords along with the microphone itself.
Tools Used
Step 15

– You’ve successfully liberated the system board from the device! Now, gently lift it off and set it down on a cushy surface so it can take a little break.
– Great news! The screen display unit is all set for a fresh start. Let’s get it swapped out!