Project Tango Tablet Teardown
Duration: 45 minutes
Steps: 21 Steps
They say it takes four to tango, but here, it only takes two. We’re diving into the second round of a cool new tablet adventure! Let’s explore the fresh features packed into this snazzy device. We’ve done our homework, so stay tuned for some insider info straight from the source. If you need a hand, just remember, you can always schedule a repair.
Step 1


– Welcome back, Project Tango. It’s been a minute! Ready to dive into the teardown? We’ll keep it smooth and easy.
– Project Tango has come a long way! Let’s quickly go over the key specs to get you familiarized:
– 7″ HD 1920 x 1200 (323 ppi) touchscreen display
– 120˚ front-facing camera + 4 MP RGB-IR rear-facing camera with a 170˚ motion tracking camera
– 2.3 GHz quad-core NVIDIA Tegra K1 CPU
– 4 GB RAM
– 128 GB flash memory, expandable via microSD
Step 2

When tackling this repair, there’s a little hurdle we need to keep an eye on: Cam glue. With the Cam glue flag set to YES, we’re staying optimistic while also gearing up for whatever surprises might come our way.
NX-74751 is the registry number of the USS Yellowstone from Star Trek: Voyager. Fun fact: ‘Yellowstone’ is also the codename for the Tango tablet. Seems like we’ve got a Star Trek connection in the mix!
– Get ready for some labeling fun! Your Tango tablet boasts a bunch of identifiers, an Nvidia logo, and a note that it’s not the life of the FCC party. But don’t worry, the real star here is buried in all of that: the model number, which is NX-74751.
Step 3

– The ATAP team has really stepped up their game with this design—definitely not the same as anything you’d expect from the Arkansas Taxpayer Access Point. It’s all about pushing boundaries here!
– The Project Tango tablet has definitely received more polish compared to its phone counterpart. The tablet’s thicker body lets the extra cameras fit in, but still keeps things sleek and lightweight—classic tablet style.
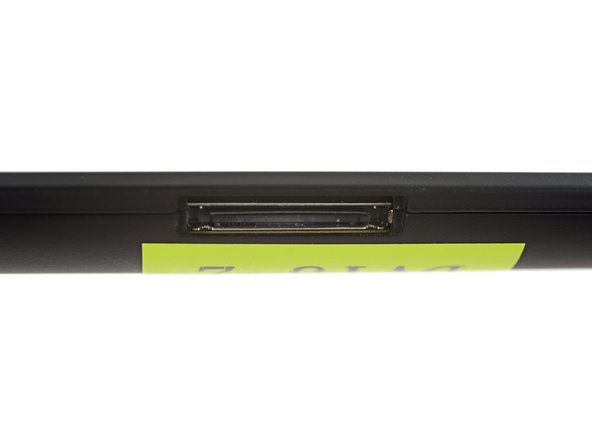
– The new design features a non-standard dock connector that supports fast 12V charging and USB 3.0—your devices are about to get a serious power boost.
– One neat design feature: The cameras are positioned so your fingers are naturally kept away from them. It’s all about preventing accidental finger-blocking, especially since the cameras are key for those cool user experiences you might not even notice.
Step 4

The camera array is secured onto a board that’s attached to the back of the case.
– Here’s a fun little riddle: How many screws or fancy fasteners does it take to keep the rear case snug against the front panel? Drumroll, please…Zero! And guess what? No sticky adhesive is involved either.
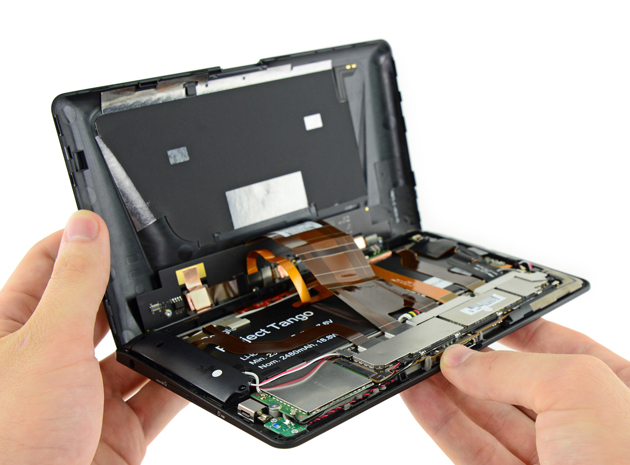
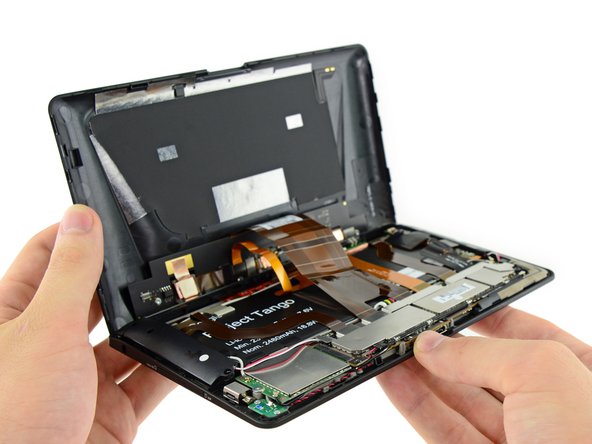
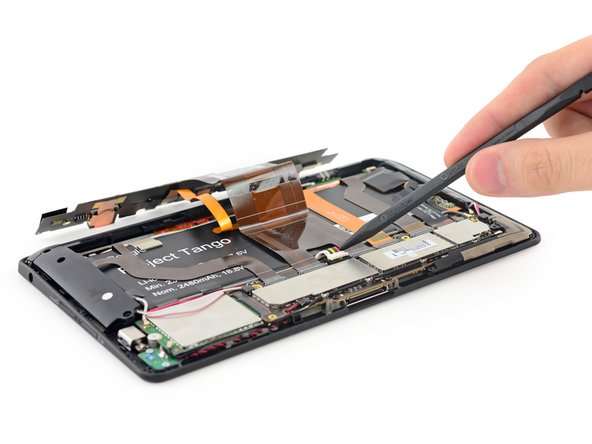
– Now, let’s gently pop open the Project Tango tablet using a trusty plastic opening tool, unveiling all those delightful surprises hidden inside.
Step 5

It looks like adding NFC to the Project Tango tablet is a clear sign that it’s designed to be the ultimate prototype shopping tablet for IKEA. How cool is that?
– Unscrew a few of those pesky screws, and voilà! The camera board pops right off the back case, giving you a chance to peek inside.
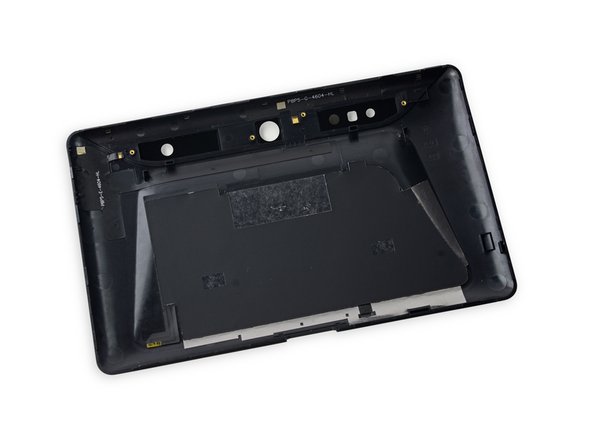
– That back cover? It’s got holes galore for all those cameras and is decked out with antennas, including the nifty NFC tech.
Step 6

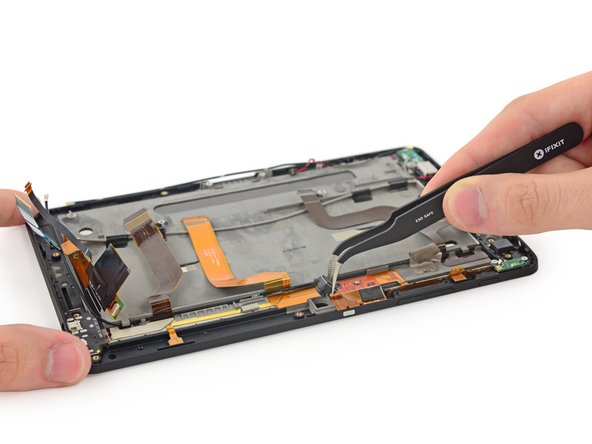
– Alright, folks, let’s dive into the camera board separation! But wait—it’s not that simple because it’s held hostage by a bunch of cables under a metal bracket. Sneaky, huh?
– We’re getting there…
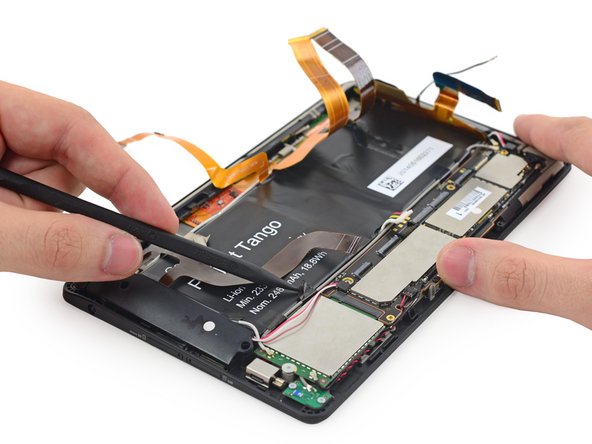
– Now that we’ve got those connectors in plain sight, let’s take a moment to carefully disconnect the battery. Safety first, right?
Step 7

– Looks like we’ve stumbled upon something that reminds us of the Kinect!
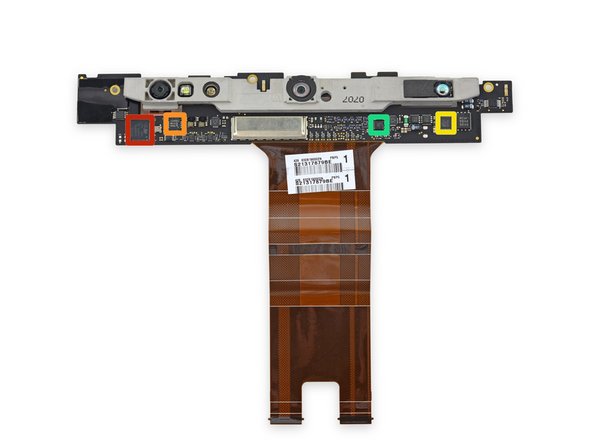
– On the camera control board, there are a few ICs to check out:
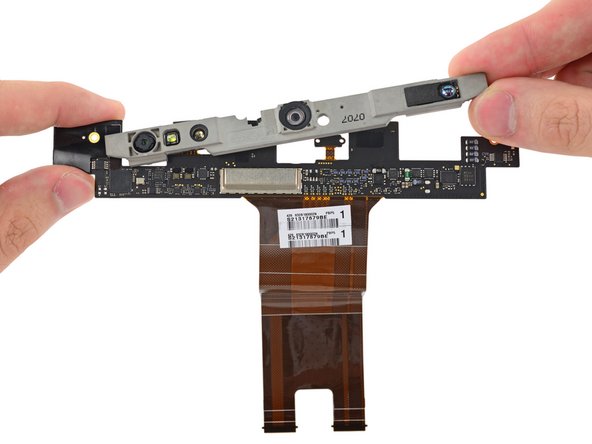
– Time to take off the camera module assembly so we can peek at those cameras up close.
– First up is the STMicroelectronics STM32L151QD, a super-efficient ARM Cortex-M3 MCU.
– Next, we’ve got the NXP Semiconductors PCA9546A tucked away in an HVQFN16 package (546A 0108 TXD403).
– Then there’s the Linear Tech LT3743, also in a QFN package (4C 3743 N3580).
– Don’t forget about the ON Semiconductor NCP45560, a Controlled Load Switch.
– This little component acts as the sensor hub, ensuring our camera captures are accurately time-stamped.
Step 8

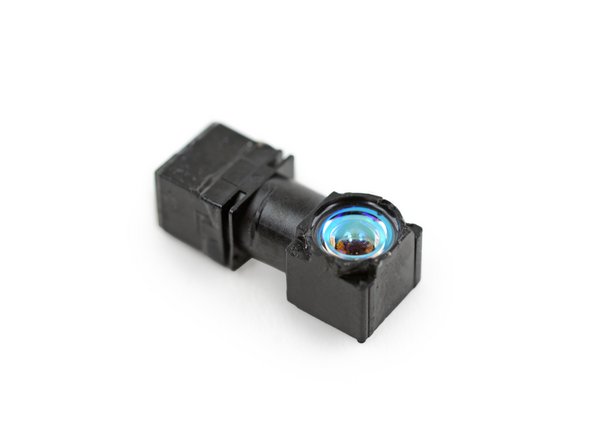
An IR projector beams out infrared light, giving non-RGB cameras a superpower—the ability to map out an area in 3D space. It’s like night vision, but for depth perception!
– The IR projector is neatly tucked away within the camera assembly, but don’t worry, it’s easy to remove with some trusty tweezers.
– Let’s take a closer look at the IR projector – it’s custom designed to work in partnership with the 4MP RGB-IR camera, giving you a great field of view and resolution.
– Looks like we figured out what the ‘cam glue’ marking meant – the two rear-facing cameras are hot-glued to the camera assembly, which can make replacement a bit tricky.
– Curious about how this all works? We’ve got the lowdown. If you’re interested in learning more about the tech behind this, we’ve got some cool explanations to share.
Tools Used

Step 9

Sure, this is a developer kit, so we can’t expect cable management to win any beauty contests, but let’s aim for a little tidiness, shall we?
– Ever notice how it can really drive us up the wall when we can’t pop out a battery in just a couple of moves? We’re right there with you!
– It turns out we had to carefully detach a bunch of connectors and ribbon cables, all of which were secured with a bit of adhesive.
Step 10

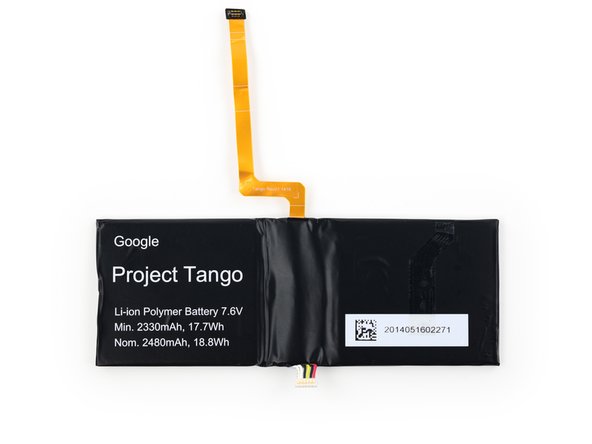
In the realm of cool consumer tablets, the Nexus 7 2nd Generation rocked a 15 Wh battery.
– To map out a whole space in glorious 3D, you need some serious power. Thankfully, the Project Tango tablet serves that up like a champ.
– Just a smidge of light adhesive is all it takes to keep the battery snugly fixed to the front panel assembly.
– The dual-cell 7.6 V Li-ion polymer battery boasts an impressive 18 Wh of energy, easily surpassing the Tango Phone’s already substantial 11.1 Wh.
– Remember, this battery isn’t just any battery; it’s custom-made with dual cells to deliver maximum power when you need it, ensuring developers can extract energy without any compromises.
Step 11
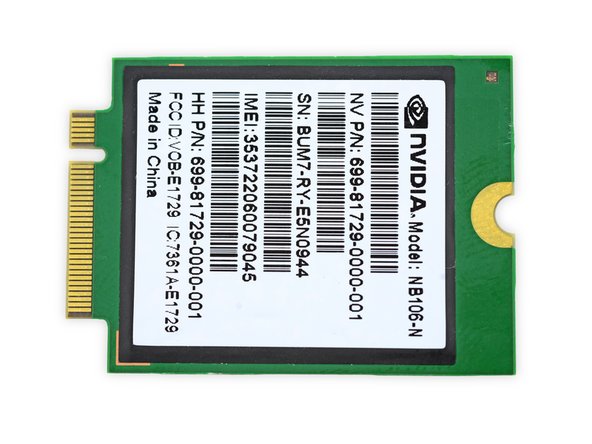

It seems like they opted for a ready-made module to make it easier to roll out the Tango tablet across various regions with different network certifications.
– While digging into the Project Tango tablet, we stumbled upon this interesting Nvidia NB106-N baseband module.
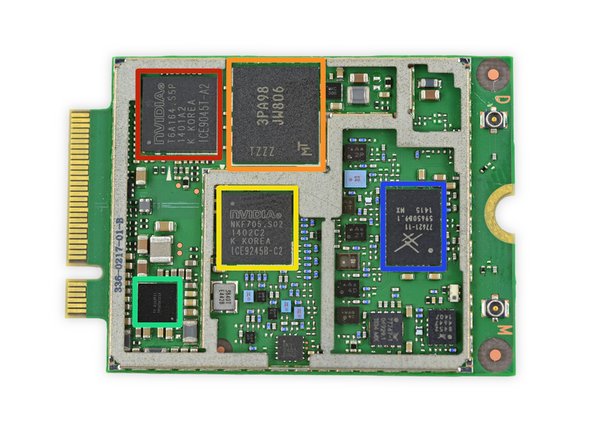
– Let’s take a closer look at the notable ICs on this baseband module:
– Nvidia’s ICE9245B-C2 low-power, multi-mode RF transceiver – a key player in keeping things connected
– Micron’s 3PA98 JW806 NAND-based MCP, which helps with storage and more
– Nvidia’s Icera ICE9045T-A2 LTE Modem, enabling those speedy LTE connections
– Texas Instruments’ TPS659121A PMU, responsible for keeping the processor powered up
– Skyworks’ 77621-11 Multimode Multiband Power Amplifier Module, amplifying signals with ease
Step 12
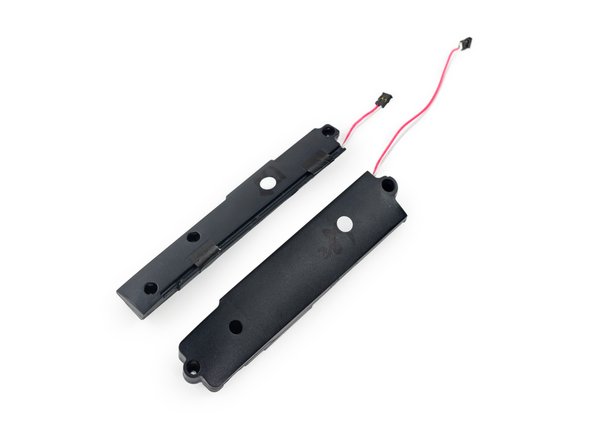

Imagine taking audio to the next level and mapping out a 3D sound universe! If only there was a way for the Project Tango tablet to create such a magical experience. Sure, it wouldn’t just need some speakers—think microphones, too! But hey, just putting it out there as a fun thought.
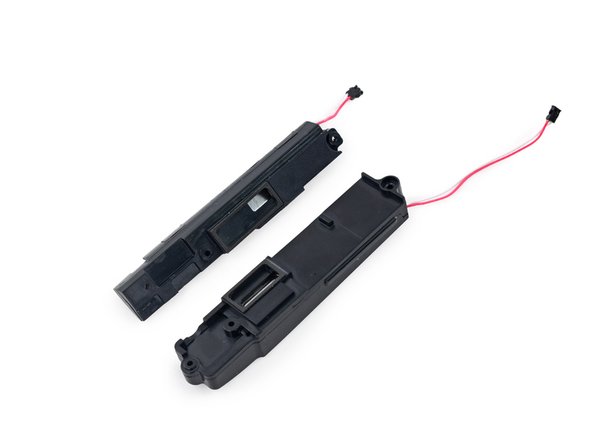
– Well, well, well! Looks like we’ve stumbled upon some speakers! Specifically, a delightful pair of stereo speakers.
– At first glance, they might just look like your average speakers. But trust me, once you know what to look for, they’re anything but ordinary!
– Hey there, let’s get started!
Step 13

Mobile platforms are getting more powerful by the day, but all that power generates a lot of heat. The Tegra K1 quad-core processor is a great example – the more heat you can dissipate, the more power you can unlock. To get the most out of your device, it’s all about keeping things cool. If you’re working on a project that requires maximum performance, you’ll want to make sure your device can handle the heat.
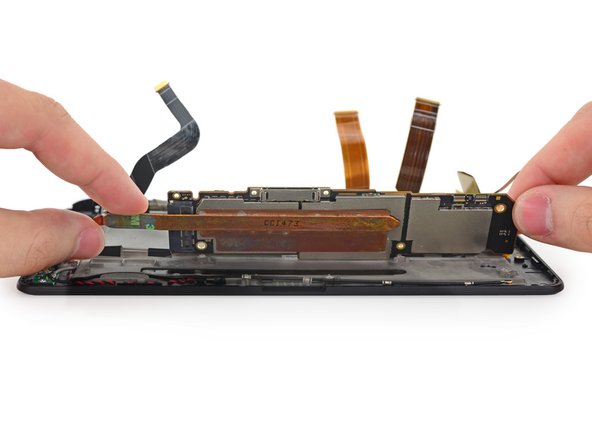
– Let’s keep moving forward to reach the motherboard! We’ve got a couple of minor hurdles to jump over:
– As we lift the motherboard, we uncover a substantial heat pipe stretching its way along the entire length.
– Watch out for those two sneaky antenna cables.
– Don’t forget about the duo of T5 Torx screws lurking in there.
– And keep an eye out for one little vibrator motor cable waiting to be disconnected.
Step 14

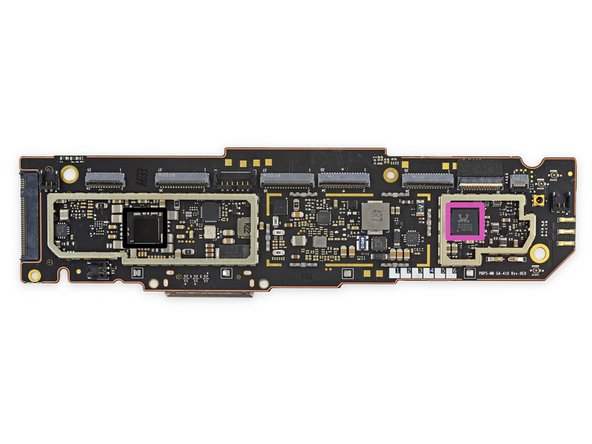
– Meet the star players powering the Project Tango tablet:
– Nvidia TD580D-A1, the speedy 2.3 GHz quad-core Tegra K1 processor that’s ready to impress.
– SanDisk 4133DF4PG02X, rocking 128 GB of flash memory for all your data needs.
– Elpida FA232A2MA, with 2 GB LPDDR3 RAM (two ICs combine for a turbocharged 4 GB total).
– Broadcom BCM4752IUB2G, your go-to integrated multi-constellation GNSS receiver.
– Broadcom BCM43341XKUBG, a slick single-chip dual-band combo device that supports 802.11n, Bluetooth 4.0+HS & FM radio.
– Realtek ACL5642, the Hi-Fi audio champ with voice/sound DSP and CODEC.
– Texas Instruments 45A2RFI, rounding out this tech ensemble.
Step 15

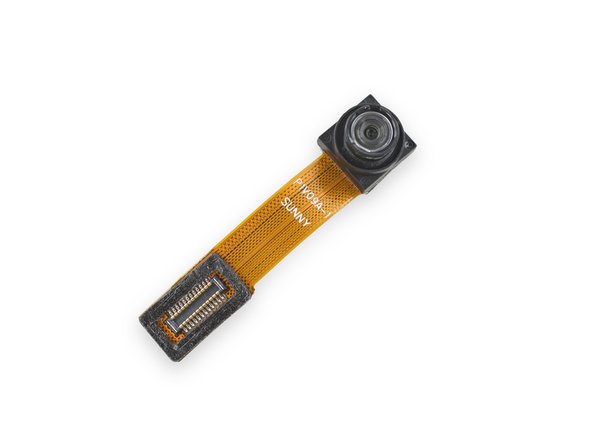
We have a hunch that this camera is quite akin to the P1V06A 120-degree front-facing camera you’d find in the Tango phone.
– Let’s add some extra antennas! Clearly, the rear case wasn’t quite enough to keep this device fully connected. This nifty bar is home to a couple of additional antennas that are ready to boost your signal.
– A must-have for today’s tech-savvy world, the Project Tango tablet features a front-facing camera with a 120˚ field of view, making it ideal for all your selfie adventures.
– The front-facing camera goes by the name P1V09A-1.
Step 16
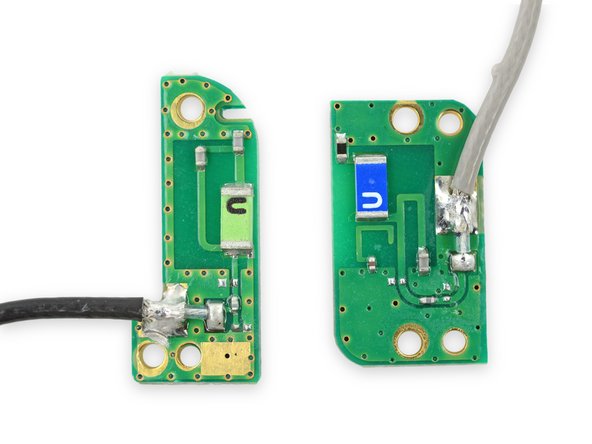

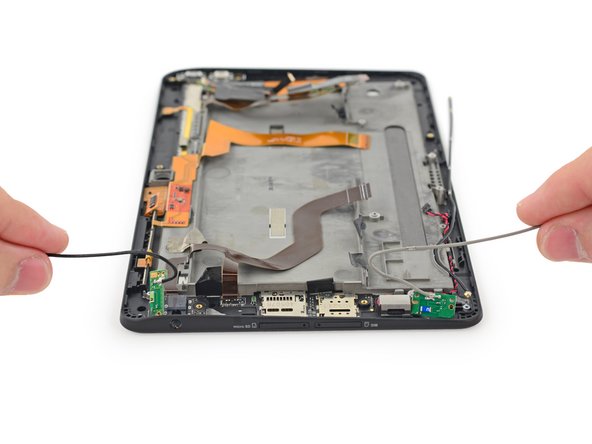
– Alright, folks, things are getting a bit wild with all these antennas! These little champions reside in the top and bottom right corners of the device, and trust us, they matter a lot.
– With a couple of spins from our trusty Phillips #00 screwdriver, we’re liberating two antenna boards from the Tango.
– Teardown Update: Good news! We’ve confirmed that the left green gadget is the GPS antenna, while the right green gadget takes care of the Wi-Fi action.
Tools Used

Step 17

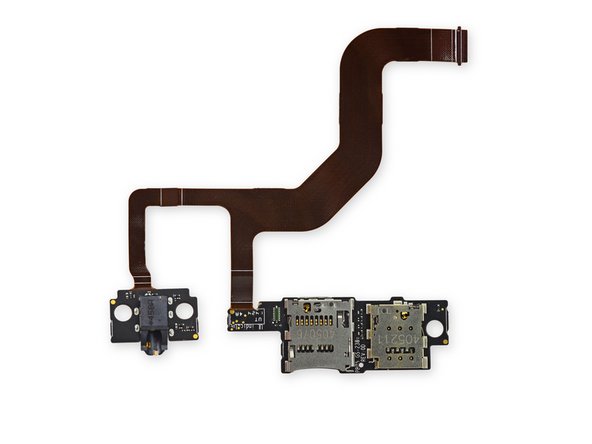
– There’s a solid chunk of adhesive keeping that headphone jack, microSD, and SIM card assembly in place, but with a bit of elbow grease, it’ll pop right out.
– And guess what? This is the first time we’ve encountered a microSD card slot featuring a handy paperclip-actuated tray, just like those nifty SIM card slots.
– These trays were inspired by a clever design team that collaborated on the Tango tablet.
Step 18

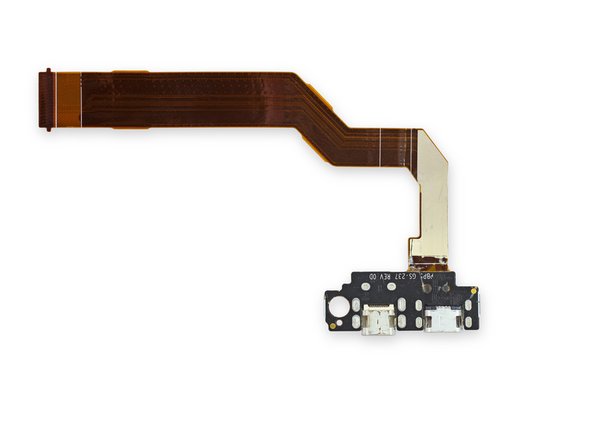
– Ah, this looks like an old friend! It’s that component that sticks out from the edge of the case, snugly attached to the back of the display assembly, and it sports a nice, long ribbon cable that reaches over to connect to the motherboard, probably making a little detour around the battery.
– So here we are, back in the good old days! Welcome to the step right before this one. This time around, we’ve got USB and HDMI replacing those classic card slots and headphone jacks.
Step 19

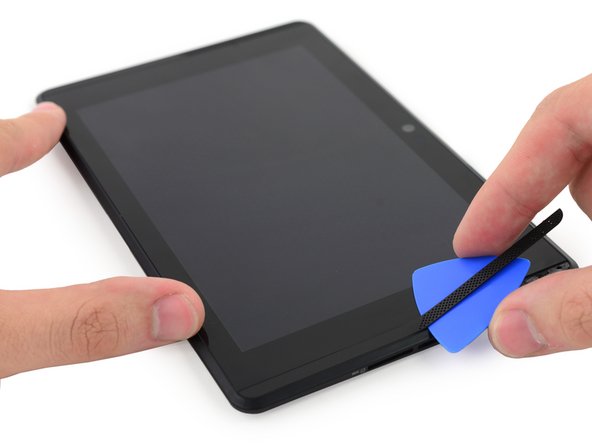
– Alright folks, we’ve nearly run out of gentle tricks for coaxing those stubbornly-glued components out of the display assembly. Time to tackle disassembly and get that glass and LCD out, even if they put up a bit of a fight!
– Before we heat things up, let’s take a little sneak peek. Those speaker grilles? Easy as pie to remove! This will make prying the display out a walk in the park. Awesome!
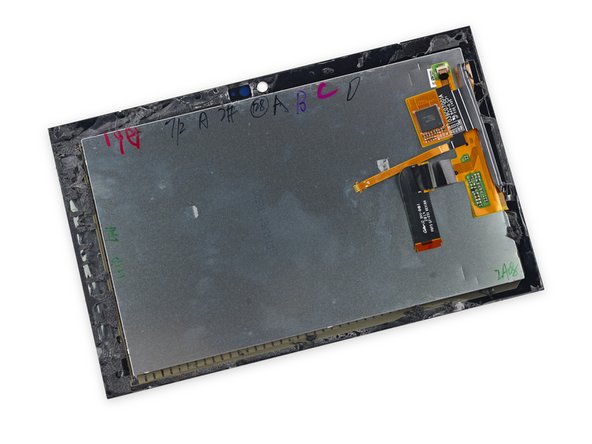
– Oh, what’s that? A touchscreen controller spotted! RM31280 50051 1418A1U0 is making an appearance!
– And just to keep it interesting, we’re leaving behind a delightful jumble of cables: power/volume buttons, camera connectors, and a front-facing microphone. Pretty neat, huh?
Step 20
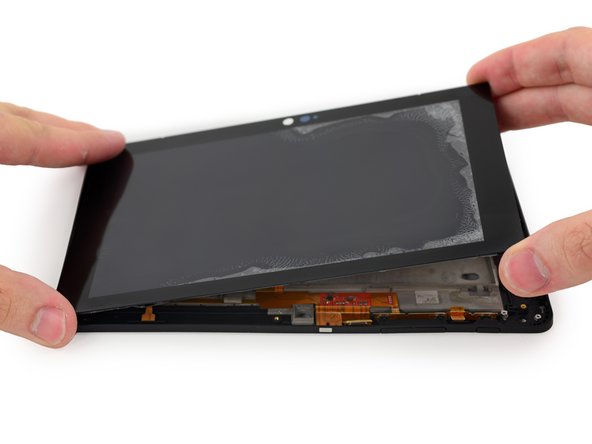

– Grilles out, let’s get this baby on the grill! Or maybe we should slide it under the broiler for some extra heat. Time to fire up that iOpener broiler!
– After a good amount of prying around the edges of the display panel, we finally get the screen lifted and out from its cozy frame. Success!
– Our hard work pays off! We’re greeted with our first glimpse of those secret Sharpie hieroglyphics, revealing the production and QA notes.
– This 7″ HD 1920 x 1200 (323 ppi) touchscreen display follows a tried-and-true standard—the Nexus 7 2nd Generation.
Tools Used

Step 21


This not-so-secret prototype may not be ready for the masses, but we’re excited to share its Repairability Score with you!
– Project Tango Tablet Repairability Score: 4 out of 10 (10 is the easiest to repair).
– Opening the rear case is a breeze—no screws or sticky adhesives here, just some handy plastic clips.
– Beware of the battery’s hiding cables! They can be a bit tricky to deal with, but hey, at least you won’t be melting adhesive like a pro chef.
– Modularity? Not so much! With a bunch of components soldered together, replacement parts might give your wallet a workout.
– The internal setup is a bit of a maze—packed with cables and quite the puzzle to disassemble and reassemble. If you find yourself in a jam, remember, you can always schedule a repair.