Google Pixel Tablet USB-C Port Replacement
Duration: 45 minutes
Steps: 34 Steps
This repair guide is crafted by the talented folks at Salvation Repair. It’s not backed by any big names, but it’s packed with everything you need to get your device back in action. For more info on our guides, dive in here.
This handy guide is your go-to for swapping out the USB-C port on your Pixel Tablet! Having trouble charging or noticing that the port has worn out and isn’t gripping the cable as it should? Sounds like it’s time for a little upgrade! Just a heads up: make sure to have some thin, double-sided tape, like Tesa 61395 Tape, handy to keep that screen secured while you work your magic. If you need help, you can always schedule a repair.
Step 1


Make sure to let your battery run completely out before diving into this repair. A battery that’s still got some juice left might just throw a fit and catch fire if it gets damaged. Stay safe!
Press and hold the power button and volume up button simultaneously to access the power off menu.
– Let’s get started by unplugging all cables from your tablet and shutting it down completely.
Step 2

– If your screen has seen better days and is all cracked up, grab some packing tape and lay a few overlapping strips across the glass. This helps protect your fingers and makes taking it apart a lot easier.
Step 3


For all the deets on using the Anti-Clamp, make sure to check out this guide.
– In the next three steps, we’re bringing out the Anti-Clamp, your new best friend for making the opening process a breeze! If you’re going tool-free, just jump down three steps for a different approach.
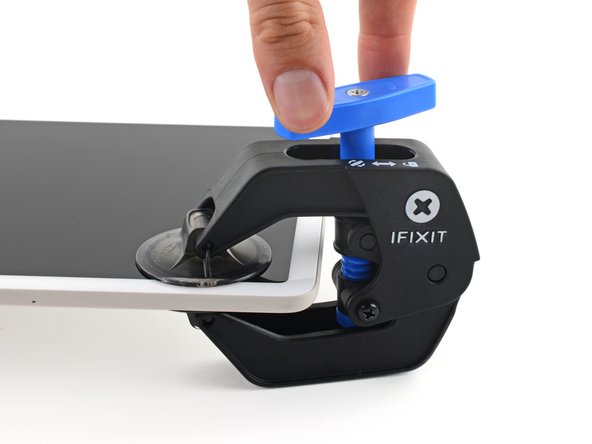
– Give that blue handle a gentle tug backward to release the Anti-Clamp’s arms. You’ve got this!
– Slide those arms over the top left corner, placing one suction cup on the back cover and the other on the screen. Teamwork makes the dream work!
– Now, set your tablet on a flat surface so it sits snugly between the Anti-Clamp’s arms. We’re almost there!
– Squeeze those suction cups together to create a solid grip. You’re doing great!
Step 4
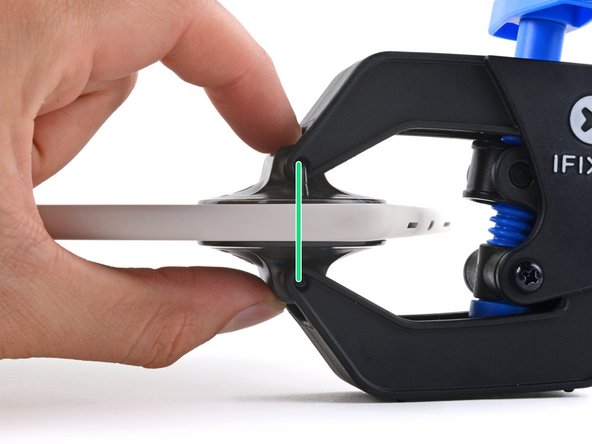

– Gently pull the blue handle forward to secure those arms in place.
– Give the handle a couple of clockwise twists—two full spins should do the trick—until you see those suction cups starting to stretch out.
– As the cups stretch, keep an eye on their alignment; they should be standing tall and straight together. If they start to wiggle or slip, no worries! Just remove the Anti-Clamp and stick some tape on the cups to help them grip.
Step 5


Watch out for the heat! Overheating can cause some serious damage to the screen and battery, so keep things cool while you’re working on it.
– Grab your trusty hair dryer or heat gun and warm up that top left corner of the screen until you see a little gap forming between the glass and the frame. It’s like magic!
– Now, slide an opening pick into that gap and let it work its charm.
– Next up, gently pull the Anti-Clamp away using the handy pull tabs on the suction cups. You’re doing great!
Tools Used


Step 6

Already got an opening pick in place with the Anti-Clamp? Sweet, you can skip ahead two steps then!
No Anti-Clamp? No worries, you can also use a hair dryer, heat gun, or hot plate to get the job done. Just be careful not to overheat things – you want the tablet to be warm to the touch, not scorching hot. If you’re not feeling confident, remember that you can always schedule a repair if you need a hand.
– Flip your tablet around so the front camera is facing you, like it’s ready for a selfie!
– Now, grab your trusty heated iOpener and apply it to the top left corner of the screen (which is now the bottom right since you flipped it) for a cozy three minutes.
Tools Used

Step 7


– Start by attaching a suction handle to the top left corner of the screen, getting as close to the top edge as you can – this is where the magic begins.
– Give the suction handle a firm, steady pull upwards until you see a gap forming between the glass and the frame. This might take a bit of elbow grease, but you’ve got this!
– Next, carefully insert the tip of an opening pick into the gap you just created. This is the part where you get to feel like a pro at this repair thing!
– Now, go ahead and remove the suction handle – you’re making great progress! If you need help, you can always schedule a repair
Tools Used

Step 8


The screen is glued down all the way around the edges. Keep an eye on these spots as you peel away the adhesive:
– The top, bottom, and left edges are where the adhesive is packing the most punch!
– The right edge is a bit more chill with slightly lighter adhesive.
– At the top, close to the front camera, you’ll find the adhesive is delicate as a butterfly, and those fragile cables are linking the screen to the frame.
Step 9


Hey there! Just a friendly reminder: keep your pick no deeper than 7 mm, which is about halfway between the tip of the pick and that cool logo. Let’s keep everything safe and sound while we work on this repair!
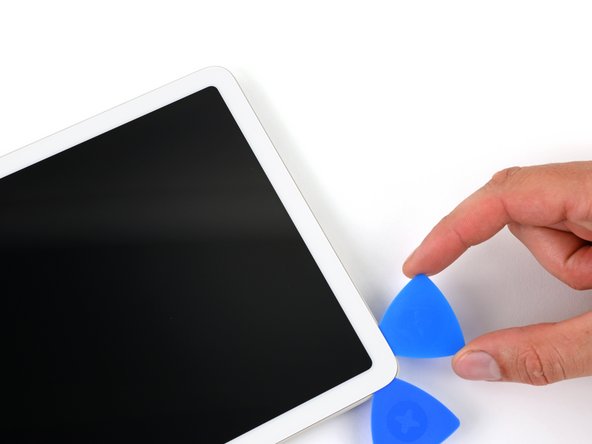
– Gently slide your trusty opening pick to the top left corner of the tablet. You’re doing great!
– Keep that pick in there to stop the adhesive from being a sneaky little rascal and resealing.
Step 10

When heat is needed, a hair dryer or heat gun can be used, just be careful not to overheat the screen or battery, we want to fix it, not fry it.
– Heat up your trusty iOpener and give the left edge of the screen some love for two minutes. You’ve got this!
Tools Used
Step 11

Keep your pick’s adventure to a maximum of 7 mm deep—just a little past the tip and before you reach the Salvation Repair logo. Stay safe and keep it light!
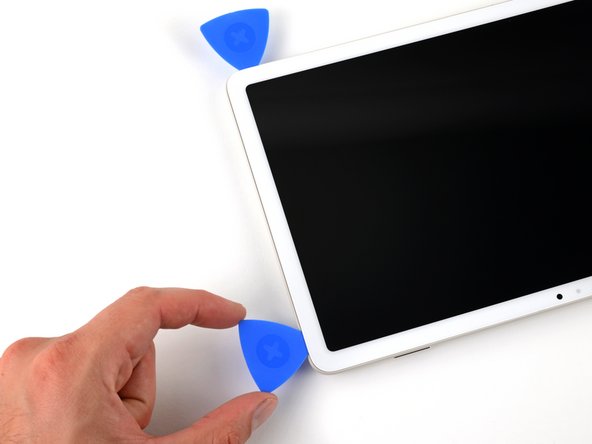
– Time to get this screen loose! Insert a second opening pick into the top left corner.
– Now, gently slide that pick down to the bottom left corner of the screen. This will help break the left edge adhesive, making it easier to remove.
– Leave this pick in place for now, so the adhesive doesn’t start to stick back together on you.
Step 12

When it’s time to get your device nice and toasty, you can bust out a hair dryer, heat gun, or hot plate. Just be sure to keep the heat in check – you don’t want to accidentally cook your screen or battery!
– Heat up your trusty iOpener and give it a cozy two-minute hug at the bottom edge of the screen. It’s like a warm embrace for your device!
Tools Used
Step 13


Hey there! Just a friendly reminder: keep your pick no deeper than 7 mm, which is about halfway between the tip of the pick and that cool logo. Let’s keep everything safe and sound while we work on this repair!
If your pick gets stuck, don’t worry! Just twist it back and forth while sliding it to help loosen the adhesive and get it moving again.
– Pop in a third opening pick at the bottom left corner. It’s like giving your device a little hug!
– Gently glide your pick over to the bottom right corner of the screen to break free that stubborn bottom edge adhesive.
– Keep that pick in place to ensure the adhesive doesn’t decide to play hide and seek again.
Step 14

You can also grab a hair dryer, heat gun, or hot plate for some extra warmth, but just keep an eye on things to avoid turning your screen or battery into a hot mess.
– Warm up the right edge of the screen with an iOpener for two minutes to get things cozy.
Tools Used
Step 15

Keep your pick chill and don’t go deeper than 5 mm along the right edge!
For a handy visual guide, measure 5 mm from the tip and give your pick a little mark with a permanent marker. You’ve got this!
– Pop a fourth opening pick into that bottom right corner.
– Gently slide your pick all the way up to the top right corner to break free from the adhesive holding you back.
– Keep that pick in place to avoid any sneaky resealing of the adhesive.
Step 16

You can also whip out a hair dryer, heat gun, or hot plate for some extra warmth, but watch out! Overheating the screen or battery is a no-go.
– Heat things up by applying a heated iOpener to the top edge of the screen for about two minutes. This will help loosen things up and make the next steps a breeze.
Tools Used
Step 17

Be super careful when you’re working along the top edge – the front camera and sensor are centered here, so don’t insert your opening pick more than 3mm (1/8in) or you might damage something important. Take your time and work slowly to avoid any issues.
For a visual touch, go ahead and measure about 3 mm from the tip and give your pick a stylish mark with a permanent marker.
– To help you avoid slicing too deep, grab a piece of masking tape about 6.3 cm (2.5 in) long and stick it right along the top edge, centered over the front camera. It’s like a little reminder to keep your cutting game strong and safe!
Step 18


– Place a fifth opening pick in the top right corner of the screen.
– Slide the pick toward the front camera, but stop when you’re about 3 cm (1.25 in) away from it.
– Pull the pick out to a depth of 3 mm (1/8 inch), then carefully slide it past the front camera.
– Once the pick is 3 cm past the front camera, push it about 6 mm deep, which is roughly halfway between the tip and the logo. Then, slide it toward the first pick you placed in the top left corner.
Step 19

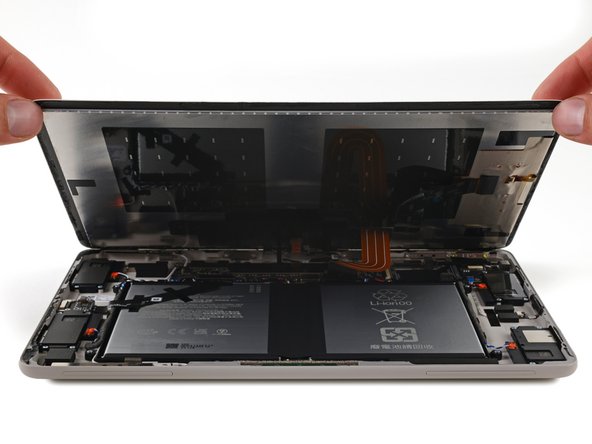
Keep that screen angle under 90 degrees, my friend! Those little front camera and sensor cables are on the short side and could get a bit too cozy with tearing.
If the screen feels stuck, take a closer look around the edges to make sure you haven’t missed any spots where the adhesive is still holding tight. Use an opening pick to carefully slice through any remaining sticky bits.
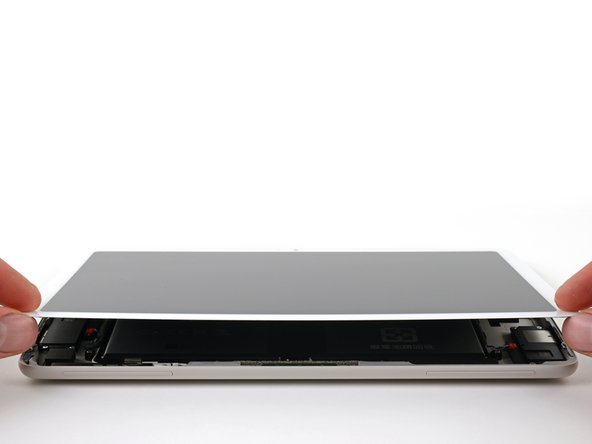
– Gently grab those bottom corners of the screen and give them a lift!
– Tilt the screen open just enough to peek at the cables connecting it to the frame.
– When it’s time to put everything back together, remember to peel off those adhesive liners from around the screen before pressing it down snugly into the frame.
Step 20


Having a tough time keeping the screen up? No worries! Just pop the tablet’s dock on the frame to give the screen a little boost, or you could get a buddy to help hold it while you work your magic.
– For the next few steps, keep that screen tilted open with one hand while your other hand gets to work.
– Grab your trusty tweezers and gently peel away the black tape from the screen cable connector.
– Now, as you get ready to put everything back together:
– If the old tape is looking a bit worse for wear, slap on some new tape from your repair kit.
– Before you seal everything up, why not give your tablet a quick test drive? Power it on and make sure it’s all good to go. Just remember to power it back down before continuing with the reassembly.
Tools Used

Step 21
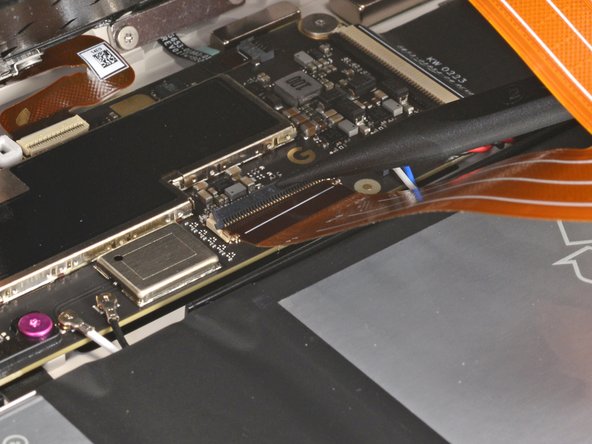

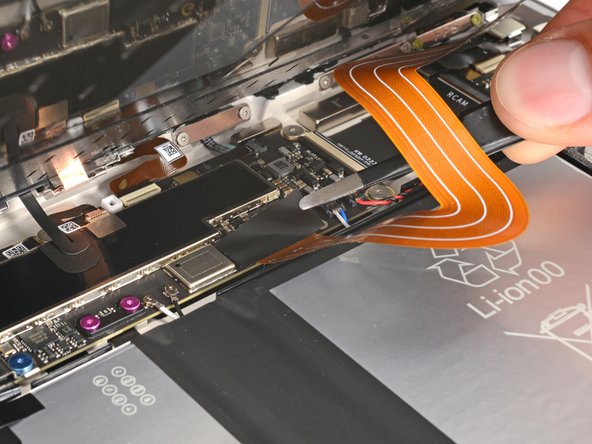
– Grab a spudger or your trusty fingernail and gently lift the tiny locking flap located on the inner edge (the same side as the cable) of the screen cable ZIF connector.
– Next, with some finesse, use tweezers or your fingers to carefully pull the screen cable straight out from its socket.

Step 22


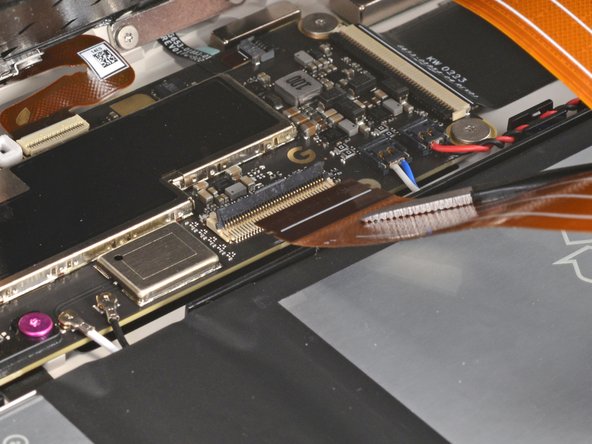
– Grab your trusty opening pick and gently flip up that small locking flap on the outside edge (the one opposite the cable) of the front camera ZIF connector. You’ve got this!
– With a steady hand, use your tweezers to pull the cable straight out of its cozy socket. Easy peasy!
– When you’re putting everything back together, watch out for that cable—it’s a little shy and doesn’t like to bend too much. Use those tweezers to guide the connector into its socket while locking that ZIF connector flap securely at the same time. You’ve got the magic touch!
Tools Used
Step 23


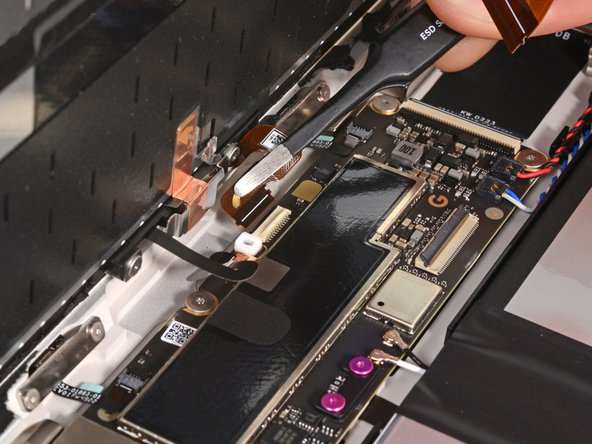
– Time to get this repair started! Use the tip of your trusty spudger or a clean fingernail to gently pry up the small locking flap on the inside edge of the front sensor connector.
– Next, grab your tweezers and carefully pull the cable straight out of its socket. You’re making great progress!
Step 24

– Time to say goodbye to that screen! Carefully detach it to get to the good stuff inside.
Step 25


If you’re planning to give your screen a second chance, make sure to strip off that old adhesive from both the screen and the frame. You’ve got this!
– Let’s get that frame sparkling clean and ready for reassembly! First up, grab the flat end of your trusty spudger or a clean fingernail and start scraping up an edge of that stubborn leftover adhesive until you can get a good grip on it.
– Now, it’s time to channel your inner adhesive ninja! Use tweezers or your fingers to peel off those large chunks of glue from the frame.
– Keep that momentum going and repeat the process all around the frame’s perimeter until no big pieces are hanging around. You’re almost there!
Step 26

Getting your screen ready for action? Don’t forget to give its edges and the frame a little TLC. A quick clean goes a long way!
– Grab a pipette or syringe and fill it up with some super-strength isopropyl alcohol (we’re talking over 90% here). Then, just apply a few drops around the edge of the frame—let’s get that party started!
– Now, take a microfiber or lint-free cloth and wrap it around the flat end of your spudger. Give that frame a good scrub until it shines like new. Don’t be shy about using more isopropyl alcohol as needed—keep it clean and fresh!
Tools Used
Step 27


The Pixel Tablet rocks Torx Plus screws, but don’t sweat it—standard Torx bits can step in when times get tough. Just remember to keep a steady, downward push to avoid stripping that precious hardware!
When you’re reaching for standard Torx bits, go for the T3 Torx; it’s the star of the show for these screws. If it feels a bit wobbly, you might want a T4 Torx bit instead.
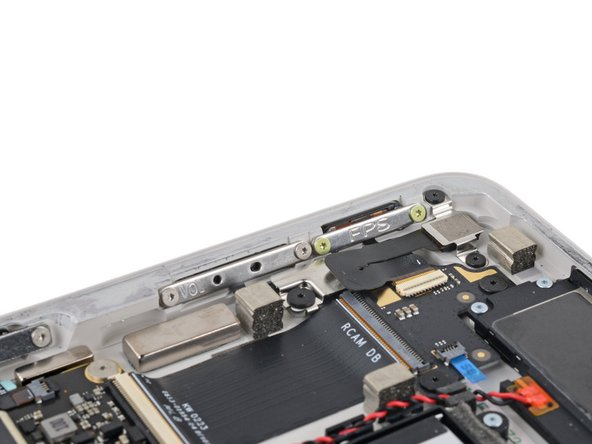
– Grab a Torx Plus 3IP driver and unscrew the two 2.6mm screws that are holding down the cover over the battery, USB-C, and speaker connectors.
– Now, just lift off the cover and you’re one step closer to getting everything fixed!
Step 28

To reconnect a press connector, simply line it up with its socket and give one side a gentle press until you hear that satisfying click. Then, show the other side some love with a press down, and voila! You’re all set.
– Grab your trusty spudger and use the flat end to gently lift and disconnect that battery press connector. You’re doing great!
Tools Used
Step 29


Hey there! Just a friendly reminder: connecting the screen cable while the battery is still hooked up can lead to shorting out the connector and could even spark a fire. Let’s keep it safe and sound!
– Take your time during reassembly to make sure the screen and battery are securely reconnected.
– Prop up the bottom of the tablet using a box or something similar. Tilt the screen back and rest it against something so it’s angled up to about 90 degrees.
– Reconnect the small front sensor cable using its ZIF connector.
– Now, reconnect the large screen cable with its ZIF connector.
– Next, reconnect the battery press connector.
– Grab your Torx Plus 3IP driver and use it to install the two 2.6mm screws, securing the connector cover in place.
– Keep the reassembly going smoothly with these cables connected.
Step 30


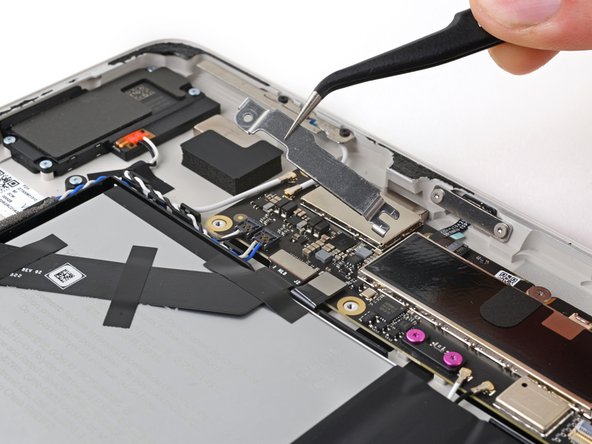
– Gently slide the flat end of your trusty spudger under the USB-C port press connector and give it a little wiggle to disconnect it. You’ve got this!
Tools Used
Step 31


Handle that battery with care—your tool is not its best friend!
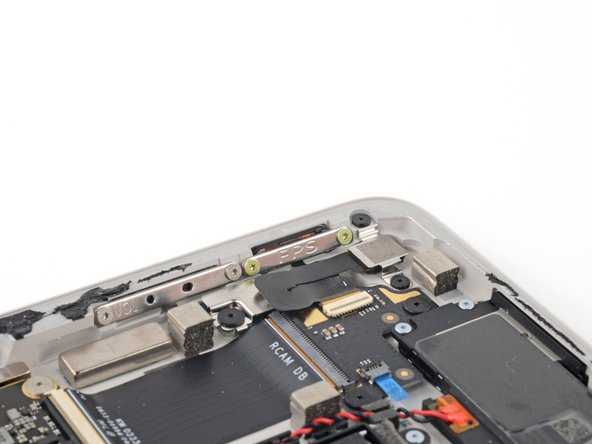
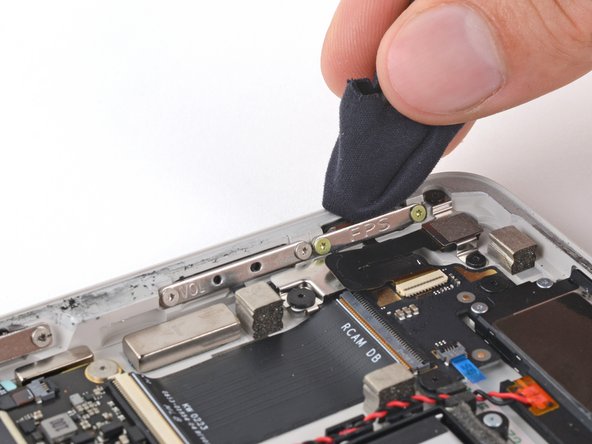
– Grab some blunt-nose tweezers (or your fingers, if you’re feeling confident) and gently peel off the three strips of tape holding the USB-C port cable in place on the battery.
– When it’s time to put things back together, reuse these strips if they’re still in decent shape. If they’ve seen better days, just cut a few thin pieces of electrical tape and use those to keep the cable secure on the battery.
Tools Used
Step 32

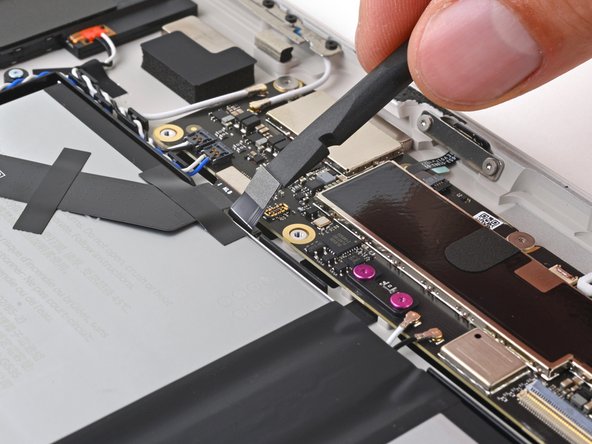
– Grab your trusty Torx Plus 3IP driver and get ready to tackle those four 3.2 mm screws that are keeping the USB-C port in place. You’ve got this!
Step 33


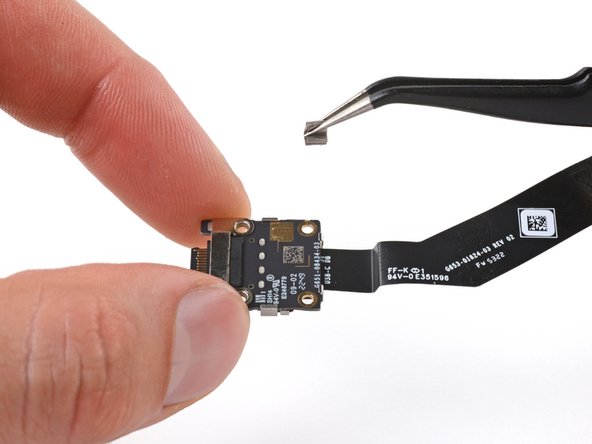
– Gently coax the USB-C port out of its snug little home in the frame and set it free!
Step 34

– Time to put your device back together! Just follow these steps in reverse and you’ll be golden.
– Got some old tech lying around? Make sure to drop it off at an R2 or e-Stewards certified recycler.
– If things didn’t go as planned, don’t fret! Give some basic troubleshooting a shot, or swing by our Answers community for a helping hand.
–
