Ematic FunTab 3 Battery Replacement
Duration: 45 minutes
Steps: 6 Steps
Is your device only running when it’s chained to the charger, or refusing to keep a charge at all? Don’t worry, we’ve got you covered! This guide will walk you through swapping out the battery to bring your device back to life. Budget about 15-30 minutes for this job, as you’ll be detaching and desoldering all the battery’s connections to the device. Take your time, and you’ll nail it!
Step 1


Before diving in, let’s power down that device, shall we?
For better luck and less hassle, always crack open your device from the side that skips the buttons.
– Start by gently sliding the hooked end of the plastic opening tool into the gap between the screen and the back panel along the edge of your device.
– Now, glide the tool down the side of the device, taking care to keep it steady.
– Give it another go—insert the tool again and carefully slide it down the side of the case for a second pass.
Step 2

– Gently pry the back panel away from the screen – it’s time to get inside and start fixing!
Step 3

– Peel away the black tape to uncover the wire ribbon connector. Let’s get to it!
Step 4

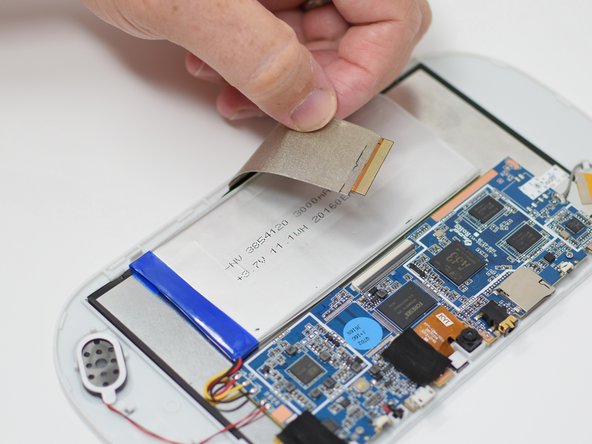
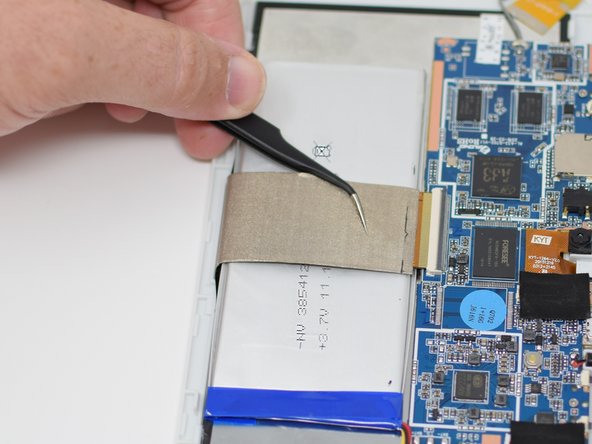
Tweezers might come in handy to gently tug out that wire ribbon. You’ve got this!
– Gently lift up the sleek black retaining tab with your trusty plastic opening tool.
– Carefully slide out the hefty wire ribbon that crosses over the battery.
Tools Used

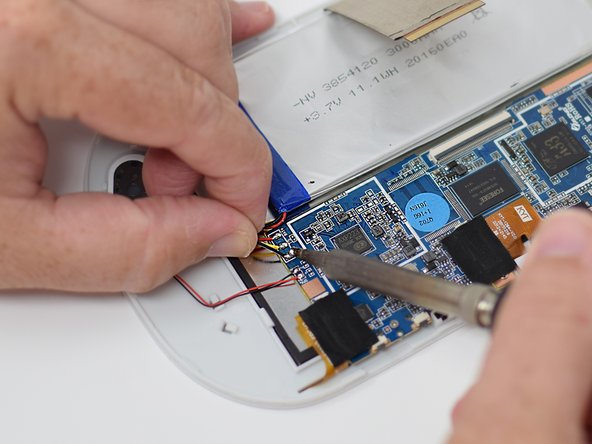
Step 5
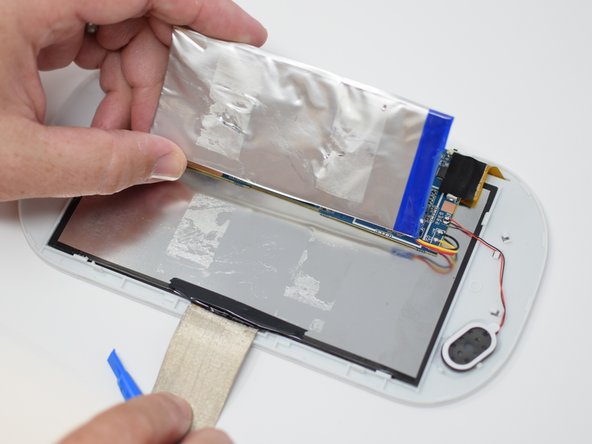


The battery is sticking on with some tape, so you might need to give it a little extra oomph to pop it off from the back of the display.
– Slip your plastic opening tool gently under the battery—like a ninja on a mission.
– Now, with some finesse, use the tool to pry up the battery. Take it slow, you’re doing great!
Step 6

– Now that you’ve got everything sorted, just work your magic in reverse to put your device back together.
–

