Jazz UltraTab C1059-HL Speaker Replacement
Duration: 45 minutes
Steps: 6 Steps
Get ready to tackle your speaker swap like a pro! This guide is your trusty sidekick, walking you through the steps to remove and replace your speaker with ease. It should only take about 15-20 minutes of your time, and if you stick to the guide, you’ll be on your way to a successful fix with little risk to your device. If you need help, you can always schedule a repair!
Step 1


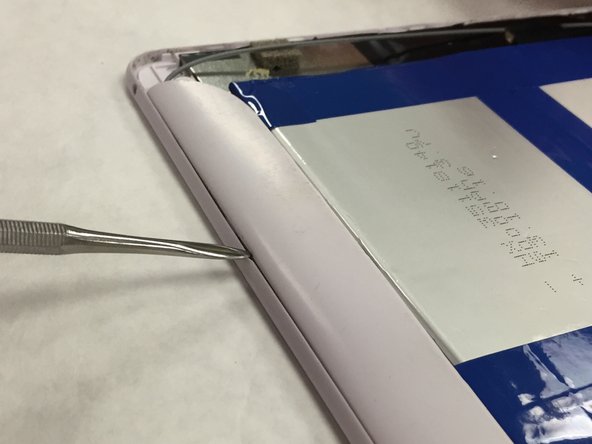
Getting those clips undone might require a little muscle! Just be careful not to scuff up that sleek plastic edge of your device.
Now that the screws are out, the case is still holding on thanks to some clips along the outer edge of the aluminum backplate. A little gentle pressure will do the trick!
– First things first, gently detach that back panel and set it aside like a pro.
– Next up, let’s tackle those pesky screws! You’ve got 4 to deal with: two chillin’ on the left and two hangin’ out on the right.
– Now grab your trusty metal spudger and with a dash of caution, carefully pry open the case as if you’re revealing a surprise gift!
Step 2

– Lay your device on the table with the screen facing down, let’s get this repair started
Step 3

– Meet the Speaker! Now, let’s kick things off by unscrewing those two black screws—time to get this party started.
Step 4

Hold on to that tape; you’ll want it for putting everything back together later!
– Peel away that black tape from the wires like it’s a sticker on a fresh phone case.
Step 5

– Fire up your soldering iron and heat the spot where the speaker wires connect to the mainboard – it’s time to get this repair started!
– When the solder gets all melty, carefully remove the speaker wires. Easy does it!
– Take a moment to note where each wire is connected, so you can put everything back together smoothly later. It’s like solving a tiny puzzle, and you’re the mastermind!
Tools Used

Step 6

– To put everything back together, just reverse the steps you followed to take it apart.
– You did it! If you need help with anything else or have another device that needs fixing, you can always schedule a repair