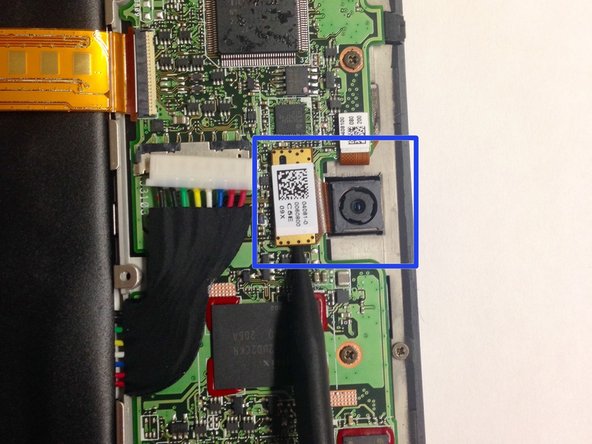
Asus TF300T Tablet Rear Camera Replacement
Duration: 45 minutes
Steps: 4 Steps
Having trouble with the rear camera or noticing blurry pics? Let’s fix that! The rear camera on the Asus TF300T Android Tablet is pretty sensitive to pressure and other factors, which can lead to it malfunctioning. This step-by-step guide will walk you through replacing the rear camera with ease and precision.
Step 1
Once you reach the side with the charging or dock port, take it slow and easy—this area has thinner plastic that’s not here to play. Excessive force? Not today!
– Step one: Make sure the dock is unplugged and the power is completely off—no surprises, right?
– Now grab your trusty plastic opening tool and get to work on the side opposite the dock/charging port. Ease your way along the short sides of the tablet and get that baby opening up.
– Once you’ve made it all the way around, switch to the spudger to separate the back panel from the screen. Voilà, you’ve unveiled the tablet’s inner workings!
Tools Used
Step 2
When you’re tackling repairs like swapping out the screen or digitizer, there’s no need to remove the battery—just power down the tablet first. Stay chill and keep those metal tools away from anything that could cause a short circuit!
– Before diving into your Asus Transformer tablet repair, give that hard power switch a little love and make sure it’s turned off. Trust us, it’s for the best!
– Next, find the power switch located near the power button on the top left. Grab a handy tool and slide it to the ‘off’ position. You’re all set for a smooth repair adventure!
Step 3
– Grab your Phillips #00 screwdriver and unscrew all the little bolts keeping the battery and motherboard joined together—it’s like breaking up a super clingy couple.
– After that, follow the photo to spot the screws and use the spudger to gently pry off the cover that’s hiding the clips for the dock sensor and a few more sneaky screws.
– Now, with the same trusty screwdriver, remove those additional screws and use your spudger to carefully disconnect the spudger sensors from their clips. Don’t worry, it’s easier than it sounds!
– Finally, once the battery is liberated, use the spudger to lift it out of its spot like you’re saving the day. Go you!
Tools Used
Step 4
– To wrap things up, simply reverse the steps you followed to take your device apart. Easy peasy!
– If you need help or have any questions, you can always schedule a repair with Salvation Repair.


