Asus Transformer Pad Infinity Rear/Front Facing Camera Replacement
Duration: 45 minutes
Steps: 22 Steps
Is your Asus Transformer Pad Infinity’s camera giving you trouble and in need of a swap? To kick off the camera replacement, you’ll want to dive into the Asus Transformer Pad Infinity Teardown Guide and tackle the first six steps. Just follow along with steps 1-6, and don’t worry, we’ve got you covered! Check out the guide here: Asus Transformer Pad Infinity Teardown. Once you breeze through Step 6, you’re all set to jump into the camera replacement adventure!
Step 1

– This Transformer Pad Infinity has landed on the repair bench and is about to get a full makeover. Time to roll up our sleeves!
– Step one: Power down the device. No accidental surprises!
Step 2
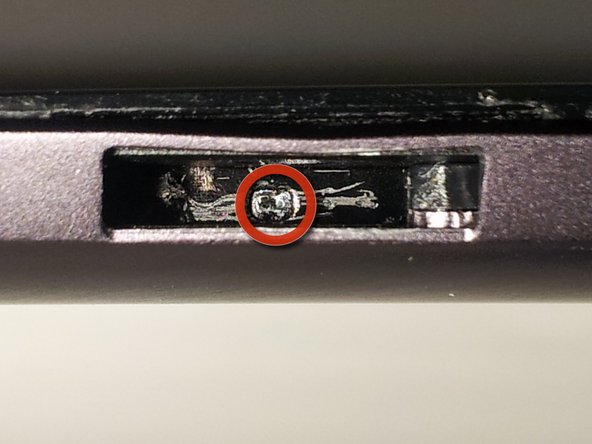
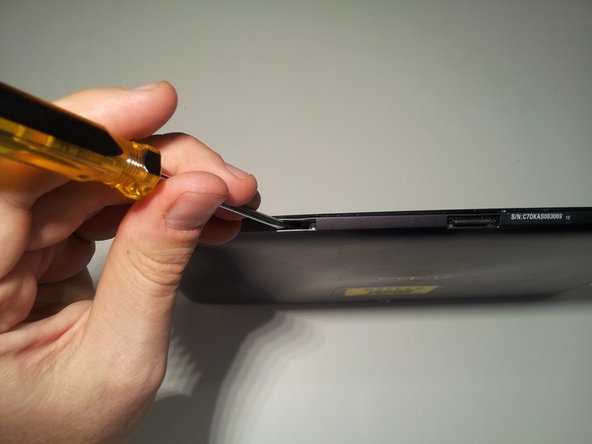

– Time to get started! Insert a small flat head screwdriver into the 2 docking station guide ports on the bottom of the tablet. This is where the magic happens.
– Now, take a closer look inside the port and you’ll find a tiny tab. Use your trusty screwdriver to gently push this tab to the right until you hear a satisfying click. This will unlock the bottom tabs that hold the screen in place.
– If everything went smoothly, you should see a small arrow pointing to the left inside the port. This is your cue to remember which way to push the tab when it’s time to relock everything during re-assembly.
– Don’t forget to unlock the tabs in both docking station guide ports. You’re making great progress!
Step 3
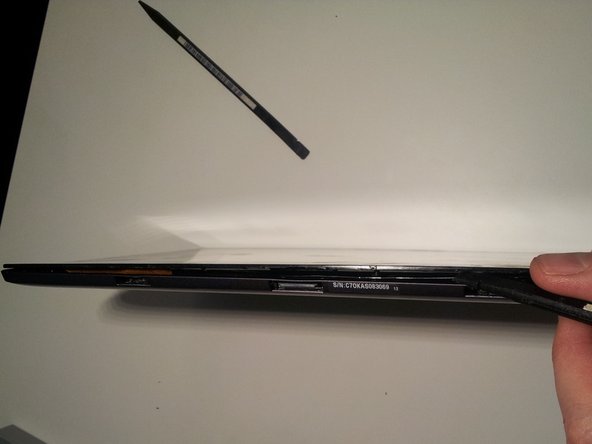


– Take a peek at the locking assembly you just freed up in Step 2. It’s a little beauty!
– Now, grab your trusty spudger or any other handy opening tool and give those small plastic tabs at the top of the docking station guide ports a gentle push upward (toward the screen). This will nudge the screen away from the frame, creating just enough space for you to slip in the flat side of another spudger and start liberating the bottom of the screen from the case.
– Slide the flat end of your spudger along the bottom edge of the tablet to pop those plastic tabs out of the locking mechanism inside. You’re doing great!
Tools Used

Step 4


– Alright, grab your trusty spudger and gently lift those plastic tabs on each side of the tablet. You’ve got 4 tabs on each side, all sitting pretty in the same spot!
– Now, a gentle reminder: these tabs are a bit delicate, so handle them with care! I may or may not have broken almost all of them on my tablet! 😅
– The best way to free them is to apply light pressure to the case while prying it away from the screen until the tab pops free. Trust me, don’t go full-on ripping like I did.
– Once you’ve got them open, you can hinge the screen along the top edge and disengage it completely from the body like a pro!
Tools Used
Step 5


There’s a stealthy little power switch right next to the battery connector. Flip it off, and boom—your device is completely powered down while you work. No surprises, no sparks, just smooth sailing.
– Make sure to switch it back on when reassembling—your device deserves a comeback story!
Step 6


– Great job on making it this far! Time to take a closer look at what’s inside.
– Grab your spudger and carefully release the two digitizer ribbon cables from the mainboard. You’ll find them on the left side of the tablet, right between the micro-HDMI and microSD slots.
– Now, use your spudger to disconnect the LCD cable from the back of the screen.
– At this point, you should be able to easily separate the screen assembly from the tablet body. Set it aside for later dissection.
Tools Used
Step 7


– At this stage, your tablet’s insides probably look a bit less dramatic than mine did. I snapped my photos during re-assembly, so my device bears the battle wounds!
– To free the front-facing camera (on the right), gently use your spudger to unlock that ribbon cable and slide the camera right out.
– For the rear-facing camera (on the left), simply unplug it from its socket by applying some light lifting pressure to the back of the cable. Easy peasy!
– Next up, let’s tackle the backup battery on the right side. Unplug the cable from the motherboard with your trusty spudger, then pry it out gently. It’s just lightly glued down, so it shouldn’t put up too much of a fight.
Tools Used
Step 8


– Time to liberate the motherboard, daughterboard, and dock connector! Grab your screwdriver and remove 14 screws to set them free.
– Don’t forget the speaker plug—it’s clinging to the motherboard for dear life. Unplug it before you make your move.
– Flip the motherboard down from the top edge of the tablet (toward the battery) and voilà—you’ve uncovered the battery connector. A little gentle spudger pressure is all it takes to unplug it.
– Now for the grand finale: disconnect the motherboard from the daughterboard by unlocking the ribbon cable on the back side of the daughterboard. Precision is key!
Tools Used
Step 9


– First things first, grab your trusty screwdriver and take out those 8 screws. Once that’s done, gently slide your spudger in between the two battery cells. Work it around to break free the adhesive that’s holding the battery snugly in place. You’ve got this!
Tools Used
Step 10


– Ready to liberate that speaker? Just slide your trusty spudger underneath it and gently pry it away from the adhesive that’s keeping it snug in the case.
– Next up, let’s tackle the bottom screen attachment locking mechanism. Unscrew those 8 screws and lift the pieces out like a pro!
Tools Used
Step 11


– Now that we’ve got our device down to the basics, let’s revisit the LCD assembly we set aside earlier. It’s time to bring it back into the mix.
– Remove the 4 screws, then use your trusty spudger to carefully pry the LCD away from the Gorilla Glass front. Don’t worry if it’s a bit sticky – there’s just a light adhesive around the edges to contend with.
Tools Used
Step 12


– Now that the LCD is free, you can spread it all out with the rest of the parts. The teardown is officially done! Next up, let’s uncover what’s hiding under those heatsinks and strips of tape.
Step 13


– Flip the motherboard over, but don’t expect any exciting surprises here—it’s mostly a no-show zone.
Step 14


– …but hey, let’s zoom in for a better look.
Step 15


– Check out the front side of the motherboard—this is where all the fun happens!
– Tegra 3 quad core processor T33-P-A3: It’s a powerhouse!
– 2x Elpida memory J4216EBBG-GNL-F: Making things smooth and snappy.
– Realtek? ALCS631: The sound guru keeping things lively.
– Hynix H26M64002BNR e-NAND: Storing all your precious data like a pro.
Step 16


– And a few close-up shots for your viewing pleasure.
Step 17


– Take a good look at both the front and back sides of the daughterboard.
Step 18


– The rear side of the LCD.
Step 19


– Here are some close-up shots to guide you through. I apologize if any of the pictures are a bit fuzzy – I was working with my trusty Samsung Galaxy Note. Hopefully, your teardown will be a lot less dramatic than mine. Good luck, you’ve got this!
– …and yep, it still works after putting everything back together. Thanks for asking, I appreciate the concern.
Step 20
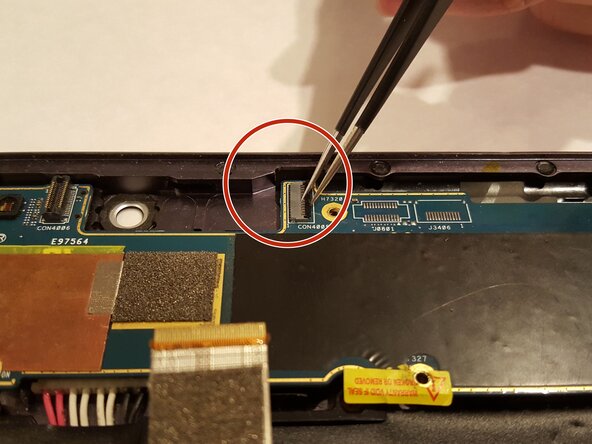


Before you dive in and tackle those ribbon connectors, take a moment to check for any sneaky release mechanisms. And double-check that it’s not a ZIF connector! A little caution now can save you from some serious heartbreak later on.
Stick to the steps that match the camera you’re swapping out—no need to go rogue! If both cameras are shot, handle both replacements. Otherwise, zero in on the steps for the specific camera you’re working on.
First pic? Big picture vibes—it shows the whole setup. Second pic? It’s all about the front-facing camera action. Third pic? Dive into the rear camera fix!
– Gently lift the clips holding those ribbons in place on the motherboard. We’re talking about the ribbon for the front-facing camera here; it’s time to set it free!
– Now, carefully remove the ribbon plugged into the motherboard. Just pull that ribbon cable straight out of the socket to disconnect it with ease!
Step 21

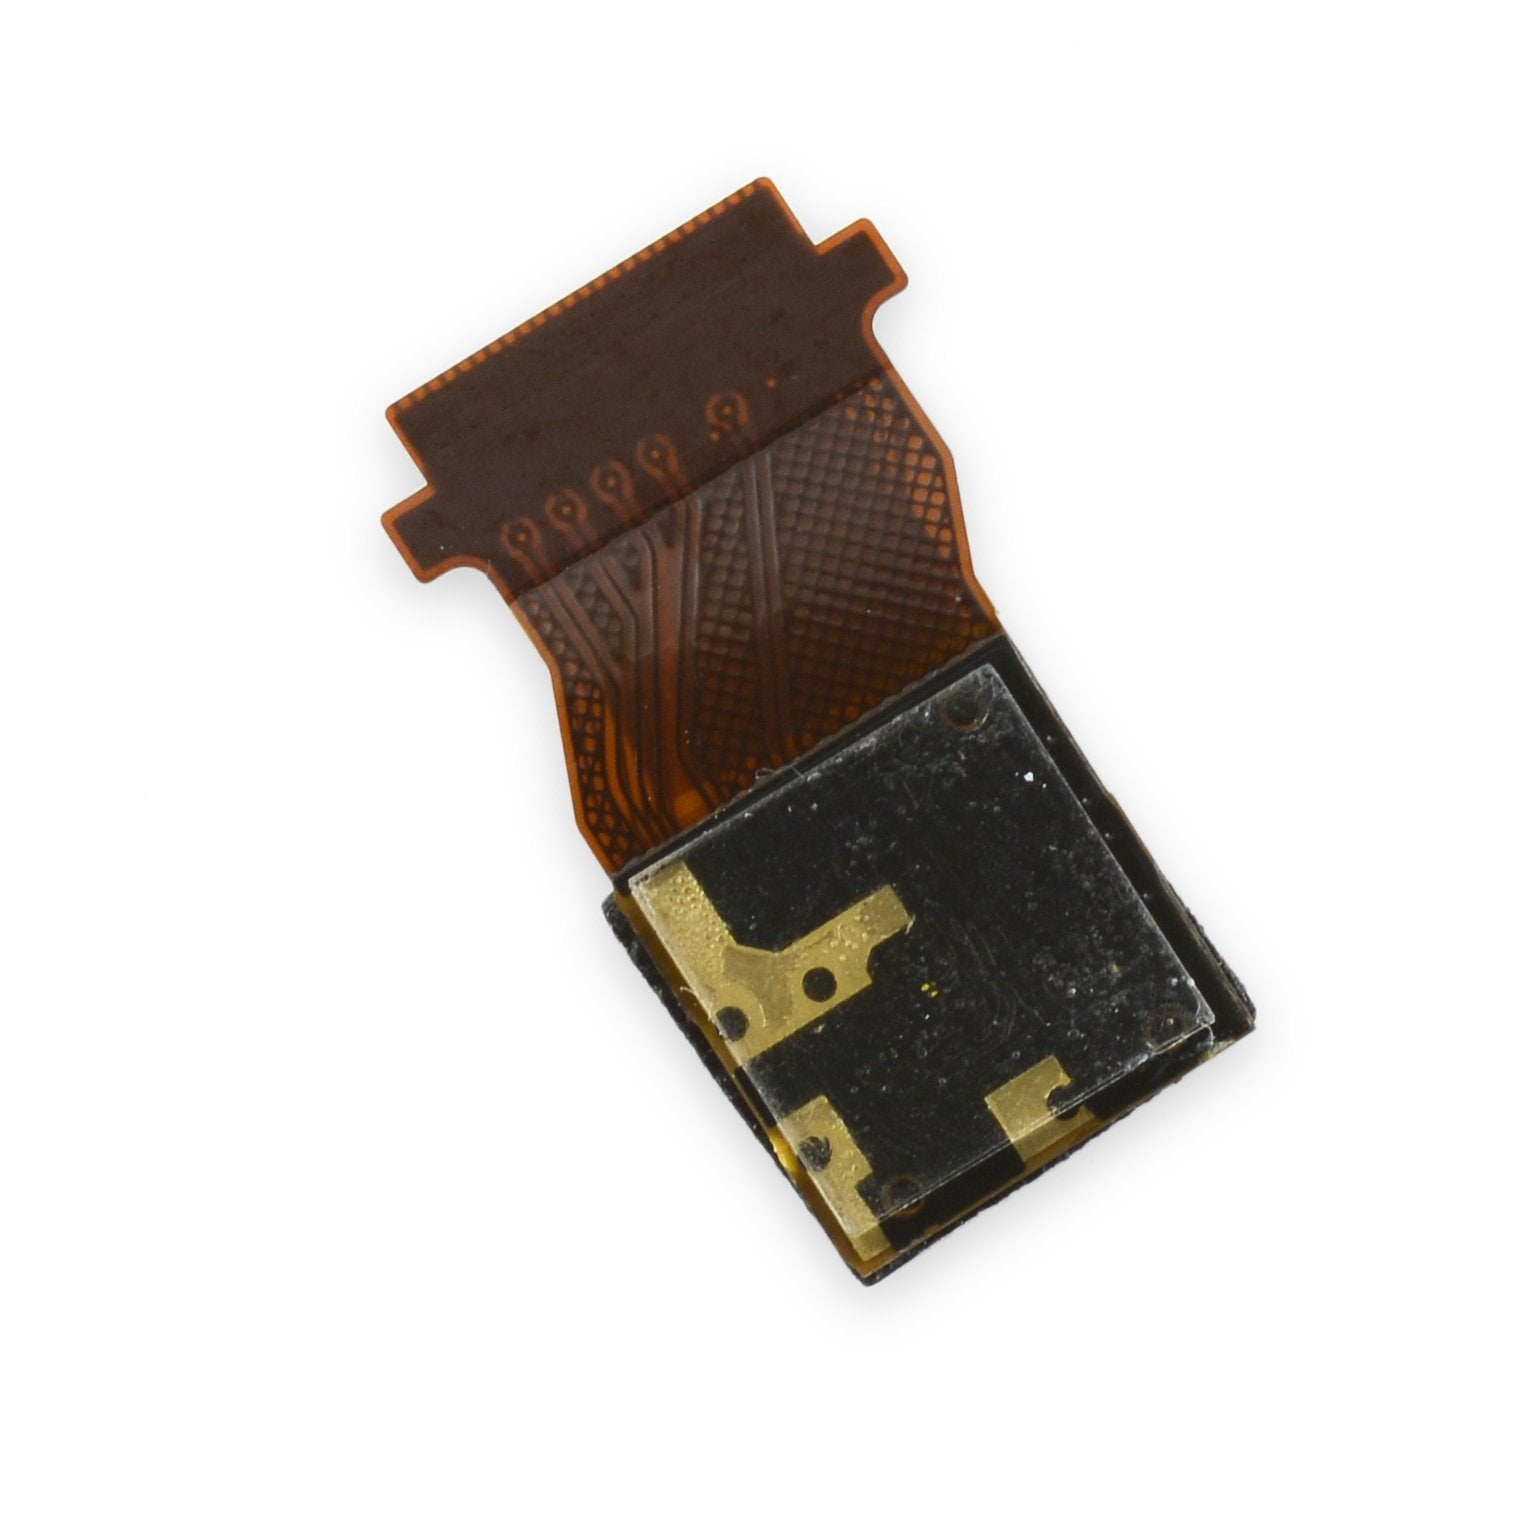
– Let’s get started by carefully removing both cameras from the tablet.
Step 22

– Put your device back together by simply reversing these steps—it’s like hitting rewind on your very own DIY adventure.
–

