ASUS Padfone X mini Station Front Camera Replacement
Duration: 45 minutes
Steps: 6 Steps
Is your device’s selfie camera playing hide and seek with the photos? Sounds like it might be time to swap out that front camera! Dive into this guide to replace the front camera lens assembly and get back to snapping those perfect selfies.
Step 1

– Slide that plastic opening tool right between the screen’s edge and the back cover like you’re parting the Red Sea.
– With a gentle touch, pry them apart. If they’re feeling stubborn, give them a little encouragement with your hands.
Step 2

Peel off all the tape hiding those screws—it’s time to set them free!
– Let’s get started by removing the three 2.5mm screws that hold the speaker case in place. Grab your trusty Phillips #00 screwdriver and carefully take out these screws to release the case from the motherboard.
Tools Used

Step 3

– Grab your trusty tweezers and peel off that cover sticker on the dock station with precision and flair.
Tools Used

Step 4

– Grab your trusty Phillips #000 screwdriver and carefully unscrew those six tiny 0.6mm screws that are holding the dock station case snugly against the motherboard. You’ve got this!
Tools Used

Step 5

Hey there! Just a friendly reminder: be gentle with that motherboard since it’s still plugged into a connector. If you really crank down on it, you might end up causing some unexpected damage. Take it easy, and your device will thank you!
– Turn the device so it’s facing up. Easy does it!
– Gently press the right side of the motherboard down, nudging it away from the dock station like a pro.
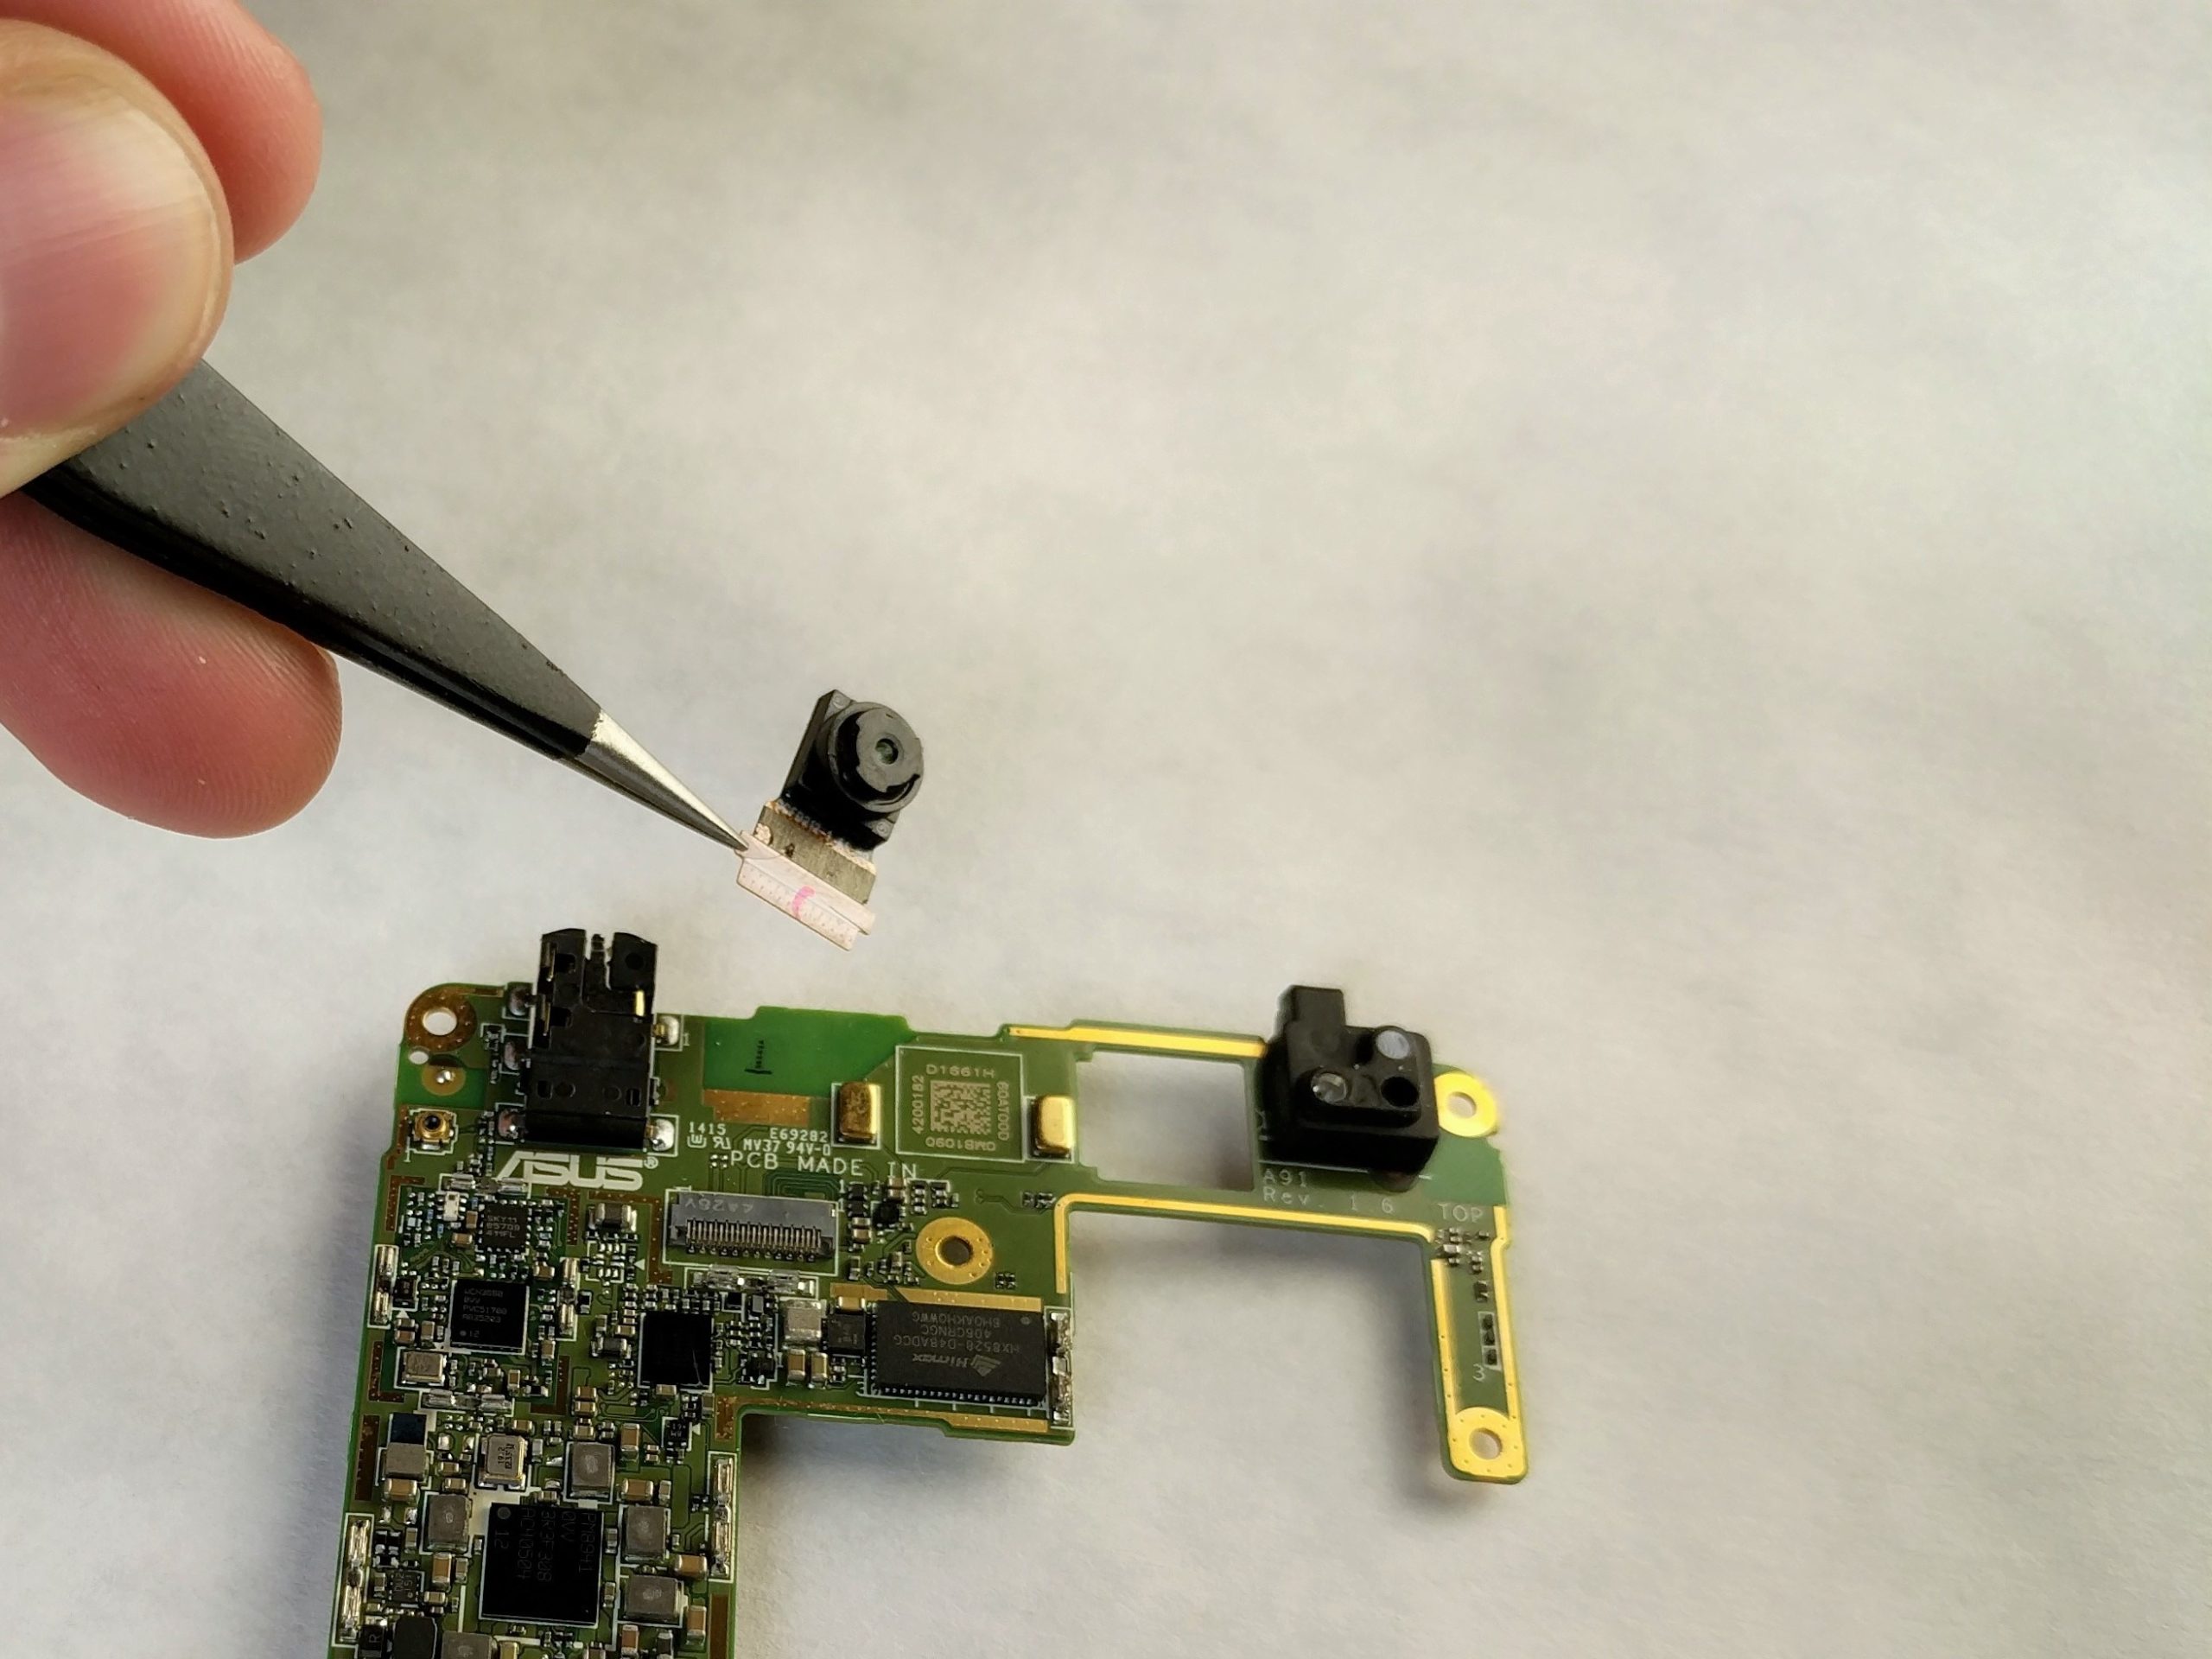
Step 6


– To get your device back in action, just work your way back through these steps in reverse – nice and easy!
–
Tools Used
Success!
