ASUS Eee Pad Transformer Motherboard Replacement
Duration: 45 minutes
Steps: 15 Steps
The motherboard is like the heart of your electronic device, keeping everything connected and running smoothly. It links all the parts to one central hub, ensuring they work together harmoniously.
Step 1
– Grab your trusty T5 Torx Screwdriver and get ready for some action! It’s time to unscrew those two 4.5 millimeter T5 screws hanging out on each side of the port at the bottom of your tablet. You’ve got this!
Tools Used
Step 2
Let’s get started! The physical buttons you’re looking for are conveniently located on the outside of the rim, on the right side. Now, let’s dive in and find those internal buttons.
– Grab your trusty Plastic Opening Tool and gently slide it between the tablet’s main body and the outer rim casing. Work your way around the device, prying it open and lifting that outer rim casing straight up. You’ve got this!
Step 3
– Let’s get started by removing the four 2 millimeter Phillips #00 screws located at the corners of your tablet. This is the first step in giving your device a brand new life.
Step 4
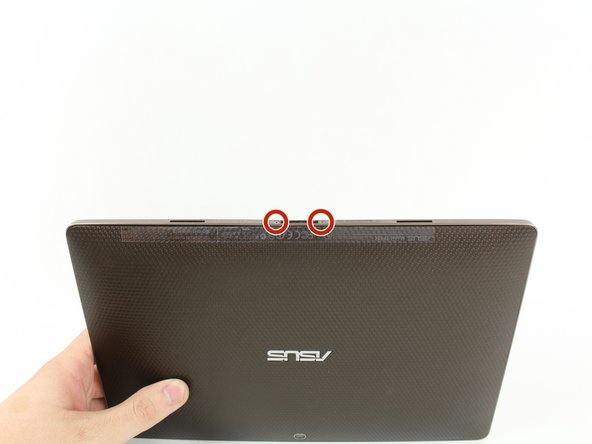
– Let’s get started by removing the three 3 millimeter screws that hold the front panel to the back panel, located above the camera area on the top portion of the tablet. Grab your trusty Phillips #00 Screwdriver and get to work!
Tools Used
Step 5
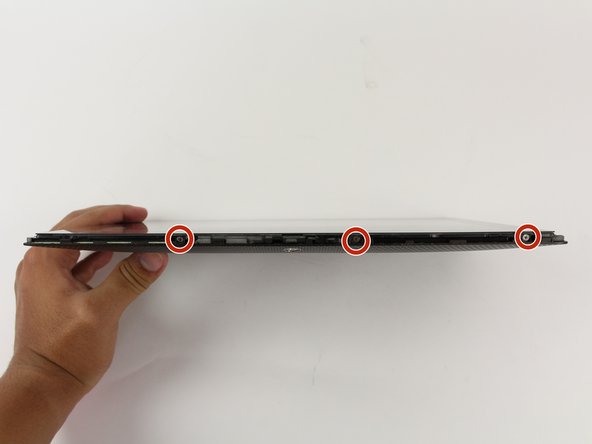
– Grab a Phillips #00 screwdriver and tackle those three 3-millimeter screws holding the front panel to the back panel. You’ll find them chilling on the bottom edge of the tablet near the port. Unscrew them with confidence!
Tools Used
Step 6
– Gently pop off the back panel by pulling it away from the rest of the device. You’ve got this!
Step 7
– Grab your trusty Phillips #00 screwdriver and unscrew those four 3mm screws holding the metal panel in place. Keep it steady, you’ve got this!
Tools Used
Step 8
The metal panel is stuck to the battery. Carefully pry it off – it’s a bit like unwrapping a present, just make sure not to rush it!
– Grab your trusty Plastic Opening Tool and gently work your magic to pop off that metal panel from the battery. Start at the right side corners and make your way around the panel with finesse!
Step 9
Hey there! Just a friendly reminder: don’t lift the battery connector up like a jack-in-the-box! Instead, gently slide it straight out in the direction of the wires. You’ve got this!
Step 10
The battery’s stuck on there pretty well! Take your time and peel it off gently.
– Gently take off that tape hanging out around the battery’s edge—it’s time to give it some room to breathe.
– Slide your trusty Plastic Opening Tool into the little slot on the battery’s side, right by the wire bundle—like a secret agent on a mission!
– Lift the battery up and out of the device. You’ve got this!
Step 11
– Grab your trusty Phillips #00 screwdriver and get ready to unscrew! It’s time to remove those six 3 millimeter screws that are holding the motherboard snugly to the screen. Let’s get this baby open!
Tools Used
Step 12
– Gently unhook the Wifi and GPS antennas (those three coaxial cables chillin’ on the motherboard) using your hands, a metal spudger, or some tweezers. Just lift them away from the device like you’re giving them a little friendly nudge.
Tools Used
Step 13
– Gently lift those clips on the ZIF connector using your fingers, a trusty plastic opening tool, or a metal spudger. Once you’ve got them up, carefully detach the ribbon cables lurking underneath. You’ve got this!
Tools Used
Step 14
– Say goodbye to any tape holding down those pesky free wires!
– Gently coax the motherboard to lift up and slide it out from its snug little home.
Step 15
– You made it! To put everything back together, just follow these steps in reverse. If you need help or want to make sure everything is done correctly, you can always schedule a repair.
–


