Acer Iconia B1-720 Motherboard Replacement
Duration: 45 minutes
Steps: 14 Steps
Step 1


– Gently slide a plastic opening tool into the little gap around the charging port at the top of your device. Wiggle it around a bit as you move it to either side of the device. It’s a bit like a dance, just be careful and have fun!
Step 2


– Gently glide your tool along the edges until the rear cover is fully liberated!
– If necessary, slide the first tool into the gap you’ve created to keep it open, and then grab a second tool to nudge off the remaining bits of the rear cover.
Step 3


– Once you’ve successfully pried apart all the edges, it’s time to gently lift the cover off your device. You’ve got this!
Step 4


– Carefully lift the plastic tape that’s hiding the battery connector.
Step 5

– Time to get that battery out. Use your trusty plastic opening tool to carefully pry the battery away from the back panel. Be prepared to apply a bit of force, as the adhesive can be pretty strong.
Step 6


– Gently pop that battery off the panel! This will kindly disconnect the battery connector from the motherboard.
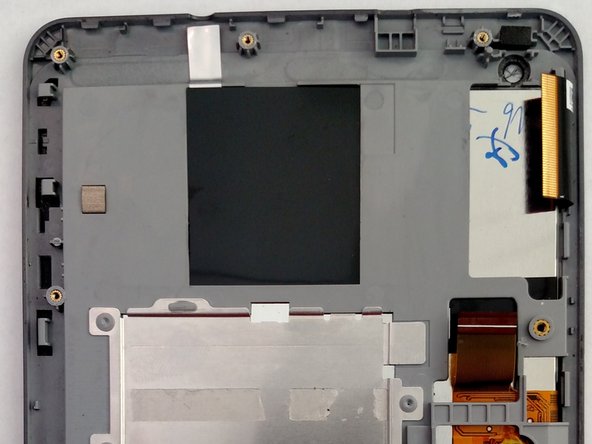
Step 7
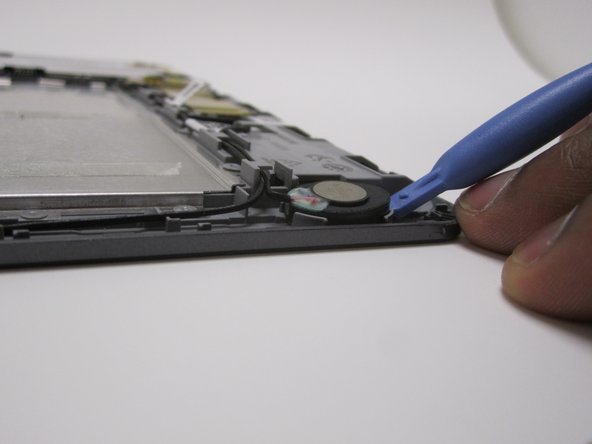

– Gently coax the speaker away from your device using the trusty plastic opening tool. It might take a bit of a nudge because of the adhesive holding it snugly in place. (Just a reminder, the battery is not shown in this picture, so keep that in mind!)
– Give the microphone a gentle tug to liberate it from its slot.
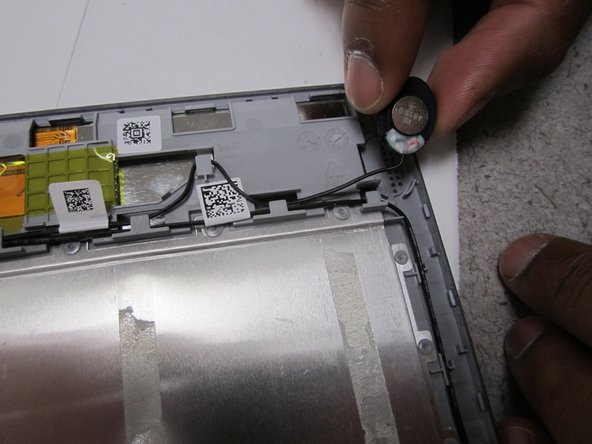
Step 8

– Gently unravel the wire from its cozy little groove.
– To pop out the microphone, just follow the same steps—easy peasy!
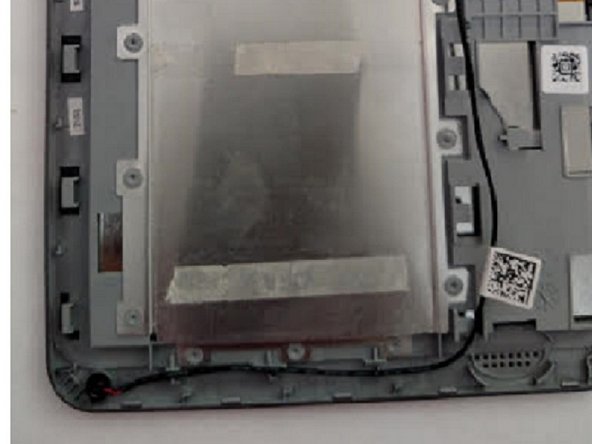
Step 9

– Gently unplug the connector from the motherboard. Take your time, it’s all about finesse!
– Use the same technique to carefully detach the microphone. You’ve got this!
– Unplug the microphone just like you did with the speaker. Easy peasy!
Step 10


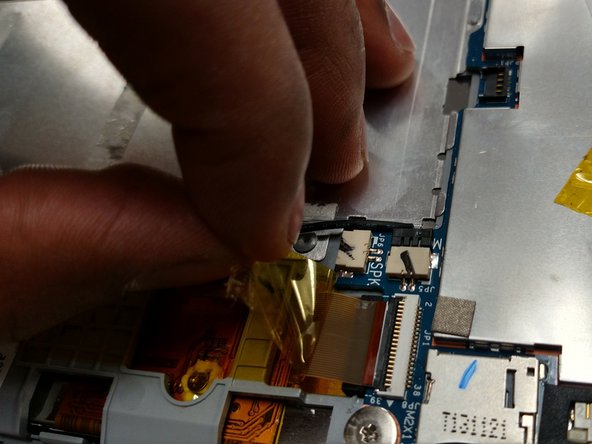
– Peel away the cheerful yellow tape that’s covering both ribbons in the two pictures shown. You’re doing great!
Step 11
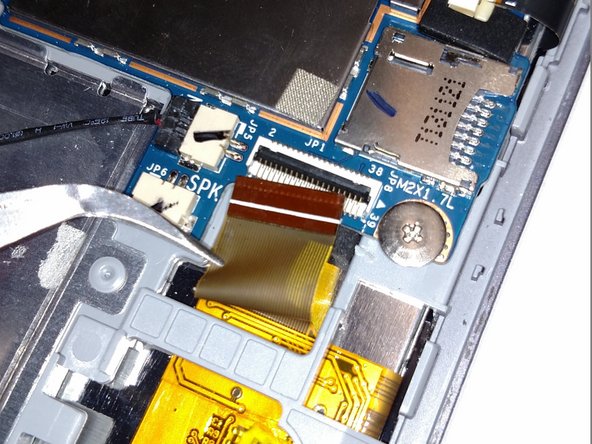

– Grab your trusty tweezers and gently flip up the small black locking tab from the orange ribbon—take it slow, no rush!
– Now, with the same tweezers, carefully slide the orange ribbon out of the lock—smooth moves only.
Step 12
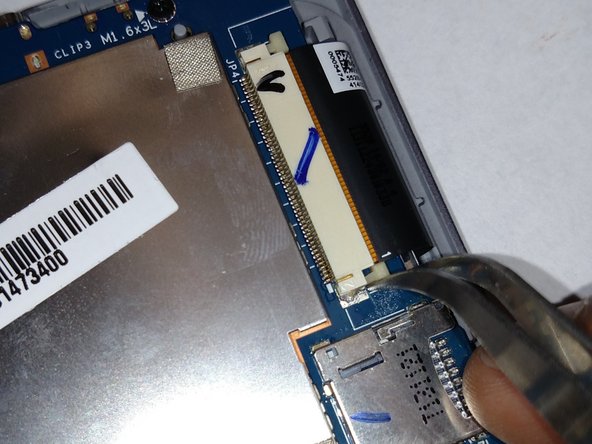


– Grab those trusty tweezers and peel away the black rubber wrap hugging the lock—it’s like unwrapping a little gift!
– Use the tweezers to gently tug on the plastic tabs on each side of the black ribbon—it’s teamwork time!
Step 13
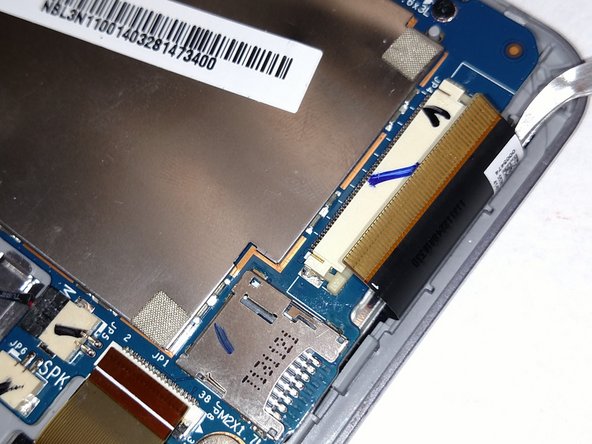

– Carefully use tweezers to lift the black ribbon out of the locking mechanism. You’re doing great!
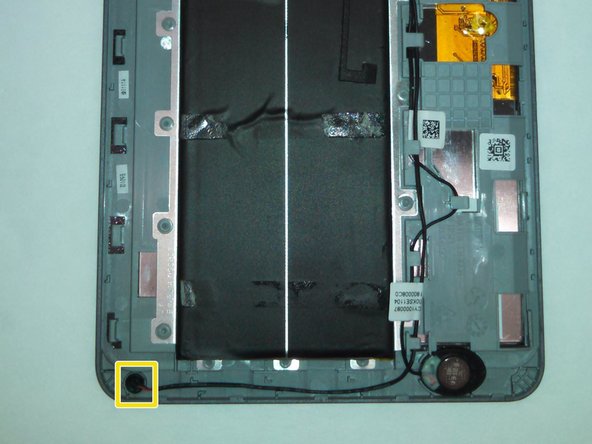
Step 14

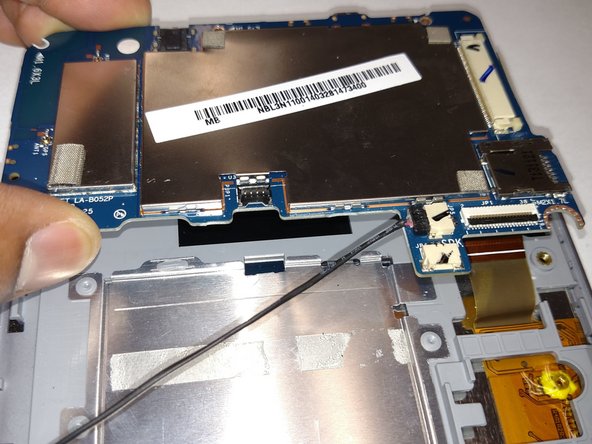
– Time to unleash your inner technician! Grab your screwdriver and remove the 5 screws highlighted in the photograph. Precision is key!
– Now, gently lift the motherboard from the front panel of the device—think of it like lifting a delicate treasure. No force needed, just a smooth lift!