Acer Iconia A100 Speakers Replacement
Duration: 45 minutes
Steps: 9 Steps
Got no sound or a funky buzz? Your Acer Iconia Tab A100’s speakers might be begging for a change-up. This guide will walk you through the step-by-step on removing or swapping out that speaker module like a pro. Let’s get your sound back in action!
Step 1

You’ve got four side pieces to work with in total.
– Pick any side of the tablet to start with.
– Grab a plastic opening tool and carefully start prying along the edges of the tablet.
– Work your way around, gently loosening the tablet as you go.
Step 2

– Grab your Phillips #00 screwdriver and unscrew the five 4 mm screws snugly holding the tablet’s edges. Time to let those screws know who’s boss!
Tools Used

Step 3

– Gently pry apart the back piece of your device using a trusty plastic opening tool. Take it slow and steady, you’re doing great!
– Be sure to glide along the entire edge of the tablet as you open it up. You’re almost there!
Step 4

– Flip your tablet over so the battery is waving at you from the other side!
– Unscrew the four 4mm screws that are huddling around the battery, and let’s get this party started!
Step 5


Make sure to keep any water or drinks far away from your device while taking out the battery—no one wants a splashy mishap!
Handle the battery removal with care. Go slow, be gentle, and avoid tugging at the wires connected to it—those wires deserve some love too!
– Grab a plastic spudger or your trusty opening tool, and gently nudge that connector head out of its cozy socket.
– Time to give that battery some love! Use your fingers or the flat edge of a plastic opening tool to lift it up and away from the device.
Step 6


A metal spudger is making an appearance, but if you have a plastic spudger or opening tool handy, go for that instead! Metal tools can be a little ruthless with cables, so handle with care if you’re using one. A little extra caution now saves a lot of hassle later!
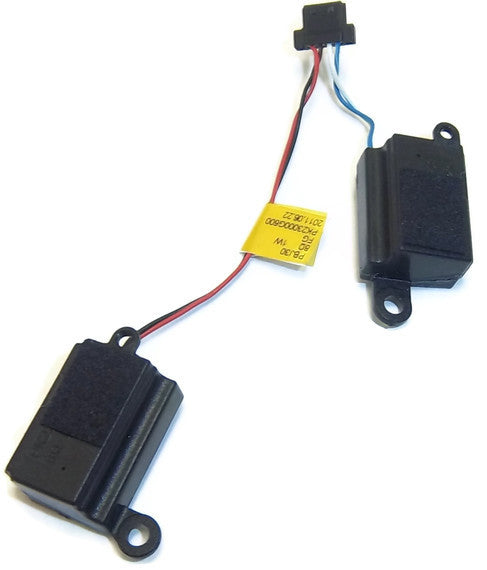
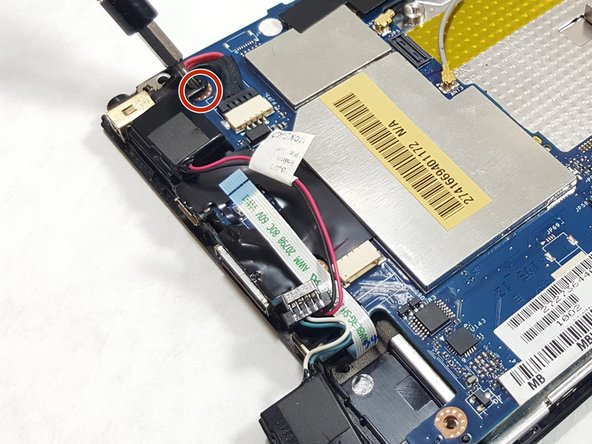
– First, let’s find the speakers module! It’s made up of two snazzy square black speakers connected by some wires. You got this!
– Next up, spot that white and blue Home Key FFC ribbon cable hanging out between those speakers. It’s like a little buddy waiting to be noticed.
– Now, grab your trusty spudger or opening tool. Carefully lift up and flip that small hinge on the connector. Then, with a gentle touch, pull the FFC ribbon cable out of its cozy connector socket.
Tools Used

Step 7


When pulling on the wires, make sure to grip them firmly near the base and distribute the force evenly across the full width. This will help prevent putting too much strain on individual wires, which could cause damage. Let’s get this repair done smoothly!
The metal spudger in the photo is just here to help you find that sneaky speaker cable – don’t try to use it to remove the cable, that’s not its job in this step, just locate the speaker cable.
– Find the speaker cable—it’s got a black head on it. Pinch both sides of that little black connector with your fingers and give it a gentle wiggle as you pull it out of its socket. Easy does it!
– If you’re struggling to get a good hold on the connector itself, no worries—just grip the wires close to the base of the connector and carefully pull from there. You’ve got this!
Tools Used
Step 8

You’ll find a pair of 4mm screws here (one for each speaker).
– Carefully remove the 4mm Phillips screws holding the speakers module in place using a Phillips #00 screwdriver. You’re doing great!
Tools Used
Step 9

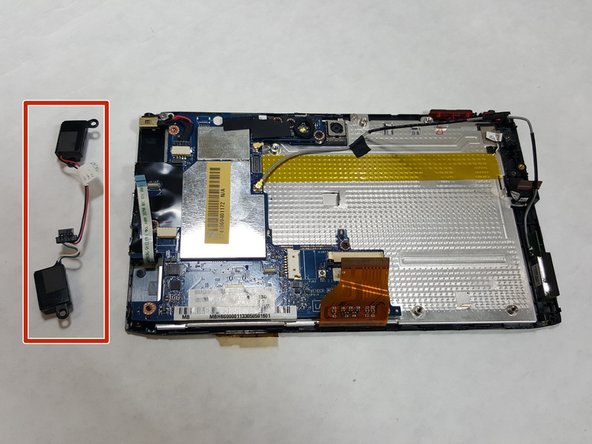
As long as they’re all good to go, these two speakers are like best buds connected by wires, creating a sleek one-piece speaker module.
– To put everything back together, just reverse the steps and you’ll be good as new!
– If you need help or have any questions, you can always schedule a repair with Salvation Repair.
Success!