Acer Iconia A1-810 Motherboard Replacement
Duration: 45 minutes
Steps: 9 Steps
Time to give your Acer Iconia A1-810 a brand new brain – replace the motherboard and get your device up and running like new! If you’re not feeling confident, don’t worry, we’ve got you covered. Just follow these steps and you’ll be a pro in no time. If you need help, you can always schedule a repair.
Step 1

– Gently pop off the back cover by using a plastic opening tool right under the camera button area. You’ve got this!
Step 2

– Peel off the black tape that’s keeping the battery and motherboard locked in a sticky embrace.
Step 3

– Gently squeeze the sides of the white resistor to pop it out safely, keeping both yourself and the component intact. You’ve got this!
Step 4


– Gently peel the battery away from the adhesive like you’re unwrapping a gift.
Step 5

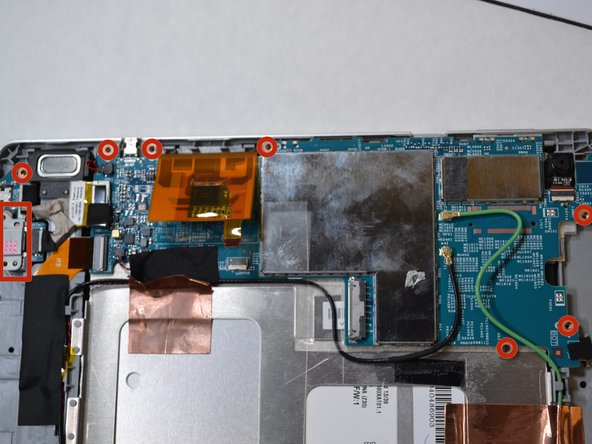
– Let’s get started! Use a trusty Phillips #000 screwdriver to carefully remove the screws around the perimeter of the motherboard. This is the first step in giving your device a brand new lease on life!
Step 6
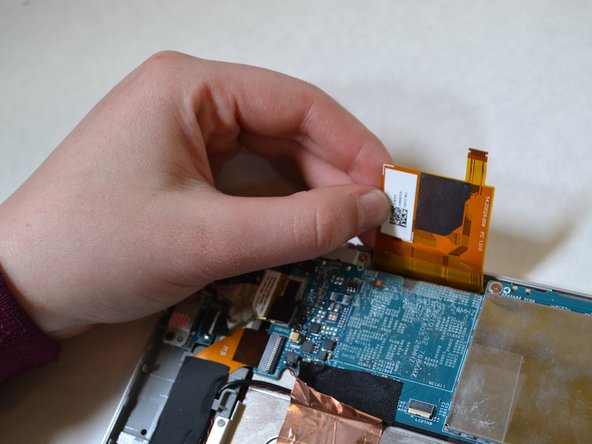

– Gently slide out the tail of the resistor connected to the cheerful orange tab to disconnect it.
– With a little finesse, pry open the orange tab located at the top left corner.
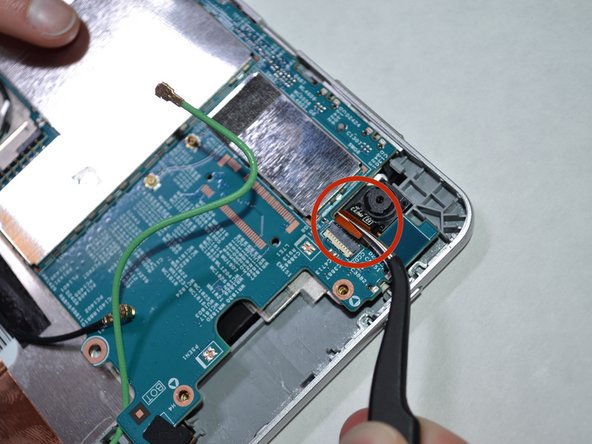
Step 7
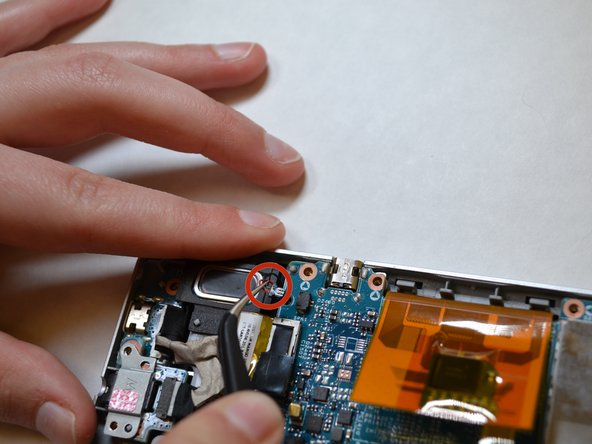

– Gently detach all cords, wires, and resistors from the motherboard using tweezers.
Tools Used

Step 8

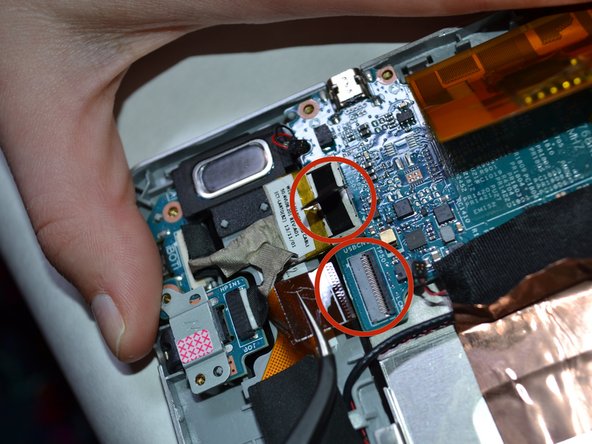
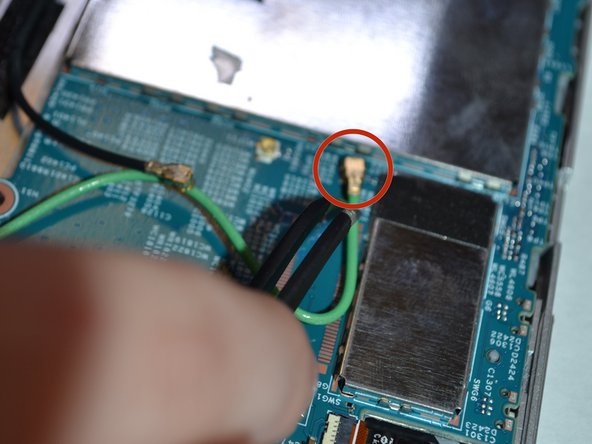
– Keep going! Gently remove all the resistors connected to the motherboard using your trusty tweezers. You’ve got this!
Tools Used
Step 9

Watch out for those sharp edges! They might give you a little surprise, so handle with care.
– Carefully lift the motherboard out like you’re removing a delicate treasure.