Samsung Galaxy S5 Teardown
Duration: 45 minutes
Steps: 18 Steps
Every now and then, our down-to-earth teardown crew takes a moment to look up. Today, we’re diving into the ins and outs of the Samsung Galaxy S5. Will this gadget shine bright in the hall of repair fame, or will it crash down like a fiery meteor? Stick with us as we use our trusty tools to uncover the truth—Salvation Repair style. Feeling like the sky is falling? Be the first to tweet about it, connect with your repair pals on Facebook, and keep an eye on Instagram for cool pics.
Step 1

- Ready for some serious tech tinkering? Here’s the gear you’re working with:
- 5.1” Super AMOLED display (1920 x 1080, 432 ppi)
- 16 MP main camera with 4K video at 30 fps; 2 MP front camera with 1080p video and wide-angle lens
- Sensors include fingerprint, heart rate, and gesture controls
- 2.5 GHz quad-core Snapdragon 801 processor, 2 GB LPDDR3 RAM
- 16 or 32 GB internal storage, plus microSD support up to 128 GB
- LTE, NFC, Bluetooth 4.0 BLE, Micro-USB 3.0, and 802.11/ac MIMO Wi-Fi networking
Step 2


Right below the 16-megapixel rear camera is the heart rate monitor. Handy for checking your pulse straight from your phone—because who doesn't want to know how their heart's doing while texting?
- Scanning the area... No signs of life detected—unless you count the gadgets that know you better than your friends do.
- With fingerprint readers and gesture sensors galore, this phone’s clearly been hanging out with some high-tech company. Oh, and let’s not forget those mystery dimples.
Step 3


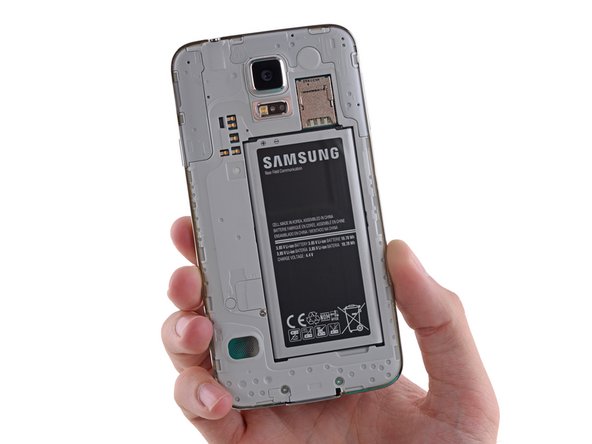
Samsung is all about that DIY vibe! Not only is this battery replaceable, but it's also meant for you to install it yourself. Give yourself a virtual high-five for taking charge!
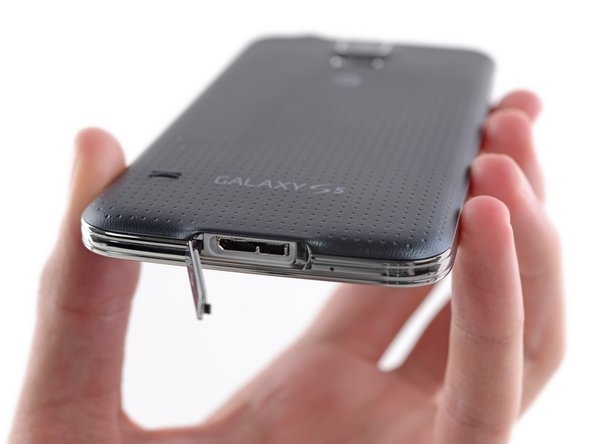
- Check out this shiny Micro-B USB 3.0 port—looking good!
- Back cover's off and we're already staring at the battery. Not a tear in sight, just smooth progress.
- Getting the back off is honestly easier than peeling a banana. All you need is a thumb and a bit of determination.
- Wait, where’s the battery? Guess we’re going on a little hunt.
- People might not love the case design, but we’re giving bonus points for how easy it is to pop the back off.
Step 4

- No need to go on an intergalactic adventure to find the back case—it's right there, easy to access.
- That odd shape in the case? It's not some alien artifact—it's a rubber gasket. Samsung kept it simple with their water and dust resistance, avoiding the more complicated solutions.
Step 5

Batteries that seem a bit dodgy might just surprise you—better to keep them out than risk a boom!
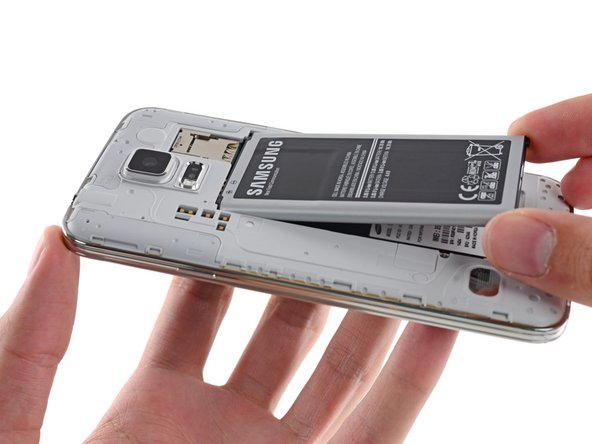
- Take a moment to check out the warnings as we carefully unwrap the battery from its sleek packaging.
- Here we have a 3.85 V, 10.78 Wh battery. Samsung proudly mentioned a better battery-saving mode, but didn’t spill the beans on how long this beauty lasts in their ads—just a spec of 2800 mAh.
- Let's pop in the new battery! And then, just for fun, we'll take it right back out. This teardown has some exciting places to explore, and they're tucked under that battery pack.
- This battery is a nice little upgrade from the S4's 3.8 V and 2600 mAh (9.88 Wh) battery. It's touted for about 7 hours of talk time and can hold on for up to 12.5 days on standby.
- For those counting at home, that took just 10 seconds! Not too shabby, right?
Step 6


- Samsung’s got a cool trick up its sleeve—yep, the microSD + SIM card combo deck.
- ‘Galaxy S5’ might have the flashier ring, but if you’re hunting for the proper name, SM-G900A is your target.
- What surprises wait behind door R1?
- Right now, looks like just a bunch of random connectors—definitely not the screws we wanted. Stick with us; there’s more to this story coming up…
Step 7


- Well, it looks like we're in a bit of a pickle! The S5's predecessor, the S4, jumped onto the teardown table like a droid ready for a spa day.
- However, this time around, the entire display assembly is throwing a wrench in our tinkering plans.
- With no other options left, we’re bringing in our trusty sidekicks: the iOpener and Opening Pick—better known in the streets as Heat and Force.
- Things are looking a bit rough. What’s up, Samsung? I thought we were pals!
- Have you been spending too much time with the Kindle Fire HDX?
Tools Used

Step 8


Cable traps are like stumbling upon a nest of snakes while trying to reach your treasure. And just to add to the adventure, Harrison Ford won’t be there to help you out.
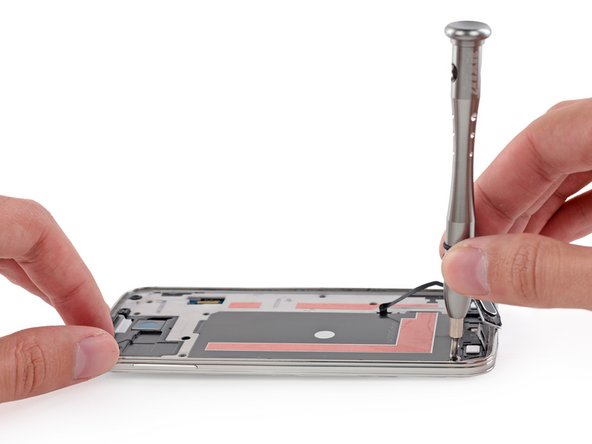
- Time for the last big pry—
- Once you've worked your way around the cable with your spudger, it's time to start freeing the display assembly. Samsung clearly loves making things interesting by making this a glass-first adventure.
- ...figures. Another cable in the way.
Step 9


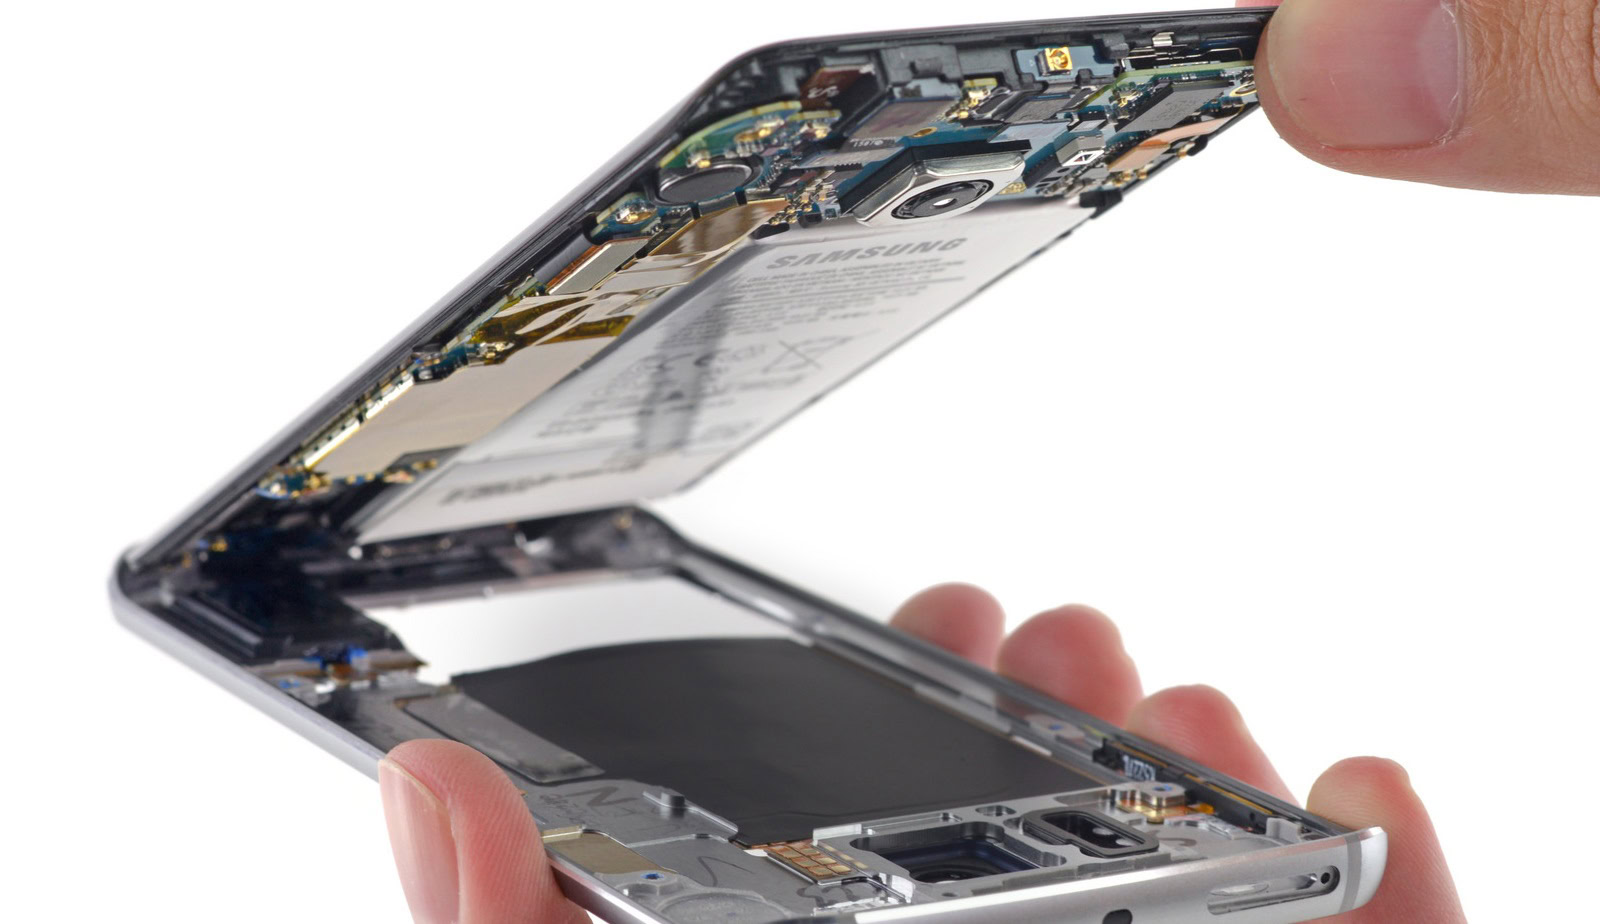
This design shake-up for the S-series is quite the twist! Instead of the usual configuration where the internal parts chill on the back of a big display, the S5 flips the script. It cleverly tucks those components between the display and the battery, creating a unique, though somewhat tricky, little compartment for them.
- Now that the display is off, it's time to gently persuade it to let go of its home button. Our trusty plastic opening tool is here to help with that!
- Wave goodbye to the sticky adhesive tape that was holding the screen in place. When you put your display back, you’ll want to grab a fresh set of adhesive to keep it secure.
- This little display assembly cable has quite a few connections to manage. Thankfully, it has the support of a Synaptics S5100A touchscreen controller to help things along.
Step 10


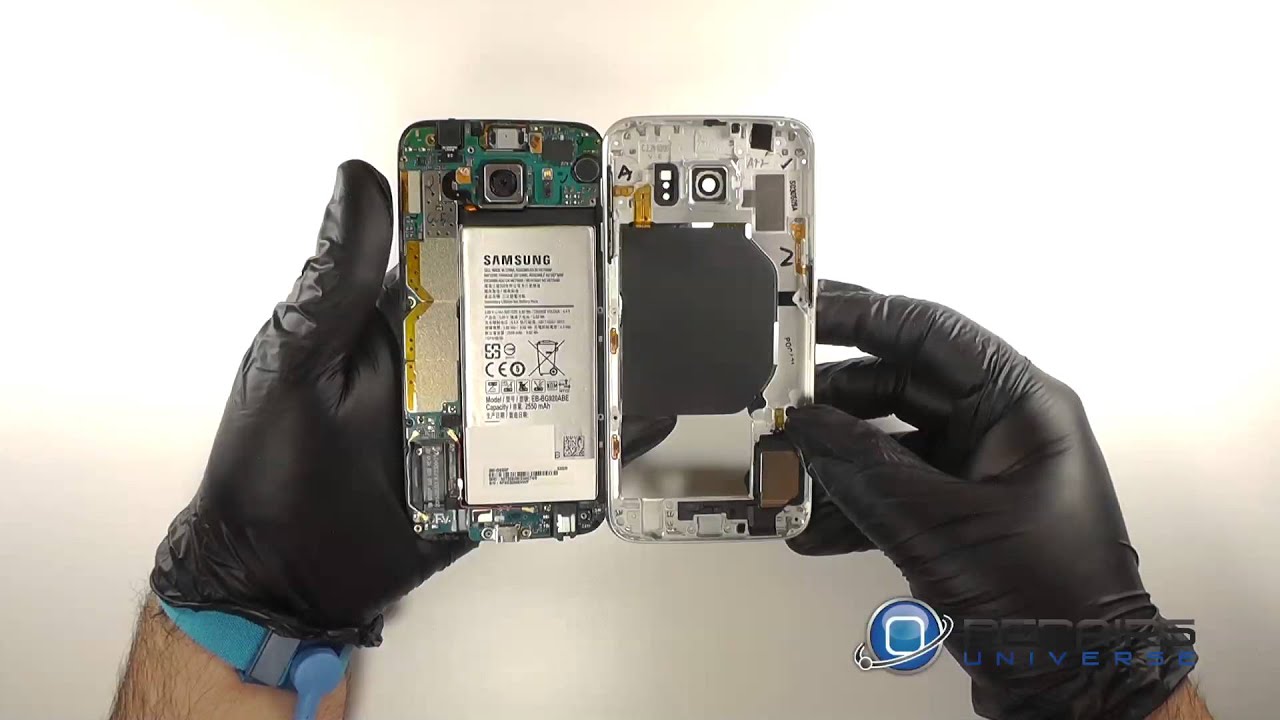
- Well, Samsung really kept us on our toes with this one. Turns out, the screws we need are hiding out on the opposite side of the phone. Classic move.
- Now, here’s where things get a little wild with Galaxy part names. Essentially, we're taking off the midframe from... another midframe. Not confusing at all, right?
- Yeah, we were scratching our heads, too.
- So, here's the scoop: once the rear case is off, you find a midframe. Between that first midframe and the display assembly? Surprise—there’s yet another midframe. Double the frames, double the fun.
Step 11

Right below the hefty rear-facing camera, you'll spot Samsung's brand-new heart rate monitor, powered by their own biosensor tech. It’s a sleek upgrade you might not notice at first glance, but it’s working behind the scenes to keep tabs on your pulse.
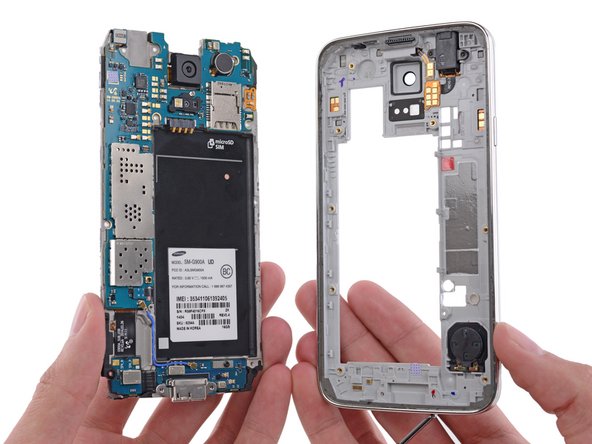
- Alright, let's summarize what we've got here:
- We're on a first-name basis with our buddies: the headphone jack, the speaker, the buttons, and more.
- On the left side, we've got the interior midframe housing the motherboard and daughterboard.
- On the right side, enjoy the exterior midframe, packed with a bunch of spring-contacted components.
- Crisis averted on identity. Now, will we tackle repairability? Stay tuned...
Step 12


Uncovering this trick really boosts the S5’s repair game—a quick disconnect of the home button cable at the start makes popping off the display way smoother, and will make putting it back together less of a puzzle.
Getting this fingerprint sensor to cooperate might take a bit of patience, but don’t worry if it’s stubborn at first.
- Guess what? That mysterious connector from earlier is actually the home button cable—plot twist!
- You’ll also spot the familiar fingerprint scanner gear here. The control chip is stamped 1200P E43F2.
Step 13

- Right in the heart of the Galaxy, we've discovered the motherboard black hole. With our hard work paying off, we carefully extract it and begin our quest for signs of smarts.
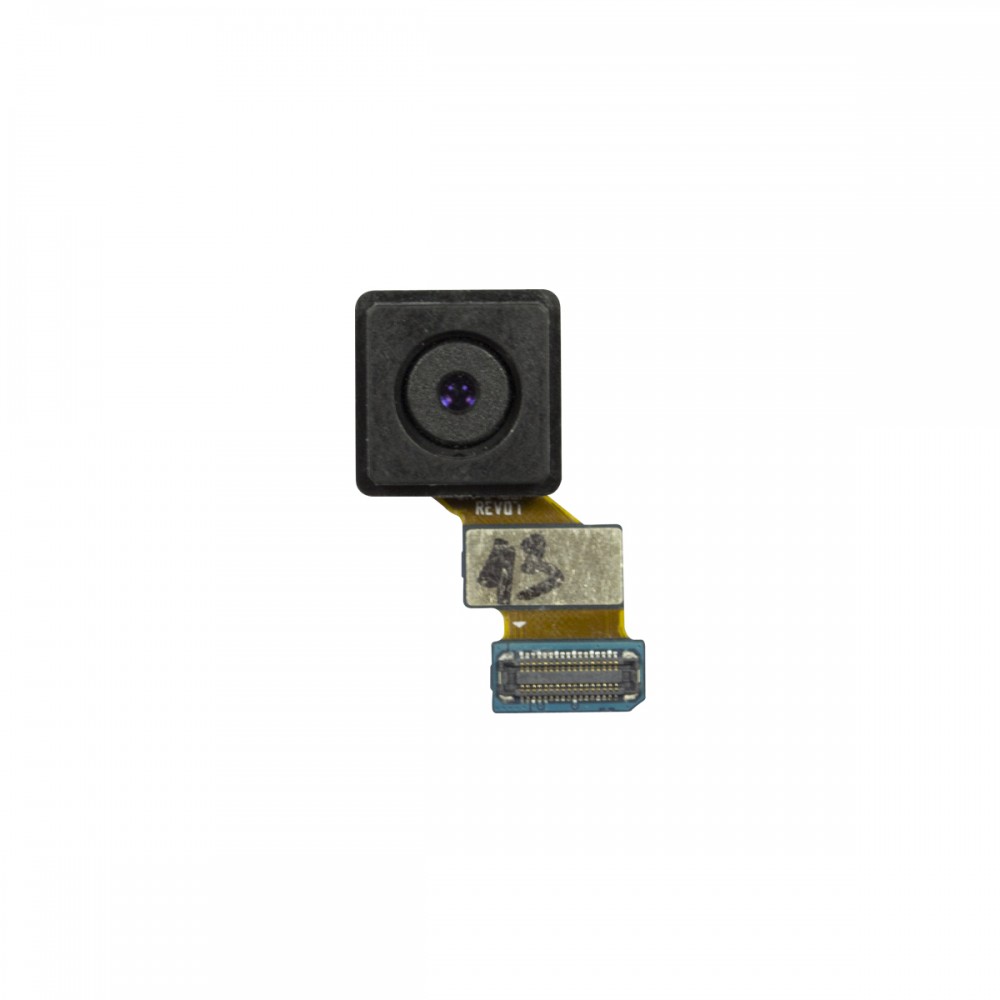
- Our first clue arrives through the camera.
- Eager for a face-off, we grab our trusty plastic opening tool and gently pry it out for a closer inspection.
Step 14


With its snazzy new auto-focus that’s quicker than a cheetah on roller skates, this camera is your ticket to finally snagging that elusive UFO pic. Get ready to capture some out-of-this-world moments!
- On the left, check out Samsung’s 16MP rear camera, rocking a 1/2.6” sensor.
- Right next to it is the selfie camera, clocking in at 2.0MP—perfect for quick snaps.
- Tucked behind the main camera is its trusty sidekick: the QDA41 L1010 R412 control chip.
- The wide-angle lens on this camera captures crisp 1920 x 1080 video, so your memories are looking sharp.
Step 15

- Some galaxies are filled with stars, and others are packed with chips:
- Elpida FA164A2PM - This is the same slick 2 GB RAM package we spotted in the HTC One (M8), and it's different from the 2 GB Samsung chip that Chipworks dug up. You've got a quad-core 2.5 GHz CPU probably hanging out underneath, ready to rock.
- Samsung KLMAG2GEAC-B0 16 GB on-board memory
- Avago ACPM-7617 multi-mode, multi-band RF front end
- Murata KM4220004 (probably your Wi-Fi module)
- 1412 (C1N75R UMR3) (C1N78B YMP4)
- Maxim Integrated MAX77804K (System PSoC) and MAX77826
- STMicroelectronics 32A M410
Step 16

- Check out the SWEP GRG28 antenna switch module—this little guy keeps your signal strong.
- Next up, the Qualcomm WTR1625L RF transceiver, making an encore appearance from the HTC One M8.
- Don’t miss the Qualcomm WFR1620, the receive-only chip that’s always listening for signals.
- Meet the Qualcomm PMC8974, your power management superstar.
- The Lattice iCE40 LP1K brings low-power FPGA magic to the mix.
- Stay steady with the Invensense MP65M (MPU-6500M) gyroscope and accelerometer combo.
- For smooth audio, there’s the Qualcomm WCD9320 codec.
- And finally, the SIMG 8240B0 mobile HD-link transmitter plus the NXP 47803 NFC controller gets your device talking to everything else.
Step 17

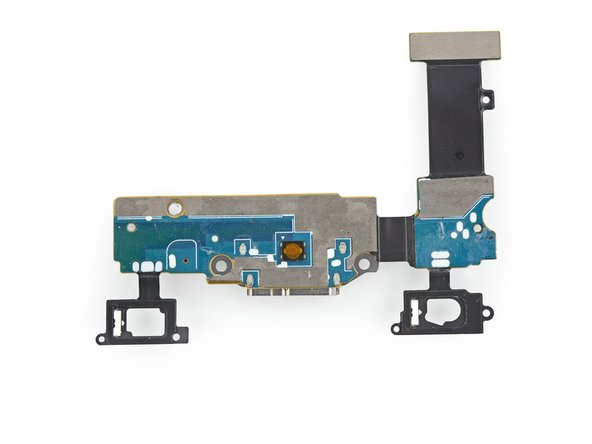
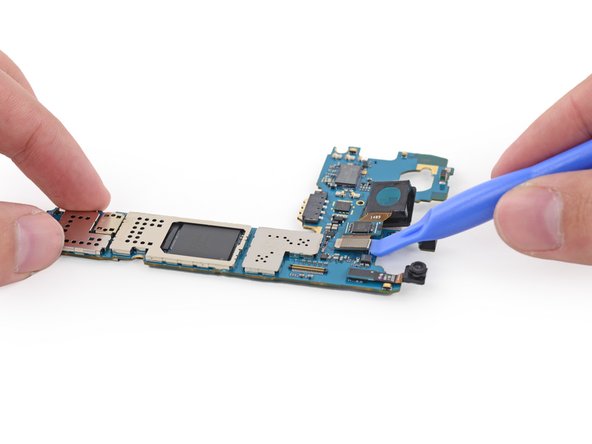
- Now that we’ve cleared the motherboard, we’re left with just our little buddy, the daughter board. Don’t worry, it’s not as lonely as it sounds!
- This daughter board is the secret hideout for the charging port! A closer look reveals it’s also got cables for the bottom buttons and a few nifty ICs hanging out:
- Cypress CY8C20075-24LKXI, our trusty CapSense capacitive touch-sensing controller
- RFMD RF1119, the antenna controller keeping us connected
- S1221, the primary microphone, ready to hear your glorious voice
Step 18


- The Samsung Galaxy S5 has a repairability score of 5 out of 10 (with 10 being the easiest to fix).
- Getting to the battery? Super simple! It's a breeze to pop out and swap in.
- The display is now one of the first things you'll tackle, making it a bit quicker to replace. Just a heads up: it's stuck in there with quite a bit of adhesive, so you'll need to be gentle and patient with your prying skills. A little heat will help, but be cautious to avoid cracking the glass or cutting any cables.
- Once you crack the case open, you'll find several components that are modular and pretty straightforward to change out, like the cameras, headphone jack, vibrator motor, and speakers.
- Just a small catch: if you're replacing anything other than the battery, you'll need to remove the display first. It's a bit of a delicate dance, and there's some risk of causing more damage along the way.