Nokia X Headphone Jack Replacement
Duration: 45 minutes
Steps: 8 Steps
Step 1

– Start by gently removing the back cover of your phone. Place your thumbs on the top corners of the device and give it a little push to pop it off. It’s as simple as that!
Step 2

– Time to pop the battery out! Gently use your finger to nudge the battery free from its cozy little slot.
Step 3

– Pop that new battery in like a pro! Just line up those shiny gold connectors and gently slide the battery in with the text side facing down. Easy peasy!
Step 4


– Alright, grab your trusty T5 Torx screwdriver and get to work by unscrewing the four 5.33mm screws hanging out in the corners of the phone. Easy-peasy, right?
– Next up, tackle the seven 4.00mm T5 Torx screws that are chilling along the edges between those corners. Keep track of where they go—organization is key!
Step 5

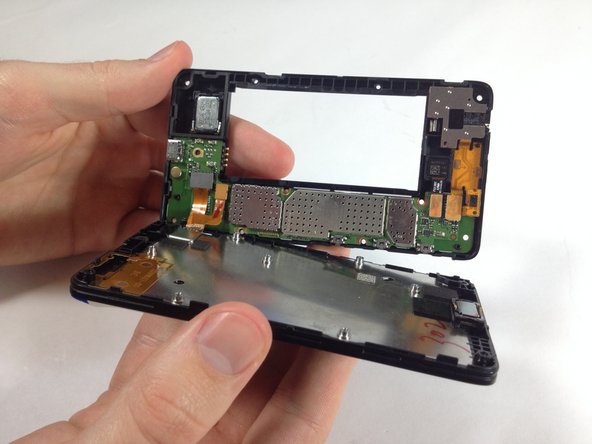
– Gently but firmly detach the screen from the motherboard—don’t be shy about using some force until it pops off with a satisfying snap. If the connectors come loose along the way, no stress—that’s totally normal!
Step 6

– If the connectors are still attached, no sweat! Just gently pry the top of the connector loose with your finger, and you’ll be golden.
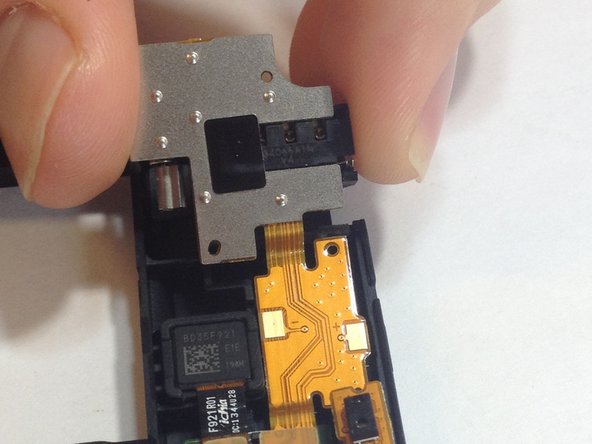
Step 7

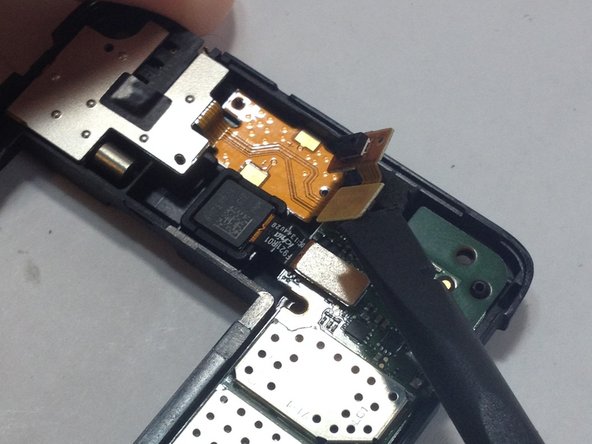
– Grab your trusty spudger tool and pop off those two connectors linking the audio jack to the motherboard. Use the flat end to make it smooth sailing!
– Heads up: that top connector has some sticky adhesive holding it down. You’ll need a bit of gentle oomph to pry it loose—don’t be shy, but no Hulk moves!
Tools Used

Step 8

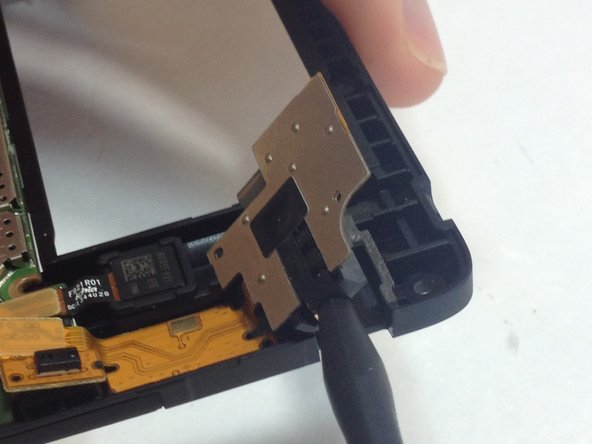
– Time to get this repair started! Carefully insert the pointed end of the spudger tool into the audio jack and gently pry it loose by pressing upwards – it should snap free with a bit of effort.
– Now, let’s tackle the biggest circuit. It’s attached to the motherboard with some strong adhesive, so be prepared to use a bit of force to disconnect it. Don’t worry, you got this!