ASUS Eee Pad Transformer Back Facing Camera Replacement
Duration: 45 minutes
Steps: 7 Steps
The back camera sits out in the open, making it more prone to life’s little bumps and bruises. While cameras might feel less essential for keeping your device alive and kicking, swapping it out is a quick and easy upgrade that’s totally worth it.
Step 1


– Grab your T5 Torx screwdriver and unscrew the two 4.5mm T5 screws on each side of the port at the bottom of the tablet. A little twist and you’re on your way!
Tools Used

Step 2


The physical buttons chill on the right side of the outer rim. Dive into the guide to uncover those sneaky internal buttons.
– Grab your trusty Plastic Opening Tool and gently work it along the gap between the main body of the tablet and its outer rim casing. As you go, pry all the way around like you’re opening a secret treasure chest, then lift the rim casing up and off—voila!
Step 3

– Grab your Phillips #00 screwdriver and get ready to take out those four 2mm screws sitting at each corner of the tablet. You’ve got this!
Step 4

– Grab your trusty Phillips #00 screwdriver and get ready to show those pesky screws who’s boss! There are three 3-millimeter screws holding the front panel snugly to the back panel, right above the camera area on the top of the tablet. Let’s unscrew them and get one step closer to your repair victory!
Tools Used

Step 5

– Grab a Phillips #00 screwdriver and take out the three 3mm screws that are holding the front panel in place. You’ll find them near the port on the bottom of the tablet, right where the magic happens.
Tools Used
Step 6


– Lift off the back panel by gently pulling it away from the rest of the device—it’s like peeling the lid off a treasure chest!
Step 7
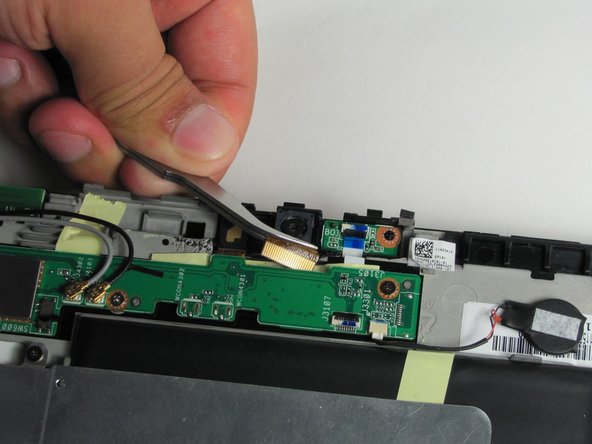

– To put your device back together, simply follow these steps in reverse. You’ve got this!
– If you run into any trouble, no worries—you can always schedule a repair.
