Dell Optiplex 745 Small Form Factor Hard Drive Replacement
Duration: 45 minutes
Steps: 8 Steps
Get ready to swap out your hard drive with this easy-to-follow guide. It’s straightforward and will have you tackling the task in no time!
Step 1


– Give the tab a little tug, and voilà, the lid pops right open—easy peasy!
Step 2


– Lift the lid straight up and off with confidence—like you’re opening the door to a new adventure.
Step 3


Both cables are snuggled right next to each other on the drive, ready to go.
– Time to get started! Gently pull out both sets of cables from the side of the optical drive.
Step 4


– Lift up the tab securing the optical drive with a confident tug.
– Gently slide the optical drive out—smooth moves, champ!
Step 5
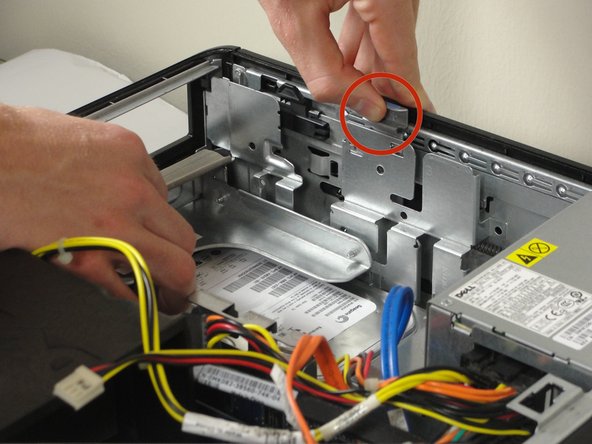


– Spin that computer around—give it a full 180-degree twist to get the backside facing up.
– Gently lift the metal tab—it’s like pulling a tiny lever. Easy does it!
– Slide the tray away from the case smoothly—no need to rush, you’ve got this!
Step 6


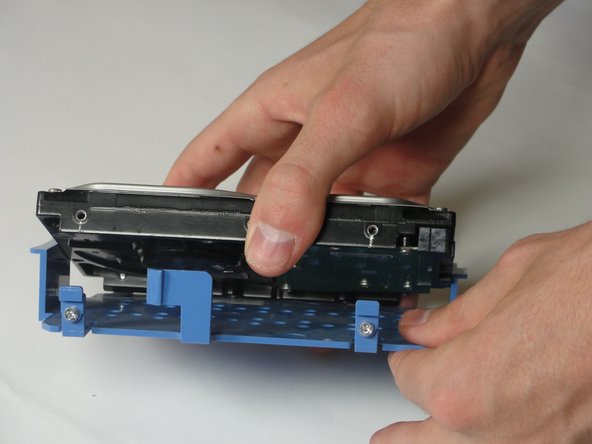
– Squeeze those two little blue tabs inward like you’re giving them a friendly hug!
– Slide the big blue tab snugly into the hard drive and nudge the drive gently away from the wall of the tower—you’re almost there!
– Once the hard drive is free, lift it out of the case like you’re raising a tiny trophy. Nice work!
Step 7


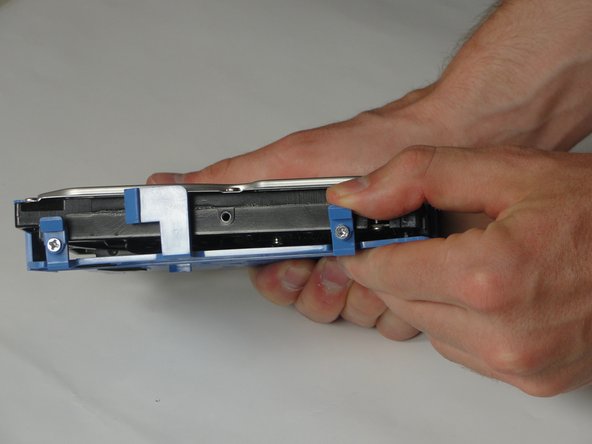
– Gently unplug both colorful bundles of wires connected to the hard drive—wiggle them out like you’re carefully pulling out a charging cable.
– Flip the hard drive over so the cool blue case faces the table and the labeled tabs are looking right at you. It’s like preparing it for a little spa day!
Step 8

– Put your device back together by following these steps in reverse order—you’re practically a pro now!
– If you hit any snags, you can always schedule a repair.
