Lenovo Y50 Touch Speakers Replacement
Duration: 45 minutes
Steps: 14 Steps
Sound is an integral part of a laptop user’s experience, especially for videos, music, and gaming. The Lenovo Y50-70 Touch is equipped with two side speakers and a bass speaker on the underside of the laptop. When there are sound problems, but all the sound drivers are running properly, replace the speakers to regain your full user experience.
Step 1


Before we dive in, hit that power button and shut down the computer—safety first, friend!
Press down firmly while turning to keep those screws in line and avoid any stripping drama.
– Grab your trusty Phillips #1 screwdriver and start unscrewing those twelve 6 mm screws from the back of your laptop. Make sure to keep them safe — you’ll need them later!
Tools Used

Step 2


– Ease that back cover off with care and confidence. It’s designed to pop off smoothly, so give it a gentle nudge and let it slide away like a pro.
Step 3


– Grab your trusty Philips #1 screwdriver and unscrew the three 3.5 mm screws holding the fan in place. You’ve got this—easy does it!
Step 4


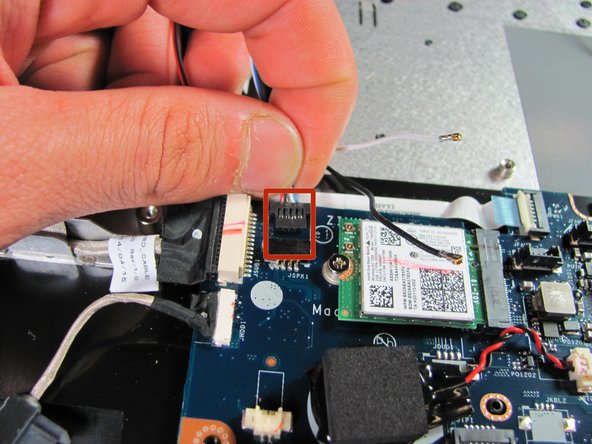
Handle those wire tabs with care, folks! Tugging too hard might just give the connection between the wires and motherboard a little too much love.
– Gently lift the wire tabs one by one to carefully detach them from the motherboard. Take your time; it’s like giving your phone a little breather!
Step 5


Gently wiggle the antenna cables—no need to channel your inner superhero here—too much force can mess up the connection to the wireless card.
– Carefully pop off the black and white antenna cables from the wireless card. You got this—no sweat!
Step 6


– Gently lift the fan just a little bit.
– Now, grab the antenna cables (black and white) and speaker wires (red, black, blue, and white). Carefully move them out of the way of the fan, making sure nothing gets snagged.
Step 7


– Casually lift the fan out of the laptop like you’re removing treasure from a chest. Stay steady and keep everything smooth.
Step 8

– Let’s get started by tracking down those speakers! You’ll find three of them hiding inside your laptop.
– The bass speaker is chillin’ near the fan’s old spot, so keep an eye out for it.
– Now, look up towards the top left and right corners of your laptop – that’s where the side speakers are hanging out.
Step 9


– Grab your trusty Philips #1 screwdriver and unscrew the two 2.5 mm bolts holding down the bass speaker—like a pro handling business!
Step 10


– Disconnect the bass speaker from the motherboard with a gentle tug. You’ve got this!
Step 11


– Gently pop out the bass speaker from the laptop—like you’re liberating it from its tiny sonic chamber.
Step 12


– Grab your trusty Philips #1 screwdriver and unscrew the 2.5 mm screws securing each side speaker to the laptop like a pro—nice and easy!
Step 13

– Alright, time to unplug those side speakers from the motherboard! Just take it slow and steady, and you’ll snap them out like a pro.
Step 14


The red and black wires are your pals connecting to the right speaker, while the blue and white wires are hanging out with the left speaker. They’re a team!
And guess what? The side speakers are totally independent from the bass speaker. You can detach them without needing to mess with the bass speaker. How cool is that?
– Carefully lift and slide out the side speakers from the laptop—time for these little sound buddies to take a break!

