Microsoft Surface Pro 5 Camera Tie Bar Replacement
Duration: 45 minutes
Steps: 14 Steps
The camera tie bar holds the front and rear cameras steady while giving some extra love to the right and left speakers with solid mounting support. It’s also a little superhero, connecting to the motherboard with a petite ribbon cable.
Step 1


– Grab a spudger and gently pop open the small locking flaps on those display cable ZIF connectors—it’s like unlocking a tiny treasure chest!
Tools Used

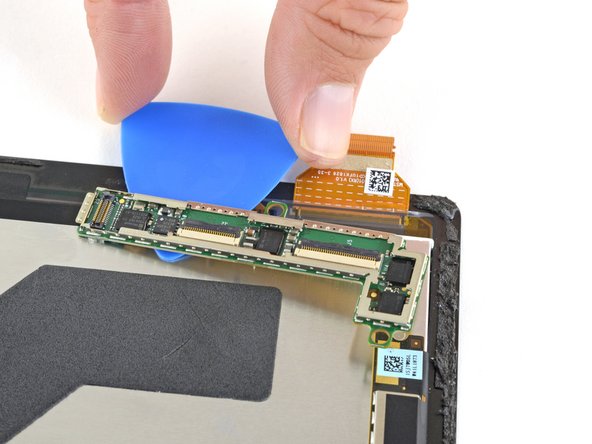
Step 2


– Gently grab your tweezers and carefully slide those display cables straight out of their cozy sockets on the display board. You’ve got this!
Tools Used

Step 3


– Gently slide an opening pick under the display board to peel away the stickiness that’s holding it to the back of the screen. Take it slow—it’s all about finesse here!
Step 4

– Pop off the display board—nice and easy!
– When putting it all back together, grab some strong double-sided tape or a precut adhesive card to hold the display board securely. Don’t skip the cleanup—scrape off that old adhesive before slapping on the fresh stuff.
– For perfect alignment, connect both display connectors first before sticking the board onto the display. Trust me, it’ll save you from a lot of grief!
Step 5

– You’re down to just the screen now—hang tight, you’re so close!
Step 6

Be gentle with the battery connection – it can be a bit finicky.
When removing the shield, don’t push too hard on the tweezers or you might damage the battery underneath.
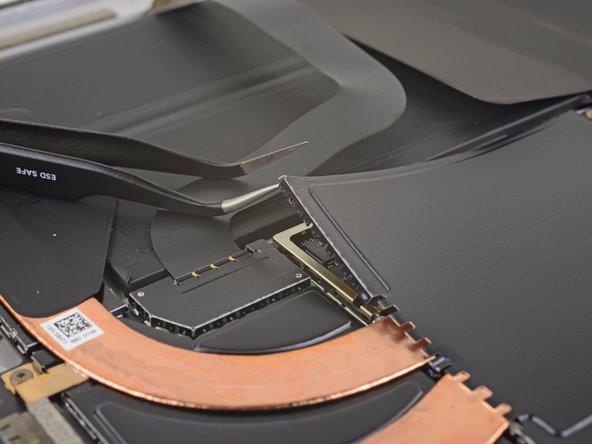
– Gently slide one end of your pointed tweezers into the gap at the corner of the EMI shield over the heat sink.
– Carefully use the tweezers to lift the EMI shield off the motherboard just enough to create some space. No need to fully remove it yet, just give it a little wiggle.
Tools Used
Step 7


– Go ahead and repeat the previous step for every corner of the EMI shield that’s snug over the heat sink. Keep going—you’ve got this!
Step 8

– Pop off that heat sink shield—nice and steady, you’re doing great!
Step 9
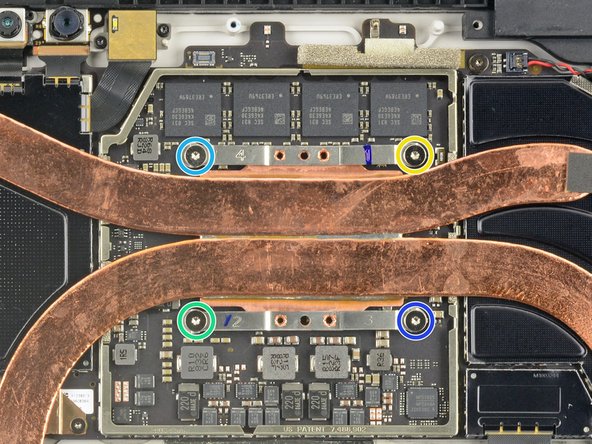

– Time to tackle the heat sink! First, pop out those ten Torx screws holding it in place:
– When you’re putting the heat sink back, give those screws a good criss-cross tightening—one turn at a time until they’re snug as a bug:
– Here’s the crew to look out for: Five 2.6 mm T3 screws and Four 3.3 mm T5 screws.
– Remember our trusty Screw Buddies? Let’s tighten them in this order: Screw 1, Screw 2, Screw 3, Screw 4.
Step 10


Handle those heat sink pipes with care—no dents, no creases, keep them looking sleek while you remove them!
– Grab the flat end of your trusty spudger and carefully nudge the heat sink straight up and off the CPU—easy does it, no need to rush!
– When it’s time to put things back together, don’t skimp on the cleaning. Give the heat sink and CPU a good cleanse, and be sure to spread some fresh thermal paste for that cool-factor these components deserve.
Tools Used
Step 11

– Take out the Torx T5 x 6mm screw that holds the black tie bar to the power button, volume control, and speaker assembly. You’ve got this!
Step 12

– Take out the last three Torx T5 x 4.5mm screws that are keeping the camera tie bar locked in place. You’ve got this!
Step 13

– Time to get disconnected! Carefully use your trusty tweezers to pull up and release the small ribbon cable that’s connecting the camera tie bar to the motherboard. Easy does it!
Tools Used
Step 14

– Ready to bring your device back to life? Just follow these steps in reverse to put everything back together again.
– And hey, if things get tricky or you’re not feeling it, you can always schedule a repair. You’ve got this!
Success!